
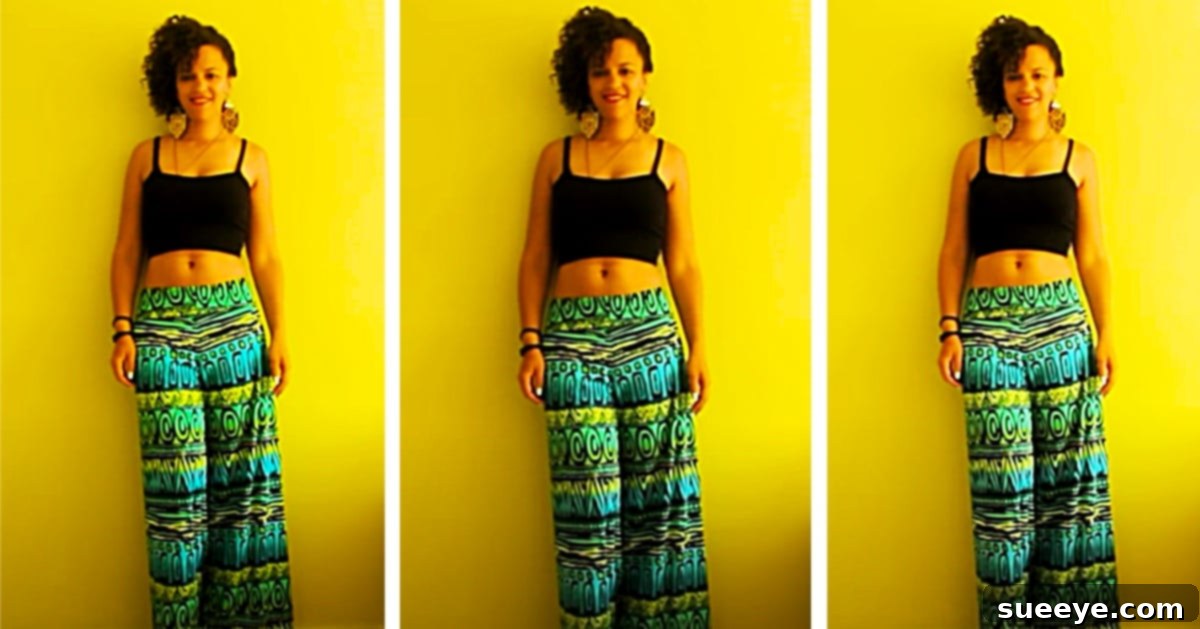
How To Sew Palazzo Pants Without A Pattern: Your Ultimate DIY Guide to Effortless Style
Palazzo pants are synonymous with relaxed elegance, offering unmatched comfort and a chic, flowing silhouette perfect for resort getaways, casual poolside lounging, or simply enjoying a breezy summer day. Many believe that creating such a stylish garment requires advanced sewing skills and complex patterns. However, you’ll be delighted to discover just how simple it is to craft your very own pair of palazzo pants from scratch, even if you’re a beginner. Thanks to an incredibly clear and straightforward video sewing tutorial by Joycy on YouTube, the entire process is demystified, making this project an accessible and rewarding endeavor for anyone with a sewing machine.
Imagine slipping into a pair of custom-made palazzo pants that fit you perfectly, created from your favorite fabric, and all achieved in a remarkably short amount of time. This guide, inspired by Joycy’s brilliant method, shows you how to use a pair of your own comfortable pants as a pattern guide, eliminating the need for complicated measurements or paper patterns. This innovative approach makes sewing palazzo pants not just easy, but truly enjoyable. Whether you’re looking for the ideal cover-up for your bathing suit this summer, or simply want to add a versatile and luxurious piece to your wardrobe, these DIY palazzo pants are an excellent choice. Let’s dive into creating your next favorite garment!
Why Sew Your Own Palazzo Pants? The Benefits of a Handmade Wardrobe
Embarking on a DIY sewing project, especially for something as versatile as palazzo pants, offers a myriad of advantages beyond just creating a new item of clothing. Here’s why making your own palazzo pants is a fantastic idea:
- Achieve a Custom Fit: Store-bought clothes often come in standard sizes that don’t always perfectly match every body type. By sewing your own, you can adjust every aspect, from waist circumference to leg length and width, ensuring a fit that flatters your unique shape and provides ultimate comfort.
- Personalize Your Style: The fabric market offers an astonishing array of colors, patterns, and textures. When you sew your own palazzo pants, you have complete freedom to choose a fabric that truly reflects your personal aesthetic, whether you prefer bold prints, subtle solids, or luxurious natural fibers.
- Cost-Effective Fashion: While initially investing in some basic sewing supplies, creating your own garments can be significantly more economical in the long run than purchasing designer or even fast-fashion alternatives. You get high-quality, custom pieces at a fraction of the retail price.
- Beginner-Friendly Project: Despite their sophisticated appearance, palazzo pants, especially with the no-pattern method, are surprisingly simple to sew. The straight seams and minimal fitting requirements make them an ideal project for those new to sewing, helping to build confidence and skills.
- Sustainable and Mindful Consumption: By making your own clothes, you contribute to a more sustainable fashion cycle. You choose your materials, reduce waste, and participate in a slower, more deliberate form of consumption, moving away from the environmental impact of fast fashion.
- The Joy of Creation: There’s immense satisfaction in wearing something you’ve created with your own hands. The process of turning raw fabric into a wearable garment is incredibly rewarding and can be a wonderful creative outlet.
Essential Materials and Tools for Your Palazzo Pants Project
Before you begin sewing, gathering all your necessary materials and tools will ensure a smooth and enjoyable creative process. Most of these items are standard for any sewing enthusiast, and some you might already have around your home. For this no-pattern method, one key item will be a pair of your own comfortable pants to use as a guide.
- Fabric (2 to 3 yards): The quantity can vary slightly depending on your size and the desired length of your palazzo pants. For fabric type, choose something light and flowing for that classic palazzo drape. Rayon, challis, lightweight cotton blends, linen blends, or even some knit fabrics work wonderfully. Consider patterns for a playful look or solids for timeless elegance.
- Wide Band of Elastic (to fit around the waist): Opt for a good quality elastic that is at least 1.5 to 2 inches wide. This wide band will create a comfortable, non-rolling waistband that stays put without digging in. Measure around your natural waist (or where you prefer the pants to sit) for the correct length.
- A Ruler or Measuring Tape: Essential for accurate marking and ensuring straight lines, especially when adding seam allowances.
- A Pair of Your Own Pants (to use as a guide): Choose a pair of comfortable, well-fitting pants that have a relaxed fit, such as sweatpants, yoga pants, or loose pajama bottoms. These will be the foundation for your palazzo pants’ shape.
- Fabric Scissors: Sharp scissors specifically designed for fabric will make clean, precise cuts. Avoid using them on paper or other materials to maintain their sharpness.
- A Rotary Cutter (Optional but Recommended): A rotary cutter, used with a self-healing cutting mat, can make cutting large pieces of fabric much faster and more accurate than scissors, especially for long, straight lines.
- A Sewing Machine: Any standard home sewing machine capable of sewing a straight stitch and a zigzag stitch (for finishing seams) will work perfectly.
- Thread: All-purpose polyester thread in a color that matches or complements your chosen fabric. Ensure you have enough for both your bobbin and top spool.
- Pins: To hold fabric layers together securely before sewing.
- Fabric Marking Tool: Tailor’s chalk, a washable fabric marker, or even a regular pencil (on the wrong side of the fabric) to mark cutting lines.
Step-by-Step Directions: Sewing Your No-Pattern Palazzo Pants
Follow these detailed steps to create your custom palazzo pants. While Joycy’s video tutorial is an excellent visual aid, this written guide will provide comprehensive instructions to ensure your success.
Phase 1: Preparing Your Fabric and Pattern Guide
Step 1.1: Preparing Your Fabric for Cutting
Begin by laying your chosen fabric out on a large, flat surface. A clean floor or a large cutting table works best. Most fabrics come folded, creating a crease. Gently press or smooth out any major wrinkles. Now, carefully fold your fabric in half lengthwise, ensuring the selvage edges (the finished edges of the fabric) are aligned. If your fabric has a noticeable “right side” (the side you want to be visible) and “wrong side,” fold it so that the wrong sides are facing each other, and the right side is visible on the outside of the fold. This allows you to easily mark on the wrong side later without it showing. Smooth out any bubbles or creases from the folded fabric to create a perfectly flat surface for cutting.
Step 1.2: Positioning Your Guide Pants
Take the pair of comfortable pants you’ve chosen as your guide. Fold them neatly in half lengthwise as well, aligning the leg seams. Place these folded guide pants onto your folded fabric. Position them strategically, ensuring that the waistline of your guide pants is aligned with the top edge of your fabric fold, and the outer leg seam of your guide pants is parallel to the folded edge of your fabric. This placement is crucial for creating the continuous front and back pieces of your palazzo pants. Leave enough space around your guide pants for generous seam allowances and the extra width needed for the palazzo style.
Step 1.3: Marking and Cutting the Fabric (The Palazzo Shape)
Once your guide pants are perfectly positioned, it’s time to mark your cutting lines. Using your fabric marking tool, carefully trace around the entire perimeter of your guide pants, but with a significant difference: for palazzo pants, we want a much wider leg. Instead of tracing directly against the guide pants, you will mark about 2.5 to 3 inches (or even more, depending on how wide you want your palazzo pants) outside the edge of your guide pants, from the hip down to the hem. Maintain this consistent extra width. For the waistline, trace closely to your guide pants, adding about 1 inch for a seam allowance. For the crotch curve, trace the curve of your guide pants, but add an extra 1 inch for seam allowance and comfort. For the hemline, extend beyond your guide pants by 2-3 inches to allow for a generous hem. This generous marking around the legs is what will give your palazzo pants their characteristic wide, flowing silhouette. Once marked, carefully cut along these lines through both layers of your folded fabric. You will now have two identical, wide-leg pant pieces, each representing one side (front/back) of one leg.
Phase 2: Constructing the Pant Legs
Step 2.1: Sewing the Inseams
Unfold your two cut fabric pieces. You should now have two large, wide-leg pieces. Take one piece and fold it in half lengthwise, right sides together, so that the raw edges of the inner leg seam (the inseam) align. Pin along this inseam from the crotch point down to the hem. Repeat this for the second fabric piece. Using your sewing machine, sew a straight stitch along both inseams with a 1/2-inch (1.25 cm) seam allowance. Backstitch at the beginning and end of each seam to secure the stitches. After sewing, finish the raw edges of these seams with a zigzag stitch or a serger to prevent fraying and ensure durability.
Step 2.2: Sewing the Crotch Seam
With both inseams sewn, you now have two separate pant legs. Turn one pant leg right side out. Keep the other pant leg wrong side out. Carefully insert the right-side-out leg into the wrong-side-out leg, so that their right sides are facing each other. Align the crotch seams perfectly, matching the inseams you just sewed. Pin along the entire crotch curve, from the front waistline, around the curve, to the back waistline. Ensure all raw edges are aligned. Sew this crotch seam with a 1/2-inch (1.25 cm) seam allowance, using a slightly smaller stitch length for added strength, especially around the curve. Backstitch at the beginning and end. Clip the curves of the seam allowance carefully (without cutting through the stitching) to allow the seam to lie flat. Finish the raw edges of the crotch seam for neatness and durability.
Step 2.3: Checking the Fit
Before proceeding, it’s a good idea to try on your pants (carefully, as the waistband and hem are not yet finished). Turn the pants right side out. This will give you an opportunity to check the overall fit, the width of the legs, and the rise. If any adjustments are needed (e.g., taking in the side seams slightly if it’s too wide, or adjusting the crotch curve), now is the time to do so. This step ensures you’re happy with the basic construction before adding the final details.
Phase 3: Creating the Elastic Waistband
Step 3.1: Preparing the Waistband Casing
For a comfortable and easy-to-wear waistband, we will create a casing for your elastic. First, press down the top raw edge of the pants towards the wrong side by 1/4 inch (0.6 cm) and press again by 1.5 to 2 inches (or slightly more than the width of your elastic plus 1/4 inch), creating a clean fold. This second fold will form the channel for your elastic. Pin this fold all the way around the waist opening. Leave a gap of about 2-3 inches (5-7.5 cm) unstitched at the back or side seam. This opening will be used to insert the elastic.
Step 3.2: Inserting the Elastic
Measure your wide elastic to fit snugly but comfortably around your natural waist. Cut the elastic to this length, adding about 1 inch for overlap. Attach a safety pin to one end of the elastic. Carefully thread the safety pin, with the elastic trailing behind, through the opening in your waistband casing. Guide the elastic all the way around the waistband until it emerges from the same opening. Be careful not to twist the elastic inside the casing.
Step 3.3: Securing the Waistband
Once both ends of the elastic are out of the opening, overlap them by about 1 inch (2.5 cm) and securely stitch them together, forming a strong loop. You can do this with a zigzag stitch or a few lines of straight stitching. Gently pull the fabric of the waistband so that the joined elastic disappears back into the casing. Distribute the gathers evenly around the waist. Finally, close the 2-3 inch opening in the waistband casing with a straight stitch, backstitching at both ends to secure it. Your comfortable elastic waistband is now complete!
Phase 4: Finishing Touches
Step 4.1: Hemming the Pant Legs
Try on your palazzo pants again to determine the perfect length. Because palazzo pants are often worn long, almost sweeping the floor, ensure they don’t drag too much, especially when worn with your preferred footwear. Mark the desired hemline. Take off the pants. Fold up the raw edge of each pant leg by 1/4 inch (0.6 cm) towards the wrong side and press. Then, fold it up again by 1 to 1.5 inches (2.5-3.8 cm) or to your marked hemline, creating a clean double-fold hem. Pin in place all around both leg openings. Stitch the hem in place using a straight stitch, sewing close to the folded edge. Backstitch at the beginning and end. Repeat for the other pant leg.
Step 4.2: Final Pressing
Give your newly sewn palazzo pants a final press with an iron. This will smooth out any wrinkles, flatten seams, and give your garment a professional, crisp finish. Pay special attention to the waistband and hems. Now, your beautiful, custom-made palazzo pants are ready to wear!
Tips for a Perfect Pair of DIY Palazzo Pants
To ensure your sewing project goes smoothly and your palazzo pants turn out fabulous, consider these expert tips:
- Choose the Right Fabric: For the ultimate flowy and comfortable feel, opt for fabrics like rayon challis, lightweight linen, crinkle cotton, or a soft modal knit. Avoid stiff fabrics that won’t drape well.
- Pre-Wash Your Fabric: Always wash and dry your fabric before cutting and sewing. This pre-shrinks the fabric, preventing your finished garment from shrinking unevenly later.
- Accurate Marking is Key: Take your time marking around your guide pants. Use a reliable fabric marker or tailor’s chalk that shows up well on your chosen fabric. Precision at this stage leads to better results.
- Generous Seam Allowances: When in doubt, err on the side of a slightly larger seam allowance, especially if you’re new to sewing. You can always trim excess fabric, but it’s hard to add it back!
- Practice Stitches: If you’re unsure about your sewing machine settings, test your stitches on a scrap piece of your fabric first. Check tension and stitch length.
- Iron as You Go: Pressing seams open or to one side after each major sewing step makes a huge difference in the professional appearance of your finished garment. It helps seams lie flat and look crisp.
- Don’t Rush the Hem: The hem gives your pants a finished look. Take your time to measure evenly and press carefully before stitching.
- Consider Pockets: For an added touch of functionality, you could integrate simple side-seam pockets. This would require a slight modification to the pattern pieces before sewing the side seams.
Styling Your New Handmade Palazzo Pants
One of the greatest appeals of palazzo pants is their incredible versatility. Once you’ve created your custom pair, you’ll find endless ways to style them for various occasions:
- Effortless Resort Wear: Pair them with a simple tank top, a strappy camisole, or a bandeau top for a relaxed, vacation-ready look. Add some sandals and a wide-brimmed hat for ultimate resort chic.
- Perfect Beach or Pool Cover-Up: The wide legs and comfortable elastic waistband make these pants ideal for slipping over your bathing suit after a swim. They’re quick-drying if you choose the right fabric and offer stylish modesty.
- Casual Day Out: Combine them with a fitted t-shirt or a breezy blouse, complete with comfortable sneakers or espadrilles for a chic yet relaxed daytime ensemble perfect for errands or lunch with friends.
- Elevated Evening Look: Dress up your palazzo pants with a silky blouse, a tailored crop top, or a fitted knit top. Add heels or wedges, a statement necklace, and a clutch for an elegant evening outfit.
- Layering for Cooler Evenings: On cooler evenings, throw on a denim jacket, a lightweight cardigan, or a structured blazer over your top to complete the look.
- Accessorize Thoughtfully: Because palazzo pants often have a lot of fabric, balance them with simpler accessories. A delicate necklace, a chic belt, or minimalist earrings can complement the look without overwhelming it.
Congratulations! You’ve successfully learned how to sew a stunning pair of palazzo pants without the need for a traditional pattern. This project not only equips you with a fashionable and comfortable garment but also enhances your sewing skills and empowers you to create more unique pieces for your wardrobe. Enjoy the luxurious feel and versatile style of your new handmade palazzo pants, and get ready to turn heads wherever you go!