
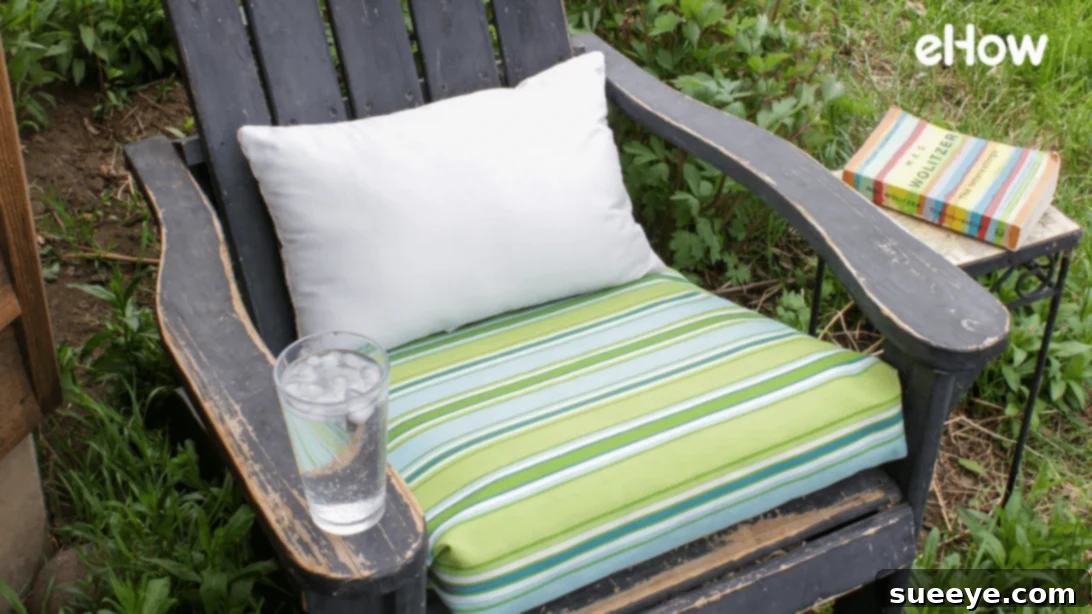
Master the Art of No-Sew Cushion Covers: An Effortless DIY Hack for Instant Style
Transforming your living space or refreshing your outdoor patio has never been easier, especially when you can achieve stunning results without a sewing machine or any sewing skills. If you’re looking for a quick, stylish, and incredibly simple solution for updating your cushions, whether you lack covers or simply desire a fresh look, this ingenious hack shared by ehow on YouTube is a game-changer. Imagine covering your cushions with any fabric of your choice, no needles or thread required, and completing the entire process in just a few minutes. This method not only offers immediate gratification but also opens up a world of creative possibilities for home decor enthusiasts.
RELATED: Super Easy No-Sew Pom Pom Cushion Tutorial
Why Choose a No-Sew Cushion Cover? Unlocking Style and Convenience
Once you discover the simplicity and effectiveness of this no-sew cushion covering technique, you might find yourself applying it to all your cushions. It’s truly that smart and convenient. The benefits extend far beyond just avoiding a sewing machine:
- Effortless Maintenance: Need to clean your cushion covers? No problem! This method allows for incredibly easy removal of the fabric when it’s time for laundering, making upkeep a breeze.
- Instant Style Refresh: Tired of your current cushion look? Change your fabric as often as you like to match seasons, holidays, or your evolving decor style. It’s a commitment-free way to update your space.
- Budget-Friendly Decor: Say goodbye to expensive custom cushion covers. By using fabric you already own, repurposing old sheets, or buying inexpensive remnants, you can achieve a high-end look without breaking the bank.
- Fabric Versatility: The best part? The fabric remains intact and can be easily removed and repurposed for other craft projects. This preserves the original size and integrity of your chosen material, making it a sustainable and economical choice.
- Accessibility for All: Whether you’re a seasoned DIYer or a complete novice, this hack requires no specialized skills, making stylish home decor accessible to everyone.
Essential Materials for Your No-Sew Cushion Project
Gathering your supplies for this project is straightforward. You only need a few basic items, making it an ideal last-minute decor solution.
- Fabric: The star of the show! Choose a fabric that complements your space. Consider durable options for outdoor use, soft textures for indoor coziness, or vibrant patterns for a pop of color. Make sure your fabric is large enough to completely wrap around your cushion with ample overlap for securing. A good rule of thumb is to measure the cushion’s length and width, then double both dimensions and add an extra 6-12 inches on each side for generous folds.
- Cushion: This can be any existing cushion you wish to cover – a throw pillow, a seat cushion, or even an old patio cushion that needs a new lease on life. Ensure it’s clean and in good shape underneath the new cover.
- Safety Pins: These small but mighty tools are your sewing machine replacements. Opt for sturdy safety pins that will hold the fabric securely without easily popping open. You’ll need a good number of them to ensure a neat and firm hold.
Step-by-Step Guide: Crafting Your Perfect No-Sew Cushion Cover
Follow these simple steps to create a beautiful, custom cushion cover without a single stitch. Precision and smoothing are key to achieving a professional-looking finish.
Step 1: Prepare Your Work Surface and Fabric
Begin by laying your chosen fabric on a clean, flat surface. Ensure the “right side” (the side you want visible) of the fabric is facing down. This means the pattern or desired texture will be hidden against your work surface. Smooth out any wrinkles or creases in the fabric to ensure an even finish.
Step 2: Position Your Cushion
Carefully place your cushion directly in the center of the fabric. It’s crucial for the cushion to be centered to ensure that you have enough fabric on all sides for wrapping and securing, leading to a balanced and symmetrical cover.
Step 3: First Wrap and Secure
Take one long side of the fabric and fold it over the cushion, pulling it tautly until it reaches the opposite edge. Make sure the fabric is lined up smoothly with the cushion’s edge, avoiding any bunching. Repeat this process with the other long side, folding it over the first wrapped section. Flatten both layers nicely, ensuring the fabric is snug against the cushion. Secure this initial overlap with one or two safety pins in the middle to temporarily hold it in place.
Step 4: Turn and Address the Corners
With the initial wrap secured, carefully turn the cushion over so that the side with the raw edges is now facing upwards. This brings the unpinned sections into view. Now, focus on the corners. Take one corner of the raw edge and fold it neatly towards the middle of the cushion’s side, creating a clean, triangular fold similar to wrapping a present. Do this for all four corners.
Step 5: Final Folds and Pinning
After folding the corners, you’ll have two remaining flaps of fabric on each short side of the cushion. Fold one of these pieces neatly over towards the center of the cushion, pulling it taut. Secure this fold firmly in place using several safety pins. Place the pins discreetly along the fold, ensuring they catch both layers of fabric and are secure. The more pins you use, the more stable and professional your cover will look.
Step 6: Complete the Other Side
Repeat the corner folding and final wrapping process for the remaining short side of the cushion. Ensure consistency in your folds and pin placement for a uniform appearance. Once both sides are secured, gently flip your cushion over, adjust any areas, and your beautifully covered, no-sew cushion is done!
Tips for a Flawless Finish and Long-Lasting Covers
While the no-sew method is simple, a few extra tips can elevate your cushion covers from good to spectacular:
- Iron Your Fabric: Before you begin, iron your fabric thoroughly. This removes creases and makes it much easier to achieve a smooth, crisp finish on your cushion.
- Choose Sturdy Pins: Invest in good quality, strong safety pins. Flimsy pins might bend or come undone, compromising the security of your cover.
- Strategic Pin Placement: Place your safety pins where they won’t be easily seen or felt. On the underside of the cushion or along the seams created by your folds are ideal spots. Use enough pins to ensure the fabric is held tautly without sagging.
- Fabric Direction: If your fabric has a directional pattern, ensure it’s oriented correctly when you place the cushion down.
- Consider Fabric Type: For outdoor cushions, opt for weather-resistant fabrics. For indoor use, almost any fabric works, but consider the texture and durability for high-traffic areas. Cotton, linen, canvas, or even velvet can create stunning results.
Versatile Applications for Your No-Sew Creations
The beauty of this no-sew hack lies in its versatility. You can apply this technique to a myriad of cushions throughout your home and outdoor spaces:
- Living Room Refresh: Give your throw pillows a quick seasonal update without buying new ones.
- Outdoor Patio Oasis: Revitalize faded or worn patio cushions, making your outdoor living area more inviting.
- Bedroom Decor: Add decorative flair to your bed with custom accent pillows that match your bedding.
- Dining Room Seating: Cover dining chair cushions for a fresh look that’s easy to clean.
- Kids’ Rooms: Create fun, washable covers for play area cushions.
This method truly transforms the way you think about cushion covers. It’s an accessible, sustainable, and endlessly customizable approach to home decor that anyone can master.
*A special thank you to ehow via YouTube for sharing this incredible hack and for all the inspiring images used in this guide. If you’ve enjoyed learning this simple cushion transformation, we highly recommend visiting their channel and subscribing for more creative and practical DIY ideas!