
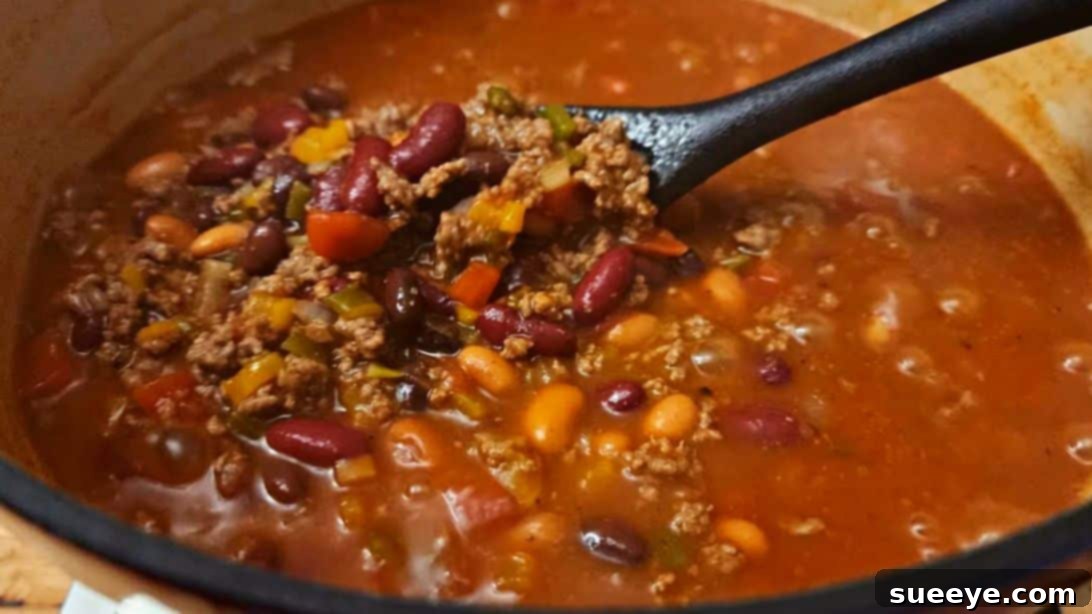
Effortless One-Pot Homemade Chili: Your Ultimate Comfort Food Guide
Few dishes capture the essence of comfort quite like a hearty bowl of chili. It’s a culinary staple that warms the soul, satisfies the deepest cravings, and brings families together. While there are countless variations, the beauty of a truly great chili often lies in its simplicity and robust flavor. This particular one-pot homemade chili recipe, inspired by the wonderful cooks at The Hillbilly Kitchen – Down Home Country Cooking on YouTube, is an absolute winner. It’s designed for ease without compromising on the rich, authentic taste that makes chili a beloved classic. Whether you’re a seasoned chef or a kitchen novice, this recipe offers a straightforward path to a deeply satisfying meal.
Our household has explored many chili iterations over the years, from spicy gourmet blends to slow-cooked masterpieces. Yet, we consistently return to simpler, more approachable methods that deliver maximum flavor with minimal fuss. This one-pot wonder exemplifies that philosophy. Its versatility also means you can easily customize it, adding your favorite ingredients or tweaking the spices to create a chili that’s uniquely yours. Get ready to dive into a recipe that promises delicious results, easy cleanup, and a warm, inviting aroma filling your home.
Why Choose a One-Pot Chili Recipe? The Ultimate Convenience
The appeal of a one-pot meal extends far beyond mere convenience; it’s a testament to smart, efficient cooking. For chili, this method is particularly advantageous. By cooking everything in a single large pot, you not only drastically reduce cleanup time but also allow the flavors to meld and deepen harmoniously from the very beginning. As ingredients cook together, they exchange their distinct essences, creating a more complex and integrated taste profile that’s hard to achieve with multi-pan cooking.
- Reduced Cleanup: Say goodbye to stacks of pots and pans. A single pot means less scrubbing and more time to enjoy your meal.
- Enhanced Flavor Development: All ingredients simmer together, allowing their individual flavors to infuse into the entire dish, creating a richer, more cohesive taste.
- Effortless Cooking: With fewer steps and less equipment, the cooking process becomes straightforward and enjoyable, even for busy weeknights.
- Perfect for Any Occasion: Ideal for family dinners, game day gatherings, or meal prepping for the week ahead.
Ingredients: Everything You Need for a Hearty Bowl
The beauty of this chili lies in its accessible ingredients, many of which you likely already have in your pantry. We focus on fresh, robust components that build a strong flavor foundation for a truly memorable chili.
- 1½ pounds Ground Beef: The cornerstone of many great chilis, providing a rich, savory base. Opt for lean ground beef to control fat content, or a slightly fattier blend for extra flavor.
- 1 large Onion, chopped: Aromatic essential that sweetens and adds depth to the chili as it caramelizes.
- 1 Bell Pepper, chopped: Adds a touch of sweetness, vibrant color, and fresh texture. Red, green, or yellow bell peppers work wonderfully.
- 2 Jalapeño Peppers, chopped: For that characteristic chili kick. Remove seeds and membranes for less heat, or leave them in for an extra spicy punch.
- 3 cans Beans (Kidney, Pinto, and Black Beans): A trio of beans brings diverse textures and flavors, making the chili hearty and satisfying. Ensure you drain and rinse them, unless the recipe specifies to keep some liquid.
- 1 or 2 cans Tomato of Your Choice: Crushed, diced, or pureed tomatoes will form the rich, tangy sauce base. Choose what you prefer; diced offers more texture, while crushed provides a smoother consistency.
- Cayenne or Chili Powder, to taste: The primary spice for chili flavor and heat. Adjust according to your preference for mild or fiery.
- Salt and Pepper, to taste: Essential seasonings to enhance all other flavors. Always taste and adjust!
- 1-2 tsp Sugar: A secret ingredient for many chili recipes, sugar helps balance the acidity of the tomatoes and rounds out the overall flavor profile.
- 1 tbsp Vinegar: A splash of vinegar (apple cider or white vinegar works well) adds a bright tanginess that cuts through the richness and lifts the other flavors.
Step-by-Step Directions: Crafting Your Delicious Chili
Follow these simple steps to create a magnificent one-pot homemade chili that will impress everyone at your table. Precision in preparation leads to perfection in flavor!
Step 1: Building the Flavor Foundation
Begin by placing a large, heavy-bottomed pot or Dutch oven on your stove over medium-high heat. This ensures even cooking and good browning. Add your ground beef to the hot pot. Using a sturdy spoon or spatula, break the beef apart into smaller pieces. Allow it to cook thoroughly, stirring occasionally, until it’s beautifully browned on all sides and no pink remains. Browning the meat is a crucial step as it develops deep, savory flavors through the Maillard reaction. Once cooked, carefully drain off most of the accumulated grease. Leaving a little behind can contribute to flavor, but too much will make your chili greasy.
After draining, reduce the heat setting to medium. Now, it’s time to introduce your aromatic vegetables: add the chopped bell pepper, jalapeño peppers, and onions to the pot with the browned beef. These vegetables will soften and release their sweet and pungent flavors, forming the essential aromatic base of your chili.
Step 2: Layering the Goodness with Beans and Tomatoes
Once the vegetables are in the pot, give them a good toss with the ground beef to combine everything evenly. Season generously with salt and pepper. Continue to cook, stirring periodically, until the vegetables become soft and translucent. This usually takes about 5-7 minutes. Allowing the vegetables to soften properly releases their flavors and aromas, setting the stage for the next layer of ingredients.
Next, open your cans of kidney, pinto, and black beans. Add all three cans to the pot, making sure to include their juices. The liquid from the cans contributes to the chili’s body and helps thicken the sauce. Then, add your chosen canned tomatoes (crushed, diced, or pureed). Mix all these ingredients together thoroughly until everything is well combined. This ensures an even distribution of beans, meat, and tomatoes, creating a harmonious blend of textures and flavors.
Step 3: Simmering to Perfection and Final Touches
Now for the magic touch! Stir in the sugar and vinegar. The sugar will temper the acidity of the tomatoes and enhance the overall sweetness, while the vinegar adds a much-needed brightness and depth, preventing the chili from tasting flat. Following these, add your cayenne or chili powder. Start with a smaller amount and add more to taste if you desire more heat or a stronger chili flavor. Give everything another good mix until all the new ingredients are completely combined and incorporated into the sauce.
Bring the chili to a gentle simmer. Once simmering, reduce the heat to low, cover the pot partially, and let it cook for about 30 to 45 minutes. The simmering time is crucial; it allows all the flavors to meld beautifully and the sauce to thicken to the perfect consistency. The chili is ready when the sauce has thinned out just enough to coat the back of a spoon and the flavors have fully developed. Taste and adjust seasonings one last time – you might want to add a pinch more salt, pepper, or chili powder. Serve hot and enjoy the fruits of your labor!
Tips for the Best One-Pot Homemade Chili
Elevate your chili game with these expert tips, ensuring every batch is a masterpiece:
- Don’t Skimp on Browning: Truly browning your ground beef is key to developing a rich, savory base. Don’t rush this step!
- Taste as You Go: Seasoning is personal. Taste your chili throughout the cooking process and adjust salt, pepper, and chili powder as needed.
- Spice It Up (or Down): If you love heat, consider adding a pinch of red pepper flakes or an extra jalapeño. For a milder version, use less jalapeño or remove all seeds and membranes.
- Let it Simmer: The longer chili simmers (within reason), the more time the flavors have to meld and deepen. If you have time, let it simmer for an hour or even two on low heat, stirring occasionally.
- Resting Period: Like many stews, chili often tastes even better the next day. A brief rest allows the flavors to fully integrate.
Chili Variations & Customizations: Make It Your Own
This recipe is a fantastic starting point, but chili is wonderfully adaptable. Feel free to experiment and make it your signature dish!
- Different Meats: Swap ground beef for ground turkey, chicken, or a mix of beef and sausage. For a richer flavor, try adding cubes of stewing beef.
- Extra Vegetables: Incorporate diced carrots, celery, corn, or zucchini for added nutrients and texture.
- Smoky Flavor: A teaspoon of smoked paprika or a dash of liquid smoke can add a delightful smoky depth.
- Cocoa Powder: A secret ingredient for some chili aficionados, a tablespoon of unsweetened cocoa powder can deepen the color and complexity of your chili without making it taste like chocolate.
- Beer or Broth: Instead of just water or bean juice, you can use a dark beer or beef broth for a more profound flavor profile during the simmering stage.
- Additional Spices: Cumin, oregano, garlic powder, onion powder, and a touch of cinnamon can all contribute to a more complex spice blend.
Serving Suggestions: What to Pair with Your Perfect Chili
A great bowl of chili deserves equally great accompaniments. Here are some classic and creative ideas to complete your meal:
- Classic Toppings: Shredded cheddar cheese, a dollop of sour cream or Greek yogurt, fresh chopped cilantro or green onions, and diced avocado are all fan favorites.
- Baked Goods: Serve alongside warm cornbread, crusty bread, or even tortilla chips for dipping.
- Rice or Pasta: Spoon your chili over a bed of white rice, brown rice, or even cooked pasta for a heartier meal.
- Loaded Baked Potatoes: Transform a simple baked potato into a satisfying meal by topping it with a generous scoop of chili and your favorite fixings.
- Chili Dogs or Nachos: Use leftover chili to create amazing chili dogs or a delicious plate of chili cheese nachos.
Storage and Reheating Your Chili
Chili is an excellent dish for meal prepping or enjoying leftovers, as its flavors often deepen and improve overnight.
- Refrigeration: Allow your chili to cool completely before transferring it to an airtight container. It will keep well in the refrigerator for up to 3-4 days.
- Freezing: Chili freezes beautifully! Divide cooled chili into individual portions or larger freezer-safe containers. It can be frozen for up to 3 months. Thaw overnight in the refrigerator before reheating.
- Reheating: Gently reheat chili on the stovetop over medium-low heat, stirring occasionally, until it’s warmed through. You may need to add a splash of water or broth to adjust the consistency if it has thickened too much. Alternatively, microwave individual portions until hot.
A special thank you to The Hillbilly Kitchen – Down Home Country Cooking via YouTube for sharing this fantastic, easy-to-follow recipe and for all the inspiring images used here. Their channel is a treasure trove of comforting, down-home cooking that’s both delicious and approachable. If you loved this recipe and are looking for more wholesome, easy-to-make dishes, we highly recommend giving their channel a visit and subscribing for endless culinary inspiration! Happy cooking!