
Effortless No-Knead Overnight Milk Bread: Bake Incredibly Soft & Fluffy Dinner Rolls
Imagine the aroma of freshly baked bread filling your home, the anticipation of biting into a warm, soft, and fluffy dinner roll. Now, imagine achieving this without the extensive kneading typically required for homemade bread. Introducing the revolutionary no-knead overnight milk bread recipe, a culinary gem from Savor Easy on YouTube that promises delightful results with minimal effort. This recipe is a game-changer for anyone who loves homemade bread but is intimidated by complex techniques or short on time.
These incredibly tender dinner rolls are not only simple to prepare but also boast a beautiful texture and subtle sweetness that makes them irresistible. What makes this recipe truly special is its adaptability. You can prepare the dough in advance, letting it chill in the refrigerator overnight, which not only deepens the flavor but also fits perfectly into a busy schedule. Wake up, shape the rolls, and enjoy fresh-baked goodness whenever you desire. Whether it’s for a cozy family dinner, a festive gathering, or simply a delightful snack, these rolls are versatile companions to any meal. Pair them with your favorite spreads, savory fillings, or enjoy them plain with a warm beverage. With just seven essential ingredients, you’re just a few steps away from baking perfection.
Dive into the world of easy, delicious bread making. This comprehensive guide will walk you through each step, ensuring you achieve perfect, pillowy rolls every time. Get ready to impress your family and friends with these delectable homemade dinner rolls!
Ingredients for Your Irresistible Milk Bread Rolls
Crafting these amazing dinner rolls requires a handful of common pantry staples. Each ingredient plays a crucial role in achieving the signature soft, fluffy texture and rich flavor. Here’s what you’ll need:
For the Dough:
- 1 cup of warm milk (approximately 105-115°F or 40-46°C): This temperature is crucial for activating the instant yeast without “killing” it. Milk also contributes to the tender crumb and slight sweetness of the rolls.
- 1 large egg: Adds richness, helps with the dough’s structure, and contributes to a beautiful golden crust.
- 3 tbsp of granulated sugar: Feeds the yeast, aids in browning, and imparts a delicate sweetness to the bread.
- 1 tsp of salt: Essential for flavor balance, it also helps to control the yeast activity and strengthens the gluten structure.
- 3 cups of all-purpose flour: The primary structural component of the bread. Ensure it’s measured correctly for the best dough consistency.
- 2 tsp of instant yeast: The star ingredient that makes the rolls rise! Instant yeast doesn’t require proofing beforehand, making this recipe even simpler.
- ¼ cup of unsalted butter, softened: Adds incredible richness, moisture, and tenderness to the rolls. Using unsalted butter allows you to control the overall salt content.
For the Egg Wash & Finishing Touch:
- 1 large egg: Whisked with milk, this creates a glossy, golden-brown crust.
- 2 tbsp of milk: Thins out the egg wash, making it easier to brush and ensuring an even coating.
- Optional: Melted Butter for brushing after baking (about 1-2 tbsp): A final touch that enhances flavor, softness, and adds a beautiful sheen to the warm rolls.
Step-by-Step Guide to Baking Perfect No-Knead Dinner Rolls
Follow these detailed instructions to create incredibly soft, airy, and delicious milk bread rolls that taste like they came from a professional bakery. The beauty of this recipe lies in its simplicity and the forgiving nature of the no-knead method.
Step 1: Mixing, Chilling, and Preparing the Dough
In a spacious mixing bowl, begin by combining the warm milk, egg, sugar, and salt. Use a whisk to thoroughly mix these ingredients until both the sugar and salt have completely dissolved. This ensures even distribution of flavor and prevents grainy textures in your final product. The warmth of the milk is key here, as it gently awakens the yeast, setting the stage for a perfect rise.
Next, gradually incorporate the all-purpose flour and instant yeast into the liquid mixture. Using a spatula or wooden spoon, gently fold the ingredients together. There’s no need for vigorous kneading; simply mix until a shaggy dough starts to form. At this point, the dough might appear a bit sticky and uneven, which is perfectly normal. Now, introduce the softened unsalted butter. Continue folding the dough until the butter is completely incorporated and absorbed, resulting in a smoother, more cohesive dough. The butter will enrich the dough, contributing to its tender texture and flavor.
Once your dough is well-mixed, cover the bowl tightly with plastic wrap to prevent it from drying out. Transfer the covered bowl to the refrigerator to chill for at least 90 minutes. For even better flavor development and a truly stress-free baking experience, you can leave it to chill overnight, or up to 24 hours. This slow, cold fermentation not only enhances the dough’s flavor but also makes it much easier to handle when shaping. The cold environment slows down yeast activity, allowing for a longer proofing period that builds complex flavors.
After the chilling period, retrieve your dough from the refrigerator. Lightly sprinkle a clean work surface with flour. Gently transfer the chilled dough onto this floured counter. The cold dough will be much less sticky and easier to manage. Now, gently “degas” the dough by pressing down on it to release the air bubbles that have formed during the chilling process. This helps to redistribute the yeast and creates a finer, more even crumb in the finished rolls.
Step 2: Shaping, Second Proofing, and Baking Your Rolls
With your dough degassed and ready, lightly flatten it on your floured surface. Using a sharp knife or a dough cutter, divide the dough into 12 equal pieces. Precision here helps ensure uniform baking and presentation. Take each piece and gently roll it into a smooth, round ball. Aim for a tight surface on each ball for the best rise and shape. Once all pieces are shaped, cover them loosely with plastic wrap or a clean kitchen towel and let them rest for about 10 minutes. This short rest allows the gluten to relax, making the dough easier to shape further.
After the resting period, take each dough ball and flatten it slightly using the heel of your palm, as demonstrated in the Savor Easy video. Then, carefully roll each flattened piece into a tight log shape. The goal is to create a compact cylinder, which will yield those beautifully structured rolls. Arrange these shaped logs seam-side down in an 8×12-inch baking dish or any similarly sized oven-safe pan. Ensure there’s a small amount of space between each roll, as they will expand during proofing and baking. If you prefer pull-apart rolls, you can place them closer together.
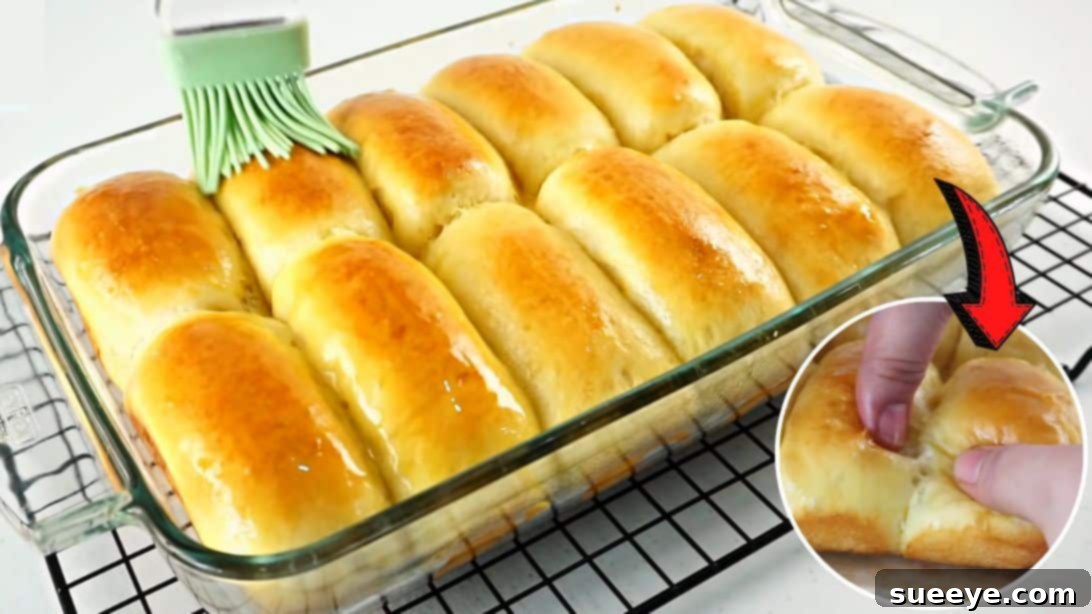
Once the rolls are arranged, cover the baking dish again with plastic wrap or a clean cloth. Let them rest in a warm place for about 30 minutes, or until they have visibly doubled in size. This crucial step, known as the second proofing, allows the yeast to produce more gas, creating the airy texture we love. While the rolls are proofing, preheat your oven to 180°C (350°F). Prepare the egg wash by whisking the remaining egg with two tablespoons of milk until well combined. Once the rolls have doubled, gently brush the egg wash generously over the tops of each roll. This will give them a beautiful golden-brown and shiny crust.
Carefully place the baking dish into your preheated oven. Bake the rolls for approximately 20 to 25 minutes, or until they are golden brown on top and cooked through. The internal temperature should register around 200-210°F (93-99°C) for fully baked bread. As soon as they come out of the oven, for an extra touch of richness and softness, brush the tops with a little melted unsalted butter. This adds a lovely sheen and another layer of flavor. Let them cool slightly in the pan before serving. These warm, tender, and incredibly fluffy rolls are best enjoyed fresh from the oven!
Tips for Perfect No-Knead Rolls Every Time
- Measure Accurately: Especially with flour, use a kitchen scale for best results or the “spoon and level” method rather than scooping directly from the bag.
- Don’t Rush the Chill: The overnight chill is not just for convenience; it significantly develops flavor and makes the dough much easier to handle.
- Warm Environment for Proofing: Yeast loves warmth! If your kitchen is cool, find a warm spot (like a slightly warmed oven turned off, or near a sunny window) for the second proofing to ensure your rolls double in size.
- Evenly Sized Rolls: Try to divide your dough as evenly as possible. This ensures uniform baking and a consistent presentation.
- Gentle Handling: After the first rise, handle the dough gently to avoid deflating it too much.
- Oven Temperature: Ensure your oven is fully preheated to the correct temperature. An oven thermometer can be very helpful.
- Customization: Feel free to experiment! You can add a pinch of garlic powder and dried herbs to the dough for savory rolls, or a sprinkle of cinnamon and sugar before baking for a sweeter treat.
Serving Suggestions for Your Homemade Rolls
These versatile milk bread rolls are a delightful addition to almost any meal. Their soft, slightly sweet profile makes them perfect for a variety of pairings:
- Classic Dinner Side: Serve them warm alongside hearty stews, rich soups, or your favorite roasted meats like chicken, beef, or pork. They’re perfect for soaking up delicious gravies.
- Breakfast & Brunch: Toast them lightly and slather with butter and jam, honey, or cream cheese. They also make excellent bases for mini breakfast sandwiches with scrambled eggs and bacon.
- Sandwiches & Sliders: Their soft texture is ideal for small sandwiches or sliders. Fill them with deli meats, cheese, or even a simple tuna or chicken salad.
- Holiday Feasts: Elevate your holiday spread, whether it’s Thanksgiving or Christmas, with these homemade rolls that are sure to be a crowd-pleaser.
- Snack Time: Enjoy them plain, fresh out of the oven, or with a simple spread like hummus or a chocolate hazelnut spread. They are equally delicious dipped in olive oil and balsamic vinegar.
*All image credit belongs to Savor Easy via YouTube. Follow and subscribe to her channel for more amazing recipes and culinary inspiration!
Bake Your Way to Deliciousness with This Easy Milk Bread Recipe
This easy no-knead overnight milk bread recipe truly redefines homemade baking. It proves that you don’t need to be an expert baker or spend hours kneading dough to produce something truly spectacular. The convenience of preparing the dough ahead of time, combined with the minimal hands-on effort, makes this recipe perfect for busy individuals and baking novices alike. The resulting rolls are consistently soft, airy, and bursting with a subtle, comforting flavor that will bring joy to your table.
Whether you’re looking for the perfect side for your next family dinner, a delightful addition to your brunch spread, or simply craving the comforting taste of fresh-baked bread, these no-knead milk bread rolls are an absolute must-try. So, gather your ingredients, follow these simple steps, and prepare to be amazed by how effortless and rewarding homemade bread baking can be. Enjoy the process, savor the aroma, and delight in every tender bite of your incredibly soft and fluffy dinner rolls!