
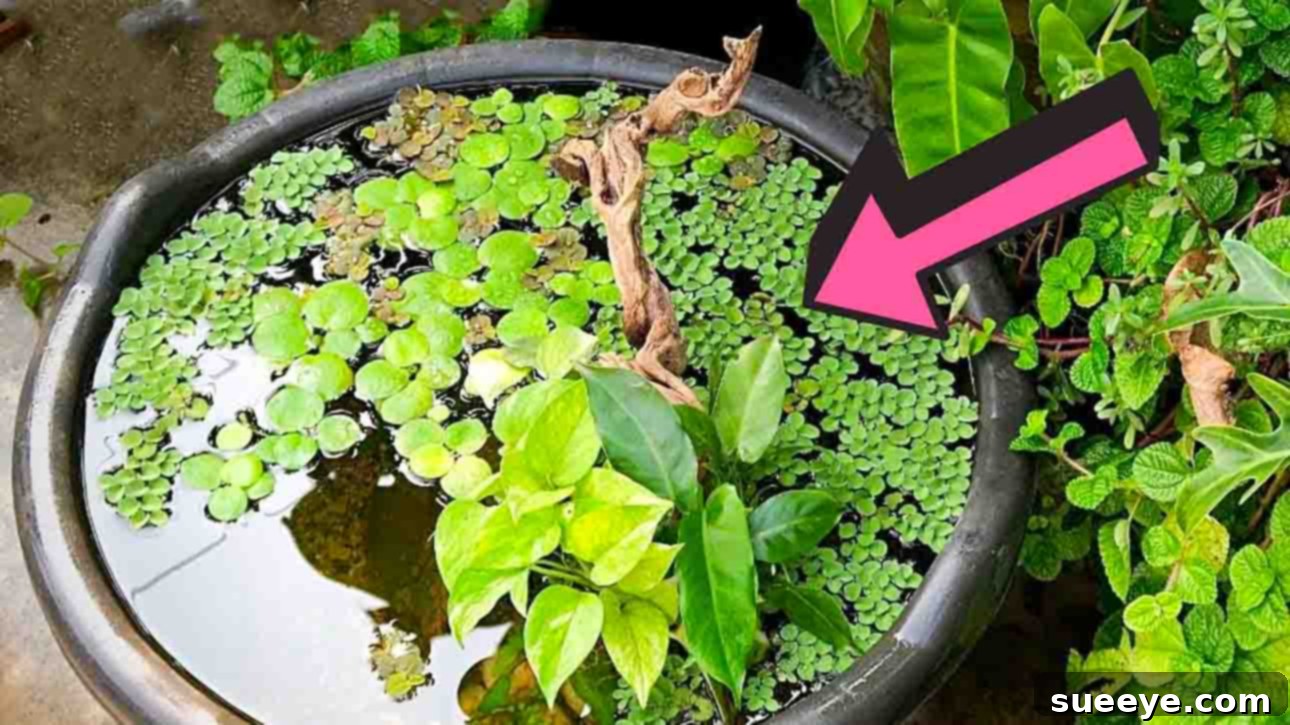
Are you envisioning a serene, natural water feature to enhance your garden or patio? Look no further! Building a DIY mini pond is an incredibly rewarding project that brings life and tranquility to any outdoor space. And with the revolutionary Walstad method, maintaining your aquatic oasis becomes surprisingly simple, relying on a naturally balanced ecosystem rather than complex filtration systems. This comprehensive guide will walk you through creating your own thriving mini pond, inspired by experts like The Urban Nemophilist on Youtube. Whether you’re a seasoned gardener or a complete beginner, this project is designed for everyone, allowing you to utilize readily available materials and customize it to your heart’s content.
Create Your Own Thriving DIY Mini Pond with the Walstad Method
Imagine the gentle ripple of water, the vibrant greens of aquatic plants, and perhaps the darting colors of small fish, all within arm’s reach. A mini pond is more than just a decorative element; it’s a miniature ecosystem that can attract local wildlife, provide a calming focal point, and offer a unique gardening experience. The beauty of the Walstad method lies in its emphasis on natural balance. By establishing a nutrient-rich substrate and a diverse range of plants, the pond largely regulates itself, significantly reducing the need for constant cleaning and chemical treatments. This makes it an ideal choice for busy individuals or those new to pond keeping.
This guide will equip you with all the knowledge you need, from gathering your materials to the delicate art of planting and introducing inhabitants. Prepare to transform an ordinary corner of your garden into an extraordinary natural wonder!
Essential Materials for Your Mini Pond Project
One of the most appealing aspects of a DIY mini pond is its accessibility. Many of the required items can be repurposed or found in your own backyard. Here’s a detailed list of what you’ll need, along with some considerations for each:
- An Old Tub or Container: The foundation of your pond! Look for a non-porous container that can hold water without leaking. Ideal choices include large plastic storage tubs, ceramic pots (without drainage holes), half whiskey barrels (lined), or even galvanized metal tubs. Consider the size and depth – deeper tubs offer more stable water temperatures and a larger volume for a healthier ecosystem. A capacity of at least 15-20 gallons is recommended for long-term stability.
- Garden Soil (Unfertilized): This is the heart of the Walstad method. You’ll need plain, nutrient-rich garden soil – avoid potting mixes with added fertilizers, perlite, or vermiculite, as these can leach unwanted chemicals into the water and cause algae blooms. Soil provides essential nutrients for your aquatic plants and acts as a natural buffer.
- River Gravel or Coarse Sand: This layer will cap the soil, preventing it from clouding the water and keeping nutrients locked in the substrate. Choose natural, uncolored gravel. A grain size of 2-5mm is ideal. Wash the gravel thoroughly before use to remove any dust or debris.
- Decorative Driftwood (2 pieces): Driftwood adds visual interest, provides surfaces for beneficial bacteria to colonize, and offers hiding spots for future inhabitants. Ensure the wood is fully submerged and has been properly leached (soaked in water for several weeks, changing water regularly, to remove tannins that can tint the water).
- Broken Terracotta Pot or Similar Structure: This serves as a vital hideout for fish or other small aquatic creatures, offering them security and a place to rest. You can also use small ceramic pipes, overturned bowls, or even strategically placed rocks to create shelters.
- Assorted Rocks and Pebbles: These are great for aesthetics, creating different levels, anchoring plants, and providing additional surface area for beneficial microorganisms. Choose natural, non-calcareous rocks (test with vinegar – if it fizzes, it’s calcareous and can alter water chemistry).
- A Selection of Aquatic Plants: Crucial for a Walstad pond! Plants are your natural filters, oxygenators, and provide shelter. Aim for a variety, including submerged plants (like Hornwort, Anacharis), rooted plants (Cryptocoryne wendtii, Java Fern, Anubias), and floating plants (Amazon Frogbit, Red Root Floaters, Water Lettuce). Consider plants that can attach to driftwood like Pothos (roots submerged, leaves out of water) for a lush look.
Step-by-Step Directions to Build Your Mini Pond
Building your mini pond is an exciting process. Follow these steps carefully to ensure a healthy and beautiful aquatic environment:
Step 1: Laying the Foundation and Hardscaping
The initial setup is critical for establishing a stable ecosystem. Begin by preparing your container and layering the essential elements:
- Add the Soil Layer: Start by carefully filling the bottom of your chosen tub with a layer of garden soil. Aim for a depth of approximately 1.5 to 2 inches (about 4-5 cm). Distribute it evenly and gently pat it down to remove any large air pockets. This nutrient-rich layer will feed your aquatic plants and facilitate the growth of beneficial bacteria essential for the Walstad method.
- Position the Driftwood: Take your two pieces of driftwood. You can secure them together with some sturdy, non-toxic twine or fishing line if you wish to create a more stable structure, or simply arrange them naturally. Place the driftwood in the center of the tub, ensuring it’s well-seated on the soil layer. The arrangement should be aesthetically pleasing and provide interesting nooks.
- Apply the Gravel Cap: Carefully, and gently, layer in the river gravel over the soil. Spread it across nicely and evenly, aiming for a consistent depth of about 0.5 to 1 inch (1-2.5 cm). This gravel layer acts as a cap, preventing the soil from clouding the water and keeping the valuable nutrients locked in the substrate for your plants.
- Place the Terracotta Hideout: Position the broken terracotta pot in the center of the tub, perhaps nestled just across from or between the driftwood pieces. This will serve as a secure hideaway for any future fish or small critters, offering them a safe retreat. Add a bit more river gravel around its base to secure the terracotta pot firmly in place, preventing it from shifting once water is added.
- Begin Filling with Water: This step requires patience. Place a plate or a plastic bag over the gravel layer and slowly pour water onto it. This technique helps to minimize disturbance to your carefully laid substrate. Fill the tub with water up to the brim. If using tap water, ensure it’s dechlorinated, as chlorine can harm beneficial bacteria and any future inhabitants. Initially, the water may appear cloudy due to disturbed soil particles; this is normal and will settle over a few days.
Step 2: Planting and Cycling Your Mini Pond
With the hardscaping complete, it’s time to bring your pond to life with plants and prepare it for any inhabitants.
- Arrange Rocks and Pebbles: Now that the water is in, strategically place additional pebbles and rocks at the bottom of the pond. You can use them to create visual interest, delineate different areas, or even create small platforms for potted plants that prefer shallower water.
- Introduce Aquatic Plants: This is where your Walstad pond truly begins to thrive. Gently plant your chosen water plants into the soil layer beneath the gravel. For rooted plants like Cryptocoryne wendtii, carefully push their roots into the soil through the gravel cap. For rhizome plants like Anubias or Java Fern, do not bury the rhizome; instead, attach them to the driftwood or rocks using fishing line or super glue gel (aquarium safe). Incorporate a variety of plant types:
- Submerged Plants: Anacharis (Egeria densa) or Hornwort are excellent oxygenators and nutrient consumers.
- Rooted Plants: Cryptocoryne wendtii (various types like ‘Red’ or ‘Green’), Swords (Echinodorus), and Vallisneria provide lush greenery and uptake nutrients from the substrate.
- Floating Plants: Amazon Frogbit, Red Root Floaters, or Water Lettuce offer shade, consume excess nutrients, and provide surface cover for fish. They are vital for algae control.
- Epiphytic/Marginal Plants: Pothos, Peace Lily, or Lucky Bamboo can have their roots submerged while their leaves grow above the water line, effectively drawing nitrates out of the water.
Aim for a dense planting scheme (at least 70-80% of the substrate covered) to ensure maximum nutrient uptake and a stable ecosystem.
- Allow for Cycling: This is perhaps the most crucial step before adding any fish. The Walstad method relies on beneficial bacteria establishing themselves in the soil and on all surfaces to process waste. This “cycling” process typically takes a few weeks (2-4 weeks). During this time, the plants will begin to grow, and the water parameters will stabilize. Avoid adding fish immediately. Monitor your pond for clarity and plant health.
- Introduce Fish (Optional, After Cycling): Once your pond has successfully cycled and the ecosystem is stable, you can consider adding a few small, hardy fish suitable for mini ponds, such as White Cloud Mountain Minnows, Guppies, or Endler’s Livebearers. Introduce them gradually, adding just one or two at a time over several days to avoid overwhelming the nascent ecosystem. Provide plenty of plant cover for them.
The Benefits of a Walstad Method Mini Pond
Choosing the Walstad method for your mini pond offers a multitude of advantages:
- Low Maintenance: This is the hallmark. With a thriving plant population and nutrient-rich soil, the pond becomes largely self-sustaining. Plants absorb nitrates and phosphates, reducing the need for frequent water changes and chemical treatments.
- Natural Filtration: The soil substrate, beneficial bacteria, and plants work together to naturally filter the water, keeping it clear and healthy without relying on mechanical filters.
- Eco-Friendly: By using natural processes, you minimize your environmental footprint, avoiding electricity consumption for pumps and filters, and reducing chemical use.
- Aesthetic Appeal: A well-planted Walstad pond is inherently beautiful, mimicking natural aquatic environments. The lush greenery and clear water create a calming and visually appealing feature.
- Habitat Creation: Even a mini pond can provide a valuable micro-habitat for beneficial insects, frogs, and birds, contributing to local biodiversity.
- Educational: It’s a living science experiment! Observe the cycles of nature firsthand, from plant growth to the interactions of small aquatic life.
Ongoing Care and Maintenance for Your Walstad Mini Pond
While known for being low-maintenance, a Walstad pond still benefits from occasional attention to ensure its long-term health and beauty:
- Water Top-Offs: Evaporation will occur, especially in warmer climates. Top off your pond with dechlorinated water regularly, taking care not to disturb the substrate.
- Plant Trimming: As your plants grow, they may become dense. Trim back any overgrown plants to prevent them from shading out others or completely covering the water surface, which can reduce gas exchange. Pruning also encourages bushier growth.
- Algae Control: A balanced Walstad pond should have minimal algae. If you notice an algae bloom, it often indicates an imbalance, usually too much light or too many nutrients. Increase floating plant cover, reduce direct sunlight exposure, or add more fast-growing submerged plants. Avoid chemical algaecides.
- Feeding Fish (if present): Feed fish sparingly. In a Walstad setup, they can find much of their food from the thriving ecosystem (microorganisms, small insects). Overfeeding is a common cause of water quality issues.
- Leaf Litter Removal: Periodically remove any fallen leaves or decaying plant matter from the water surface to prevent them from breaking down and adding excess nutrients.
- Winterizing (if applicable): If you live in a region with freezing winters, you’ll need to prepare your pond. For small tubs, you might bring them indoors. For larger ones, ensure the water is deep enough not to freeze solid, or use a small pond heater if you have fish.
Enhancing Your Mini Pond
Once your basic Walstad mini pond is established, there are many ways to further enhance its appeal and functionality:
- Lighting: For evening enjoyment, consider adding a small, submersible LED light. Solar-powered options are particularly convenient.
- Additional Decor: Small ceramic ornaments, unique stones, or even a miniature waterfall (with a small, low-power pump) can add character.
- Companion Plants: Place potted plants that enjoy high humidity around the pond’s edge to create a lush, jungle-like effect.
- Small Fountains: While the Walstad method minimizes the need for pumps, a very small, solar-powered fountain can add the soothing sound of moving water and some surface agitation without disrupting the natural balance too much.
Creating your own DIY mini pond using the Walstad method is a journey into sustainable and natural aquatic gardening. It offers a rewarding experience, transforming a simple container into a vibrant, self-sustaining ecosystem that provides beauty, tranquility, and a touch of wildness to your surroundings. With the detailed steps and insights provided, you’re now ready to embark on this delightful project. So gather your materials, get creative with your planting, and enjoy the calming presence of your very own thriving mini pond!