
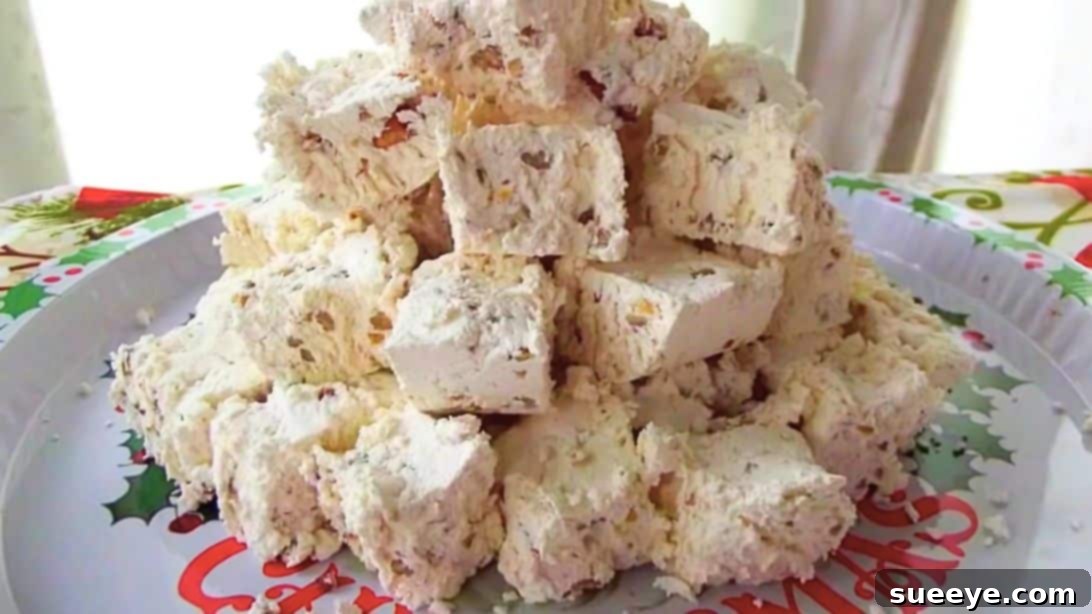
There are certain aromas and tastes that instantly transport you back to childhood, especially during the festive holiday season. For my family, that unmistakable scent was always my Mom’s homemade divinity fudge. Every Christmas, her kitchen would fill with the sweet, sugary perfume of this light, ethereal candy, a tradition that became synonymous with the magic of the season. Now, as an adult, it’s my privilege and challenge to step into her shoes and continue this cherished legacy. Mastering divinity fudge is no small feat; it’s a delicate dance of sugar, egg whites, and precise temperatures, and the pressure to impress her and the entire family with my rendition of this classic dessert is wonderfully real.
Divinity fudge, with its cloud-like texture and melt-in-your-mouth sweetness, stands apart from its denser, chocolatey cousins. It’s a confection that evokes a sense of old-world charm, a truly special treat that’s often reserved for holiday gatherings. Its unique, nougat-like consistency, punctuated by crunchy nuts, makes it an unforgettable addition to any dessert spread. As I embarked on my journey to recreate this beloved family staple, I knew I wanted to start with an authentic, time-tested recipe. My goal wasn’t just to make divinity; it was to master the art, to produce a fudge that lived up to the nostalgic perfection of my Mom’s.
RELATED: Grandma’s Old Fashioned Fudge Recipe
Before even considering tweaking ingredients or adding my own spin, I sought out a foundational recipe that was both reliable and easy to understand. When it comes to old-fashioned, traditional cooking that genuinely captures the essence of “down-home” flavors, my go-to resource is The Hillbilly Kitchen – Down Home Country Cooking on YouTube. Their approach to classic Southern recipes is simply unparalleled. The instructions are always incredibly clear, the steps are logically presented, and the passion for authentic, homemade food shines through every video. Their divinity fudge recipe promised simplicity and success, making it the perfect starting point for my holiday candy-making adventure. It provided the confidence I needed to tackle this famously finicky confection.
Understanding Divinity Fudge: A Cloud of Sweetness
Before diving into the recipe, it’s helpful to understand what makes divinity fudge so special. Unlike traditional chocolate fudges that rely on a creamy, dense texture, divinity is a meringue-based candy. This means its primary structure comes from whipped egg whites, which are then stabilized and sweetened with hot sugar syrups. The result is a confection that is remarkably light, airy, and somewhat chewy, reminiscent of nougat but with a distinct crispness at its core. The addition of nuts provides a delightful textural contrast and complements the intense sweetness. It’s a true testament to the beauty of simple ingredients transformed through careful technique into something truly divine.
Ingredients for Homemade Divinity Fudge:
Creating perfect divinity fudge requires precise measurements and high-quality ingredients. Pay close attention to these components, as each plays a vital role in achieving the desired light and airy texture.
Syrup #1 (for Initial Egg White Stabilization):
- 1 cup of granulated sugar
- ½ cup of water
- 1/8 tsp of cream of tartar
(Cream of tartar is crucial here, acting as a stabilizer for the egg whites and helping to prevent sugar crystallization, ensuring a smooth, pliable fudge.)
Syrup #2 (for Final Fudge Structure):
- 2 cups of granulated sugar
- 2/3 cup of white corn syrup
- ¼ tsp of salt
- ¼ cup of water
(White corn syrup is key to preventing crystallization in the larger batch of sugar, guaranteeing a smooth and professional-looking finish. Salt helps to balance the sweetness.)
Other Essential Components:
- 3 large egg whites (ensure they are at room temperature for optimal whipping)
- 1 tsp of real vanilla extract (pure vanilla offers the best flavor)
- 1 cup of finely chopped nuts (pecans or walnuts are traditional and highly recommended)
(Room temperature egg whites whip up to a much greater volume, creating the signature airy texture. Good quality vanilla extract will elevate the overall flavor profile, and finely chopped nuts distribute evenly throughout the fudge.)
How to Make Divinity Fudge: Step-by-Step Guide
Making divinity fudge is a rewarding process that combines careful heat control with vigorous mixing. Follow these steps precisely for the best results, transforming simple ingredients into a festive holiday masterpiece.
Step 1: Preparing Your Syrups to Perfection
Begin by preparing both sugar syrups simultaneously, as timing is crucial for divinity fudge. In your first saucepan, combine the ingredients for Syrup #1: 1 cup of sugar, ½ cup of water, and 1/8 tsp of cream of tartar. Stir these ingredients thoroughly until the sugar begins to dissolve. Place this saucepan over medium heat and bring the mixture to a boil, stirring occasionally to ensure no sugar crystals form on the sides of the pan. Continue heating until this syrup reaches a precise temperature of 240°F (116°C) on a reliable candy thermometer. This first syrup will be used to stabilize the initial whipping of the egg whites.
Concurrently, in a second, larger saucepan, add the ingredients for Syrup #2: 2 cups of sugar, 2/3 cup of white corn syrup, ¼ tsp of salt, and ¼ cup of water. Stir these together until well combined. Place this saucepan over medium-high heat. You’ll want to bring this mixture to a higher temperature, specifically 280°F (138°C). Stir this syrup occasionally to prevent burning and ensure even heating, but be mindful not to stir too vigorously once it starts boiling, as this can encourage crystallization. Keep a close eye on both pans and your candy thermometers; precision in temperature is paramount for the success of your divinity fudge.
Step 2: Whipping Egg Whites and Incorporating Syrups
While your syrups are heating, add the three room-temperature egg whites to the clean bowl of a stand mixer fitted with the whisk attachment. Begin beating the egg whites on medium-high speed. Continue beating until they form stiff, glossy peaks. This means when you lift the whisk, the peaks should hold their shape firmly and not droop. This step is critical for incorporating air and creating the light texture of divinity.
Once Syrup #1 reaches 240°F (116°C) and your egg whites are at stiff peaks, it’s time for careful incorporation. Turn the mixer speed down to low, and very slowly, in a thin, steady stream, pour Syrup #1 into the whipped egg whites. Pour it down the side of the bowl to avoid hitting the whisk directly, which could splatter the hot syrup. After adding the first syrup, increase the mixer speed to medium-high and continue beating. The mixture will look glossy and expand in volume.
As the mixer continues to run, keep an eye on your second saucepan. When Syrup #2 reaches its target of 280°F (138°C), reduce the mixer speed to low once more. Slowly and carefully, pour the second hot syrup into the egg white mixture in the same manner as the first, pouring it down the side of the bowl. Once both syrups are incorporated, increase the mixer speed back to medium-high and continue beating. This vigorous mixing helps to cool the mixture, develop its structure, and achieve that signature divinity texture.
Step 3: Adding Flavor, Color, and Nuts
Continue beating the mixture in the stand mixer. After about 8 to 9 minutes of continuous mixing (the exact time can vary depending on your mixer and ambient humidity), the mixture will transform. It should become very thick, stiff, and sticky, almost difficult for the mixer to handle. This is the point where you want to quickly add your flavorings and nuts. Reduce the mixer speed to low or turn it off briefly.
Add 1 teaspoon of real vanilla extract and any food coloring if you desire a festive tint (a drop or two of red or green can be lovely for holidays). Scrape down the sides of the bowl to ensure everything is well incorporated. Now, quickly add the 1 cup of finely chopped nuts. Fold them into the thick mixture by hand with a sturdy spatula or on the lowest mixer setting just until they are evenly distributed. It is essential to work swiftly here, as divinity fudge begins to set very quickly once it starts to cool. The longer it sits, the harder it becomes to mix and spread.
Step 4: Setting, Cooling, and Serving Your Divinity Fudge
Immediately after folding in the nuts, transfer the sticky divinity mixture to a prepared baking dish. A 9×13 inch pan lined with parchment paper (lightly greased) works wonderfully, allowing for easy removal. Use a greased spatula or your hands to quickly spread the mixture evenly across the bottom of the pan. Press it down firmly and smoothly to ensure a compact and uniform fudge.
Now comes the hardest part: patience. Allow the divinity fudge to cool down completely at room temperature. This can take several hours, or even overnight, depending on the warmth and humidity of your kitchen. Do not rush this process by refrigerating, as it can affect the texture. The fudge should become firm and completely set.
Once fully hardened, lift the parchment paper to remove the entire block of fudge from the pan. Place it on a cutting board. Using a sharp, greased knife (or a pizza cutter for cleaner lines), cut the divinity into small, bite-sized bars or squares. Wipe your knife clean between cuts for the neatest presentation. Arrange your beautiful homemade divinity fudge on a platter and serve it to your eagerly awaiting family and friends. Enjoy the fruits of your labor and the joy of continuing a delicious holiday tradition!
Tips for Perfect Divinity Fudge Every Time:
- Monitor Humidity: Divinity fudge is notoriously sensitive to humidity. For the best results, try to make it on a dry day. High humidity can prevent the fudge from setting properly, resulting in a sticky, softer consistency.
- Calibrate Your Thermometer: A precise candy thermometer is non-negotiable for divinity. Test your thermometer’s accuracy by placing it in boiling water; it should read 212°F (100°C). Adjust your target temperatures accordingly if it’s off.
- Clean Equipment: Ensure your mixer bowl and whisk are perfectly clean and free of any grease or egg yolk, as even a tiny amount can prevent egg whites from whipping properly.
- Patience with Cooling: Resist the urge to refrigerate your divinity to speed up cooling. It needs to set slowly at room temperature to achieve its ideal texture.
- Work Quickly: Once the final syrup is added and the mixture starts to thicken, it will set rapidly. Have your nuts measured and your pan ready to go.
- Storage: Store divinity fudge in an airtight container at room temperature. It will stay fresh for about 1-2 weeks. Avoid storing it in the refrigerator, as it can become soggy.
- Variations: Feel free to experiment with different nuts like pecans, walnuts, or even macadamia nuts. A touch of almond extract can complement the vanilla beautifully. For a festive twist, consider adding dried cranberries or finely chopped candied fruit.
- Troubleshooting Sticky Fudge: If your divinity remains too sticky and doesn’t set, it’s often due to insufficient cooking of the syrup (temperature too low) or high humidity. Unfortunately, it’s hard to salvage, but it can still be enjoyed as a sticky topping or mixed into ice cream.
Making divinity fudge is more than just following a recipe; it’s an experience. It’s a journey of patience, precision, and ultimately, immense satisfaction. The effort is well worth it when you present these light, sweet, and nutty squares to your loved ones. There’s a special kind of pride that comes from continuing a family tradition, especially one as delicious and beloved as homemade divinity. This holiday season, I encourage you to embrace the challenge and create your own batch of this truly divine confection. The smiles and compliments will be your sweet reward.
All images are credited to The Hillbilly Kitchen – Down Home Country Cooking via YouTube. We highly recommend visiting their channel and subscribing for more authentic, heartwarming country cooking recipes!
Easy Homemade Divinity Fudge Recipe