
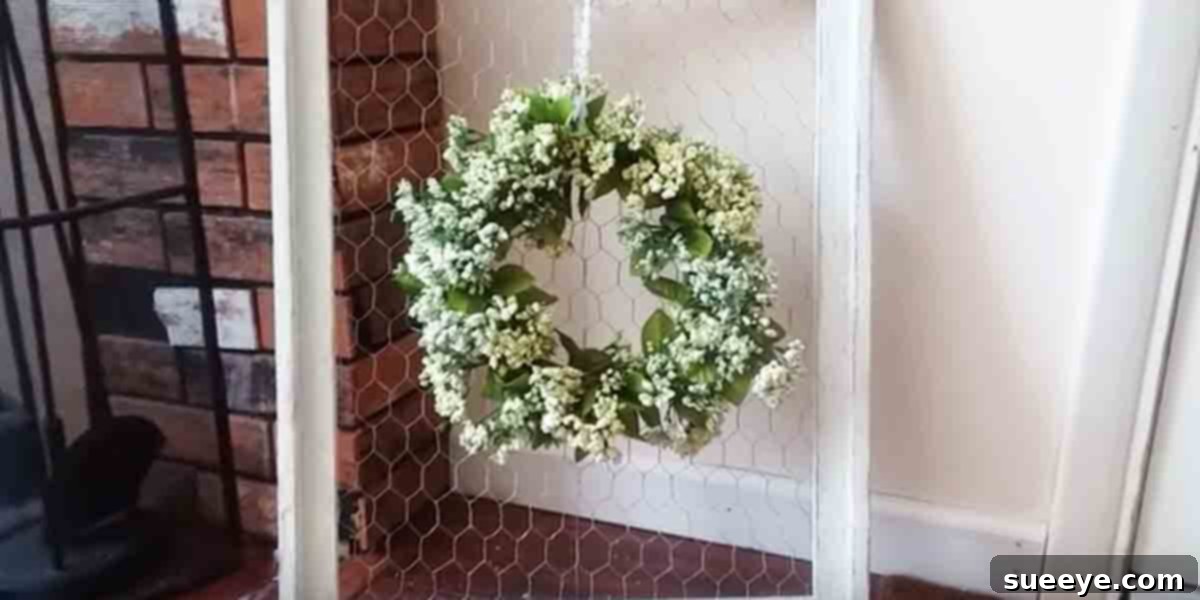
DIY Rustic Farmhouse Chicken Wire Frame: Create High-End Decor on a Budget
Are you yearning to infuse your living space with that coveted rustic farmhouse charm without breaking the bank? Look no further! This DIY project offers the perfect solution, allowing you to craft a stunning chicken wire frame that exudes country elegance and serves as a captivating focal point in any room. It’s an incredibly simple, budget-friendly endeavor that yields surprisingly rich, high-end results, proving that beautiful home decor doesn’t have to come with a hefty price tag.
The allure of farmhouse decor lies in its ability to blend warmth, comfort, and a touch of vintage appeal. Our rustic chicken wire frame perfectly embodies this aesthetic, offering an ideal canvas for displaying everything from seasonal wreaths to cherished family photos. You’ll be amazed at how easily you can achieve a sophisticated, custom look with just a few readily available materials and a sprinkle of creativity. Get ready to elevate your home decor game with a project that’s as rewarding to make as it is beautiful to behold!
Why Farmhouse Decor Continues to Captivate
The enduring popularity of farmhouse decor is undeniable. It’s a style that evokes a sense of nostalgia, simplicity, and genuine comfort. Characterized by natural materials, distressed finishes, and practical yet beautiful pieces, farmhouse style creates inviting and serene environments. From sprawling country estates to cozy urban apartments, people are drawn to its unpretentious charm and ability to make a house feel like a home. This aesthetic celebrates imperfections, embraces salvaged items, and emphasizes functionality, all while maintaining a cohesive and stylish appearance.
Our DIY chicken wire frame fits seamlessly into this beloved trend. Its rustic texture, often paired with a distressed wooden frame, speaks volumes about the handcrafted, authentic spirit of farmhouse living. It’s not just a decorative item; it’s a statement piece that whispers tales of simpler times and cherished traditions, making it an indispensable addition to any farmhouse-inspired space.
The Irresistible Charm of the Chicken Wire Frame
What makes a chicken wire frame such an iconic and versatile piece of farmhouse decor? Beyond its humble origins, chicken wire possesses a unique visual texture that instantly adds character and depth to any setting. When framed, it transforms into a rustic art piece capable of displaying a myriad of items, adapting effortlessly to different seasons and personal tastes. It’s a dynamic decor element that allows for endless personalization, ensuring your home always reflects your current mood or the festive spirit of the season.
Imagine a vibrant spring wreath adorning your frame, followed by cherished family photographs clipped onto the wire for a personal touch, or perhaps a collection of dried lavender for a fragrant, calming autumn display. The chicken wire frame is more than just a wall hanging; it’s a storytelling canvas. Its open, airy design prevents it from feeling heavy or overwhelming, making it suitable for even smaller spaces while still commanding attention as a sophisticated focal point.
Gathering Your Materials: What You’ll Need
One of the most appealing aspects of this DIY project is the simplicity and affordability of the materials. You likely have some of these items lying around, or they can be easily sourced from thrift stores, craft shops, or hardware stores. Remember, embracing the “less for more” philosophy is key to achieving that authentic farmhouse look!
Essential Supplies:
- A Sturdy Wooden Frame: The heart of your project! Look for an old picture frame, mirror frame, or even a window pane frame. Thrift stores, garage sales, and flea markets are treasure troves for unique finds. Don’t worry about the current finish; we can always paint or distress it. Aim for a frame with a solid back lip where the chicken wire can be securely attached.
- Chicken Wire: This is the defining element. You’ll need enough to cover the opening of your frame with a slight overlap for attachment. Chicken wire rolls are typically inexpensive and can be found at hardware stores or online.
- Wire Cutters: Essential for cutting the chicken wire to size. Ensure they are robust enough for the gauge of wire you choose.
- Staple Gun and Staples: For securely attaching the chicken wire to the back of the frame. A manual staple gun works perfectly, but an electric one can make the job even quicker. Alternatively, small nails or tacks can be used with a hammer.
- Protective Gloves: Chicken wire edges can be sharp! Always wear sturdy gloves to protect your hands during handling and cutting.
Optional Decor and Finishing Touches:
- Paint (Chalk Paint, Acrylic, or Spray Paint): If you want to refresh or distress your frame. Chalk paint is particularly popular for achieving a soft, matte farmhouse finish.
- Sandpaper: For distressing the frame to create a worn, vintage look.
- Wreath: A beautiful wreath (floral, eucalyptus, cotton, or seasonal) instantly elevates the frame. Craft stores often have great sales!
- Small Clips or Clothespins: For attaching photos, notes, or small decorative items to the chicken wire.
- Twine or Ribbon: For hanging the frame or adding decorative bows.
- Command Hooks or Picture Hangers: For safely mounting your finished project.
Step-by-Step Tutorial: Crafting Your Farmhouse Masterpiece
Creating this rustic chicken wire frame is surprisingly straightforward. Follow these simple steps, and you’ll have a charming piece of decor ready to display in no time!
Step 1: Preparing Your Frame
- Clean the Frame: If you’re using a salvaged frame, thoroughly clean it to remove any dust, grime, or loose paint. A damp cloth with a mild cleaner usually does the trick.
- Remove Existing Components: Carefully remove any glass, backing, or existing hardware from the frame. You only need the bare frame.
- Paint or Distress (Optional):
- If your frame needs a new look, apply your chosen paint. Chalk paint often requires minimal prep and gives a lovely matte finish.
- For a distressed farmhouse look, apply two coats of paint (a darker base coat, then a lighter top coat). Once dry, lightly sand the edges and raised areas to reveal the underlying color and create a worn effect.
- Allow the paint to dry completely according to the manufacturer’s instructions before proceeding.
Step 2: Measuring and Cutting the Chicken Wire
- Measure the Opening: Carefully measure the inside dimensions of your frame’s opening.
- Cut the Chicken Wire: Wearing your protective gloves, cut a piece of chicken wire that is slightly larger than your frame’s opening – aim for an extra 1/2 to 1 inch on each side. This overlap will give you enough material to securely staple it to the back of the frame.
- Safety First: Be extremely careful when handling chicken wire, as the cut edges are very sharp.
Step 3: Attaching the Chicken Wire to the Frame
- Position the Wire: Lay your frame face down on a clean, protected surface. Center the cut chicken wire over the back opening of the frame.
- Secure One Side: Starting with one side, carefully pull the chicken wire taut and begin stapling it to the inner lip of the frame. Place staples every 1-2 inches. Ensure the wire is flat and even.
- Work Around the Frame: Continue to pull the chicken wire taut as you work your way around all four sides of the frame, adding staples. The goal is to have a drum-tight piece of wire that won’t sag.
- Trim Excess (Optional): If there are any excessively long or sharp edges of chicken wire protruding after stapling, carefully trim them down with your wire cutters, again wearing gloves. You might also consider bending down any remaining sharp points with pliers to prevent snags.
Step 4: Adding Your Personal Touch
Now comes the fun part – decorating your newly crafted frame!
- Wreath Placement: The easiest way to adorn your frame is with a beautiful wreath. Simply thread a piece of twine or ribbon through the top of the wreath and tie it around the top bar of the frame, allowing the wreath to hang centrally. Alternatively, you can use a small Command hook or picture hanging wire attached to the top inside edge of the frame.
- Photo Display: Use small clips or mini clothespins to attach cherished photographs, postcards, or inspirational quotes directly to the chicken wire.
- Seasonal Decor: Easily swap out wreaths and small embellishments to match the season – think faux pumpkins for autumn, evergreen sprigs for winter, or bright florals for spring.
Step 5: Displaying Your Masterpiece
Your beautiful farmhouse chicken wire frame is ready to be admired! Choose a prominent spot in your home – perhaps above a mantel, in a hallway, as part of a gallery wall, or to greet guests in an entryway. Its versatility ensures it will enhance any space it inhabits.
Tips for Success and Longevity
- Thrift Store Scouting: Dedicate time to scouting thrift stores. The perfect frame might be hidden in plain sight, often for just a few dollars. Don’t be afraid of frames that look a bit rough; a fresh coat of paint can do wonders!
- Safety First, Always: Reiterating the importance of gloves. Cuts from chicken wire can be nasty.
- Consider Your Decorating Style: While “farmhouse” is the main theme, think about your specific sub-style (modern farmhouse, vintage farmhouse, rustic chic) when choosing paint colors and embellishments.
- Experiment with Wire Types: While chicken wire is classic, hardware cloth or other decorative meshes can offer a different look. Just ensure they are flexible enough to work with.
- Seasonal Swaps: The beauty of this frame is its adaptability. Plan for seasonal rotations of wreaths and clip-on decor to keep your space feeling fresh and festive.
- Clean with Care: Dust your frame gently with a soft cloth. Avoid harsh chemicals, especially on distressed finishes.
Creative Variations & Personalization Ideas
While the basic chicken wire frame is charming on its own, there are countless ways to customize and personalize it to truly make it yours. Let your imagination run wild!
- Multi-Frame Displays: Create a captivating gallery wall by using frames of different sizes and shapes, all featuring chicken wire. This adds dynamic visual interest.
- Incorporating Hooks: Attach small S-hooks or cup hooks along the bottom edge of the frame for hanging lightweight items like keys, kitchen utensils (in a pantry), or small decorative ornaments.
- Chalkboard Insert: Instead of chicken wire, or in conjunction with it on a multi-pane frame, consider adding a small chalkboard panel for messages or grocery lists.
- Backlighting: For a truly unique effect, attach a string of battery-operated fairy lights to the back of the chicken wire. This creates a soft, ambient glow, especially beautiful in the evenings.
- Fabric Backing: For a softer look, staple a piece of burlap or a light, farmhouse-patterned fabric behind the chicken wire. This provides a backdrop for items clipped onto the wire.
- Stenciled Details: Before attaching the chicken wire, stencil a subtle farmhouse-inspired design (like a floral motif or a rustic word) onto the bare wood of the frame.
The Rewards of DIY Home Decor
Embarking on DIY home decor projects, especially one as enjoyable and impactful as this chicken wire frame, offers a multitude of benefits beyond just saving money:
- Personal Satisfaction: There’s immense pride in displaying something you’ve created with your own hands. It adds a unique story to your home.
- Uniqueness: Your decor pieces will be truly one-of-a-kind, reflecting your personal style and creativity, something mass-produced items can rarely offer.
- Budget-Friendly: Reusing and repurposing materials significantly cuts down on decorating costs, allowing you to achieve a high-end look without the high-end price tag.
- Eco-Friendly: Upcycling old frames and materials is a sustainable practice that reduces waste and gives new life to forgotten items.
- Stress Relief: Many find the process of crafting to be a therapeutic and relaxing activity, a wonderful escape from daily stressors.
Bring Farmhouse Charm Home Today!
This rustic farmhouse chicken wire frame project is more than just a craft; it’s an magnificent invitation to personalize your home with warmth, character, and a touch of handmade artistry. It’s an easy, inexpensive, and deeply satisfying way to embrace the beloved farmhouse aesthetic. From its thrifty origins to its final display, every step of creating this piece is infused with the joy of bringing beauty into your living space.
So, gather your materials, unleash your creativity, and get ready to transform an ordinary frame into an extraordinary piece of farmhouse chic decor. You don’t need to be an expert craftsman; you just need a desire to create something beautiful. We can’t wait to see the charming focal point you create for your home!