
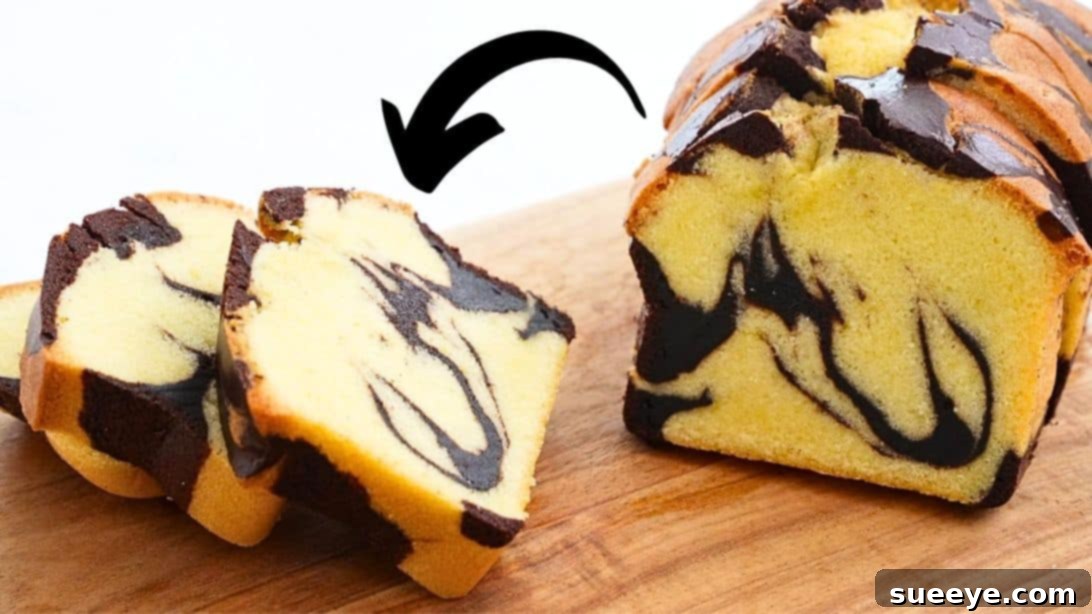
Baking Perfection: Mastering the Classic Easy Marble Cake Recipe
There’s an undeniable joy that comes with baking, a delightful process of transforming simple ingredients into something truly magical. For many, myself included, the act of baking is as rewarding as the pleasure of indulging in a freshly made treat, especially when paired with a comforting cup of coffee or tea. When it comes to timeless desserts, the classic marble cake holds a special place in the hearts of bakers and eaters alike. Its distinctive swirled pattern, a beautiful dance between vanilla and chocolate, promises not only a feast for the eyes but also a harmonious blend of flavors.
This particular recipe, inspired by the wonderful work of Apron on YouTube, stands out as a true gem. It’s incredibly easy to make, remarkably quick to prepare, and calls for just a handful of staple ingredients that you likely already have in your pantry. If you’re yearning for a cake that boasts a heavenly fluffy, wonderfully spongy, and delightfully light texture, coupled with an unbelievably delicious taste, then look no further. This classic marble cake recipe is guaranteed to become your new favorite, delivering satisfaction with every tender bite. It’s perfect for casual family gatherings, special occasions, or simply to brighten an ordinary day with a touch of homemade elegance.
Essential Ingredients for Your Fluffy Marble Cake
Crafting the perfect marble cake begins with selecting quality ingredients and understanding their role in achieving that coveted light and airy texture. This recipe keeps things simple with just eight core components, ensuring accessibility without compromising on taste or quality.
- 4 large whole eggs: Eggs provide structure and moisture to the cake. Using them at room temperature is crucial as they emulsify better with other ingredients, leading to a smoother batter and a lighter, airier cake crumb.
- ½ cup of granulated sugar: Sugar not only sweetens the cake but also contributes to its tenderness and helps create a beautiful golden crust. Ensure it’s finely granulated for even distribution throughout the batter.
- 2/3 cup of unsalted butter: Butter adds richness, flavor, and moisture. Like eggs, using unsalted butter at room temperature is vital. It creams better with sugar, incorporating air that gives the cake its fluffy texture. Unsalted butter allows you to control the overall salt content in the recipe.
- 1 cup of cake flour: Cake flour is a low-protein flour that yields a very tender and fine crumb, which is essential for a truly light and spongy cake. If you don’t have cake flour, you can create a substitute by removing two tablespoons of all-purpose flour from one cup and replacing it with two tablespoons of cornstarch, then sifting well.
- 1 tsp of baking powder: This leavening agent is responsible for the cake’s rise, creating those delightful air pockets that contribute to its fluffiness. Make sure your baking powder is fresh for optimal results.
- ¼ tsp of salt: A small pinch of salt enhances the flavors of the other ingredients, balancing the sweetness and adding depth to the overall taste profile.
- 2 tbsp of unsweetened cocoa powder: This provides the rich chocolate flavor and color for the marble swirl. Use good quality cocoa powder for the best chocolatey taste.
- 2 tbsp of hot water: Hot water helps to bloom the cocoa powder, intensifying its flavor and ensuring a smooth, lump-free chocolate batter.
Equipment You’ll Need
Having the right tools makes the baking process smoother and more enjoyable. For this marble cake, you’ll want to gather a few standard kitchen items:
- Stand Mixer or Hand Mixer: Essential for thoroughly beating the eggs and creaming the butter and sugar, ensuring a light and airy batter.
- Large Mixing Bowls: At least two, one for the main batter and one for the chocolate portion.
- Sifter: For sifting the dry ingredients to prevent lumps and incorporate air.
- Measuring Cups and Spoons: For accurate ingredient measurements.
- 8-inch Round Cake Pan: The ideal size for this recipe, ensuring even baking.
- Rubber Spatula: For folding ingredients gently and scraping down the sides of the bowl.
- Toothpick or Skewer: For creating the signature marble swirl effect.
- Wire Cooling Rack: For cooling the cake completely after baking.
- Oven: Preheating is key for consistent baking.
Preparation Tips for a Perfect Bake
Before you even begin mixing, a few preparatory steps can significantly impact the success of your marble cake:
- Room Temperature Ingredients: Ensure your eggs and butter are at room temperature. This is crucial for proper emulsification and a smooth, consistent batter. Cold ingredients can lead to a lumpy batter and a denser cake.
- Preheat Your Oven: Always preheat your oven to the specified temperature (180°C or 350°F) for at least 15-20 minutes before baking. A consistently hot oven ensures the cake rises properly from the moment it enters.
- Prepare Your Cake Pan: Lightly grease and flour an 8-inch round cake pan. Alternatively, you can line the bottom with parchment paper and grease the sides. This prevents the cake from sticking and ensures an easy release once baked and cooled.
- Sift Dry Ingredients: Sift the cake flour, baking powder, and salt together thoroughly. This removes any lumps, aerates the flour, and ensures these leavening agents are evenly distributed throughout the batter, leading to a uniform rise.
Baking Directions: Step-by-Step
Follow these detailed steps carefully to achieve a beautifully marbled, fluffy cake that will impress everyone.
Step 1: Crafting the Vanilla and Chocolate Batters
Begin by placing the room temperature whole eggs into the bowl of a stand mixer fitted with a whisk attachment. Beat the eggs on high speed for several minutes until they become very light, fluffy, and pale in color. This step is crucial for incorporating air, which contributes significantly to the cake’s light texture. Gradually add the granulated sugar to the beaten eggs, continuing to beat until the mixture is thick, glossy, and light yellow, forming ribbons when the whisk is lifted. Next, add the softened room temperature unsalted butter, piece by piece, to the egg and sugar mixture. Continue to beat until the butter is fully incorporated, and the batter is smooth and well combined. Scrape down the sides of the bowl as needed to ensure everything is evenly mixed.
In a separate bowl, sift together the cake flour, baking powder, and salt. Sifting is essential to remove any lumps and to aerate the flour, which prevents a dense cake. Gently fold the sifted dry ingredients into the wet batter using a rubber spatula. Mix only until just combined; overmixing at this stage can develop the gluten in the flour, resulting in a tough cake. The batter should be smooth and cohesive.
Now, it’s time to prepare the chocolate portion. In a small, separate bowl, combine the cocoa powder and hot water. Whisk vigorously until you have a smooth, dark chocolate paste without any lumps. The hot water helps to “bloom” the cocoa, intensifying its flavor and color. Take about one-fourth of the prepared vanilla batter and gently fold it into the chocolate paste until it is thoroughly combined and uniform in color. This creates your rich chocolate batter.
Step 2: Assembling, Baking, and Cooling Your Marble Masterpiece
With both vanilla and chocolate batters ready, it’s time to create the signature marble effect. Drop alternating dollops of the vanilla batter and the chocolate batter into your prepared cake pan. Start with a spoonful of vanilla batter, then a spoonful of chocolate batter next to it, and continue alternating until all the batter is used. You can be creative with your placement, ensuring a good mix of both colors.
Once all the batter is in the pan, gently tap the pan on the counter a few times. This helps to settle the batter, release any trapped air bubbles, and ensure an even surface. For the beautiful marble swirl, insert a toothpick, skewer, or a thin knife into the batter and gently swirl it around a few times. Be careful not to overmix, as this can blend the colors too much and result in a muddy appearance rather than distinct swirls. A few gentle S-shapes or figure-eights are usually sufficient to create an appealing marble pattern.
Carefully place the cake pan in the middle rack of your preheated oven at 180°C or 350°F. Bake for approximately 45 to 55 minutes. Baking times can vary depending on your oven, so start checking around the 40-minute mark. You’ll know the cake is done when a toothpick inserted into the center comes out clean. The cake should also be golden brown on top and spring back lightly when touched.
Once baked, remove the cake from the oven and allow it to cool in the pan on a wire rack for about 10-15 minutes. This allows the cake to set and prevents it from breaking when unmolding. After this initial cooling, carefully invert the cake onto the wire rack to cool completely. Cooling completely is essential before slicing and serving, as it allows the cake’s structure to fully stabilize and locks in moisture, ensuring the best texture and flavor. Once cooled, slice into generous portions, serve with your favorite beverage, and enjoy this delightful homemade treat!
Tips for the Perfect Marble Cake Every Time
Achieving a consistently perfect marble cake is easier than you think with these expert tips:
- Don’t Overmix: After adding the flour, mix only until just combined. Overmixing develops gluten, leading to a tough, dense cake.
- Achieve Distinct Swirls: When creating the marble pattern, use a light hand. Over-swirling can cause the chocolate and vanilla batters to blend too much, resulting in a less defined, muddy appearance rather than clear swirls.
- Accurate Oven Temperature: An oven thermometer can be a baker’s best friend. Many ovens can be off by several degrees, which can significantly impact baking time and the cake’s texture.
- Resist Opening the Oven Door: Especially during the first 30 minutes of baking, avoid opening the oven door. The sudden drop in temperature can cause the cake to sink in the middle.
- Cool Completely: Patience is key. Cutting into a warm cake can cause it to crumble and lose moisture. Let it cool entirely on a wire rack before slicing.
- Grease and Flour Properly: Don’t skip this step! A well-prepared pan ensures your beautiful cake releases easily without sticking or tearing.
Variations and Customizations
While the classic marble cake is delightful on its own, don’t hesitate to experiment with these ideas to make it uniquely yours:
- Frosting and Glaze: A simple dusting of powdered sugar is elegant, but you can also elevate your cake with a vanilla buttercream, a rich chocolate ganache, or a simple pour-over glaze made from powdered sugar and milk.
- Flavor Enhancements: Add a touch of almond extract to the vanilla batter for a subtle nutty note, or a tablespoon of instant coffee granules (dissolved in the hot water) to the chocolate batter to deepen its flavor.
- Add-Ins: Fold in a handful of miniature chocolate chips into either batter for extra pockets of melty chocolate, or sprinkle toasted chopped nuts (like walnuts or pecans) over the top before baking for added crunch.
- Mini Cakes or Cupcakes: This recipe can easily be adapted to make marble cupcakes or mini cakes. Adjust baking time accordingly (usually 18-22 minutes for cupcakes).
Storage Instructions
To keep your marble cake fresh and delicious for as long as possible:
- Room Temperature: Store leftover cake, covered tightly with plastic wrap or in an airtight container, at room temperature for up to 2-3 days.
- Refrigeration: If your kitchen is warm or if your cake has a perishable frosting, refrigerate it. Bring it back to room temperature before serving for the best flavor and texture. It will last up to 5 days in the fridge.
- Freezing: Marble cake freezes beautifully. Wrap individual slices or the whole cake (unfrosted) tightly in plastic wrap, then in aluminum foil, and freeze for up to 2-3 months. Thaw overnight in the refrigerator before bringing to room temperature to serve.
*All image credit belongs to Apron via YouTube. Follow and subscribe to her channel for more delightful recipes!
Indulge in the Timeless Delight of Homemade Marble Cake
There’s something truly special about a homemade cake, and this classic marble cake recipe exemplifies that sentiment perfectly. With its irresistible blend of vanilla and chocolate, its beautiful swirled pattern, and its wonderfully light and moist texture, it’s a dessert that never fails to charm. This recipe proves that you don’t need complicated techniques or a long list of exotic ingredients to create something extraordinary in your own kitchen.
Whether you’re an experienced baker or just starting your culinary journey, this easy-to-follow guide ensures a successful and delicious outcome. Imagine the aroma filling your home as it bakes, the satisfying moment of slicing into a perfectly swirled cake, and the sheer delight on the faces of those who taste it. This marble cake isn’t just a dessert; it’s an experience, a comforting classic that brings people together and creates cherished memories.
So, gather your ingredients, follow these simple steps, and embark on a delightful baking adventure. You’ll be amazed at how effortlessly you can create a bakery-quality marble cake right in your home. Indulge in the timeless charm and incredible flavor of this beloved classic, and savor every fluffy, spongy, and utterly delicious bite. Happy baking!