
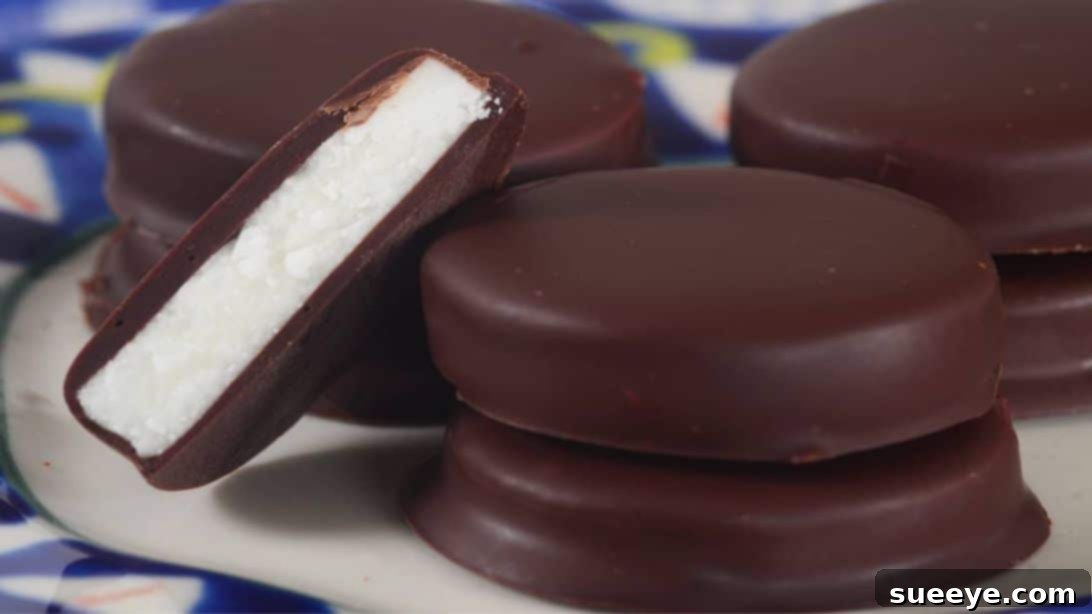
Irresistible Homemade Chocolate Peppermint Patties: Your Guide to Sweet Perfection
Prepare to delight your taste buds with these sensational chocolate-coated peppermint patties! Far superior to store-bought varieties, these homemade treats offer a burst of refreshing mint perfectly complemented by rich, decadent chocolate. They are an absolute showstopper, guaranteed to be the star dessert at any gathering, leaving your guests craving more. Beyond their incredible flavor, their elegant appearance makes them ideal for gifting or simply indulging yourself after a delicious meal.
EXPLORE MORE: Easy 4-Ingredient Peppermint Bark Recipe
The beauty of this recipe lies in its simplicity. With just a handful of common ingredients and three straightforward steps, you can craft these delectable candies with remarkable ease. This no-fail method ensures that even beginners can achieve perfect results on their very first try. Follow along with our detailed instructions and gain confidence from this excellent video tutorial by Joy of Baking on YouTube, ensuring your homemade peppermint patties turn out flawlessly every time.
Why Homemade Peppermint Patties Are a Must-Try
- Unbeatable Freshness: Experience the vibrant, natural peppermint flavor that only fresh, homemade ingredients can provide.
- Customizable Perfection: Adjust the intensity of the peppermint, choose your favorite chocolate, or even experiment with different extracts to create a treat that’s uniquely yours.
- Economical & Rewarding: Making your own candy is often more cost-effective than buying gourmet versions, and the satisfaction of crafting something so delicious from scratch is truly priceless.
- Impressive & Elegant: These beautiful patties look incredibly professional and sophisticated, making them perfect for special occasions, holiday platters, or thoughtful edible gifts.
- Simple & Accessible: Despite their gourmet appeal, the recipe is incredibly easy to follow, making it a fantastic project for home bakers of all skill levels.
Essential Ingredients for Heavenly Peppermint Patties
Creating these delightful treats requires a few key components. Ensure you have these high-quality ingredients ready to achieve the best flavor and texture.
For the Creamy Peppermint Filling:
- 2 cups of powdered sugar (confectioners’ sugar): Essential for the smooth, melt-in-your-mouth texture of the filling.
- 1½ tbsp of unsalted butter, softened: Adds richness and helps bind the ingredients, contributing to a creamy consistency.
- ¼-½ tsp of pure peppermint oil, food-grade: This is where the magic happens! Use pure peppermint oil, not extract, for an intense, authentic mint flavor. Start with ¼ tsp and add more to taste.
- ¼ tsp of pure vanilla extract: A touch of vanilla rounds out the flavors and adds depth to the sweetness.
- 2 tbsp of evaporated milk or heavy cream: Provides the necessary liquid to form a pliable dough and enhances the creaminess.
For the Rich Chocolate Coating:
- 8 ounces of semi-sweet or bittersweet chocolate, chopped: The quality of your chocolate will significantly impact the final taste. Choose a good quality baking chocolate. Chopping ensures even melting.
- 1 tbsp of shortening or butter: A small amount of shortening or butter helps thin the chocolate, making it easier to dip and creating a smoother, glossier coating that sets nicely.
Essential Tools for Your Peppermint Patty Adventure
Gathering your tools before you begin will make the process smooth and enjoyable:
- Large Mixing Bowl: For combining your peppermint filling ingredients.
- Electric Mixer (handheld or stand mixer): Crucial for thoroughly beating the filling ingredients to a smooth dough.
- Parchment Paper: Indispensable for rolling out the dough without sticking and for cooling the finished patties.
- Rolling Pin: To achieve an even thickness for your peppermint dough.
- Baking Sheets: For chilling the dough and setting the chocolate-coated patties.
- 1½ inch Cookie Cutter: Ideal for creating uniform, perfectly round peppermint patties. If you don’t have one, a small glass rim or knife can be used.
- Heatproof Bowl: For melting your chocolate using a double boiler or microwave.
- Spatula or Spoon: For mixing and dipping.
- Fork or Dipping Tools: Makes dipping the patties in chocolate much easier and less messy.
Step-by-Step Guide: Crafting Your Chocolate Peppermint Patties
Follow these detailed steps closely to achieve exquisite homemade chocolate peppermint patties.
Step 1: Preparing the Velvety Peppermint Dough
Begin by combining all the ingredients for the peppermint filling in a large mixing bowl: powdered sugar, softened unsalted butter, pure peppermint oil (start with ¼ tsp, you can always add more later if you prefer a stronger mint flavor), pure vanilla extract, and either evaporated milk or heavy cream. Using an electric mixer, start beating these ingredients on a low speed until they are just combined and appear crumbly. This initial gentle mixing prevents the powdered sugar from flying everywhere. Once combined, increase the mixer speed to medium-low and continue to beat for approximately 2 minutes. During this time, the mixture will transform into a cohesive, pliable dough. The dough should be firm enough to handle but still soft. Once the dough forms, place it between two sheets of parchment paper. This method prevents sticking and makes rolling much easier. Using a rolling pin, roll the dough evenly until it is about ¼ inch thick and forms an approximately 8-inch round. Consistency in thickness is key for uniform patties.
Step 2: Chilling, Shaping, and Perfecting Your Patties
Carefully transfer the rolled dough, still sandwiched between the parchment paper sheets, onto a baking sheet. Place the baking sheet into the refrigerator to chill and set for at least 60 minutes. Alternatively, for a quicker chill, you can place it in the freezer for about 15 minutes. The goal is for the dough to become cold and very firm, which will make it much easier to cut cleanly without distorting its shape. Once thoroughly chilled, remove the dough from the refrigerator or freezer. Gently peel off the top piece of parchment paper. Now, it’s time to cut your patties! Dip a 1½-inch round cookie cutter into powdered sugar before each cut. This prevents the dough from sticking to the cutter and helps maintain a clean edge. Press firmly to cut out individual patties. Gather any dough scraps, gently re-roll them between parchment paper, chill briefly if necessary, and cut out more patties until all the dough is used.
Step 3: The Decadent Chocolate Dip and Final Set
Once your patties are cut, place them back into the freezer for a quick chill, allowing them to become firm again. This step is crucial, as frozen patties will hold their shape better and prevent the chocolate coating from melting them. While the patties are chilling, prepare your chocolate coating. Add the chopped semi-sweet or bittersweet chocolate and the shortening (or butter) to a heatproof bowl. Melt the chocolate mixture gently using a double boiler method or in the microwave in 30-second intervals, stirring well after each interval, until the chocolate is completely smooth and melted. Be careful not to overheat the chocolate, as this can cause it to seize. Once the chocolate is perfectly melted, remove the firm patties from the freezer. Using a fork or a candy dipping tool, carefully dip each frozen peppermint patty into the melted chocolate, ensuring it is thoroughly coated on all sides. Gently tap off any excess chocolate. Place each chocolate-coated patty onto a baking sheet lined with fresh parchment paper. Once all patties are coated, return the baking sheet to the refrigerator. Let them chill for approximately 30 to 60 minutes, or until the chocolate coating is completely firm and set. Serve your homemade chocolate peppermint patties and savor every cool, minty, chocolatey bite!
Pro Tips for Peppermint Patty Perfection
- Don’t Overmix the Dough: Beat just until the dough comes together. Overmixing can result in a tougher texture.
- Temperature Control is Key: Ensure your butter is softened but not melted. The dough needs to be chilled thoroughly before cutting and the patties frozen before dipping for best results.
- Adjust Peppermint Oil: Peppermint oil is potent. Start with the smaller amount and add more drops if you desire a stronger mint flavor, tasting a tiny bit of the dough (before freezing).
- Even Thickness: Rolling the dough to an even ¼ inch thickness ensures all patties cook and set uniformly.
- Clean Cuts: Dipping your cookie cutter in powdered sugar before each cut is a simple trick for clean, non-sticky edges.
- Melting Chocolate: If using a microwave, melt chocolate in short bursts (15-30 seconds), stirring well between each, to prevent burning. For a double boiler, ensure the bowl doesn’t touch the simmering water.
- Smooth Coating: The added shortening or butter to the chocolate helps create a thinner, smoother coating that’s easier to work with and sets beautifully.
- Tap Off Excess: After dipping, gently tap the fork against the edge of the bowl to remove excess chocolate, preventing pools at the base of your patties.
Exciting Variations and Customizations
While classic chocolate peppermint patties are divine, feel free to get creative:
- Different Chocolate Types: Experiment with dark chocolate for a more intense flavor, milk chocolate for a sweeter profile, or even white chocolate for a visually stunning contrast.
- Extract Swaps: Replace peppermint oil with other food-grade extracts like almond, orange, or even a hint of espresso for unique flavor combinations.
- Decorative Toppings: Before the chocolate sets, sprinkle with crushed candy canes, sea salt flakes, edible glitter, or finely chopped nuts for added texture and visual appeal.
- Food Coloring: Add a drop of green food coloring to the peppermint filling for a vibrant, festive look, especially around holidays.
- Mini Patties: Use a smaller cookie cutter for bite-sized delights perfect for dessert platters.
Serving and Storage Recommendations
These chocolate peppermint patties are incredibly versatile for serving and easy to store:
- Serving: They are perfect as an after-dinner mint, a delightful addition to holiday cookie trays, a sweet treat for parties, or simply a refreshing indulgence on a warm day. Serve them chilled for the best experience.
- Storage: Store the finished chocolate peppermint patties in an airtight container in the refrigerator for up to 2-3 weeks. They can also be frozen for longer storage, up to 2-3 months. If freezing, separate layers with parchment paper to prevent sticking. Thaw in the refrigerator before serving.
This recipe for homemade chocolate peppermint patties is not just about making candy; it’s about creating a moment of pure joy. The refreshing burst of mint and the rich embrace of chocolate make these treats truly unforgettable. Whether you’re making them for a special occasion, as a thoughtful gift, or simply to treat yourself, this recipe promises delicious success. Dive into the delightful process and savor the sweet rewards!
All image credit belongs to Joy of Baking via YouTube. Follow and subscribe to their channel for more delightful recipes!