
Irresistible No-Bake, No-Flour, No-Egg Chocolate Cake: Your New Favorite Dessert
Craving a rich, decadent chocolate cake but don’t want to turn on the oven? Or perhaps you’re looking for a delightful dessert that requires no flour and no eggs? Look no further! This incredible no-bake, no-flour, no-egg chocolate cake recipe is a game-changer. Perfect for bakers of all skill levels, from beginners to seasoned dessert enthusiasts, it offers a heavenly solution to your sweet cravings. Prepare to be amazed by how easily you can create a truly indulgent chocolate masterpiece.
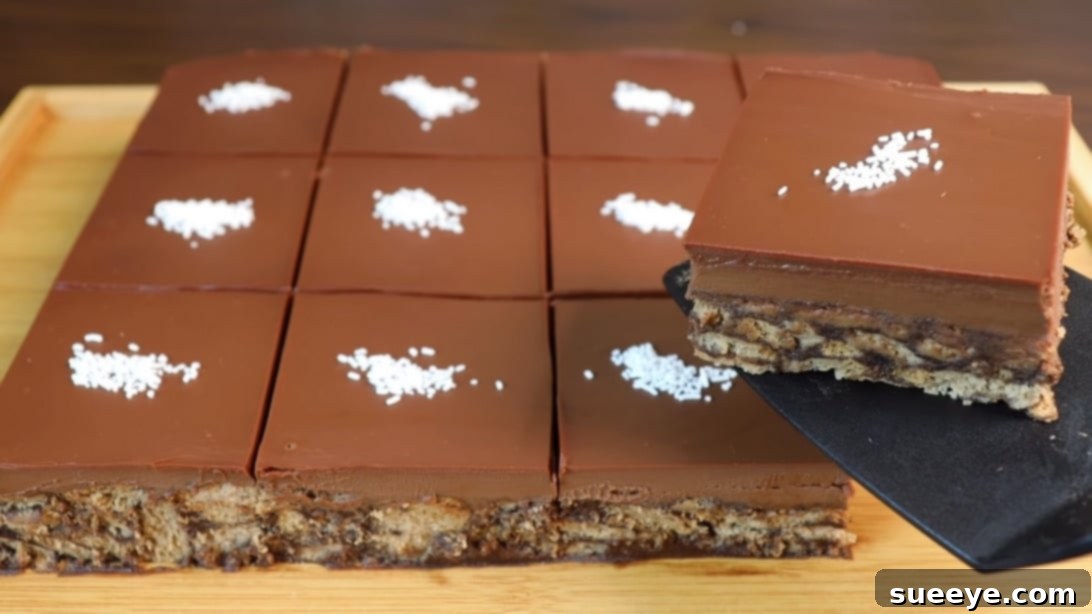
This recipe, inspired by the culinary experts at Quick Simple & Delicious on YouTube, delivers an unparalleled experience. Imagine a luscious chocolate topping cascading over a satisfyingly crunchy biscuit base – it’s a symphony of textures and flavors that will leave you wanting more. It’s the ideal treat to pair with a steaming cup of coffee or tea, whether you’re starting your morning or winding down your afternoon. Get ready to impress your friends and family with this surprisingly simple yet utterly sophisticated dessert!
Why This No-Bake Chocolate Cake is an Absolute Must-Try
In a world where time is precious and convenience is key, this recipe stands out. Here’s why this no-bake, no-flour, no-egg chocolate cake is about to become your go-to dessert:
- Effortlessly Simple: With just a few common ingredients and straightforward steps, anyone can make this cake. No complicated techniques or specialized equipment needed.
- No Oven Required: Perfect for hot days, small kitchens, or when your oven is occupied. Achieve bakery-quality results without ever turning on the heat.
- Diet-Friendly Options: Being free of flour and eggs, it’s an excellent choice for those with dietary restrictions or allergies to these common ingredients.
- Quick Preparation Time: While it requires chilling, the active preparation time is minimal, making it ideal for spontaneous dessert cravings or last-minute gatherings.
- Irresistible Flavor & Texture: The combination of a crunchy biscuit base and a smooth, rich chocolate topping creates a delightful contrast that’s truly addictive.
- Budget-Friendly: Utilizes readily available and affordable ingredients, proving that delicious desserts don’t have to break the bank.
- Impressive Presentation: Despite its simplicity, the finished cake looks incredibly elegant and professional, perfect for celebrations or a special treat.
Gather Your Essential Ingredients
One of the beauties of this recipe is its reliance on readily available ingredients that transform into something truly magical. For the best results, we recommend using high-quality ingredients, especially when it comes to chocolate.
- 14 oz (approximately 400g) of Biscuits: Digestive biscuits, rich tea biscuits, or Maria cookies work wonderfully. They provide the perfect crumbly texture for the base when crushed and absorb the chocolate mixture beautifully.
- 1 ¾ cups (approximately 420ml) of Milk: Full-fat milk is recommended for a richer, creamier custard, but you can use lower-fat alternatives if preferred.
- 3 tablespoons of Granulated Sugar: Sweetens the chocolate custard base to perfection. Adjust to your taste, or consider a touch less if your dark chocolate is sweeter.
- 4 tablespoons of Cornstarch: This is the secret to thickening our no-flour custard. It creates a smooth, velvety consistency without any gluten. Ensure it’s fully dissolved before heating to prevent lumps.
- 3 tablespoons of Unsweetened Cocoa Powder: Opt for a good quality cocoa powder for a deep, intense chocolate flavor in the base.
- 9.5 oz (approximately 270g) of Dark Chocolate: We’ll divide this for the base and the topping. A good quality dark chocolate (around 60-70% cocoa solids) will yield the best flavor. Chop it finely for easier melting.
- 3 tablespoons of Unsalted Butter: Adds richness and a smooth texture to both the base mixture and the luxurious topping.
- 1 cup (approximately 240ml) of Sweetened Whipping Cream: This forms the base of our luscious topping. If you only have unsweetened heavy cream, you can add 1-2 tablespoons of powdered sugar to it before warming.
- White Chocolate Chips (Optional): A fantastic garnish for a touch of elegance and contrasting flavor. Feel free to use chocolate shavings, cocoa powder, or fresh berries instead.
Step-by-Step Instructions: Crafting Your Chocolate Masterpiece
Follow these simple steps to create a show-stopping no-bake chocolate cake that will impress everyone.
Phase 1: Preparing the Crunchy Biscuit Base & Velvety Chocolate Custard
This initial phase focuses on creating the delicious foundation of your cake, combining the crunchy biscuits with a rich chocolate custard.
Step 1: Prepare the Biscuit Base and Chocolate Custard
Begin by gently breaking the 14 oz of biscuits into small, irregular pieces using your hands. Avoid crushing them too finely; we want to retain some textural contrast in the final cake. Set these broken biscuits aside in a large mixing bowl. Next, prepare your chocolate custard. In a medium-sized pot, combine 1 ¾ cups of milk, 3 tablespoons of sugar, 4 tablespoons of cornstarch, and 3 tablespoons of cocoa powder. Whisk these ingredients together thoroughly until the cornstarch and cocoa powder are completely dissolved and no lumps remain. Place the pot over medium heat, continuously whisking the mixture. It’s crucial to keep stirring to prevent scorching the bottom and ensure an evenly thickened custard. Continue cooking and whisking until the mixture visibly thickens to a pudding-like consistency, enough to coat the back of a spoon. Once thickened, immediately remove the pot from the heat.
Step 2: Incorporate Chocolate and Butter into the Custard
While the chocolate custard is still hot, add approximately 3.5 oz (about 100g) of the finely chopped dark chocolate and 1.5 tablespoons of butter directly into the pot. The residual heat from the custard will quickly melt the chocolate and butter. Continuously stir the mixture with your whisk or a spatula until the chocolate and butter are fully melted and smoothly incorporated, creating a rich, glossy chocolate cream. This ensures a uniform flavor and luxurious texture for your biscuit base.
Step 3: Assemble the Cake Base
Now, pour the warm chocolate mixture directly over the broken biscuits in your large mixing bowl. Using a spatula or spoon, gently fold and mix until every biscuit piece is thoroughly coated with the chocolate custard. This step ensures an even distribution of flavor and moisture throughout the base. Prepare your chosen mold – an 8-inch springform pan works best for easy removal, or you can line a regular cake pan with parchment paper for lifting. Transfer the biscuit and chocolate mixture into the mold, pressing it down firmly and evenly with the back of a spoon or your hands. Ensure the top surface is flat and compact. Place the mold in the refrigerator and chill for a minimum of 10 minutes to allow the base to set slightly while you prepare the topping.
Phase 2: The Luxurious Chocolate Topping and Final Chill
This phase adds the smooth, creamy, and intensely chocolatey layer that completes your no-bake delight, followed by the crucial chilling period.
Step 4: Create the Silky Chocolate Topping and Chill
In a separate small pot, pour 1 cup of sweetened whipping cream. Gently warm the cream over low to medium heat until it’s just about to simmer but not boiling. Boiling cream can cause the chocolate to seize. Remove from heat and add the remaining dark chocolate (approximately 6 oz or 170g) and the remaining 1.5 tablespoons of butter. Let it sit for a minute to allow the heat to melt the chocolate, then whisk continuously until the chocolate and butter are fully melted and beautifully smooth, creating a glossy ganache-like topping. Retrieve your cake base from the refrigerator. Carefully and evenly pour this warm, silky chocolate topping over the slightly set biscuit base. Use a spatula to gently spread it to the edges if needed, ensuring a smooth, uniform layer. If using white chocolate chips or other garnishes, sprinkle them on top now before chilling. Return the cake to the refrigerator and chill for a minimum of 4 to 5 hours, or ideally, overnight. This extended chilling time is vital for the cake to fully set, making it firm enough to slice beautifully and enhancing all the flavors.
After the recommended chilling period, carefully remove the cake from its mold. If using a springform pan, simply release the latch. If using a lined regular pan, gently lift it out using the parchment paper. Slice into generous portions and serve immediately. This sweet and utterly yummy treat is now ready to be savored!
Expert Tips for No-Bake Chocolate Cake Success
Achieving perfection with this no-bake cake is simple, especially with a few insider tips:
- Quality Matters: Using good quality dark chocolate and cocoa powder significantly impacts the final flavor. Invest in chocolate you’d enjoy eating on its own.
- Don’t Rush the Custard: Whisking continuously on medium heat prevents lumps and ensures the cornstarch fully activates for a smooth, thick consistency. Don’t let it boil vigorously.
- Chop Chocolate Finely: For both the base and topping, finely chopped chocolate melts more quickly and smoothly, integrating better into the mixtures.
- Patience with Chilling: The chilling time is not just a suggestion; it’s essential. It allows the cake to fully set, resulting in clean slices and a firm texture. An overnight chill is always recommended for the best results.
- Lining Your Pan: If not using a springform pan, line your pan with parchment paper, leaving an overhang on the sides. This creates “handles” to easily lift the cake out once it’s set.
- Even Biscuit Crushing: Aim for varied sizes of biscuit pieces – some crumbs, some larger chunks. This adds to the delightful textural contrast.
Customization Ideas: Make It Your Own!
This no-bake chocolate cake recipe is incredibly versatile. Feel free to experiment and personalize it to your taste!
- Biscuit Variations: While digestive biscuits are classic, try graham crackers, shortbread cookies, ginger snaps for a spicy kick, or even Oreo cookies (remove cream filling first) for a richer chocolate base.
- Chocolate Choices: Experiment with different types of chocolate. Use milk chocolate for a sweeter cake, semi-sweet for a balanced flavor, or even a mix of dark and milk chocolate for the topping.
- Flavor Enhancers: Stir in a teaspoon of vanilla extract, a pinch of instant coffee powder (to intensify chocolate flavor), or a hint of orange zest into the chocolate topping for an extra layer of taste.
- Add-ins for the Base: Mix in chopped nuts (walnuts, pecans, hazelnuts), shredded coconut, or dried fruit (raisins, cranberries) with the biscuit mixture for added texture and flavor.
- Topping Variations: Beyond white chocolate chips, consider chocolate shavings, a dusting of cocoa powder, fresh berries (raspberries, strawberries), a drizzle of caramel or raspberry sauce, or a sprinkle of sea salt flakes for a gourmet touch.
- Individual Servings: Instead of one large cake, press the biscuit mixture into individual ramekins or small dessert glasses for personal portions. Adjust chilling time accordingly.
Serving and Storage Suggestions
Once your magnificent no-bake chocolate cake is perfectly set, it’s ready to be the star of your table!
Serve slices as is, or enhance the experience with a dollop of freshly whipped cream, a scoop of vanilla bean ice cream, or a side of fresh berries. Its rich flavor makes it an excellent accompaniment to a robust cup of coffee, a creamy latte, or a delicate herbal tea. This cake is ideal for casual afternoon treats, elegant dinner party desserts, or simply satisfying that intense chocolate craving.
- Storage: Store any leftover cake in an airtight container in the refrigerator for up to 3-4 days.
- Freezing: This cake can also be frozen! Wrap individual slices tightly in plastic wrap, then in foil, and store in a freezer-safe container for up to 1 month. Thaw in the refrigerator overnight before serving.
Unleash Your Inner Baker with This Simple Chocolate Delight
Forget the complexities of traditional baking. This no-bake, no-flour, no-egg chocolate cake is proof that some of the most delicious desserts can be the simplest to create. It’s a testament to the fact that you don’t need a pantry full of ingredients or hours of time to craft something truly special. Whether you’re a seasoned chef or a kitchen novice, this recipe empowers you to create an absolutely divine chocolate experience with minimal effort. So, go ahead, gather your ingredients, follow these easy steps, and treat yourself and your loved ones to a slice of pure chocolate heaven. Enjoy the process, savor the flavors, and revel in the joy of creating a fantastic dessert from scratch!