
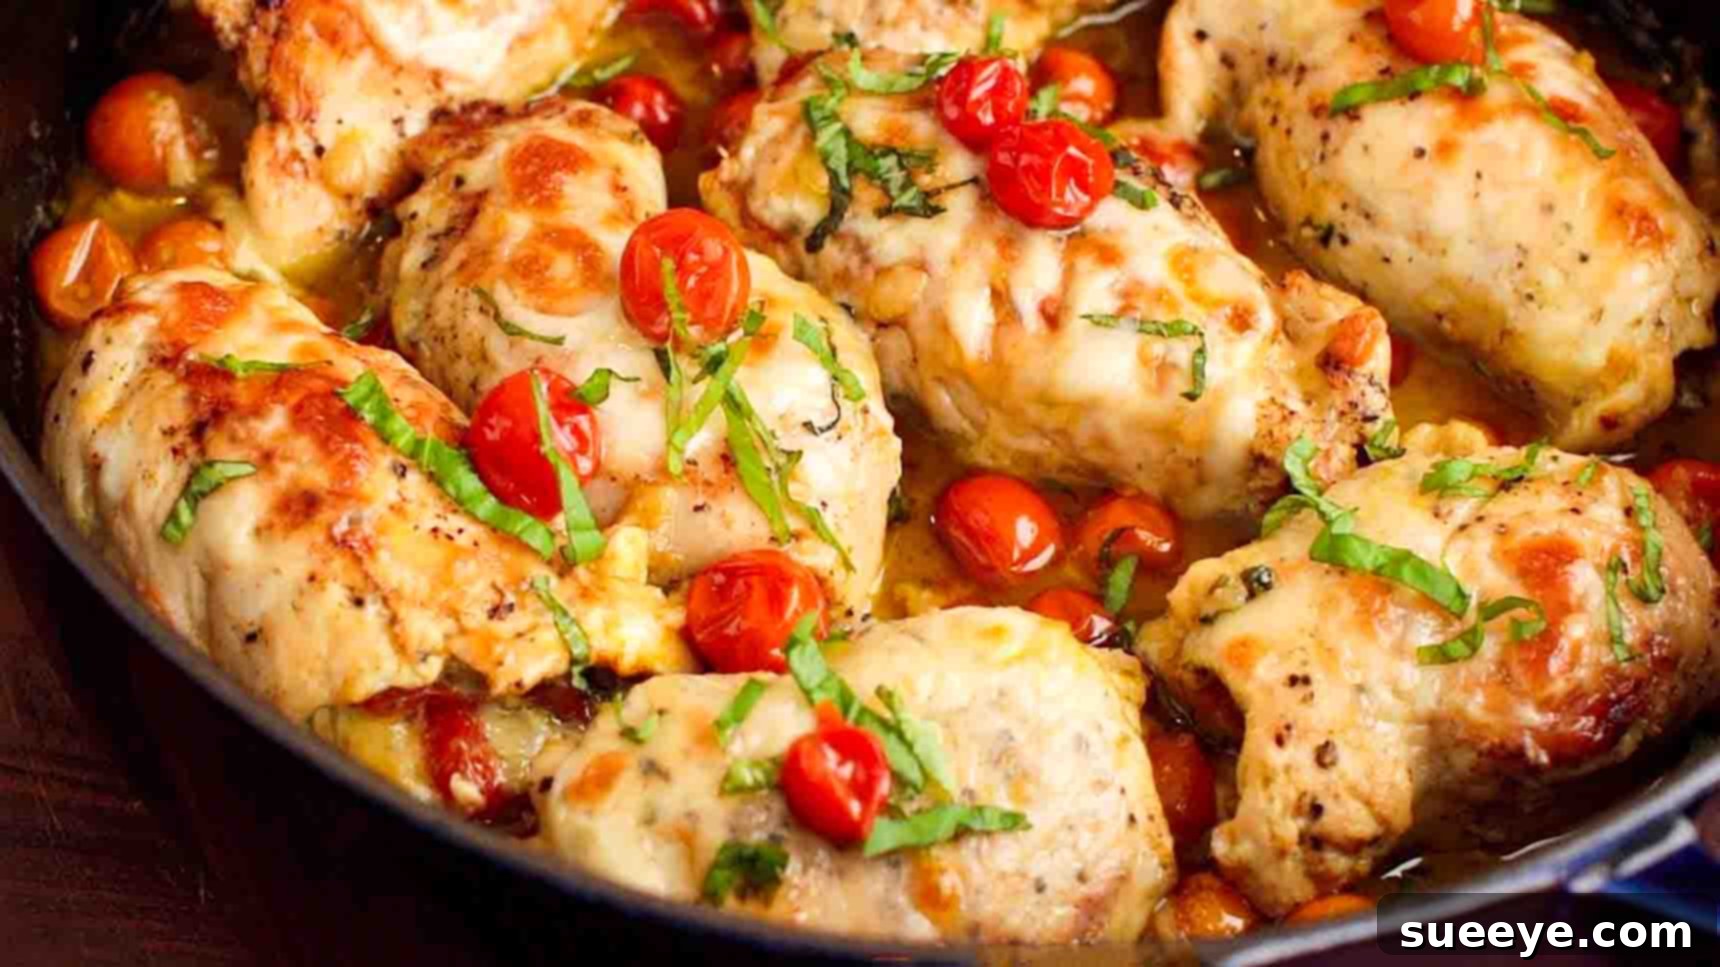
Easy & Delicious Chicken Pesto Roll-Ups: Your New Favorite Tuscan-Inspired Dinner
Prepare to delight your taste buds and impress your family with these incredibly delicious Chicken Pesto Roll-Ups! Inspired by the culinary genius of Natasha’s Kitchen on YouTube, this recipe transforms simple ingredients into a gourmet-looking, yet surprisingly easy-to-make dish. If you’re a fan of vibrant Tuscan flavors, rich pesto, succulent chicken, and gooey mozzarella cheese, then you are in for an absolute treat. This recipe is not just about convenience; it’s about creating a memorable meal that’s packed with fresh, aromatic ingredients and satisfying textures. It’s perfect for busy weeknights, special gatherings, or whenever you crave a comforting dish that feels a little bit fancy without all the fuss. Get ready to add this fantastic recipe to your regular rotation!
Why These Chicken Pesto Roll-Ups Will Become Your Go-To Recipe
There are countless reasons why these chicken pesto roll-ups deserve a prime spot in your recipe collection. First and foremost, they offer an explosion of flavor in every bite. The savory chicken perfectly complements the aromatic basil pesto, fresh tomatoes add a burst of sweetness and acidity, and the melted mozzarella cheese brings it all together with its creamy texture. Beyond taste, the ease of preparation is a major highlight. You don’t need to be a seasoned chef to create this masterpiece; the steps are straightforward and accessible for cooks of all levels.
Furthermore, this dish is wonderfully versatile. While the core ingredients provide a robust flavor profile, you can easily customize it to suit your preferences or what you have on hand. It’s also an excellent way to incorporate lean protein into your diet in an exciting and appetizing manner. The combination of searing and baking ensures the chicken remains juicy and tender, while developing a beautiful golden crust. It’s a complete meal in itself, but also pairs beautifully with a variety of side dishes, making it adaptable for any occasion, from a casual family dinner to a more formal gathering. Get ready for requests for seconds – and the recipe!
Ingredients for Flavorful Chicken Pesto Roll-Ups
Gathering your ingredients is the first step to culinary success. This recipe relies on a handful of fresh, high-quality components to achieve its rich, satisfying flavor. Opt for the freshest possible ingredients for the best results!
- 4 medium/large chicken breasts (approximately 2 lbs): Choose fresh, boneless, skinless chicken breasts. They are easy to flatten and roll, providing a lean and tender base for your roll-ups.
- Garlic salt (to taste): A foundational seasoning that adds depth and a savory kick. Adjust the amount based on your preference.
- Black pepper (to taste): Freshly ground black pepper will offer the most potent aroma and flavor, enhancing the overall seasoning.
- 1/2 cup pesto sauce: The star of the show! Use a good quality store-bought pesto or homemade pesto for an even fresher taste. Basil pesto is traditional and highly recommended.
- 8 oz shredded mozzarella cheese (reserve 2 oz for topping): Mozzarella melts beautifully, creating a gooey, irresistible center and a lovely cheesy crust on top. Shredding your own from a block can sometimes yield better melting results than pre-shredded varieties.
- 1 large or 2 medium tomatoes (thinly sliced into 12 rings): Fresh, ripe tomatoes provide a wonderful tartness and a juicy element that cuts through the richness of the pesto and cheese. Roma tomatoes work well for their firm texture.
- 1 cup cherry tomatoes (optional): These add a delightful burst of sweetness and color when added to the pan during the final baking stage. They roast beautifully alongside the chicken.
- Fresh basil leaves (shredded, optional garnish): A sprinkle of fresh basil just before serving elevates the dish with its vibrant aroma and classic Italian flair.
- 1 tbsp Olive Oil: Essential for searing the chicken, contributing to a beautiful golden-brown crust and rich flavor.
- 1 tbsp Butter: Adds a touch of richness and helps in achieving a perfect sear, complementing the olive oil.
Essential Kitchen Equipment for Your Roll-Ups
Before you begin, ensure you have these basic kitchen tools ready to streamline your cooking process. Having everything at hand will make the preparation enjoyable and efficient:
- A sharp chef’s knife and a sturdy cutting board for precise preparation of chicken and vegetables.
- A meat mallet or a heavy rolling pin to evenly pound the chicken breasts, ensuring consistent thickness.
- A large baking sheet (useful for arranging cutlets before rolling and seasoning).
- A large oven-safe skillet (cast iron or stainless steel are excellent choices for their ability to go from stovetop to oven seamlessly).
- A handful of toothpicks to securely hold the chicken roll-ups together during cooking.
- Standard measuring cups and spoons for accurate ingredient portions.
- An instant-read meat thermometer (highly recommended for ensuring chicken is cooked to a safe internal temperature).
Step-by-Step Guide to Perfect Chicken Pesto Roll-Ups
Step 1: Preparing Your Chicken & Crafting the Roll-Ups
The foundation of these delicious roll-ups starts with properly prepared chicken. Begin by taking each of your four medium/large chicken breasts and carefully slicing them in half lengthwise. This technique will yield eight thinner cutlets, which are ideal for rolling. The goal here is to create uniform pieces that will cook evenly and roll easily. Next, place each cutlet between two sheets of plastic wrap or parchment paper – this crucial step helps prevent mess and tearing, making the pounding process much smoother. Use a meat mallet or a heavy rolling pin to pound them down to an even thickness of about an eighth of an inch. Aim for a consistent thickness across all cutlets for optimal cooking results, as this ensures they cook through simultaneously.
Once your chicken cutlets are perfectly flattened, arrange them neatly on a large cutting board or a baking sheet. This setup makes the assembly process much smoother and more organized. Generously season both sides of each cutlet with garlic salt and freshly ground black pepper. Don’t be shy with the seasoning, as this provides a crucial base layer of flavor that will permeate the entire roll-up. Now, take approximately 1 tablespoon of pesto sauce and spread it evenly over the center of each seasoned chicken cutlet. Be sure to leave a small border around the edges, which helps prevent the pesto from oozing out during rolling and searing. Next, thinly slice your large tomato (or two medium ones) into approximately 12 uniform rings. Place two slices of tomato on top of the pesto on each chicken cutlet. Finally, sprinkle 2 to 3 tablespoons of the shredded mozzarella cheese over the tomatoes. Remember to reserve about 2 ounces of mozzarella for the final topping step before baking.
With all your delicious fillings in place, it’s time to roll! Carefully and tightly roll up each chicken cutlet, starting from one of the shorter ends. This compact roll helps keep all the flavorful fillings securely inside during cooking. Once rolled, use a toothpick to secure the seam. Make sure the toothpick goes through all layers of chicken and filling to prevent the roll-up from unraveling. At this point, preheat your oven to a precise 425 degrees Fahrenheit (220 degrees Celsius). Getting the oven to temperature before searing ensures a smooth transition and consistent cooking, contributing to the overall success of the dish.
Step 2: Searing and Baking for Perfect Tenderness
The next crucial step is searing, which creates a beautiful golden-brown crust and locks in the juices, contributing immensely to the flavor and texture of your chicken roll-ups. Begin by placing a large oven-safe skillet (like a cast-iron or heavy-bottomed stainless steel pan) over medium-high heat. Add 1 tablespoon of olive oil and 1 tablespoon of butter to the skillet. Allow the butter to fully melt and gently sizzle – this indicates the pan is perfectly heated and ready for the chicken. Carefully place the chicken roll-ups into the hot skillet, ensuring the toothpick side is facing up first. This strategic placement helps the roll maintain its shape as it begins to sear.
Sear the chicken roll-ups for approximately four minutes on each side. You’re aiming for a beautiful, even golden-brown crust on all exposed surfaces. This searing process develops rich, caramelized flavors and adds a pleasant texture contrast to the tender interior of the chicken. Be mindful not to overcrowd the pan; if necessary, sear the roll-ups in batches to ensure proper browning and to prevent the pan temperature from dropping too much. Once both sides are nicely seared, turn off the stove. Now, it’s time to add the finishing touches before transferring to the oven. Sprinkle the tops of the chicken roll-ups with your remaining mozzarella cheese. If you’re using the optional cherry tomatoes, scatter them around the chicken in the skillet. These will roast alongside the chicken, bursting with sweet flavor and adding a lovely visual appeal.
With the skillet still hot, carefully transfer it to your preheated 425 degrees Fahrenheit (220 degrees Celsius) oven. Bake for 13 to 15 minutes, or until the chicken is cooked through and the cheese is beautifully melted, bubbly, and golden brown. To ensure the chicken is safely cooked and at its most tender, an instant-read thermometer should register an internal temperature of 165 degrees Fahrenheit (74 degrees Celsius) when inserted into the thickest part of a roll-up. Once baked to perfection, carefully remove the skillet from the oven. It’s important to allow the chicken pesto roll-ups to rest for about 5-10 minutes before serving. This resting period allows the juices to redistribute throughout the meat, ensuring maximum tenderness and flavor. Before serving, remember to gently remove all toothpicks!
Serving Your Delicious Chicken Pesto Roll-Ups
These flavorful Chicken Pesto Roll-Ups are incredibly versatile and pair wonderfully with a variety of side dishes, allowing you to create a complete and satisfying meal for any occasion. For a classic Italian experience, consider serving them alongside a generous portion of your favorite pasta, simply tossed in olive oil, fresh garlic, and a sprinkle of Parmesan cheese, or with a light tomato sauce. The roll-ups also shine when accompanied by roasted vegetables, such as tender asparagus, vibrant broccoli florets, or sweet zucchini, which add a healthy and colorful dimension to your plate. A crisp, simple green salad with a bright vinaigrette dressing provides a refreshing contrast to the richness of the chicken and cheese, cleansing the palate beautifully. Don’t forget some crusty artisanal bread to soak up any delicious pan juices or pesto remnants – it’s too good to waste! For a heartier meal, you might consider serving them with creamy mashed potatoes or a fragrant rice pilaf. No matter how you choose to serve them, these impressive yet easy roll-ups are sure to be a crowd-pleaser and elicit rave reviews.
Tips for Perfect Chicken Pesto Roll-Ups Every Time
Achieving culinary perfection often comes down to paying attention to a few key details. Here are some expert tips and tricks to ensure your Chicken Pesto Roll-Ups turn out perfectly, every single time, making your cooking experience as rewarding as the meal itself:
- Even Thickness is Key: When pounding your chicken breasts, strive for the most uniform thickness possible, ideally around an eighth of an inch. This is crucial for ensuring even cooking; uneven thickness can lead to some parts being undercooked while others become dry and overcooked.
- Don’t Skimp on Quality Ingredients: Since this recipe features relatively few components, the quality of each one truly shines through. Invest in a good quality pesto (whether store-bought or homemade), use fresh, ripe mozzarella, and select flavorful tomatoes for the best possible taste profile.
- Master the Sear: The initial searing step is not just for creating a beautiful golden-brown color; it’s essential for locking in moisture and building a crucial layer of rich flavor. Ensure your skillet is adequately hot before adding the chicken, and avoid overcrowding the pan, which can steam the chicken instead of searing it.
- Secure Tightly: Use enough toothpicks to firmly secure your rolled chicken cutlets. You want them to stay intact throughout the searing and baking process to keep all the delicious fillings safely inside.
- Rest the Chicken: After removing the skillet from the oven, resist the urge to cut into the chicken immediately. Allow the roll-ups to rest for 5-10 minutes before slicing and serving. This resting period allows the juices within the meat to redistribute, resulting in significantly more tender and flavorful chicken.
- Internal Temperature Check: For optimal food safety and to achieve the perfect texture, always use an instant-read meat thermometer. Insert it into the thickest part of a chicken roll-up; the internal temperature should register 165°F (74°C).
- Experiment with Fillings: While the classic pesto, tomato, and mozzarella combination is undeniably fantastic, feel free to get creative! Consider adding other complementary ingredients like sun-dried tomatoes (chopped), fresh spinach, or even different cheeses such as provolone or a sprinkle of grated Parmesan for a personalized touch.
Enjoy Your Homemade Tuscan Delicacy!
There you have it – a comprehensive guide to creating magnificent Chicken Pesto Roll-Ups that are as delightful to make as they are to eat. This recipe truly embodies the spirit of easy yet elegant home cooking, bringing the vibrant, sun-drenched tastes of Tuscany right to your dinner table, without requiring extensive culinary expertise. Whether you’re a seasoned cook looking for a new family favorite or just starting your culinary journey, these roll-ups offer a rewarding experience with consistently incredible results. So, gather your ingredients, follow these simple, detailed steps, and prepare to savor every cheesy, pesto-infused bite. We sincerely hope this becomes a cherished recipe in your household, bringing joy, deliciousness, and compliments to your family meals for years to come. Happy cooking, and bon appétit!