
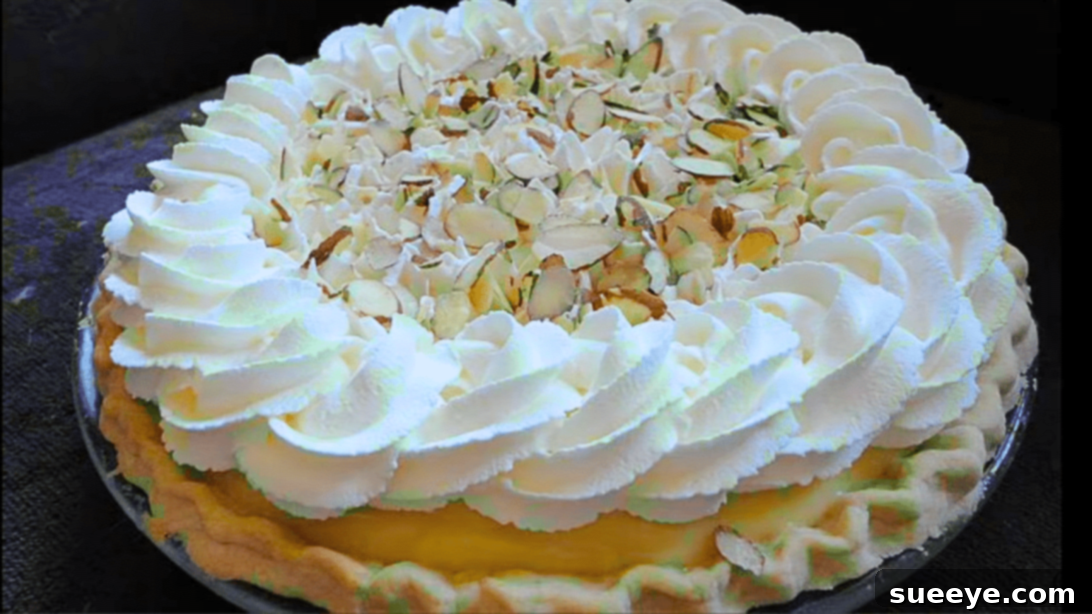
Among the vast universe of delightful desserts, one classic stands out for its comforting richness and irresistible flavor: the humble yet magnificent Banana Cream Pie. This iconic dessert, renowned for its silky-smooth, banana-infused custard, ripe banana slices, and a crisp, buttery crust, topped with a generous cloud of whipped cream, is more than just a treat—it’s an experience. Perfect for any occasion, from a casual family dinner to an elegant gathering, or simply as a satisfying indulgence, this pie offers a delightful blend of textures and tastes that captivate both young and old alike. Its ability to be prepared ahead of time makes it an ideal choice for hosts looking to impress without the last-minute rush, allowing you to savor moments with your guests while a stunning dessert awaits in the refrigerator.
RELATED: Discover another delightful banana-infused dessert: Easy Banana Cream Cheesecake Recipe
This dessert embodies the essence of comfort food, making it an excellent choice for any season, though its refreshing qualities truly shine during the warmer months. Imagine a slice of cool, creamy banana pie on a hot summer’s day – pure bliss! Learning to master this dessert is simpler than you might think, and we’re here to guide you through every step. For a visual demonstration, you can also follow along with the helpful video tutorial provided by Crouton Crackerjacks on YouTube. Get ready to bake a pie that will earn you rave reviews and requests for an encore!
The Irresistible Appeal of Homemade Banana Cream Pie
What makes banana cream pie such a beloved classic? It’s the perfect harmony of simple ingredients transformed into something extraordinary. The velvety custard, infused with the natural sweetness of ripe bananas and a hint of vanilla, creates a luxurious base. Layered with fresh, tender banana slices, it offers bursts of fruity flavor with every bite. The contrast of the firm, flaky pie crust against the soft, creamy filling is simply divine. Topped with a mountain of airy whipped cream, sometimes adorned with a sprinkle of toasted almonds, this pie delivers a multi-senssensory experience that is both comforting and sophisticated. It’s a dessert that evokes nostalgia, reminding many of childhood treats, while still feeling elegant enough for special celebrations. Making it from scratch ensures the freshest flavors and allows you to control the quality of ingredients, resulting in a pie that far surpasses any store-bought version.
Ingredients for the Ultimate Banana Cream Pie
Crafting the perfect banana cream pie begins with selecting high-quality ingredients. Each component plays a crucial role in achieving the desired flavor and texture, so pay attention to the details. Here’s what you’ll need to gather:
- ¾ cup of granulated sugar: Provides the foundational sweetness for the custard.
- ¼ cup of cornstarch: This is your key thickening agent, ensuring a perfectly set, silky custard.
- ¼ tsp of fine salt: A small but mighty ingredient that balances the sweetness and enhances all the other flavors.
- 3 large egg yolks: Adds richness, color, and contributes significantly to the custard’s smooth texture and thickening.
- 2½ cups of whole milk, divided: Whole milk is essential for a rich, creamy custard; the division allows for proper tempering.
- 2 tbsp of unsalted butter: Incorporates a luscious mouthfeel and adds depth of flavor to the finished custard.
- 1½ tsp of pure vanilla extract: Elevates the overall aroma and taste profile, complementing the banana beautifully.
- 3 ripe bananas, sliced: Choose bananas that are yellow with a few brown spots for optimal sweetness and flavor.
- 1 pastry pie crust, store-bought or homemade: A 9-inch pie crust is ideal. Whether you opt for the convenience of store-bought or the pride of homemade, ensure it’s a good quality, flaky crust.
- Freshly made whipped cream: The quintessential topping, offering a light, airy contrast to the rich filling.
- Sliced almonds, optional: For an elegant garnish and a subtle nutty crunch.
Essential Equipment for Baking Success
Before you begin, ensure you have the right tools on hand to make the process smooth and enjoyable. You won’t need anything overly specialized, but having these items ready will help you create your banana cream pie with ease:
- 9-inch pie plate
- Large mixing bowl
- Medium saucepan
- Whisk (a balloon whisk is ideal for custard)
- Measuring cups and spoons
- Fork (for pricking the pie crust)
- Plastic wrap
- Spatula or spoon (for spreading)
- Oven
- Stovetop
How to Make the Best Homemade Banana Cream Pie
Follow these detailed steps to create a show-stopping banana cream pie that will be the highlight of any dessert table. Precision and patience are key to achieving that perfect, creamy texture.
Step 1: Preparing the Pie Crust
Begin by preparing your chosen pie crust. If using a store-bought crust, unroll it into your pie plate. For both homemade and store-bought options, it’s crucial to prick the bottom of the pie crust generously all over with a fork. This step, known as blind baking, allows steam to escape during baking, preventing the crust from puffing up excessively and ensuring a beautifully flat base for your filling. Transfer the pricked crust to a preheated oven set at 425°F (220°C). Bake for approximately 10 to 12 minutes, or until the edges turn a delicate golden brown and the crust appears slightly set. Once baked, remove the crust from the oven and set it aside on a wire rack to cool completely. A fully cooled crust is essential to prevent a soggy bottom once the creamy filling is added.
Step 2: Crafting the Custard Base
While your pie crust cools, turn your attention to the luscious banana custard. In a large, heat-proof bowl, combine the granulated sugar, cornstarch, salt, egg yolks, and ½ cup of the whole milk. Whisk these ingredients vigorously until they are fully incorporated and the mixture is smooth and lump-free. Set this egg mixture aside. Next, pour the remaining 2 cups of whole milk into a medium saucepan. Place the saucepan on a stove over medium heat and begin to heat the milk, stirring consistently to prevent scorching on the bottom. Heat the milk just to the point of a gentle boil; you’ll see small bubbles forming around the edges and steam rising. Do not let it boil rapidly.
Step 3: Tempering and Thickening the Custard
Once the milk in the saucepan reaches a gentle boil, it’s time to temper the egg mixture. This critical step slowly introduces the hot milk to the eggs, preventing them from scrambling. Slowly pour the hot milk into the egg mixture in a thin, steady stream while continuously and quickly whisking the egg mixture. This gradual addition and constant whisking equalize the temperature. After all the hot milk has been incorporated, transfer the entire mixture back into the saucepan. Return the saucepan to the stove over medium heat. Continue to cook, stirring constantly with your whisk or a rubber spatula, scraping the bottom and sides of the pan. The custard will gradually thicken and become bubbly. This typically takes about 5-7 minutes. Once it’s thick enough to coat the back of a spoon and holds its shape slightly, it’s ready.
Step 4: Enriching and Cooling the Custard
As soon as the custard reaches its desired thickness, immediately remove the saucepan from the heat to stop the cooking process. Add the butter and vanilla extract to the hot custard. Whisk them thoroughly until the butter has completely melted and is fully combined, lending an extra layer of richness and a beautiful sheen to the custard. Now, the custard needs to cool down to set properly. Place the saucepan back on a heat-safe surface (but off the heat) and allow it to cool for at least 45 minutes to 1 hour, or until it reaches room temperature. For faster cooling, you can occasionally stir it, or place the saucepan in an ice bath. While cooling, you may want to place plastic wrap directly on the surface of the custard to prevent a “skin” from forming.
Step 5: Assembling Your Banana Cream Pie
Once the custard has cooled sufficiently and is almost ready for assembly, prepare your baked and cooled pie crust. Slice your ripe bananas into even rounds, about ¼ inch thick. Arrange these banana slices in a single layer on the bottom of the baked pie crust. Ensure they cover the entire base to provide banana flavor in every bite. If you’re concerned about bananas browning, you can lightly toss them with a tiny amount of lemon juice (though for a pie that will be eaten relatively quickly, it’s often unnecessary). Once the bananas are in place, carefully pour the cooled, thickened custard evenly over the banana layer, using a spatula to spread it smoothly to the edges.
Step 6: Chilling, Decorating, and Serving
After the pudding is spread, cover the pie with plastic wrap. For best results, press the plastic wrap directly onto the surface of the pudding to prevent a skin from forming and to keep the top smooth. Alternatively, if you plan to decorate soon, you can chill it uncovered. Place the pie in the refrigerator to chill for approximately 4 to 6 hours, or even better, overnight. This chilling period is crucial for the custard to fully set and for the flavors to meld beautifully. Once thoroughly chilled and set, remove the pie from the refrigerator. Now comes the fun part: decoration! Generously dollop or pipe freshly whipped cream all over the top of the pie. If desired, garnish with additional sliced bananas (add these just before serving to prevent browning), a sprinkle of toasted sliced almonds, or even a dusting of cocoa powder. Slice, serve, and bask in the joy of your homemade banana cream pie!
Pro Tips for a Perfect Banana Cream Pie Every Time
- Use Ripe Bananas: For the best flavor, select bananas that are ripe but still firm, with a few brown spots. Overly ripe bananas can be too soft and watery for slicing.
- Prevent Browning: If you’re preparing the pie far in advance, a light brush of lemon juice on the banana slices can help prevent them from oxidizing and turning brown, though this can slightly alter the taste. For immediate consumption, it’s often not necessary.
- Blind Bake the Crust Properly: Don’t skip pricking the crust. For extra insurance against a soggy bottom, you can line the crust with parchment paper and fill it with pie weights or dried beans during the initial bake.
- Temper Eggs Carefully: Whisking the egg mixture constantly while slowly pouring in hot milk is crucial. This prevents the eggs from scrambling and ensures a smooth custard.
- Continuous Stirring: Once the custard is back on the heat, stir it non-stop. This prevents lumps and scorching on the bottom of the pan, yielding a perfectly smooth, creamy texture.
- Chill Thoroughly: Patience is a virtue when it comes to chilling. A minimum of 4-6 hours (preferably overnight) in the refrigerator allows the custard to fully set, making for clean slices and optimal flavor.
- Fresh Whipped Cream: While canned whipped cream is convenient, nothing beats the taste and texture of homemade whipped cream. It’s easy to make and elevates the pie significantly.
- Make Ahead: The pie can be assembled (without the final whipped cream and banana garnish) a day in advance. Add the whipped cream and fresh banana slices just before serving for the freshest look.
Delicious Variations to Customize Your Banana Cream Pie
While the classic banana cream pie is divine, there are many ways to personalize it and add your unique touch:
- Different Crusts: Experiment with a graham cracker crust, a Nilla wafer crust, or even a chocolate cookie crust for a different flavor base.
- Chocolate Lover’s Dream: Drizzle melted chocolate over the banana layer before adding the custard, or mix mini chocolate chips into the custard once it’s cooled. A sprinkle of chocolate shavings on top is also a delightful addition.
- Nutty Crunch: Besides sliced almonds, consider toasted pecans, walnuts, or even macadamia nuts for a different texture and flavor profile.
- Caramel Swirl: A delicate swirl of homemade or store-bought caramel sauce over the whipped cream adds a luxurious touch and extra sweetness.
- Tropical Twist: Add a layer of toasted coconut flakes on top of the whipped cream, or infuse a little coconut extract into the custard for a hint of the tropics.
- Spiced Custard: A pinch of nutmeg or cinnamon in the custard can add warmth and depth, especially enjoyable during cooler months.
- Adult Version: For a grown-up treat, add a tablespoon or two of rum, bourbon, or banana liqueur to the cooled custard before pouring it into the crust.
Serving and Storage Suggestions
To fully appreciate the exquisite flavors of your homemade banana cream pie, serving and storage are key:
- Serving Temperature: Banana cream pie is best served chilled. Remove it from the refrigerator about 15-20 minutes before serving to allow the flavors to soften slightly, but don’t let it sit out for too long.
- Presentation: For elegant slices, use a sharp, thin knife and wipe it clean between each cut.
- Storage: Store any leftover pie in an airtight container or tightly covered with plastic wrap in the refrigerator. It will remain fresh and delicious for 2-3 days. Note that the bananas may start to brown and the crust may soften slightly over time.
- Freezing: Freezing banana cream pie is generally not recommended as the custard can become watery and the bananas may become mushy upon thawing. It’s best enjoyed fresh.
*All image credit belongs to Crouton Crackerjacks via YouTube. Follow and subscribe to his channel for more inspiring recipes and culinary adventures!
Bake Your Own Easy Banana Cream Pie Dessert Recipe Today!
With this comprehensive guide, you now have all the knowledge and inspiration to create a truly unforgettable banana cream pie. This dessert is a testament to how simple ingredients, combined with careful technique, can yield a masterpiece. Whether you’re a seasoned baker or new to the kitchen, the process is rewarding, and the end result is a decadent treat that will surely bring smiles to everyone who tastes it. So, roll up your sleeves, gather your ingredients, and embark on this delightful baking journey. Enjoy the sweet, creamy, and utterly delicious experience of making and savoring your very own homemade banana cream pie!