
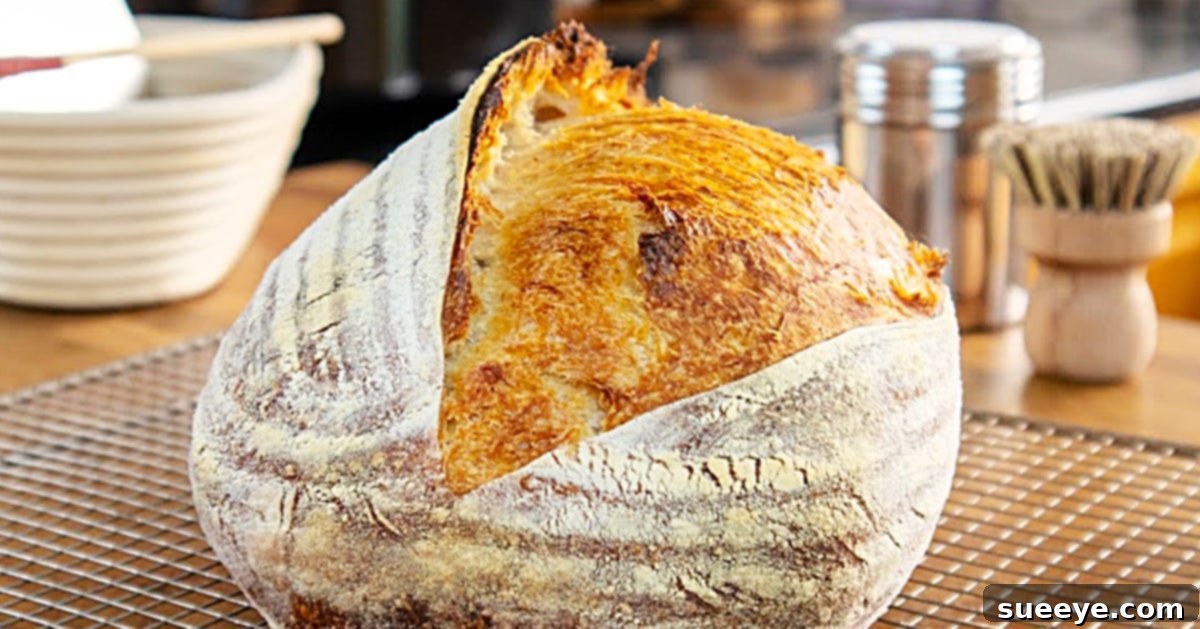
There’s an undeniable magic to baking sourdough bread. The aroma that fills your kitchen, the satisfying crackle of a perfectly golden crust, and the soft, airy interior—it’s an experience that transcends mere cooking. For many, the idea of baking sourdough seems daunting, fraught with complex techniques and endless kneading. However, what if we told you that achieving that artisanal, rustic farmhouse taste you adore could be incredibly simple? Welcome to the world of no-knead sourdough, a revolutionary method that brings the joy of homemade bread within reach of every aspiring baker.
As a passionate enthusiast of all things bread, particularly the robust flavor of a well-crafted sourdough loaf, I’ve explored numerous recipes. My quest for simplicity led me to an outstanding resource: a sourdough video recipe tutorial by Culinary Exploration on YouTube. This guide stands out as the most straightforward and forgiving method I’ve encountered, consistently delivering breathtaking results. The true cornerstone of any magnificent sourdough loaf, however, begins with a vibrant and active sourdough starter. If you’re new to the world of sourdough, don’t fret! Here’s an incredibly easy recipe for a sourdough starter that you can effortlessly create and maintain on your kitchen counter indefinitely, ensuring you always have the living heart of your bread ready for action.
No-Knead Sourdough Bread: Master the Art of Effortless Baking
Imagine pulling a warm, crusty loaf of sourdough from your oven, its distinct tangy aroma filling your home. This no-knead method simplifies the process without compromising on flavor or texture. It’s perfect for beginners and seasoned bakers alike who appreciate efficiency without sacrificing quality. This comprehensive guide, inspired by the excellent insights from Culinary Exploration, will walk you through every step, ensuring your success.
The Secret Weapon: Your Sourdough Starter
Before you even think about mixing dough, understanding your sourdough starter is paramount. This living culture of wild yeasts and bacteria is what gives sourdough its unique flavor, texture, and rise. A healthy, active starter is the key to a successful loaf. It should be bubbly, smell pleasantly sour (like fermented fruit or yogurt), and noticeably double in size after being fed. If you’re not already maintaining one, the provided sourdough starter recipe is an excellent starting point. Feed your starter approximately 4-12 hours before you plan to bake, ensuring it’s at its peak activity when incorporated into your dough.
Ingredients For Your Rustic Sourdough Loaf:
Crafting this incredible bread requires just four fundamental ingredients, proving that simplicity can lead to extraordinary results. Quality ingredients, however, make a noticeable difference in the final product.
- 128 grams active sourdough starter (100% hydration): Ensure your starter is bubbly and passes the float test (a small spoonful floats in water).
- 247 grams of water: Preferably filtered, at room temperature or slightly warm (around 80-90°F / 27-32°C) to encourage yeast activity.
- 375 grams of bread flour: High-protein bread flour is recommended for its gluten-forming capabilities, contributing to a better crumb structure. All-purpose flour can work, but the results might be slightly less robust.
- 12 grams of sea salt: Fine sea salt is preferred. It not only enhances flavor but also controls fermentation and strengthens the gluten network.
Directions: Baking Your Masterpiece
This sourdough video recipe tutorial by Culinary Exploration provides a clear visual guide, but here we’ll break down each step with additional insights to ensure your baking journey is smooth and successful.
1. Initial Mixing: The “Shaggy” Stage
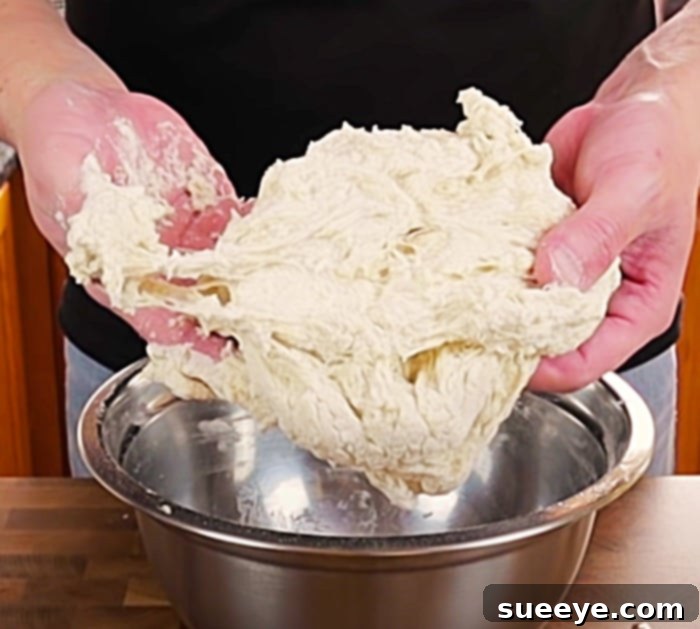
The beauty of the no-knead method lies in its minimal intervention. Begin by adding all your ingredients—the active starter, water, flour, and sea salt—to a large mixing bowl. Using your hands, a spatula, or a Danish dough whisk, gently blend all the ingredients until just combined. You’re not looking for a smooth, elastic dough at this stage. Instead, the mixture should appear somewhat “shaggy,” with no dry spots of flour remaining. This rough texture is perfectly normal and desired, indicating that the gluten is just beginning its natural development process through hydration. Resist the urge to overwork the dough; gentle mixing is key to the no-knead philosophy.
2. Bulk Fermentation: The Rise of Flavor
Once your ingredients are mixed, cover the bowl with a damp cloth or plastic wrap to prevent the dough from drying out. This stage, known as bulk fermentation or the first rise, is where the magic truly happens. During this period, the wild yeasts in your starter begin to feast on the sugars in the flour, producing carbon dioxide and lactic acid. This process builds flavor, develops the gluten structure, and causes the dough to expand. The duration of bulk fermentation can vary significantly depending on your kitchen’s temperature. It typically ranges from 8 to 12 hours at room temperature (around 70-75°F or 21-24°C). Look for signs that your dough is ready: it should have increased noticeably in volume (often by 50-70%), appear bubbly on the surface, and feel light and airy when gently prodded.
3. Shaping Your Loaf: A Gentle Touch
Once bulk fermentation is complete, gently transfer your dough onto a lightly floured surface. At this point, the dough will still be quite sticky and extensible. The goal here is to gently shape it into a tight ball (a boule) without degassing it too much. Use a bench scraper or floured hands to coax the dough into shape, creating surface tension. This tension is crucial for a good oven spring. After shaping, place the dough seam-side up into a well-floured banneton (proofing basket) or a bowl lined with a floured kitchen towel. This prevents the dough from sticking and helps maintain its shape during the final proof.
4. Cold Fermentation: Flavor & Manageability
Cover your banneton or bowl and place it in the refrigerator for the final proof, also known as cold fermentation. This step is incredibly beneficial for several reasons: it slows down fermentation, allowing more complex flavors to develop, and it firms up the dough, making it much easier to handle and score before baking. Cold fermentation can last anywhere from 12 hours to 24 hours, or even up to 36 hours for a more pronounced sour flavor. This flexibility makes sourdough baking adaptable to your schedule.
5. Preheat & Prepare for Baking
Approximately 45-60 minutes before you plan to bake, place your Dutch oven (or baking stone with a heat-proof container for steam) into your oven and preheat it to a high temperature, typically 450-500°F (232-260°C). Allowing the Dutch oven to preheat fully is vital for achieving that desirable crispy crust and excellent oven spring. A hot baking vessel delivers an initial burst of heat that quickly sets the crust.
6. Scoring & Baking: The Grand Finale
Once your oven and Dutch oven are fully preheated, carefully remove the hot Dutch oven. Gently invert your cold dough from the banneton directly into the preheated Dutch oven. Now comes the artistic part: scoring. Use a sharp knife or a baker’s razor blade (lame) to make a swift, confident horizontal cut across the top of the bread. This cut, often referred to as an “ear,” allows the dough to expand predictably during baking, creating a beautiful rustic appearance and preventing uncontrolled cracking. The cut also gives the loaf its classic signature rustic look, as beautifully demonstrated in the tutorial.
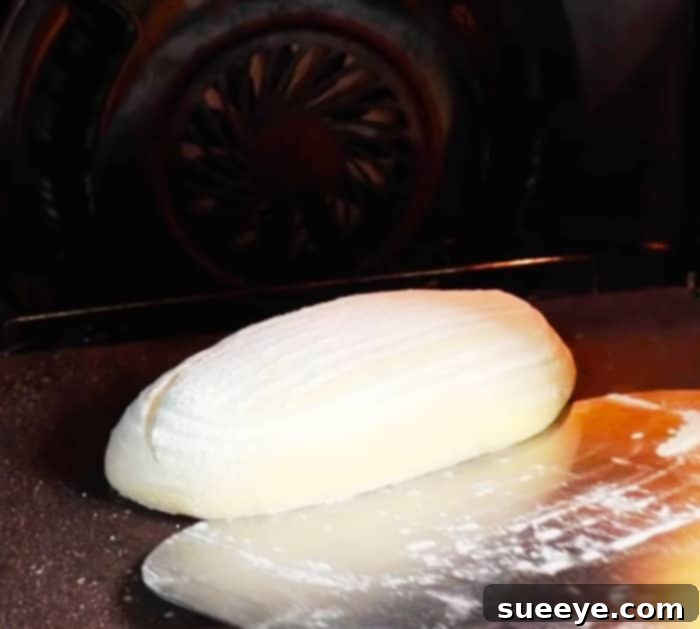
Place the lid back on the Dutch oven and bake for 20-25 minutes. The lid traps steam, which keeps the crust soft initially, allowing the dough to expand maximally. After this initial phase, remove the lid and continue baking for another 25-35 minutes, or until the crust is a deep golden brown and reaches an internal temperature of 200-210°F (93-99°C). This second phase without the lid allows the crust to crisp up beautifully.
7. Cooling: The Final Essential Step
Resist the urge to slice into your beautiful loaf immediately! Transfer the bread to a wire rack and allow it to cool completely for at least 1-2 hours. This cooling period is absolutely crucial. During this time, the internal structure of the bread sets, moisture distributes evenly, and the flavors fully develop. Slicing too early can result in a gummy texture and loss of precious moisture.
Why This No-Knead Sourdough Recipe Is a Game-Changer
This rustic farmhouse sourdough loaf is not just beautiful; it’s incredibly delicious, with a depth of flavor and texture that store-bought bread simply cannot replicate. The no-knead method demystifies sourdough, making it accessible to everyone. The prolonged fermentation develops complex flavors and makes the bread more digestible. The hands-off approach allows you to fit baking into even the busiest schedules, turning what seems like a complex craft into an enjoyable, rewarding experience.
Tips for Sourdough Success: Elevate Your Baking
- Know Your Starter: An active, healthy starter is paramount. Pay attention to its feeding schedule and signs of vitality.
- Temperature Matters: Room temperature greatly influences fermentation time. Adjust your bulk fermentation based on your kitchen’s warmth.
- Hydration: Don’t be afraid of sticky dough. Sourdough is typically high hydration, contributing to its open crumb.
- Patience is a Virtue: Sourdough baking is a slow process. Embrace the waiting periods as they contribute immensely to flavor and texture.
- Invest in a Dutch Oven: While not strictly essential, a good Dutch oven creates the perfect steamy environment for a superior crust and rise.
Common Questions and Troubleshooting
- My dough is too sticky: Sourdough dough is often high hydration, so it will be sticky. Use wet hands or a well-floured surface/bench scraper for handling. A brief cold proof can also make it easier to manage.
- My bread isn’t rising: Ensure your starter is very active. Old or inactive starter is the most common culprit. Also, check your bulk fermentation time and temperature.
- Dense crumb: This can be due to an inactive starter, under-proofing, or not developing enough gluten structure (even with no-knead, adequate bulk fermentation is key).
- Flat loaf: Often caused by over-proofing or insufficient surface tension during shaping.
The Unrivaled Joy of Homemade Sourdough
There’s an immense sense of accomplishment that comes with baking your own sourdough. The process, while requiring patience, is incredibly meditative and deeply rewarding. From the simple act of mixing to the anticipation of the final bake, each step contributes to a culinary creation that is both wholesome and utterly delicious. You simply cannot buy bread like this from a typical grocery store; it has to be made at home, with love and attention. You will be so glad you made the effort to embark on this journey.
Serve your warm, crusty sourdough with a generous smear of butter, alongside a hearty soup, or as the foundation for gourmet sandwiches. It’s versatile, satisfying, and a true testament to the beauty of natural fermentation. This no-knead sourdough recipe isn’t just about baking bread; it’s about discovering a new passion, creating something truly special with your own hands, and enjoying the unparalleled taste of authentic, homemade goodness.