
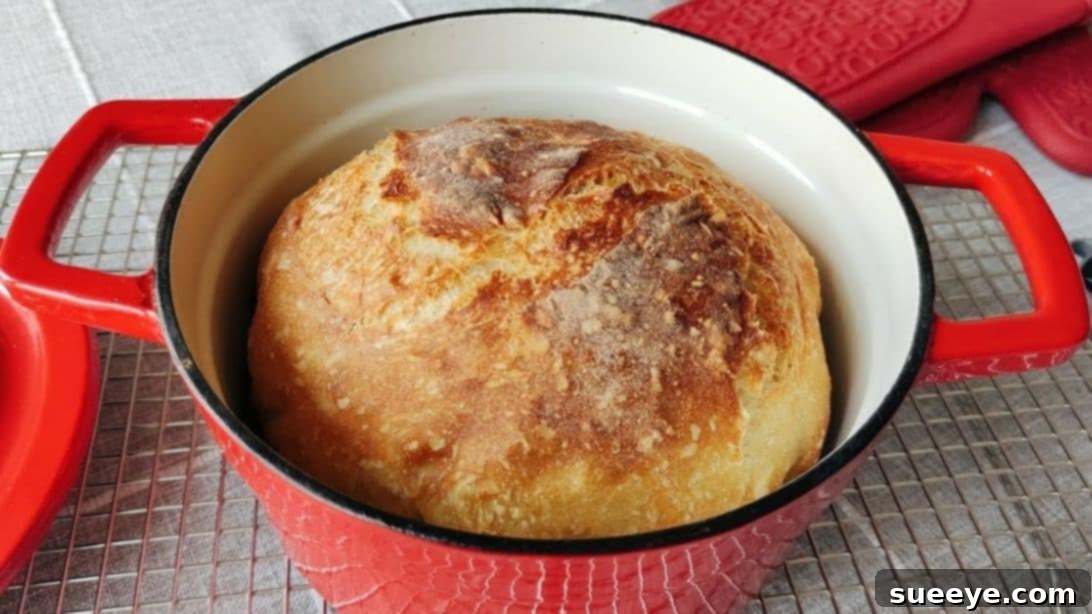
Easy 4-Ingredient No-Knead Dutch Oven Bread Recipe: Your Guide to Perfect Homemade Loaves
There’s nothing quite like the aroma of freshly baked bread filling your home. It’s a scent that promises warmth, comfort, and deliciousness. While many associate baking bread with lengthy processes and intricate techniques, this incredible no-knead Dutch oven bread recipe shatters those preconceptions. Designed for simplicity and maximum flavor, it requires just four basic ingredients and absolutely no kneading, making homemade bread accessible to everyone, from seasoned bakers to complete novices.
I absolutely adore homemade bread, not only for its incredible taste but also for its versatility. It pairs perfectly with almost anything, at any time of day. Over the years, I’ve tried countless recipes, but this particular method, inspired by the fantastic tutorials from Bake Only on YouTube, has become my ultimate go-to. Its convenience, ease of preparation, and consistently delicious results are simply unmatched. You truly have to experience the magic of this 4-ingredient no-knead Dutch oven bread to believe how straightforward and rewarding it is.
Why This No-Knead Dutch Oven Bread Recipe Is a Game-Changer
This recipe isn’t just easy; it’s revolutionary for home bakers. Here’s why it stands out:
- No Kneading Required: Forget the strenuous arm work! This recipe relies on a long, slow fermentation to develop gluten and flavor, eliminating the need for traditional kneading. This saves time and effort, making it perfect for busy schedules.
- Minimal Ingredients: With only four pantry staples, you likely already have everything you need on hand. This simplicity means less shopping and more baking.
- Dutch Oven Magic: Baking in a Dutch oven creates a steamy environment that mimics a professional baker’s oven. This results in an incredibly crispy, golden crust and a wonderfully soft, airy interior.
- Beginner-Friendly: If you’ve ever been intimidated by bread baking, this recipe is your perfect entry point. The steps are simple, clear, and designed for success.
- Exceptional Flavor: Despite its simplicity, the long fermentation process allows deep, complex flavors to develop, giving you a loaf that tastes far more sophisticated than its effort suggests.
Essential Ingredients for Your Perfect Loaf
The beauty of this recipe lies in its minimalist ingredient list. Each component plays a crucial role in creating a delicious loaf. Ensure you have these four simple items ready:
- 2 cups of all-purpose flour: This forms the foundation of your bread. All-purpose flour provides a good balance of protein for structure and tenderness.
- ½ tsp of instant yeast: Instant yeast is ideal for no-knead recipes as it can be mixed directly with dry ingredients and doesn’t require prior activation. It’s what gives your bread its beautiful rise.
- 1 tsp of salt: More than just a seasoning, salt enhances the flavor of the bread, strengthens the gluten structure, and controls the yeast activity, ensuring a balanced fermentation.
- 1 cup of hot water: The water hydrates the flour and activates the yeast. The temperature is crucial – warm enough to wake up the yeast but not so hot that it kills it.
Recommended Equipment for No-Knead Baking
While the ingredients are simple, having the right tools can make the process even smoother:
- Large Mixing Bowl: Essential for combining ingredients and allowing the dough to proof comfortably.
- Dutch Oven with Lid: The star of this recipe! A heavy, lidded Dutch oven (enameled cast iron or bare cast iron) is crucial for trapping steam and achieving that signature crust.
- Parchment Paper: Makes transferring the dough into the hot Dutch oven much safer and easier, and prevents sticking.
- Heat-Resistant Gloves or Oven Mitts: For safely handling the extremely hot Dutch oven.
- Wire Rack: For cooling the bread completely, which is vital for its texture and flavor.
- Kitchen Thermometer: Useful for checking water temperature for yeast activation and the internal temperature of the baked bread for doneness.
Step-by-Step Directions: Baking Your No-Knead Masterpiece
Follow these straightforward steps to create a truly irresistible loaf of homemade bread.
Step 1: Mixing the Dough and First Rise
Begin by taking a large mixing bowl. Add the two cups of all-purpose flour, the half teaspoon of instant yeast, and the one teaspoon of salt. Use a spoon or whisk to mix these dry ingredients thoroughly until they are well combined. This ensures the yeast and salt are evenly distributed throughout the flour. Next, carefully add one cup of hot water. The water temperature is critical here; it should be comfortably warm to the touch, ideally between 115°F to 125°F (46°C to 52°C). Water that is too cold won’t activate the yeast effectively, while water that is too hot can kill it. Continue to mix everything together with a spoon until a sticky, shaggy dough forms. Don’t worry about it being perfectly smooth; lumps are fine in this stage. Once mixed, cover the bowl tightly with plastic wrap or a damp kitchen towel, and let it proof at room temperature for at least 1 hour, or until the dough has visibly doubled in size and has a bubbly surface. After the first proof, gently deflate the dough using a spatula or your hands, then transfer it to a lightly floured surface. With floured hands, carefully fold the dough a few times, bringing the edges into the center to create some tension. Finally, gently shape it into a loose ball, as demonstrated in the original video, ensuring a taut surface.
Step 2: Second Rise and Oven Preparation
Prepare for the second proof by lining a clean large bowl (or a proofing basket, if you have one) with parchment paper. This will prevent sticking and make transferring the dough into the hot Dutch oven much easier. Carefully place the shaped dough ball into the parchment-lined bowl. Cover it again with plastic wrap or a damp towel and let it proof for another 45 minutes to 1 hour, or until it has noticeably doubled in size and appears puffy. During this second rise, it’s crucial to begin preheating your Dutch oven. Place your Dutch oven with its lid on into your oven, then preheat the oven to a high temperature of 450°F (230°C). Allowing the Dutch oven to preheat for at least 30 minutes to an hour ensures it reaches the desired temperature, which is essential for achieving a perfect crust. Once the dough has finished its second proof and the Dutch oven is adequately preheated, carefully remove the hot Dutch oven from the oven. Using a sharp knife or a bread lame, make a few slashes (scoring) on the top of the dough. This helps the bread expand in a controlled way and creates beautiful patterns. Gently lift the dough by the parchment paper and carefully lower it into the preheated Dutch oven, then quickly and gently cover it with the lid.
Step 3: Baking, Browning, and Cooling
Place the covered Dutch oven back into the preheated oven. Allow the bread to bake for approximately 30 minutes with the lid on. The trapped steam inside the Dutch oven during this initial baking phase is vital for creating a wonderfully chewy, crispy crust. After 30 minutes, carefully remove the lid from the Dutch oven and also remove the parchment paper (if it’s easy to do so without deflating the bread). Return the now-uncovered Dutch oven with the bread back into the oven. Let it continue to bake for an additional 10 to 15 minutes, or until the crust turns a rich, golden brown color. To ensure the bread is fully cooked, you can use a kitchen thermometer to check its internal temperature, which should reach at least 190°F (88°C). Once your beautiful loaf is baked to perfection, carefully remove the Dutch oven from the oven. Using oven mitts, transfer the bread immediately to a wire rack. This cooling step is absolutely crucial; allowing the bread to cool completely on a wire rack ensures that moisture escapes, preventing a gummy interior and setting the final texture of the crust and crumb. Resist the urge to slice into it too soon! Let it cool down for at least 30-60 minutes before slicing and serving. Enjoy your incredible homemade Dutch oven bread!
Tips for Achieving the Best No-Knead Loaf
While this recipe is incredibly forgiving, a few pointers can elevate your bread from great to extraordinary:
- Precision in Water Temperature: As mentioned, the 115°F to 125°F (46°C to 52°C) range for hot water is critical. Use a thermometer for accuracy.
- Don’t Rush Proofing: The long proofing times are where the magic happens for flavor and texture. Let the dough take its time, especially in cooler environments.
- Handle Gently: After the first rise, treat the dough with care. Overworking it can deflate the air pockets that create a light, airy crumb.
- Preheat Thoroughly: A properly preheated Dutch oven is non-negotiable for a perfect crust. Give it ample time to come up to temperature with the oven.
- Cool Completely: This cannot be stressed enough. Slicing hot bread can make it gummy and dense. Patience is a virtue here!
- Experiment with Scoring: Scoring the top of the dough not only aids in oven spring but also allows for artistic expression. Try different patterns like a simple cross, a zigzag, or multiple parallel lines.
Delicious Variations and Serving Suggestions
Once you’ve mastered the basic no-knead Dutch oven bread, don’t hesitate to get creative with additions and serving ideas:
Customize Your Loaf:
- Herbs: Incorporate fresh or dried rosemary, thyme, or oregano into the dough during the initial mixing phase for an aromatic twist.
- Cheese: Add grated Parmesan, cheddar, or Gruyère for a savory, cheesy bread that’s perfect with soups.
- Garlic: Minced fresh garlic or garlic powder can infuse a wonderful savory depth.
- Seeds: Sprinkle sesame seeds, poppy seeds, or a mix of “everything bagel” seasoning on top before baking for added texture and flavor.
- Olives: Chopped Kalamata or green olives can add a briny, Mediterranean touch.
Perfect Serving Pairings:
This versatile bread is excellent on its own or as a companion to countless dishes:
- With Butter and Jam: A timeless classic, especially for breakfast or brunch.
- Alongside Soups and Stews: Its robust crust and soft interior are perfect for soaking up rich broths.
- Sandwiches: Elevate your everyday sandwich with a slice of this homemade goodness.
- Bruschetta: Slice, toast lightly, and top with fresh tomatoes, basil, and mozzarella.
- With Dips: Serve with olive oil and balsamic vinegar, hummus, or your favorite spread.
This easy 4-ingredient no-knead Dutch oven bread recipe truly simplifies the art of baking. It delivers a rustic, flavorful loaf with a perfect crust and tender crumb, all with minimal effort. It’s a testament to the fact that delicious, homemade bread doesn’t have to be complicated or time-consuming. So, gather your ingredients, follow these steps, and prepare to impress yourself and your loved ones with a fresh, artisan-quality loaf straight from your own oven. Happy baking!
*All image credit belongs to Bake Only via YouTube. Follow and subscribe to her channel for more delicious recipes and baking inspiration!