
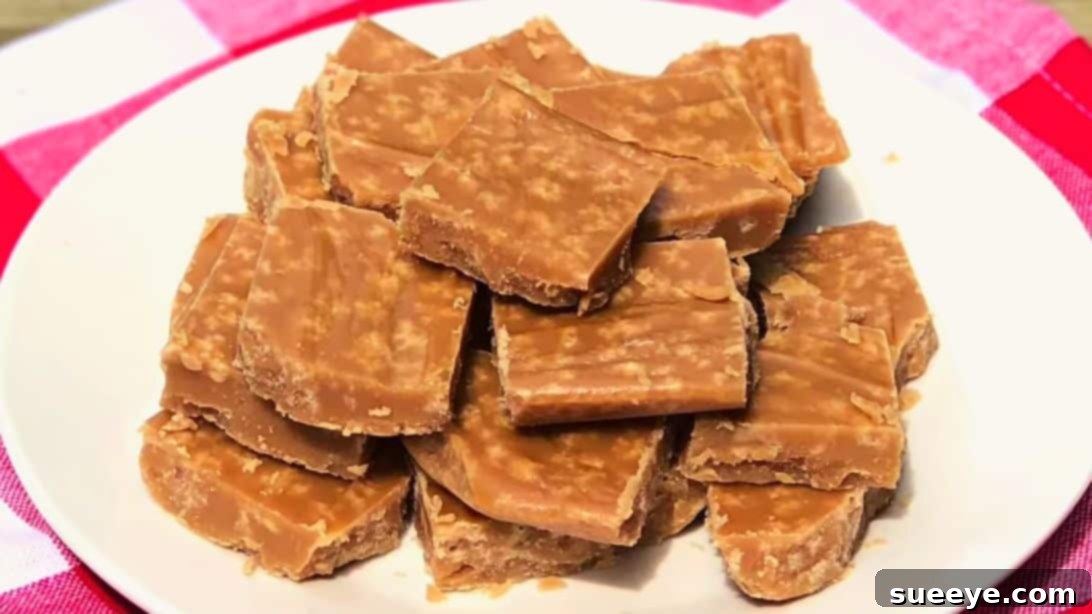
Indulge in Homemade Maple Fudge: The Ultimate 3-Ingredient Fall Treat
As the leaves begin to change and a crisp coolness fills the air, there’s nothing quite like the comforting aroma and taste of fall-inspired treats. And when it comes to capturing the essence of autumn in a sweet, delightful bite, our incredibly simple 3-ingredient maple fudge stands in a league of its own. This isn’t just a recipe; it’s an invitation to create luscious, velvety candy that melts in your mouth, requiring minimal effort but delivering maximum flavor.
Whether you’re a seasoned candy maker or stepping into the kitchen for your very first fudge-making adventure, this recipe promises success. We’ve streamlined the process to ensure a foolproof experience, allowing you to whip up batches of this creamy, irresistible maple delight with confidence. The beauty lies in its simplicity: just three core ingredients transform into a decadent dessert that’s perfect for cozy evenings, festive gatherings, or a thoughtful homemade gift. Prepare to be amazed at how easily you can create such a luxurious treat. With our detailed instructions and helpful tips, you’ll be enjoying homemade maple fudge in no time!
Why You Will Love This Easy Maple Fudge
- Effortlessly Simple: With just three primary ingredients, this recipe cuts down on complexity without compromising on taste. It’s perfect for busy schedules or beginners looking for a rewarding culinary project.
- Rich, Authentic Maple Flavor: Pure maple syrup is the star, delivering a deep, natural sweetness and a distinct flavor that evokes the true spirit of autumn.
- Creamy, Velvety Texture: The method ensures a smooth, melt-in-your-mouth consistency that is characteristic of premium homemade fudge.
- Perfect for Fall: This fudge is an ideal treat for Thanksgiving, Halloween parties, or simply enjoying during a cozy autumn evening with a warm beverage.
- Impressive & Giftable: Beautifully sliced into squares, this fudge makes a wonderful homemade gift for friends, family, or neighbors. Package it in a decorative box for a personal touch.
- No Special Skills Required: Forget complicated techniques! As long as you follow the steps and use a candy thermometer, success is practically guaranteed.
Essential Ingredients for Maple Fudge
The magic of this maple fudge truly lies in the quality of its few, but mighty, ingredients. Opt for the best quality you can find to ensure the richest flavor and most desirable texture.
- 2 cups of Pure Maple Syrup: This is the heart of your fudge. Make sure to use pure maple syrup, not pancake syrup or maple-flavored corn syrup, as the authentic flavor and chemical composition are crucial for the fudge to set correctly. Medium or dark amber syrup will provide a richer maple essence.
- 3 tbsp of Unsalted Butter: Butter adds richness, helps prevent crystallization, and contributes to the smooth, creamy texture. Unsalted butter allows you to control the overall saltiness if you wish to add a pinch later.
- 1 cup of Heavy Cream: The heavy cream (or whipping cream) adds a luxurious mouthfeel and contributes significantly to the fudge’s velvety smoothness. Its high-fat content is key to achieving that perfect creamy consistency.
Step-by-Step Guide to Perfect Maple Fudge
Step 1: Preparation and Cooking the Mixture
Begin by preparing your baking dish. A square baking dish, typically 8×8 or 9×9 inches, works best for a good fudge thickness. Lightly grease the dish with a nonstick cooking spray to ensure easy removal. Next, line the greased dish with parchment paper, leaving an overhang on the sides. This parchment paper sling will be your best friend when it comes time to lift the cooled fudge out of the pan. Set this prepared dish aside, ready for action.
Now, turn your attention to the stovetop. Select a medium-sized, heavy-bottomed pot or saucepan. A heavy bottom helps distribute heat evenly and prevents scorching. Place it over high heat. Carefully pour the pure maple syrup into the pot, followed by the butter. Bring this mixture to a rolling boil, stirring occasionally to ensure the butter melts completely and integrates with the syrup. Allow it to boil vigorously for approximately 5 minutes. This initial boiling helps to concentrate the maple syrup and initiate the candy-making process.
After the initial boil, reduce the heat slightly if needed to prevent overflow, then stir in the heavy cream. Mix these ingredients thoroughly until they are well combined and the mixture returns to a boil. Now, the crucial step: attach a reliable candy thermometer to the side of the pot, ensuring its tip is submerged in the mixture but not touching the bottom of the pan. Continue to cook the mixture over medium-high heat, stirring occasionally to prevent sticking and burning, until the thermometer registers precisely 245°F (118°C). This temperature, known as the “firm ball” stage, is critical for the fudge’s final texture. Be patient, as reaching this temperature may take some time, but consistency is key for perfect results.
Step 2: Cooling, Beating, and Setting
Once the mixture reaches the precise temperature of 245°F (118°C), immediately remove the pot from the stove and turn off the heat. Do not stir the mixture at this point. Carefully detach the candy thermometer and set it aside. Let the hot mixture cool undisturbed for approximately 5 minutes. This initial cooling period is important because it allows the mixture to stabilize before the beating process begins, which helps prevent crystallization and promotes a smoother texture.
After the brief cooling period, it’s time for the magic of beating! Using a sturdy whisk, begin to beat the mixture vigorously. The beating process is crucial for achieving the characteristic creamy, smooth texture of fudge. As you whisk, you’ll notice a remarkable transformation: the mixture will gradually lose its glossy sheen, become thicker, and start to lighten in color. Continue beating for about 5 minutes, or until the mixture becomes opaque, significantly thicker, and starts to show resistance when you stir. It should be thick enough to hold its shape somewhat but still pourable. The faster and more consistently you beat, the finer the sugar crystals will be, resulting in a silkier fudge.
Once the fudge mixture has thickened to the desired consistency, promptly pour it into your prepared baking dish. Use a spatula to scrape every last bit of that deliciousness into the pan. Gently spread the fudge evenly across the dish, ensuring a flat top. Resist the urge to poke or stir it too much once it’s in the pan. Now comes the most challenging part: patience! Allow the fudge to cool completely at room temperature. This can take several hours, or even overnight, depending on the ambient temperature and humidity. Do not rush this step by placing it in the refrigerator, as rapid cooling can affect the texture.
Once the fudge is completely cool and firm, it’s ready to be cut. Use the parchment paper overhangs to carefully lift the slab of fudge out of the baking dish and place it on a clean cutting board. Using a sharp, heavy knife, slice the candy into 16 uniform squares. For cleaner cuts, you can wipe the knife with a damp cloth between slices. Arrange the delectable squares on a serving platter, and now, finally, it’s time to enjoy your perfectly crafted homemade maple fudge! Each bite is a testament to the simple joy of fall flavors.
Expert Tips for Flawless Maple Fudge
Achieving perfect fudge is easier than you think, especially with a few insider tips:
- Invest in a Good Candy Thermometer: Precision is key in candy making. A reliable candy thermometer is your best friend. Calibrate it by checking if it reads 212°F (100°C) in boiling water. If not, adjust accordingly or mentally note the difference.
- Avoid Scraping the Sides: During the cooking process, don’t scrape down the sides of the pot with a spoon or spatula. Sugar crystals can form on the sides and, if introduced back into the main mixture, can cause the entire batch to crystallize and become grainy.
- Patience During Cooling: Do not stir the mixture once it’s off the heat and cooling. Let it sit undisturbed. Stirring too early can initiate crystallization. The beating process comes *after* initial cooling.
- Humidity Matters: Fudge can be tricky on very humid days. High moisture in the air can make it harder for the fudge to set properly. If it’s a humid day, consider waiting for a drier one, or be prepared for a slightly softer fudge.
- Beating is Crucial: Don’t skip or rush the beating step. This is where the sugar crystals are broken down into super-fine particles, resulting in that smooth, creamy texture. If you stop too early, the fudge might be grainy. If you beat too long, it might become crumbly. Look for a significant thickening and dulling of the mixture.
- Clean Cuts: For neat squares, use a large, sharp knife. For the cleanest cuts, heat your knife slightly under hot water, dry it thoroughly, and then slice. Repeat this for each cut.
Storing Your Homemade Maple Fudge
Proper storage ensures your maple fudge stays fresh and delicious for as long as possible:
- Room Temperature: Store maple fudge in an airtight container at room temperature for up to 1-2 weeks. Place parchment paper between layers of fudge to prevent sticking.
- Refrigeration: While not strictly necessary, refrigerating can extend its shelf life. Store in an airtight container in the refrigerator for up to 3-4 weeks. Let it come to room temperature for about 15-20 minutes before serving for the best texture and flavor.
- Freezing: For long-term storage, maple fudge freezes beautifully. Wrap individual pieces tightly in plastic wrap, then place them in an airtight freezer-safe container or bag. It can be stored in the freezer for up to 3 months. Thaw in the refrigerator overnight, then bring to room temperature before enjoying.
Creative Variations and Serving Suggestions
While this 3-ingredient maple fudge is perfect as is, you can easily customize it to suit your taste or create new flavor profiles:
- Nutty Delight: Stir in 1/2 to 1 cup of chopped pecans, walnuts, or almonds during the beating stage. The added crunch complements the creamy fudge beautifully.
- Spiced Maple Fudge: Enhance the fall flavors by adding 1/2 teaspoon of ground cinnamon, a pinch of nutmeg, or a dash of allspice along with the heavy cream.
- Sea Salt Finish: For a sophisticated touch, sprinkle a light dusting of flaky sea salt over the top of the fudge just after pouring it into the pan. The salt enhances the maple’s sweetness and adds a delightful contrast.
- Chocolate Drizzle: Once the fudge is completely set, melt some dark or white chocolate and drizzle it decoratively over the top for an extra layer of indulgence.
- Maple Extract Boost: If you desire an even more intense maple flavor, you can add 1/2 teaspoon of pure maple extract during the beating process.
Serve your maple fudge alongside a warm cup of coffee, tea, or cider for a quintessential autumn experience. It also makes a fantastic addition to any dessert platter, especially during holiday gatherings. Consider pairing it with fresh fruit or a scoop of vanilla bean ice cream for an elevated treat.
The Sweet Magic of Maple Syrup
At the heart of this recipe is pure maple syrup, a natural wonder derived from the sap of maple trees. Its unique flavor profile – rich, earthy, with caramel and vanilla undertones – makes it an irreplaceable ingredient in autumn cuisine. Unlike refined sugar, maple syrup contains trace minerals and antioxidants, offering a slightly healthier edge to your sweet indulgences. Its natural hygroscopic properties also contribute to the fudge’s moist and tender texture, setting it apart from fudges made with granulated sugar. Embrace the authentic taste of nature’s sweetener in every bite.
Conclusion: Your New Favorite Fall Treat
There you have it – a remarkably easy, undeniably delicious, and truly satisfying recipe for 3-ingredient maple fudge. This sweet and creamy candy is more than just a dessert; it’s a celebration of the autumn season, a testament to the magic of simple ingredients, and a delightful project for any home cook. With its rich maple flavor and velvety smooth texture, it’s sure to become a cherished part of your fall traditions. So, gather your ingredients, follow our straightforward steps, and prepare to impress yourself and everyone you share it with.
We extend our sincere gratitude to Twisty Creek Kitchen via YouTube for inspiring this wonderful recipe and for the beautiful images used here. If you enjoyed creating this maple fudge, we highly recommend visiting their YouTube channel for more fantastic cooking tutorials and delightful culinary inspiration. Don’t forget to subscribe to their channel to stay updated on their latest creations! Happy fudge making!