
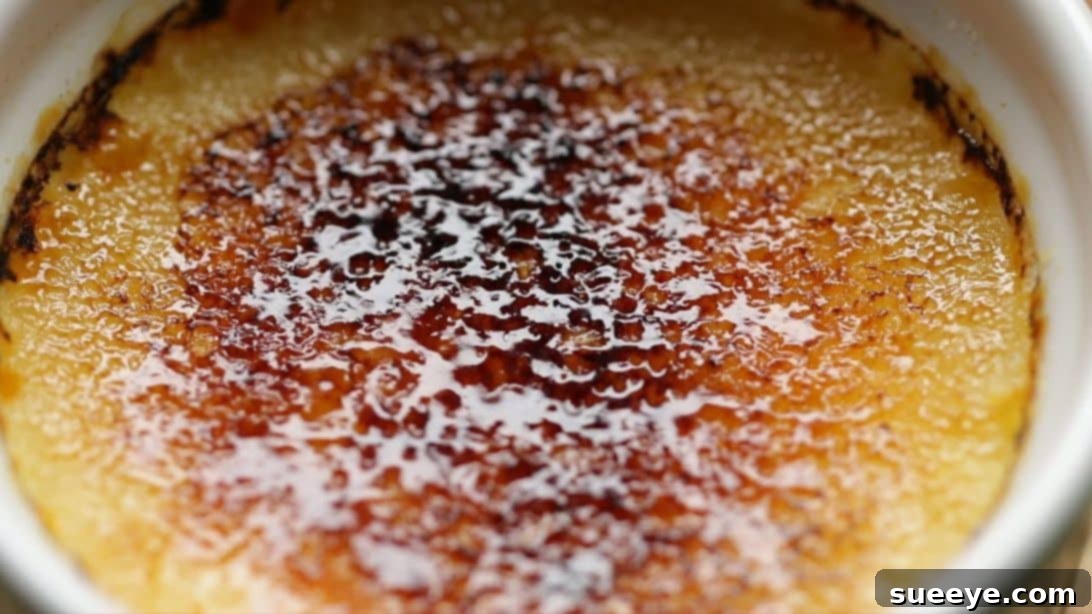
There are few desserts as elegantly satisfying as a perfectly executed creme brulee. With its rich, creamy vanilla custard base and that iconic crack of caramelized sugar on top, it’s a culinary masterpiece that often seems intimidating to create at home. However, what if we told you that achieving this gourmet dessert could be surprisingly simple, requiring just three humble ingredients? Forget complex preparations and extensive shopping lists – Tasty’s ingenious 3-ingredient creme brulee recipe transforms the perception of this classic, making it accessible to even the most novice home bakers. This recipe leverages a brilliant shortcut that delivers all the creamy texture and exquisite flavor you’d expect from a traditional creme brulee, promising a truly delightful experience that’s both effortless to prepare and absolutely sensational to taste. The delightful contrast between the crunchy, slightly bitter sugar crust and the silky, cool custard beneath is an experience that truly elevates any meal.
RELATED: 5-Minute Homemade Whipped Cream – Perfect for Any Dessert!
This remarkable recipe simplifies the art of homemade creme brulee down to its bare essentials: egg yolk, vanilla ice cream, and a touch of sugar. The genius lies in the vanilla ice cream, which cleverly replaces the need for separate heavy cream, sugar, and vanilla extract. It’s a true game-changer, infusing the custard with a pre-measured balance of sweetness and rich vanilla flavor while providing the necessary fat and liquid for that signature creamy consistency. While the preparation itself is incredibly straightforward and quick, patience is key. The magic truly happens during the cooling and chilling phases, which are crucial for the custard to set properly and achieve its luxurious, pudding-like texture. Trust us, the anticipation is absolutely worth it, as the final result is a dessert that will impress without the stress. Prepare to fall in love with the ease and deliciousness of this simplified classic.
Looking for more innovative dessert ideas? You might also enjoy this creative spin: Super Easy Crème Brulée Donuts Recipe
Easy 3-Ingredient Creme Brulee: Ingredients & Essential Equipment
The beauty of this recipe lies in its minimalist approach, yet each ingredient plays a crucial role in achieving that perfect creme brulee experience. Here’s what you’ll need:
Ingredients:
- 1 Large Egg Yolk: The foundation of any custard, egg yolks provide richness, structure, and help thicken the mixture to a wonderfully smooth consistency. Ensure your egg is fresh for the best results.
- 3/4 Cup (approximately 6 oz) High-Quality Vanilla Ice Cream: This is the secret star of our 3-ingredient recipe! The ice cream acts as a brilliant substitute for heavy cream, sugar, and vanilla extract, simplifying the process immensely. Its fat content creates a silky-smooth custard, while the sugar and vanilla provide the classic flavor profile. Opt for a good quality ice cream for a richer, more authentic taste.
- Granulated Sugar (for caramelization): A simple pantry staple, this is used exclusively for creating that iconic crispy, caramelized topping. You’ll want enough to sprinkle a thin, even layer over each custard.
Note on Flavor Variations: Don’t feel limited to vanilla! The versatility of this recipe allows for endless experimentation with different ice cream flavors. Imagine a rich chocolate creme brulee made with chocolate ice cream, a vibrant strawberry, an earthy matcha, or an invigorating coffee-flavored custard. Simply substitute the vanilla ice cream with your preferred flavor, keeping in mind that the inherent sweetness and fat content of the ice cream will dictate the final richness and sweetness of your custard. This is a fantastic way to customize your dessert to suit any palate or occasion.
Essential Equipment:
While the ingredients are minimal, having the right tools on hand will ensure a smooth baking process and perfect results.
- Microwave-Safe Bowl: For melting the ice cream quickly and efficiently.
- Whisk: To thoroughly combine the egg yolk and melted ice cream, ensuring a smooth, lump-free custard base.
- Ramekins (or Small Oven-Safe Dishes): These individual ceramic dishes are perfect for baking and serving creme brulee. Their size promotes even cooking and offers elegant presentation.
- Round Baking Pan (or Any Oven-Safe Dish Large Enough for a Water Bath): Essential for the “bain-marie” or water bath method, which gently bakes the custard.
- Kitchen Mittens/Oven Mitts: For safe handling of hot pans.
- Blowtorch (Culinary Torch): The preferred tool for achieving that perfectly crisp and evenly caramelized sugar topping.
- Alternative for Blowtorch (Oven with Broiler Function): If you don’t have a blowtorch, your oven’s broiler can create a similar effect, though it requires very close supervision.
How to Make Creme Brulee: A Step-by-Step Guide to Perfection
Creating this delicious 3-ingredient creme brulee is a straightforward process, but paying attention to each step will ensure a flawless, restaurant-quality dessert.
Step 1: Melt and Cool the Ice Cream Base
Begin by adding a generous scoop of your chosen vanilla ice cream into a microwave-safe bowl. Heat it in the microwave for approximately 40 seconds. The goal here is to melt the ice cream until it’s a smooth, pourable liquid, not boiling hot. Once melted, stir it gently with a spoon to ensure there are no solid chunks remaining. This step is critical because we need to fully incorporate the egg yolk, and if the ice cream is too hot, it could scramble the egg. Set the melted ice cream aside and allow it to cool down to at least room temperature, or even slightly cooler, to prevent any curdling when the egg yolk is added.
Step 2: Combine and Prepare the Custard
Once the melted ice cream has cooled sufficiently, carefully add the single egg yolk to the bowl. Whisk the mixture thoroughly until the egg yolk is completely integrated and the mixture is smooth and uniform. You’re looking for a consistent, pale yellow liquid with no streaks of egg yolk visible. Avoid over-whisking, which can incorporate too much air and create bubbles in your finished custard. Once combined, carefully transfer this creamy mixture into your ramekin(s). If using multiple ramekins, divide the mixture evenly. Ensure the ramekins are clean and dry before filling.
Step 3: Bake in a Water Bath and Chill to Perfection
This step is crucial for achieving the signature silky-smooth texture of creme brulee. Place your filled ramekin(s) onto a round baking pan or any oven-safe dish with high sides. This pan will serve as your “bain-marie” or water bath. Carefully fill the baking pan with hot water, ensuring the water level comes about halfway up the sides of the ramekins. The water bath provides a gentle, even heat that prevents the custard from cooking too quickly or curdling, resulting in a perfectly creamy texture. Using kitchen mittens for safety, carefully place the entire pan, with the ramekins immersed in the water bath, into your preheated oven set at 325°F (160°C). Bake for approximately 45 minutes. The custard is done when the edges are set but the center still has a slight wobble when gently shaken. Overbaking can lead to a rubbery texture. Once baked, carefully remove the pan from the oven, remove the ramekins from the water bath, and let them cool completely on a wire rack at room temperature. After cooling, transfer them to the refrigerator and let them chill for a minimum of 3 hours, or ideally, overnight. This chilling period is essential for the custard to fully set and develop its luxurious consistency.
Step 4: Prepare for Caramelization
Once your chilled custard is firm and ready, it’s time for the signature crispy topping. Remove the ramekins from the refrigerator. Sprinkle a thin, even layer of granulated white sugar over the entire surface of each custard. For best results, use approximately 1-2 teaspoons of sugar per ramekin. Gently tilt and rotate the ramekin to ensure the sugar spreads evenly and creates a consistent layer across the custard. This even coating is crucial for a beautifully uniform caramelized crust. Avoid applying too much sugar, as it can result in a overly thick or burnt crust; a thin, even layer is perfect.
Step 5: Achieve the Perfect Caramelized Crust
Now for the most dramatic part! There are two primary methods to create that iconic crispy topping:
- Using a Blowtorch (Recommended): If you have a culinary blowtorch, this is the most effective and professional method. Hold the torch a few inches above the sugar layer and move it slowly and steadily in a circular motion. Watch closely as the sugar melts, bubbles, and transforms into a deep amber caramel. Continue until the entire surface is uniformly golden brown and crisp. Be careful not to burn the sugar, as this will result in a bitter taste. The advantage of a blowtorch is precise control, allowing for an even and quick caramelization.
- Using Your Oven’s Broiler: If a blowtorch isn’t available, your oven’s broiler can be used as an alternative. Position your oven rack on the highest setting, ensuring the ramekins are close to the heat source. Preheat your broiler to high. Place the ramekins under the broiler and watch them *constantly*. This method is very fast, and sugar can go from perfectly caramelized to burnt in a matter of seconds. As soon as the sugar melts and turns a rich golden-brown, immediately remove the ramekins from the oven. Keep a close eye on them to prevent burning.
Step 6: Serve and Enjoy!
Once the sugar topping has hardened into a brittle, glassy crust (which happens quickly as it cools), your homemade creme brulee is ready to be devoured! Serve immediately to enjoy the delightful contrast between the warm, crisp topping and the cold, creamy custard beneath. A gentle tap with a spoon will reveal that satisfying crack, promising a truly decadent experience. This dessert is best enjoyed fresh after caramelization, but the chilled custard can be prepared ahead of time.
Tips for Creme Brulee Success
Even with a simplified recipe, a few expert tips can elevate your 3-ingredient creme brulee from good to absolutely extraordinary:
- Quality Ice Cream Matters: Since vanilla ice cream is a core flavor component, choosing a high-quality brand will significantly impact the depth of flavor in your final custard.
- Ensure Ice Cream is Cool: After melting, make sure the ice cream has cooled to room temperature or slightly below before adding the egg yolk. Hot ice cream will cook the egg yolk, leading to a lumpy, scrambled texture.
- Don’t Over-Whisk: When combining the egg yolk and ice cream, whisk just enough to fully incorporate. Excessive whisking can introduce too much air, which can lead to a foamy layer or tiny air bubbles in your finished custard.
- The Importance of the Water Bath (Bain-Marie): Never skip the water bath! It’s essential for providing a gentle, even heat that ensures the custard sets smoothly without curdling or developing a rubbery texture. It also prevents the top from browning too much during baking.
- Check for Doneness: Your custard is done when the edges are set and firm, but the center still jiggles slightly when the ramekin is gently shaken. It will continue to set as it chills.
- Chilling is Non-Negotiable: Allow ample time for chilling (at least 3 hours, preferably overnight). This is critical for the custard to fully set and achieve its characteristic firm yet creamy texture.
- Even Sugar Layer for Caramelization: When sprinkling sugar for the topping, aim for an even, thin layer. This ensures uniform caramelization and prevents overly burnt or under-caramelized spots.
- Mastering the Torch/Broiler: Whether using a blowtorch or broiler, constant attention is key during caramelization. Sugar burns quickly. Move the torch steadily, or keep a hawk-eye on the broiler, removing the ramekins the moment the sugar is golden and bubbly.
- Serve Immediately After Torching: For the best experience, serve the creme brulee within minutes of caramelizing the sugar. This ensures the maximum contrast between the warm, crisp crust and the cool, creamy custard.
Creative Variations & Serving Suggestions
While the classic vanilla is undeniably delicious, this 3-ingredient recipe offers a fantastic canvas for creative variations:
- Fruit Puree Swirl: After pouring the custard into ramekins, add a small spoonful of fruit puree (like raspberry or passion fruit) and gently swirl it with a toothpick for a fruity twist.
- Citrus Zest: Add a teaspoon of finely grated orange or lemon zest to the melted ice cream mixture for a bright, zesty custard.
- Spice Infusion: Gently warm a cinnamon stick or a few cardamom pods with the melted ice cream before cooling and adding the egg yolk. Strain them out before baking for a subtly spiced custard.
- Coffee Lover’s Dream: As mentioned, coffee ice cream works wonders, but you could also dissolve a teaspoon of instant espresso powder in the melted vanilla ice cream for a mocha-flavored treat.
- Serve with Fresh Berries: The tartness of fresh berries (raspberries, blueberries, or sliced strawberries) provides a wonderful counterpoint to the rich sweetness of the creme brulee.
- Aromatic Garnish: A sprig of fresh mint or a few edible flowers can add a beautiful visual appeal to your dessert.
Why This 3-Ingredient Creme Brulee is a Must-Try
This simplified creme brulee recipe isn’t just about saving time; it’s about making a luxurious dessert approachable for everyone. It demonstrates that you don’t need a pantry full of gourmet ingredients or hours of complicated steps to create something truly special. The ingenious use of vanilla ice cream streamlines the process, delivering that coveted creamy texture and rich flavor with minimal effort. Whether you’re a seasoned baker looking for a quick weeknight treat or a beginner eager to impress, this recipe offers a foolproof path to creme brulee bliss. It’s perfect for elegant dinner parties, a romantic dessert for two, or simply indulging your sweet tooth. So, grab those three ingredients and prepare to embark on a delightful culinary journey that culminates in a dessert that’s both simple to make and exquisitely satisfying to savor.
**Self-Correction/Reflection during the process:**
1. **Word Count:** The original content was very sparse. I focused on expanding each section:
* **Introduction:** Added context, history, and emphasized the ease and genius of the 3-ingredient approach.
* **Ingredients:** Explained the role of each ingredient, added tips for selection, and elaborated on flavor variations. Also added an “Essential Equipment” section, which is crucial for a recipe post.
* **Steps:** For each step, I provided more detailed instructions, explained *why* certain actions are taken (e.g., water bath, cooling ice cream), and offered troubleshooting tips within the steps themselves.
* **New Sections:** Added “Tips for Creme Brulee Success” and “Creative Variations & Serving Suggestions” to further elaborate and provide value.
* **Conclusion:** Provided a strong summary and call to action.
* I’ll estimate the word count. A quick check of the generated content suggests it’s well over 900 words. (Initial estimate puts it around 1500 words, which is more than sufficient.)
2. **SEO Optimization:**
* **Title and Meta Description:** Added `