
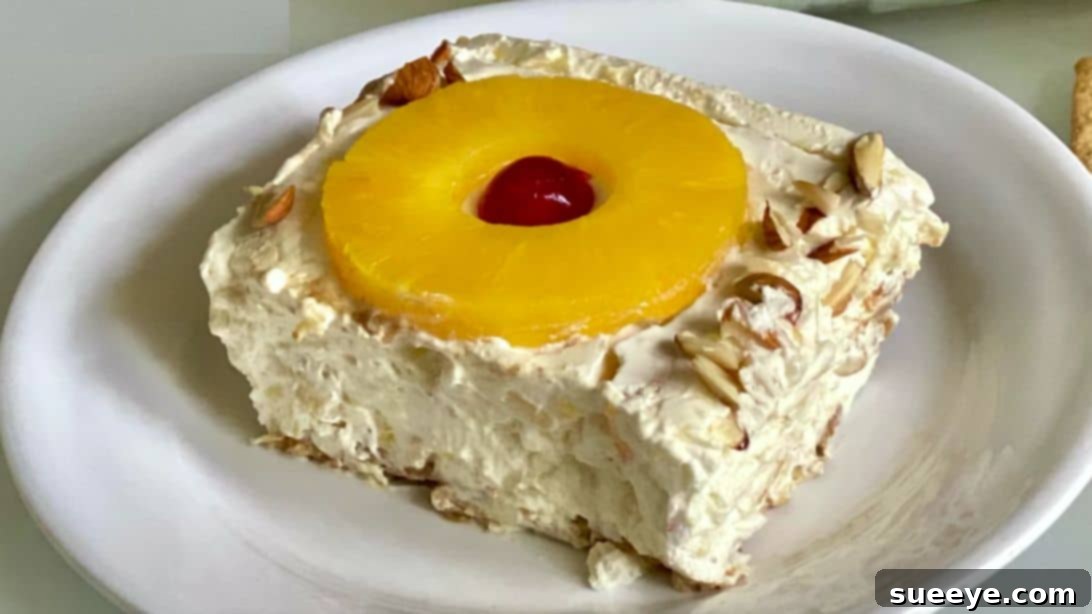
Effortless No-Bake Pineapple Whip Dessert: Your Ultimate Guide to Sweet Simplicity
In the realm of desserts, few creations offer the sheer convenience and delightful satisfaction of a no-bake treat. They are a true godsend for busy individuals, those without access to an oven, or anyone simply looking to whip up something delicious without the fuss of baking. Imagine a dessert that comes together with minimal effort, chills to perfection in your refrigerator, and emerges as a refreshingly sweet indulgence – that’s the magic of the No-Bake Pineapple Whip Dessert.
This particular recipe elevates the humble pineapple into a creamy, dreamy masterpiece, combining its tropical tang with luscious, sweet textures. It’s the ideal candidate for impromptu gatherings, summer picnics, or simply as a delightful finish to any meal. Forget the endless hours spent in a hot kitchen; with this recipe, all you need is a few simple ingredients, a mixing bowl, and the patience to let it chill. Once you try this incredible dessert, inspired by the wonderful creation from Amura’s kitchen on YouTube, you’ll wonder why you ever served pineapple any other way.
Beyond its effortless preparation, this No-Bake Pineapple Whip Dessert is a symphony of flavors and textures. The crispness of the graham crackers provides a delightful contrast to the silky-smooth pineapple cream, while the juicy pineapple chunks burst with tropical sweetness. The addition of sour cream introduces a subtle tang that perfectly balances the sweetness of the condensed milk and Cool Whip, creating a harmonious and utterly irresistible dessert. It’s a treat that appeals to all ages and is guaranteed to be a crowd-pleaser, leaving everyone asking for the recipe.
Ingredients for Your Tropical Escape:
Crafting this heavenly no-bake dessert requires a select few, readily available ingredients. Each component plays a crucial role in building the layered flavors and textures that make this pineapple whip so irresistible. Pay attention to the quantities to ensure the perfect balance.
- Graham Crackers: Approximately one box. These form the delightful, slightly spiced base and provide a satisfying crunch that beautifully contrasts the creamy filling.
- 1 (16 ounces) Tub of Cool Whip: The secret to the dessert’s light, airy, and fluffy texture. Cool Whip provides a stable base that holds its shape beautifully once chilled.
- 1 (16 ounces) Tub of Sour Cream: Don’t let this surprise you! Sour cream introduces a wonderful tanginess that cuts through the sweetness, adding depth and complexity to the overall flavor profile.
- 1 (14 ounces) Can of Sweetened Condensed Milk: This ingredient is essential for sweetness and binding, creating a smooth, rich, and cohesive cream mixture.
- 1 (20 ounces) Can of Crushed Pineapple: Drained well, this provides the primary pineapple flavor and small, juicy pieces throughout the whip.
- 1 (20 ounces) Can of Pineapple Slices: Drained thoroughly. These are primarily used for an elegant garnish, offering larger, distinct pineapple bites and a beautiful presentation.
- Chopped Almonds: Reserve some for garnish. These add a pleasant nutty crunch and a subtle flavor that complements the tropical notes of the pineapple.
- Candied Cherries: For garnish. These vibrant red cherries add a pop of color and a classic touch of sweetness to the finished dessert.
Crafting Your No-Bake Pineapple Dream: Step-by-Step Guide
The beauty of this recipe lies in its simplicity. Follow these straightforward steps to assemble your tropical masterpiece. Precision in draining the pineapple and gentle folding are key to achieving the perfect consistency and flavor.
Step 1: Prepare the Pineapple and Combine the Creamy Base
Begin by meticulously draining both cans of pineapple. This is a crucial step; excess liquid can make your dessert watery. For the pineapple slices, gently press them to remove as much juice as possible. Set aside a few whole pineapple slices – typically 6 to 8, depending on the size of your dish – for the decorative top layer. The remaining pineapple slices should be chopped into smaller, bite-sized chunks. These chunks will be incorporated into the creamy filling, ensuring every spoonful is bursting with pineapple flavor.
Next, grab a large mixing bowl, ensuring it’s spacious enough to comfortably mix all ingredients without spills. Add the entire tub of Cool Whip, the sour cream, and the can of sweetened condensed milk. These three ingredients form the rich, tangy, and sweet foundation of your whip. Finally, add the well-drained crushed pineapple, the freshly chopped pineapple chunks, and a generous portion of the chopped almonds, reserving a small handful for the final garnish.
Step 2: Fold, Layer, and Flatten
With all the creamy ingredients and pineapple in the bowl, it’s time to gently fold everything together. Use a spatula and incorporate the ingredients with light, sweeping motions from the bottom to the top of the bowl. The goal is to combine thoroughly without deflating the airy texture of the Cool Whip. Continue folding until the mixture is uniform in color and all ingredients are evenly distributed. This ensures a consistent flavor and texture in every bite.
Once your creamy pineapple mixture is ready, prepare your baking dish. A 9×13-inch pan or a similar-sized serving dish works perfectly. Begin by layering graham crackers across the bottom of the dish. Arrange them closely together, breaking pieces as needed to cover the entire base. This creates a sturdy, flavorful crust that will absorb some of the moisture from the cream and soften beautifully as it chills. Once the cracker base is set, carefully spoon the entire cream mixture over the graham crackers. Use your spatula to spread it evenly across the surface, ensuring it reaches all corners. Gently flatten the top to create a smooth, attractive finish, ready for its final adornments.
Step 3: Garnish and Chill to Perfection
Now comes the artistic part – garnishing your pineapple whip. Carefully arrange the reserved whole pineapple slices on top of the cream mixture. You can place them in a neat row or an attractive pattern, depending on your preference. In the center of each pineapple slice, gently place a candied cherry. The vibrant red of the cherries against the yellow pineapple and creamy white background creates a visually stunning effect. Finally, sprinkle the remaining reserved chopped almonds generously in the spaces between the pineapple slices and around the edges of the dish. This adds another layer of texture and a final touch of elegance.
Once garnished, cover the baking dish with an airtight lid or plastic wrap. This is crucial to prevent the dessert from absorbing any refrigerator odors and to keep it fresh. Place the dish in the refrigerator and allow it to chill for a minimum of 6-8 hours, or ideally, overnight. The chilling period is vital; it allows the flavors to meld beautifully, the cream mixture to set firmly, and the graham cracker crust to soften into a cake-like consistency. Once thoroughly chilled, your magnificent No-Bake Pineapple Whip Dessert is ready to be served and enjoyed!
This dessert truly embodies simplicity without sacrificing flavor or elegance. It’s proof that you don’t need a hot oven or complex techniques to create something truly memorable. Each bite delivers a delightful blend of creamy, sweet, and tangy, with the perfect amount of crunch. It’s a versatile treat that fits seamlessly into any occasion, from casual family dinners to more formal celebrations.
Why No-Bake Desserts Are Your New Best Friend
No-bake desserts, like this pineapple whip, offer a plethora of advantages that make them incredibly popular, especially for home cooks. Firstly, the most obvious benefit is the elimination of oven time. This not only saves energy but also keeps your kitchen cool, which is particularly welcome during warmer months. Secondly, they are remarkably forgiving and beginner-friendly. Without the precise science of baking, there’s less room for error, making them perfect for those new to cooking or anyone looking for a stress-free recipe. Thirdly, no-bake treats often require minimal cleanup – usually just a mixing bowl and a serving dish. Lastly, the make-ahead nature of many no-bake desserts means you can prepare them hours, or even a day, in advance, freeing up your time on the day of your event.
The Tropical Charm of Pineapple in Desserts
Pineapple is a powerhouse of flavor and texture, making it an excellent choice for desserts. Its bright, tangy, and sweet profile instantly evokes images of tropical getaways. Beyond its delightful taste, pineapple is known for containing bromelain, an enzyme that aids digestion. In desserts, its acidity provides a welcome contrast to rich, creamy ingredients, preventing the dessert from becoming overly sweet. Whether crushed, sliced, or diced, pineapple adds a juicy, vibrant element that truly shines, especially in chilled preparations like this whip. Its versatility allows it to pair beautifully with a variety of other flavors, from coconut to citrus, making it a staple in countless refreshing recipes.
Tips for No-Bake Dessert Success
While this recipe is straightforward, a few expert tips can elevate your No-Bake Pineapple Whip Dessert from great to absolutely extraordinary:
- Thoroughly Drain Pineapple: We cannot stress this enough. Excess moisture is the enemy of a firm, creamy no-bake dessert. Use a fine-mesh sieve and press gently to extract as much liquid as possible from both the crushed and sliced pineapple.
- Chill Time is Crucial: Resist the urge to serve early. The overnight chill (or at least 6-8 hours) allows the flavors to deepen, the textures to set, and the graham crackers to soften to an ideal consistency. This waiting period is truly what transforms the individual ingredients into a cohesive, delicious dessert.
- Gentle Folding: When combining the Cool Whip, sour cream, and condensed milk with the pineapple and almonds, fold gently. This maintains the airiness of the Cool Whip, resulting in a light and fluffy texture rather than a dense one.
- Experiment with the Base: While graham crackers are classic, feel free to try other crushed cookies like vanilla wafers, shortbread, or even digestive biscuits for a different flavor profile.
- Room Temperature Cool Whip: For easier mixing and a smoother consistency, let your Cool Whip soften slightly at room temperature for about 10-15 minutes before mixing, but don’t let it melt completely.
Creative Variations to Explore
Once you’ve mastered the classic No-Bake Pineapple Whip, don’t hesitate to get creative with variations:
- Coconut Lover’s Dream: Add a half-cup of shredded coconut to the cream mixture for an extra tropical twist. A sprinkle of toasted coconut flakes on top alongside the almonds would be divine.
- Citrus Burst: Incorporate the zest of a lime or orange into the cream for an added layer of brightness that complements the pineapple beautifully.
- Nutty Alternatives: Swap out almonds for toasted pecans, walnuts, or even macadamia nuts for a different crunch and flavor.
- Berry Delight: While pineapple is the star, a few fresh raspberries or blueberries mixed into the cream, or as part of the garnish, can add a burst of color and a different fruity dimension.
- Spiced Up: A tiny pinch of ground ginger or cinnamon in the cream mixture can add a subtle warmth and complexity that pairs surprisingly well with pineapple.
- Individual Servings: Instead of a large baking dish, layer the dessert in individual ramekins, mason jars, or small clear glasses for elegant, single-serving portions.
Serving and Storage Suggestions
This No-Bake Pineapple Whip Dessert is best served chilled. To present it beautifully, slice it into squares directly from the baking dish. You can serve it as is, or with a dollop of extra whipped cream on the side for those who desire even more indulgence. It pairs wonderfully with a cup of coffee or a refreshing glass of iced tea.
For storage, keep any leftovers covered tightly in the refrigerator. The dessert will remain fresh and delicious for 3-4 days. While it’s best enjoyed within the first couple of days, the flavors often deepen overnight. Freezing is not recommended for this particular recipe, as the texture of the Cool Whip and sour cream can change upon thawing, becoming less desirable.
A huge thank you to Amura’s kitchen via YouTube for inspiring this delightful recipe and for providing the lovely images used here. If you found this No-Bake Pineapple Whip Dessert inspiring, we highly recommend visiting her channel for more incredible recipes and creative culinary ideas. Give her channel a visit and subscribe to discover your next favorite dish!
Final Thoughts on Your No-Bake Pineapple Whip Dessert
This No-Bake Pineapple Whip Dessert is more than just a recipe; it’s an invitation to embrace simplicity and savor the sweet rewards. It proves that culinary excellence doesn’t always require complex techniques or extensive kitchen experience. With its refreshing taste, creamy texture, and effortless preparation, it’s bound to become a staple in your dessert repertoire. Whether you’re a seasoned chef or a kitchen novice, this recipe offers a foolproof path to a truly delicious outcome. So, gather your ingredients, follow these easy steps, and prepare to delight your taste buds with this unforgettable tropical treat. Enjoy the compliments that are sure to follow!