
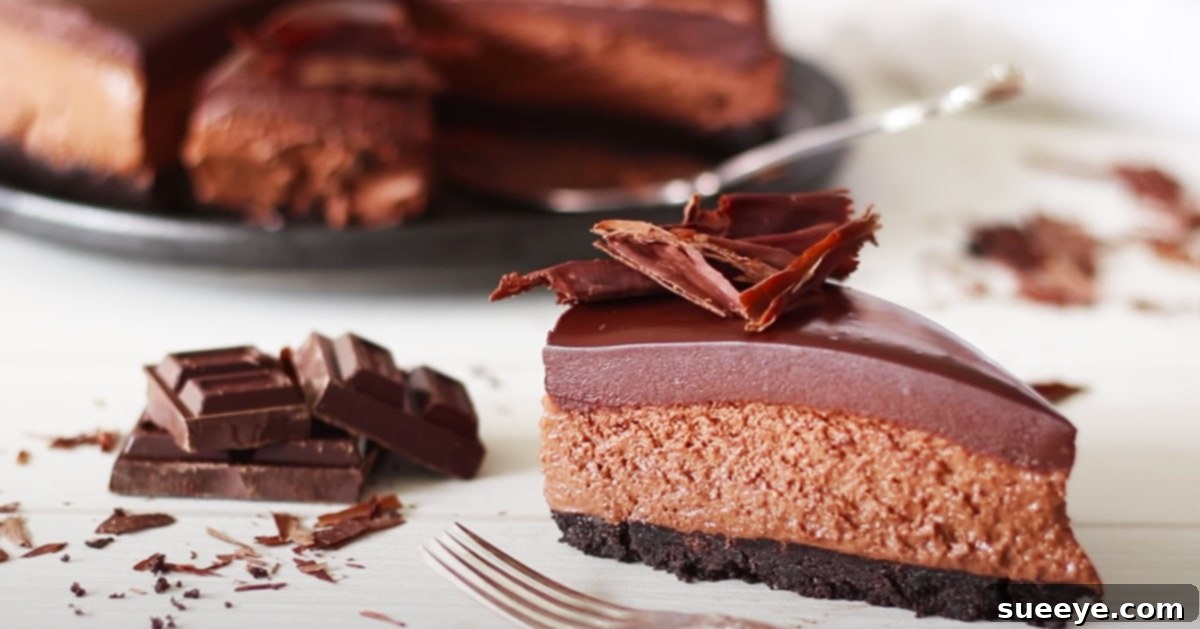
Indulge in Pure Bliss: The Ultimate No-Bake Decadent Chocolate Cheesecake with Oreo Crust
Prepare to embark on a culinary journey that will forever change your perception of cheesecake. While traditional cheesecakes might not always be at the top of everyone’s dessert list, this extraordinary no-bake chocolate cheesecake recipe is designed to captivate your senses and become an instant favorite. Requiring no oven, this dessert is a masterpiece of richness, decadence, and pure chocolatey delight. From its luscious, moist-looking filling to its impressive presentation, every aspect of this recipe screams indulgence, making it a perfect treat for any occasion.
What truly sets this cheesecake apart is its incredible ease of preparation, combined with an unbelievably luxurious outcome. The thought of a perfectly moist and spongy chocolate filling, complemented by a crunchy, flavorful crust, is enough to make anyone’s mouth water. For many, the highlight of any cheesecake is often the crust, and this recipe’s Oreo crust is nothing short of revolutionary. Imagine biting into that delightful crunch, a perfect counterpoint to the smooth, creamy filling. It’s so good, you might just find yourself reaching for more than one slice!
This dessert is a celebration of chocolate in its finest form, offering an intense flavor profile that’s both satisfying and sophisticated. Despite its opulent taste and elegant appearance, the process is remarkably straightforward, proving that you don’t need to be a pastry chef to create something truly spectacular. While this rich dessert is incredibly satisfying on its own, serving it alongside a refreshing glass of almond milk provides a lovely balance, cutting through the richness just enough to ensure you can fully savor every single bite without feeling overwhelmed. Get ready to impress your family and friends with this show-stopping, no-fuss chocolate cheesecake that promises to deliver pure bliss with every spoonful.
Why You’ll Fall in Love with This No-Bake Chocolate Cheesecake
This recipe isn’t just about making a dessert; it’s about crafting an experience. Here’s why this no-bake chocolate cheesecake will quickly become your go-to recipe:
- Effortless Elegance: Achieve a sophisticated, bakery-quality dessert without the need for an oven or complex techniques. It’s perfect for beginner bakers and seasoned pros alike.
- Pure Chocolate Indulgence: With a generous amount of dark chocolate in both the filling and the ganache, this cheesecake delivers an intense, satisfying cocoa flavor that true chocolate lovers crave.
- Irresistible Oreo Crust: The crushed Oreo cookie crust provides a delightful textural contrast to the silky-smooth filling, adding a beloved flavor that’s hard to resist.
- Perfect for Any Occasion: Whether it’s a summer potluck, a holiday gathering, or a simple weeknight treat, this cheesecake is versatile and always a crowd-pleaser.
- Cool and Refreshing: As a no-bake dessert, it’s ideal for warmer months when turning on the oven is out of the question, offering a delightfully cool and refreshing treat.
Ingredients: Crafting Your Decadent Cheesecake
Quality ingredients are the cornerstone of any exceptional dessert. For this no-bake chocolate cheesecake, each component plays a vital role in achieving its rich flavor and perfect texture. Here’s a detailed look at what you’ll need, with notes on selection:
- For the Oreo Cookie Crust:
- 25 Oreo Cookies (approximately 1 standard package): These classic chocolate sandwich cookies provide the perfect balance of chocolate and cream, creating a sturdy and flavorful base. Any chocolate sandwich cookie can be substituted, but Oreos offer that iconic taste.
- ½ Stick | ¼ Cup | 55g Unsalted Butter, melted: Unsalted butter gives you control over the overall saltiness of the crust. Melting it ensures it binds the cookie crumbs together effectively, creating a firm base.
- For the Rich Chocolate Cheesecake Filling:
- 9oz | 250g High-Quality Dark Chocolate, chopped: The quality of your chocolate directly impacts the flavor of your cheesecake. Opt for a dark chocolate with 60-70% cocoa solids for a deep, rich flavor without excessive bitterness. Chopping it finely helps it melt evenly.
- 1⅔ Cup | 400ml Heavy Cream (also known as Double Cream or Whipping Cream): This is essential for achieving the cheesecake’s light yet rich texture. Ensure it’s very cold before whipping to achieve the best volume.
- 9oz | 250g Full-Fat Cream Cheese, softened: Use full-fat cream cheese for the creamiest, most luxurious texture. Ensure it’s at room temperature before mixing to prevent lumps and ensure a smooth filling.
- ½ Cup Powdered Sugar | Icing Sugar: Powdered sugar dissolves easily, contributing to the cheesecake’s smooth, silky texture without any grainy feel.
- For the Silky Chocolate Ganache Topping:
- 1 Cup | 250ml Heavy Cream: Used to create the smooth, pourable ganache.
- 9oz | 250g High-Quality Dark Chocolate, chopped: Again, the quality here is key for a glossy, flavorful ganache.
Essential Equipment for a Seamless Experience:
While this recipe is straightforward, having the right tools makes the process even smoother:
- Food Processor: Indispensable for quickly crushing the Oreo cookies into fine crumbs.
- 9-inch Springform Pan: The removable sides make it incredibly easy to release the cheesecake without damaging its perfect edges.
- Mixing Bowls: Several bowls will be needed for melting chocolate, whipping cream, and mixing the filling.
- Electric Mixer (Handheld or Stand Mixer) or Whisk: For whipping the heavy cream to soft peaks.
- Rubber Spatula: Ideal for folding ingredients gently and scraping down bowls.
- Small Saucepan (for melting butter) and Heatproof Bowl (for melting chocolate): Or a microwave-safe bowl if using a microwave.
Directions: Crafting Your No-Bake Masterpiece
Follow these detailed steps to create a show-stopping no-bake chocolate cheesecake that will impress everyone.
Step 1: Preparing the Irresistible Oreo Cookie Crust
The foundation of this decadent cheesecake begins with a perfectly crunchy and flavorful Oreo crust. This simple step sets the stage for the indulgence to come.
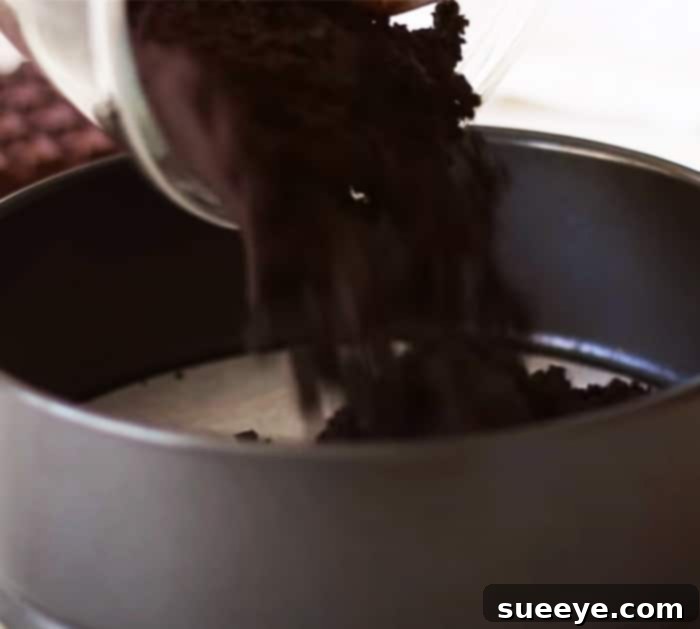
- Crush the Oreos: Place all 25 Oreo cookies (no need to remove the cream filling!) into a food processor. Process on high until the cookies are finely ground into even crumbs. Ensure there are no large chunks remaining, as this will affect the crust’s consistency.
- Melt the Butter: In a small saucepan over low heat or in a microwave-safe bowl, melt the ½ stick (¼ cup | 55g) of unsalted butter until it’s completely liquid. Be careful not to overheat it.
- Combine and Press: Pour the melted butter directly into the food processor with the Oreo crumbs (or transfer crumbs to a mixing bowl). Pulse a few times (or mix thoroughly with a spoon) until the crumbs are evenly moistened and resemble wet sand.
- Form the Crust: Line the bottom of a 9-inch springform pan with parchment paper for easy removal later. Pour the Oreo crumb mixture into the prepared pan. Using the back of a spoon or the bottom of a flat-bottomed glass, press the crumbs firmly and evenly across the bottom of the pan. Make sure it’s packed tightly to prevent crumbling when slicing.
- Chill to Set: Place the springform pan with the crust into the refrigerator for at least 30 minutes to allow the butter to firm up and the crust to set. This prevents the filling from making the crust soggy.
Step 2: Crafting the Silky Chocolate Cheesecake Filling
This is where the magic happens, transforming simple ingredients into a rich, velvety chocolate dream. Pay attention to temperatures and gentle mixing for the best results.
- Prepare the Chocolate: Finely chop the 9oz (250g) of dark chocolate and place it in a heatproof bowl.
- Melt the Chocolate: You can melt the chocolate using a double boiler method (placing the bowl over a saucepan of simmering water, ensuring the bowl doesn’t touch the water) or in a microwave. If using a microwave, heat in 20-30 second intervals, stirring well after each, until smooth and fully melted. Allow the melted chocolate to cool slightly to room temperature, but don’t let it solidify again. This is crucial for preventing the filling from seizing when mixed with cooler ingredients.
- Whip the Heavy Cream: In a large, medium-sized mixing bowl, pour the 1⅔ cups (400ml) of very cold heavy cream. Using an electric mixer or a whisk, beat the cream on medium-high speed until it forms soft peaks. Be careful not to over-whip it, as it can turn grainy.
- Combine Cream Cheese and Sugar: In another large mixing bowl, add the 9oz (250g) of softened full-fat cream cheese and ½ cup of powdered sugar. Beat with an electric mixer (or vigorously with a whisk) until the mixture is completely smooth, creamy, and free of any lumps. Scrape down the sides of the bowl as needed.
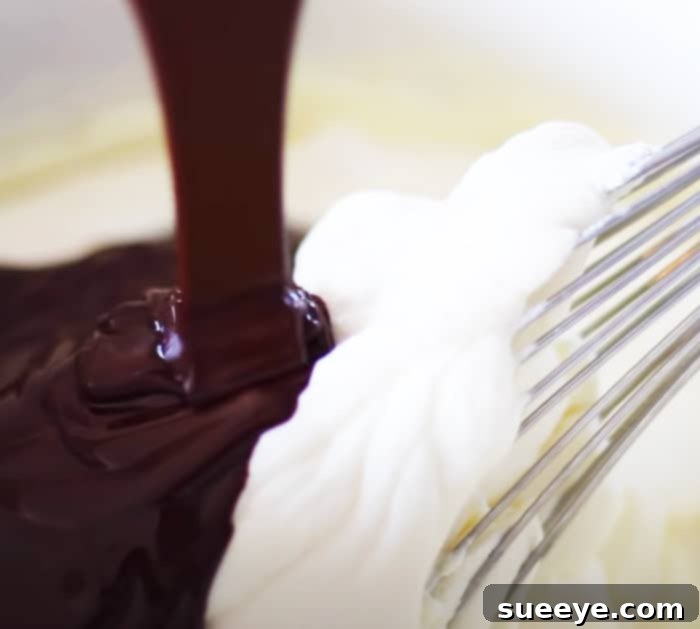
- Gently Fold in Flavors: Pour the slightly cooled melted chocolate into the cream cheese mixture and mix gently until just combined. Then, carefully fold in the softly whipped heavy cream using a rubber spatula. Use a light hand and fold from the bottom up to retain as much air as possible in the mixture, which contributes to the cheesecake’s light texture. Mix only until no streaks of cream or chocolate remain.
Step 3: Assembling and Chilling Your No-Bake Cheesecake
The assembly is quick, but patience with chilling is key to achieving that perfect slice.
- Fill the Crust: Retrieve the chilled Oreo crust from the refrigerator. Carefully pour the chocolate cheesecake mixture over the crust, spreading it evenly with your rubber spatula. Gently tap the pan a few times on the counter to release any trapped air bubbles and ensure a smooth top.
- Chill to Perfection: Place the cheesecake back into the refrigerator to firm up. It will need a minimum of 4-6 hours, but ideally, leave it overnight (8 hours or more) for the best results. This allows the filling to set completely, ensuring clean slices and a stable structure.
Step 4: Crafting the Silky Chocolate Ganache Topping
A glossy, smooth chocolate ganache is the crowning glory of this cheesecake, adding another layer of rich chocolate flavor and an elegant finish. This step was only hinted at in the original, so here are the full instructions.
- Prepare for Ganache: Once your cheesecake has thoroughly chilled and set, begin preparing the ganache. Finely chop the remaining 9oz (250g) of dark chocolate and place it in a clean heatproof bowl.
- Heat the Cream: In a small saucepan, heat the 1 cup (250ml) of heavy cream over medium heat until it just begins to simmer around the edges. Do not let it boil vigorously.
- Pour and Wait: Immediately pour the hot cream over the chopped chocolate in the heatproof bowl. Let it sit undisturbed for 5 minutes. This allows the heat from the cream to melt the chocolate.
- Stir to Smoothness: After 5 minutes, gently whisk the chocolate and cream together, starting from the center and working your way outwards, until the mixture is completely smooth, glossy, and uniform.
- Cool Slightly: Allow the ganache to cool for about 10-15 minutes at room temperature, stirring occasionally, until it reaches a thick, pourable consistency. It should not be too hot (which could melt the cheesecake) or too thick (which makes it difficult to spread).
- Top the Cheesecake: Carefully pour the cooled ganache over the fully chilled chocolate cheesecake. Gently tilt the pan or use an offset spatula to spread the ganache evenly to the edges, creating a beautiful, smooth layer.
- Final Chill: Return the cheesecake to the refrigerator for another 30-60 minutes to allow the ganache to set.
This final layer of ganache truly completes the recipe, giving the cheesecake a polished, professional look. The combination reminds many of a luxurious chocolate mousse, yet with the satisfying density of a cheesecake.
Expert Tips for No-Bake Cheesecake Success:
- Room Temperature Cream Cheese: Always ensure your cream cheese is at room temperature. This is essential for a smooth filling, as cold cream cheese will create lumps that are difficult to remove.
- Don’t Overmix: Once you add the melted chocolate and whipped cream to the cream cheese mixture, mix just until combined. Overmixing can deflate the whipped cream, resulting in a dense rather than airy cheesecake.
- Cool Chocolate: Ensure the melted chocolate has cooled slightly before adding it to the cream cheese mixture. Hot chocolate can cause the cream cheese to seize or melt the whipped cream.
- Chill Time is Crucial: The minimum chill time is 4-6 hours, but for the best texture and easiest slicing, an overnight chill is highly recommended. Patience here yields perfect results.
- Clean Slices: For perfectly clean slices, dip a sharp knife in hot water and wipe it clean before each cut.
Serving Suggestions & Creative Variations:
While this decadent chocolate cheesecake is spectacular on its own, a few additions can elevate the experience even further:
- Classic Pairing: Serve with a cold glass of milk, almond milk, or a strong cup of coffee or espresso to balance the richness.
- Fresh Berries: A scattering of fresh raspberries, strawberries, or blueberries adds a beautiful pop of color and a tart counterpoint to the sweet chocolate.
- Whipped Cream: A dollop of freshly whipped cream can enhance the luxurious feel.
- Dusting of Cocoa: A light dusting of unsweetened cocoa powder or chocolate shavings makes for an elegant garnish.
- Mint Leaves: For a touch of sophistication and a hint of freshness, a few mint leaves can be a lovely addition.
- Espresso Kick: Add 1-2 teaspoons of instant espresso powder to the chocolate cheesecake filling for a deeper, more complex mocha flavor.
- White Chocolate Swirl: Instead of a dark chocolate ganache, consider a white chocolate ganache swirl, or drizzle both for a striking visual.
This no-bake chocolate cheesecake isn’t just a dessert; it’s an unforgettable experience. Its ease of preparation, combined with its incredibly rich and satisfying flavor, makes it a perfect choice for any occasion. Whether you’re a seasoned baker or just starting, this recipe promises a show-stopping result that will have everyone asking for seconds. So go ahead, treat yourself and your loved ones to this ultimate chocolate delight. You won’t regret it!