
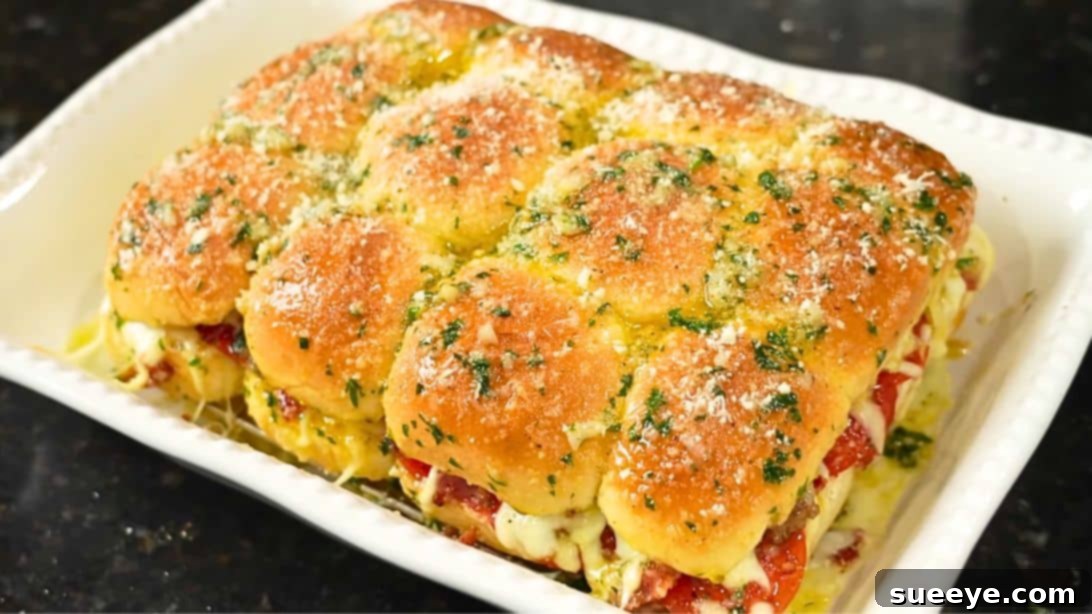
Irresistible Meat Lover’s Pizza Sliders: The Ultimate Party Appetizer Recipe
Prepare to delight your taste buds with these incredible Meat Lover’s Pizza Sliders! Perfectly portioned, packed with savory meats and gooey cheese, all nestled in soft Hawaiian sweet rolls, these sliders are an absolute game-changer for any occasion. Whether you’re hosting a lively game day gathering, enjoying a cozy movie night with the family, or bringing a show-stopping dish to a potluck, these pizza sliders are guaranteed to be the star of the spread. They offer all the beloved flavors of a classic meat lover’s pizza in a convenient, shareable format that’s impossible to resist.
Forget complicated recipes; these sliders are surprisingly simple to assemble, making them a fantastic choice for home cooks of all skill levels. With a few straightforward steps, you’ll create a dish that looks impressive and tastes even better. Expect compliments galore when you serve these delightful bites – they truly are the ultimate crowd-pleaser. Get ready to dive into this ultimate guide and learn how to make these fan-favorite sliders today!
Why You’ll Love This Easy Pizza Slider Recipe
There’s a reason these Meat Lover’s Pizza Sliders become an instant hit wherever they go. Here’s what makes them truly special:
- Unbeatable Flavor: Layers of seasoned Italian sausage, crispy bacon, and spicy pepperoni, combined with rich pizza sauce and melted mozzarella, create a symphony of flavors in every bite.
- Effortless to Make: Despite their gourmet appeal, these sliders are incredibly easy to prepare. Most of the work involves simple assembly, making them perfect for busy hosts.
- Crowd-Pleasing Perfection: From kids to adults, everyone adores pizza. These sliders take that universal love and package it into a fun, easy-to-eat format that disappears quickly at parties.
- Versatile for Any Occasion: Ideal for game days, casual dinners, potlucks, birthday parties, or even a quick weeknight meal. They fit seamlessly into any event.
- Customizable: While this recipe focuses on a “meat lover’s” theme, it’s easily adaptable. You can add more veggies, different cheeses, or even a different type of sauce to suit any preference.
- Make-Ahead Friendly: Assemble them in advance and bake just before serving, allowing you more time to enjoy your guests and less time in the kitchen.
Essential Ingredients for Your Meat Lover’s Pizza Sliders
Crafting the perfect pizza slider starts with high-quality ingredients. Here’s what you’ll need to create this incredibly savory and cheesy dish. We’ll break down the components for the sliders themselves and the homemade pizza sauce.
For the Irresistible Sliders:
- Hawaiian Sweet Rolls: The foundation of our sliders. Their slightly sweet and soft texture perfectly complements the savory fillings. Look for a pack of 12 or 24 connected rolls for easy slicing.
- Mozzarella Cheese, shredded: The ultimate melting cheese for pizza. Use low-moisture, part-skim mozzarella for the best gooey stretch. You’ll need a generous amount for two layers of cheesy goodness.
- Pepperoni Slices: A classic pizza topping that crisps up beautifully and adds a lovely spicy, salty kick.
- ½ pound Italian Sausage: Opt for mild or hot Italian sausage, depending on your spice preference. Ground sausage will be cooked and crumbled, adding a rich, savory depth to the sliders.
- 4-6 strips Bacon: Crispy bacon bits contribute a smoky, salty crunch that elevates the flavor profile significantly.
- 1 stick (½ cup) Unsalted Butter: Melted butter forms the base of our fragrant garlic-herb topping, adding moisture and incredible flavor to the buns.
- ¼ cup Fresh Parsley, chopped: Brightens the dish with a fresh, herbaceous note and a pop of color. Flat-leaf parsley is recommended.
- 1 tablespoon Minced Garlic: Fresh garlic is key for the garlic butter topping, infusing the rolls with aromatic deliciousness.
- Garlic and Herb Seasoning: A versatile blend that enhances the savory notes of the meats and cheese. Adjust to your taste.
- Hot Honey Seasoning, optional: For those who love a sweet and spicy kick, a sprinkle of hot honey seasoning adds an exciting layer of flavor.
- All-Purpose Seasoning: Used to season the Italian sausage and the pizza sauce, providing a foundational savory flavor.
- Grated Parmesan Cheese: A final flourish for serving, adding a salty, umami kick and a beautiful presentation.
For the Rich Homemade Pizza Sauce:
While store-bought pizza sauce works in a pinch, taking a few extra minutes to whip up this flavorful homemade version truly makes a difference. It’s incredibly easy and elevates the entire slider experience.
- 2 tablespoons Tomato Paste: Concentrated tomato flavor forms a robust base for the sauce.
- 1 tablespoon Garlic Paste: Provides a deep, mellow garlic flavor without the sharpness of raw minced garlic.
- 1 tablespoon Italian Herb Paste: A convenient way to add a complex blend of Italian herbs to the sauce.
- 2 tablespoons Olive Oil: Used for sautéing the pastes and building the sauce’s flavor.
- 1 (32-ounce) can Tomato Sauce: The main liquid component of our sauce, providing a smooth texture.
- 1 tablespoon Granulated Sugar: Balances the acidity of the tomatoes and enhances their natural sweetness.
- ½ teaspoon Dried Oregano: Essential for that classic pizza flavor profile.
- Additional Seasonings (optional): Feel free to add a pinch of dried basil, red pepper flakes for heat, or a dash of onion powder to customize your sauce.
How to Create the Ultimate Meat Lover’s Pizza Sliders: A Step-by-Step Guide
Follow these detailed instructions to assemble your mouth-watering pizza sliders. Each step is designed for clarity and delicious results.
Step 1: Prepare the Crispy Bacon
Begin by cooking your bacon until it’s perfectly crisp. Lay the bacon strips in a cold pan and cook over medium heat, flipping occasionally, until they reach your desired level of crispiness. This low and slow method helps render the fat effectively, resulting in perfectly crisp bacon. Once cooked, transfer the bacon strips to a plate lined with paper towels to drain off any excess grease. This is crucial for preventing soggy sliders. Allow the bacon to cool completely before chopping it into small, manageable pieces. Set aside.
Step 2: Brown the Italian Sausage
Using the same pan where you cooked the bacon (this adds extra flavor from the bacon fat!), add your Italian sausage meat. Break the sausage apart with a spoon or spatula as it cooks, mashing it as finely as possible to ensure even browning. Cook over medium heat until the sausage is fully browned and cooked through, with no pink remaining. Drain off any accumulated grease – this is important to prevent the sliders from becoming too oily. Transfer the cooked and crumbled sausage to a separate plate or bowl and set it aside to cool slightly.
Step 3: Begin Your Flavorful Pizza Sauce Base
Place a clean saucepan or pot over medium-low heat. Add the olive oil, followed by the tomato paste, garlic paste, and Italian herb paste. Stir these ingredients well, gently toasting them for about 2-3 minutes. This step, known as blooming the pastes, deepens their flavor and releases their aromatics, creating a richer sauce base.
Step 4: Simmer and Season the Pizza Sauce
Pour in the canned tomato sauce, stirring continuously to thoroughly combine all the ingredients. Add the all-purpose seasoning, dried oregano, and granulated sugar. The sugar helps to balance the acidity of the tomatoes, resulting in a perfectly rounded flavor. Stir vigorously until all seasonings are fully incorporated and the sauce is uniform. Taste and adjust seasonings as needed; you might want to add a pinch of salt, black pepper, or a dash of red pepper flakes for a subtle heat.
Step 5: Develop Sauce Flavor and Prepare Garlic Butter
Bring the pizza sauce to a gentle simmer over low heat and let it cook for about 15 to 20 minutes, stirring occasionally. This simmering time allows the flavors to meld and deepen, resulting in a more complex and delicious sauce. While the sauce simmers, prepare the garlic butter topping. In a separate small pan or microwave-safe bowl, melt the stick of unsalted butter. Once melted, stir in the minced garlic and, if using, the hot honey seasoning. Mix well until fragrant. Finally, fold in the freshly chopped parsley, ensuring it’s evenly distributed. Set this flavorful garlic butter aside.
Step 6: Prepare the Sweet Rolls for Layering
Preheat your oven to 400°F (200°C). Using a serrated knife, carefully slice the entire block of Hawaiian sweet rolls horizontally through the middle, separating the top halves from the bottom halves. It’s much easier to do this in one go rather than slicing individual rolls. Gently remove the top half of the buns and set them aside. Place the bottom layer of the buns into a baking dish (typically 9×13 inches works well). For best results and to prevent soggy bottoms, you can line the baking dish with parchment paper or a small wire rack, if available. Evenly spread a generous layer of your homemade pizza sauce over the bottom half of the buns, ensuring every roll is covered. Then, sprinkle a generous amount of shredded mozzarella cheese over the sauce.
Step 7: Layer on the Meats and More Cheese
Now, it’s time for the “meat lover’s” magic! Arrange a single layer of pepperoni slices over the mozzarella cheese. Next, evenly distribute the cooked and crumbled Italian sausage over the pepperoni. Finally, sprinkle the chopped crispy bacon bits over the sausage. To enhance the flavor further, lightly sprinkle some garlic and herb seasoning (or your preferred seasoning) over the meat layers. Top this magnificent meaty stack with another generous layer of shredded mozzarella cheese. Carefully place the top half of the buns back over the layered fillings, aligning them as best as possible.
Step 8: Bake to Golden Perfection and Finish
Place the baking dish containing your assembled sliders into the preheated oven. Bake for approximately 10 minutes, or until the cheese is melted and bubbly, and the tops of the rolls are lightly golden. Halfway through baking, or right after the initial 10 minutes, carefully remove the sliders from the oven. Using a pastry brush, liberally brush the prepared garlic butter mixture over the tops of the buns. This step adds incredible flavor and a beautiful sheen. Return the sliders to the oven for another 2-5 minutes, just until the garlic butter is absorbed and the tops are perfectly golden and fragrant. Once baked, remove from the oven, sprinkle with some grated Parmesan cheese for a final touch, then serve immediately. Enjoy these warm, cheesy, and meaty delights!
Tips for Achieving the Perfect Pizza Sliders Every Time
Even though these sliders are easy to make, a few expert tips can take them from great to absolutely extraordinary:
- Don’t Skip the Homemade Sauce: While convenient, pre-made sauce can’t compare to the depth of flavor you get from making your own. It’s worth the extra few minutes.
- Crispy Bacon is Key: Ensure your bacon is truly crispy before chopping. Soft bacon can make the sliders soggy.
- Drain the Fats: Always drain excess grease from both the bacon and Italian sausage. This prevents the sliders from becoming greasy and heavy.
- Serrated Knife for Rolls: A serrated knife makes slicing the block of rolls horizontally much easier and cleaner, keeping them intact.
- Generous Cheese Layers: Don’t be shy with the cheese! It acts as a binder and provides that satisfying gooey texture.
- Brush with Garlic Butter Before Baking (or during): Brushing the tops of the rolls with the garlic butter about halfway through baking allows the butter to soak into the bread, infusing it with flavor without making it too greasy.
- Prevent Soggy Bottoms: To ensure the bottom buns don’t get soggy, you can lightly toast them in a dry pan for a few minutes before adding the sauce, or place the assembled sliders on a wire rack within the baking dish.
- Customize Your Meats: Feel free to experiment with other cooked meats like ground beef, shredded chicken, or ham to vary the “meat lover’s” experience.
- Don’t Overbake: Overbaking can dry out the rolls and make the cheese rubbery. Keep an eye on them; once the cheese is bubbly and melted, they’re ready.
Delicious Variations & Customizations
While the Meat Lover’s Pizza Sliders are fantastic as is, feel free to get creative and customize them to your liking:
- Veggie Lover’s Sliders: Omit the meat and load up on sautéed mushrooms, bell peppers, onions, spinach, and olives.
- Chicken Bacon Ranch Sliders: Use shredded cooked chicken, crispy bacon, a drizzle of ranch dressing, and Monterey Jack cheese.
- Spicy Italian Sliders: Add hot Italian sausage, extra red pepper flakes to the sauce, and top with slices of jalapeño or banana peppers.
- Hawaiian Pizza Sliders: Include diced ham and pineapple chunks along with the mozzarella.
- Cheeses: Experiment with provolone, cheddar, Colby Jack, or a blend of Italian cheeses alongside mozzarella for different flavor profiles.
- Sauce Swaps: Try a white garlic sauce, pesto, or even a BBQ sauce for a unique twist.
Serving Suggestions for Your Pizza Sliders
These pizza sliders are a meal in themselves, but they pair wonderfully with a few simple sides:
- Fresh Green Salad: A light, crisp salad with a vinaigrette dressing provides a refreshing contrast to the rich sliders.
- Soup: A classic tomato soup or minestrone makes a comforting pairing.
- Extra Dipping Sauce: Offer extra pizza sauce, ranch dressing, or a marinara for dipping.
- Fries or Tater Tots: For a true game day spread, serve alongside your favorite crispy potato sides.
Storage and Reheating Instructions
Leftover pizza sliders, while rare, can be stored and reheated:
- Refrigeration: Store any leftover sliders in an airtight container in the refrigerator for up to 2-3 days.
- Reheating: For best results, reheat sliders in a preheated oven or air fryer at 300°F (150°C) for 10-15 minutes, or until warmed through and the cheese is melted again. Microwaving is an option, but the buns might become soft.
- Freezing: While possible, freezing may alter the texture of the buns. If freezing, wrap individual sliders tightly in plastic wrap and then aluminum foil. Reheat from frozen in the oven at 350°F (175°C) for 20-30 minutes.
There you have it! A comprehensive guide to making the most delicious Meat Lover’s Pizza Sliders that are sure to be a hit with everyone. This recipe balances ease of preparation with incredible flavor, making it a staple for any home cook looking to impress. So gather your ingredients, follow these steps, and get ready to enjoy the ultimate comfort food experience.
Give this recipe a try and let us know how your sliders turn out! Happy cooking!
*All image credit belongs to Mr. Make It Happen via YouTube. Follow and subscribe to his channel for more!