
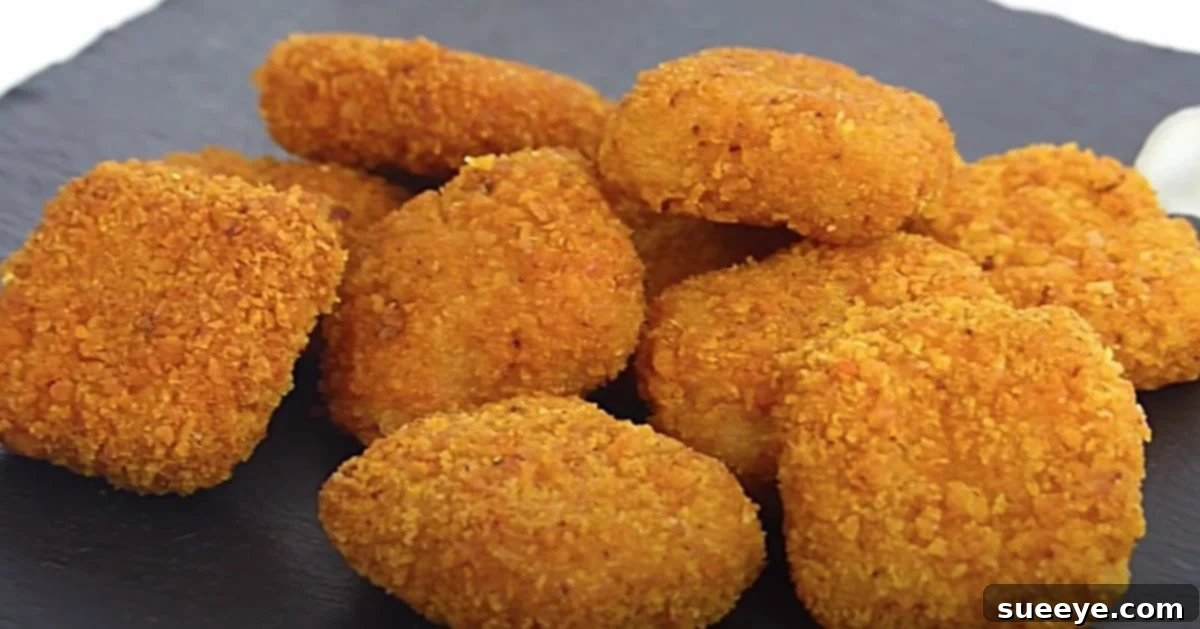
Mastering Homemade Chicken Nuggets: Your Guide to Crispy Perfection
In a world increasingly leaning towards healthier, more mindful eating, the allure of preparing our favorite comfort foods from scratch has never been stronger. Chicken nuggets, a beloved classic for both children and adults, often conjure images of fast-food convenience. However, the satisfaction and superior taste of homemade chicken nuggets are unparalleled. Moving away from highly processed options and embracing natural food preparation not only makes culinary sense but also ensures you have complete control over the ingredients. This comprehensive guide will walk you through crafting delicious, crispy chicken nuggets right in your own kitchen, a recipe inspired by excellent online tutorials that simplify the process. Get ready to transform simple ingredients into a golden-brown, flavorful treat that rivals any restaurant version!
Why Choose Homemade Chicken Nuggets?
The decision to make your own chicken nuggets goes beyond just saving a trip to the drive-thru. It’s about quality, health, and customization. When you prepare nuggets at home, you eliminate artificial preservatives, excessive sodium, and unhealthy fats often found in commercial products. You get to select high-quality, lean chicken breast, choose your preferred spices, and control the breading to achieve that perfect crispy texture. This means a healthier meal for your family without compromising on taste. Moreover, the process of creating something so universally loved from scratch is incredibly rewarding. It allows for creative variations and dietary adjustments, such as gluten-free breading or leaner cooking methods, truly making this a versatile and beneficial recipe to master.
Essential Equipment for Nugget Success
Before diving into the recipe, ensure you have the right tools at hand. While some steps can be done manually, certain equipment will significantly simplify the process and enhance the outcome of your homemade chicken nuggets:
- Food Processor: This is arguably the most crucial tool for this recipe. It efficiently grinds the chicken breast and other ingredients into a fine, paste-like consistency, which is key to achieving that authentic nugget texture. If you don’t have one, a meat grinder can also work, or you can finely mince the chicken by hand, though it will require more effort.
- Large Mixing Bowl: For combining the ground chicken mixture with spices and binders.
- Cutting Board: Essential for forming and cutting the nuggets.
- Shallow Dishes or Trays: For setting up your breading station (egg wash, breadcrumbs).
- Deep Pot or Dutch Oven: If you plan to deep fry, a sturdy pot with high sides is vital for safety and effective frying.
- Slotted Spoon or Spider Strainer: For safely adding and removing nuggets from hot oil.
- Wire Rack: Placed over a baking sheet, this allows excess oil to drain from the fried nuggets, keeping them crispy.
- Meat Thermometer or Candy Thermometer: Crucial for monitoring oil temperature for perfect frying.
Ingredients for the Ultimate Homemade Chicken Nuggets
Crafting these delectable nuggets requires a thoughtful selection of ingredients. Each component plays a vital role in achieving the desired flavor and texture. Here’s a detailed breakdown of what you’ll need:
- Boneless Chicken Breast (500 grams): The foundation of our nuggets. Opt for fresh, high-quality chicken breast. You can also use boneless, skinless chicken thighs for a slightly richer flavor and more tender texture, though the breast offers a leaner option. Ensure any excess fat or sinew is trimmed before processing.
- White Bread (4 slices, preferably stale or day-old): This acts as a binder and helps create that classic, soft interior texture. Stale bread works best as it absorbs less moisture. You can lightly toast fresh bread if needed.
- Ginger Paste (1/2 tablespoon): Adds a warm, aromatic, and slightly pungent flavor that complements the chicken beautifully. Freshly grated ginger can be used as an alternative for a more potent zest.
- Garlic Paste (1/2 tablespoon): A staple in many savory dishes, garlic paste provides a robust, foundational flavor. Again, fresh minced garlic works wonderfully if paste isn’t available.
- Soy Sauce (1/2 tablespoon): Introduces an umami depth and a touch of saltiness, enhancing the overall savory profile of the nuggets. Use a low-sodium variety if preferred.
- White Pepper Powder (1 tablespoon): Offers a milder, more subtle peppery heat compared to black pepper, which is ideal for the delicate flavor of chicken nuggets.
- Paprika Powder (1/2 tablespoon): Contributes a lovely mild flavor and a beautiful reddish hue to the mixture. Smoked paprika can be used for an extra layer of smoky flavor.
- Salt (1/2 teaspoon): Essential for seasoning. Adjust to taste, keeping in mind the soy sauce also contains salt.
- Medium Size Egg (1): Acts as a primary binder, helping to hold the chicken mixture together. It also forms part of the egg wash for breading.
- Milk (1 tablespoon): A small amount of milk helps to tenderize the chicken and adds a bit of moisture to the mixture.
- Breadcrumbs (1 cup for coating): These provide the glorious crispy exterior. For an extra crunch, consider using Panko breadcrumbs. You can elevate the flavor by seasoning your breadcrumbs with additional salt, pepper, garlic powder, onion powder, or even a touch of dried herbs like oregano or thyme.
- Cooking Oil (for deep frying): Choose an oil with a high smoke point, such as vegetable oil, canola oil, peanut oil, or sunflower oil. Ensure you have enough to submerge the nuggets for even frying.
Step-by-Step Culinary Journey: Crafting Your Perfect Nuggets
This recipe transforms simple chicken breast into a truly extraordinary culinary delight. Follow these detailed steps for guaranteed success:
Step 1: Preparing the Chicken Mixture
- Prepare the Chicken: Start by thoroughly washing the boneless chicken breast and patting it completely dry with paper towels. Trim off any visible fat or sinew. Cut the chicken into 1-inch cubes to ensure it processes evenly.
- Process the Base: Tear the 4 slices of white bread into smaller pieces and place them into your food processor. Pulse a few times until they form fine crumbs. Remove the breadcrumbs and set aside.
- Grind the Chicken: Add the cubed chicken breast to the food processor. Process until the chicken is finely minced and forms a smooth, paste-like consistency. This is crucial for achieving the tender, cohesive texture of a classic nugget.
- Combine Ingredients: To the ground chicken in the food processor, add the ginger paste, garlic paste, soy sauce, white pepper powder, paprika powder, and salt. Add the medium-sized egg and the tablespoon of milk. Process everything together until all ingredients are well combined and the mixture is smooth and uniform. This should only take about 30-60 seconds. Avoid over-processing, which can make the chicken tough.
In this excellent video tutorial, you will be guided step by step to prep your chicken breast meat by grinding up all the ingredients in the food processor. Then you will make a big patty on a cutting board then cut small nuggets out of the reconstituted chicken meat.
Step 2: Forming the Nuggets
- Shape the Mixture: Transfer the chicken mixture to a large bowl. Lightly oil your hands to prevent sticking. Take a portion of the chicken mixture and roll it into a ball, then flatten it slightly. You can shape them into traditional nugget forms, small patties, or even use cookie cutters for fun shapes. Aim for a consistent size to ensure even cooking.
- Chill for Firmness: Arrange the formed nuggets on a baking sheet lined with parchment paper. Place them in the refrigerator for at least 30 minutes. Chilling is a critical step; it helps the nuggets firm up, maintain their shape during breading, and prevents them from falling apart in the hot oil.
Step 3: Breading the Nuggets
- Set Up the Breading Station: Prepare three shallow dishes. In the first, place a small amount of all-purpose flour (optional, but helps the egg wash adhere). In the second dish, lightly whisk one extra egg (if needed, not part of the initial mixture) with a tablespoon of milk or water for an egg wash. In the third dish, spread out your seasoned breadcrumbs.
- Coat Each Nugget: Take one chilled nugget at a time. First, dredge it lightly in flour (if using), shaking off any excess. Then, dip it into the egg wash, ensuring it’s fully coated but not dripping. Finally, transfer it to the seasoned breadcrumbs, pressing gently to ensure an even and thorough coating on all sides. Repeat for all nuggets.
Then, you will dredge your lovely mini chicken nuggets in the homemade bread crumb mixture and then deep fry in your favorite variety of cooking oil until the nuggets are a crispy golden brown.
Step 4: Frying to Golden Perfection
- Heat the Oil: In a deep pot or Dutch oven, pour enough cooking oil to submerge the nuggets. Heat the oil over medium-high heat until it reaches a temperature of 350-375°F (175-190°C). Use a meat or candy thermometer to monitor the temperature accurately.
- Fry the Nuggets: Carefully place a few breaded nuggets into the hot oil, ensuring not to overcrowd the pot. Fry them in batches to maintain the oil temperature. Fry for 3-5 minutes, turning occasionally, until they are golden brown and crispy on the outside and cooked through internally (an internal temperature of 165°F or 74°C).
- Drain and Serve: Once cooked, remove the nuggets with a slotted spoon or spider strainer and transfer them to a wire rack placed over a baking sheet to drain excess oil. Serve immediately with your favorite dipping sauces!
Tips for the Crispiest, Most Flavorful Nuggets
- Don’t Overcrowd the Fryer: Frying in small batches is essential. Overcrowding the pot will drop the oil temperature, leading to greasy, soggy nuggets instead of crispy ones.
- Maintain Oil Temperature: Use a thermometer to keep the oil between 350-375°F (175-190°C). Too low, and they’ll soak up oil; too high, and they’ll burn on the outside before cooking through.
- Season Everything: Don’t just season the chicken mixture; make sure to season your breadcrumbs too. This layers the flavor and makes every bite exciting.
- Chill Time is Key: The refrigeration step firms up the nuggets, making them easier to handle and ensuring they hold their shape during frying. Don’t skip it!
- Drain Properly: Always place fried items on a wire rack over a baking sheet. Paper towels can make the bottom soggy by trapping steam.
- Double Breading (Optional): For an extra thick and crispy crust, after the first breading, you can dip the nugget back into the egg wash and then into the breadcrumbs again.
Serving Suggestions & Dipping Delights
Homemade chicken nuggets are fantastic on their own, but they truly shine when paired with the right accompaniments. Classic dipping sauces like ketchup and BBQ sauce are always a hit. For something a little different, try homemade honey mustard, sweet chili sauce, or a creamy ranch dressing. Don’t forget to offer a variety of sides! Crispy French fries or sweet potato fries are perfect companions, while a fresh green salad, steamed vegetables, or a colorful coleslaw can balance out the meal. Get creative and explore different combinations to find your family’s favorite pairing!
Storage and Reheating Homemade Nuggets
Making a large batch of these delicious nuggets means you can enjoy them later! Here’s how to store and reheat them:
- Storing Raw Nuggets: If you’re not frying all the nuggets immediately, arrange the breaded, uncooked nuggets on a baking sheet lined with parchment paper and freeze them until solid (about 2-3 hours). Once frozen, transfer them to an airtight freezer-safe bag or container. They can be stored for up to 2-3 months. Fry directly from frozen, adding a few extra minutes to the cooking time.
- Storing Cooked Nuggets: Allow cooked nuggets to cool completely. Store them in an airtight container in the refrigerator for up to 3-4 days.
- Reheating Cooked Nuggets: For best results, avoid the microwave, which can make them soggy. Reheat in an oven or air fryer at 350°F (175°C) for 10-15 minutes, or until heated through and crispy again.
Variations and Customizations
This recipe provides a fantastic base, but don’t hesitate to customize it to your taste! Here are a few ideas:
- Spicy Nuggets: Add a pinch of cayenne pepper or red chili flakes to the chicken mixture for a kick.
- Herb-Infused: Mix dried Italian herbs, thyme, or oregano into the chicken mixture or the breadcrumbs for an aromatic twist.
- Cheese-Stuffed: Gently press a small cube of cheddar or mozzarella cheese into the center of each nugget before forming and breading for a delightful surprise.
- Gluten-Free: Substitute white bread with gluten-free bread and use gluten-free breadcrumbs for a dietary-friendly version.
- Baked Not Fried: For a lighter option, you can bake the nuggets. Preheat your oven to 400°F (200°C), lightly spray the breaded nuggets with cooking oil, and bake for 15-20 minutes, flipping halfway, until golden and cooked through. An air fryer is also an excellent option for a crispy, less oily result.
Conclusion
There’s immense satisfaction in preparing classic dishes from scratch, and homemade chicken nuggets are no exception. This recipe offers a delightful alternative to fast-food versions, allowing you to enjoy a healthier, more flavorful, and truly personalized treat. From grinding the chicken to achieving that perfect golden crunch, every step is a rewarding part of the culinary journey. So, gather your ingredients, fire up your food processor, and get ready to impress your taste buds and loved ones with the ultimate batch of crispy, delicious homemade chicken nuggets. Happy cooking!