
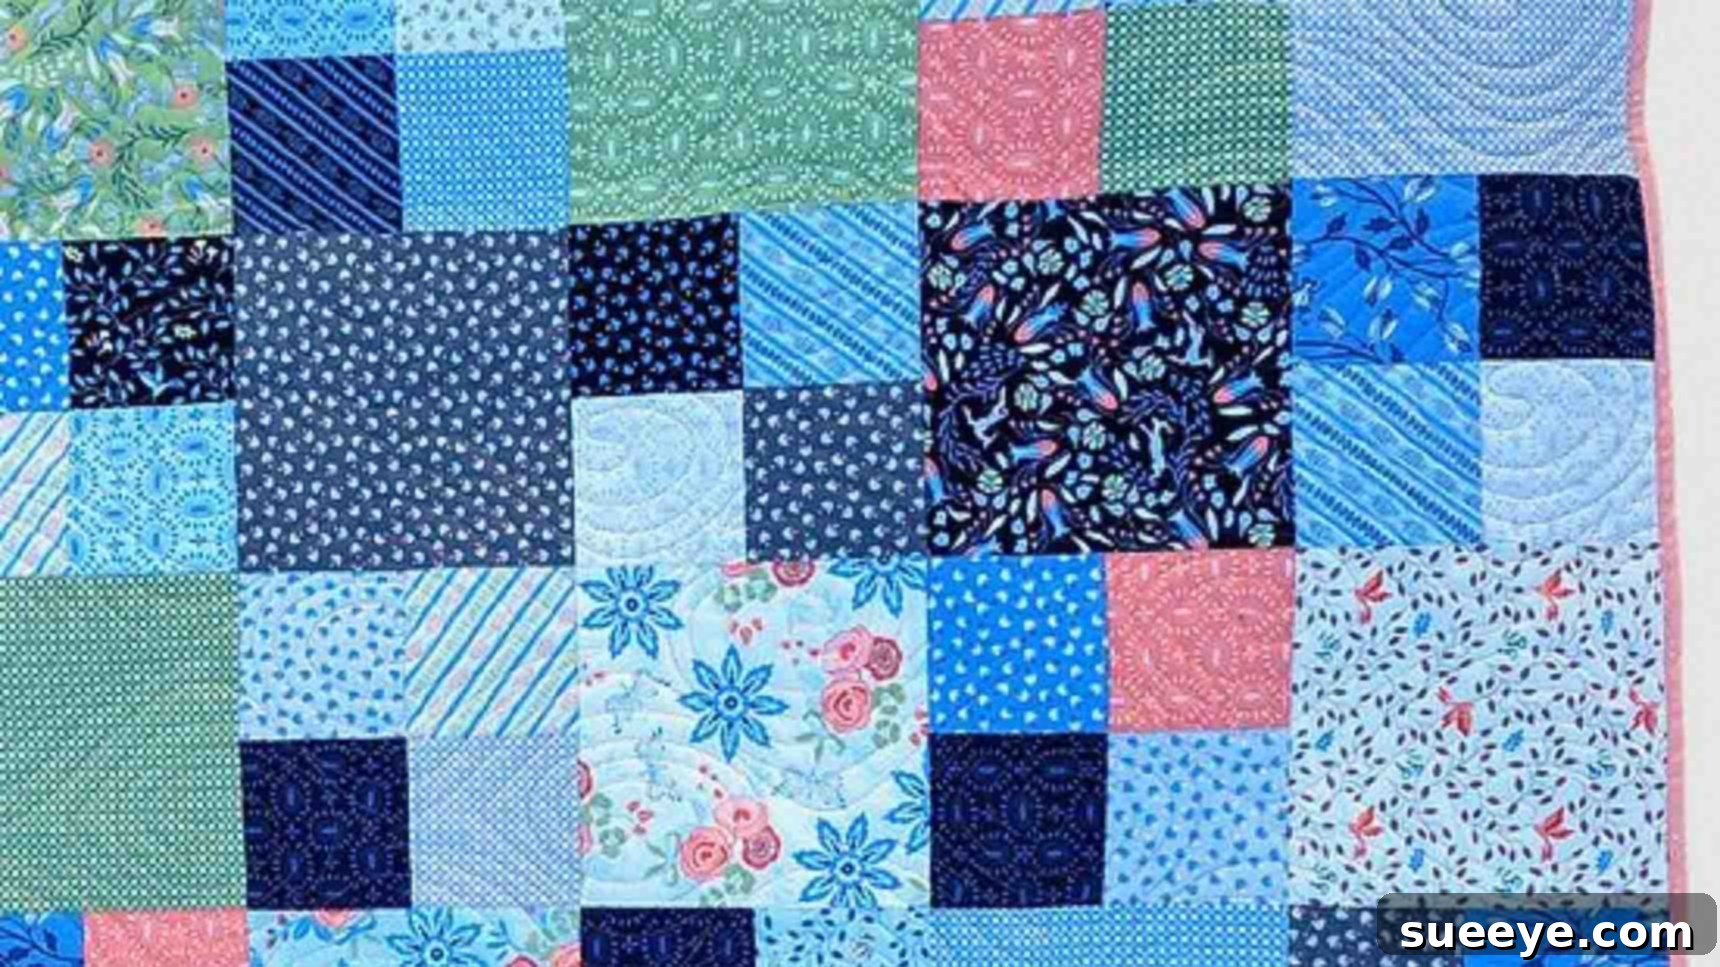
Are you searching for a quilt project that combines speed, simplicity, and immense satisfaction? Look no further! This detailed guide will walk you through creating a beautiful Snippet Four-Patch Quilt, a fantastic project that can be completed in as little as a single day. Inspired by the brilliant tutorial from Moonkin Stitchery on YouTube, this quilt is designed to be incredibly easy, making it perfect for quilting beginners. Even seasoned quilters will appreciate its straightforward approach and the joy of a quick finish. The best part? It primarily uses pre-cut layer cakes, which significantly simplifies fabric selection and cutting, allowing you to dive straight into the fun of sewing. Get ready to transform lovely fabric squares into a cozy and charming throw quilt with our comprehensive, step-by-step instructions.
Why the Snippet Four-Patch Quilt is Perfect for You
The Snippet Four-Patch Quilt stands out as an exceptional project for several compelling reasons. Its core appeal lies in its beginner-friendliness and rapid completion time, making it an ideal entry point into the rewarding world of quilting or a refreshing palate cleanser for experienced sewists. The classic four-patch block is a foundational element in quilting, universally recognized for its versatility and timeless charm. Mastering this simple block builds confidence and opens doors to countless other quilt designs, laying a solid groundwork for future quilting adventures.
Furthermore, the reliance on 10-inch pre-cut fabric squares, commonly known as “layer cakes,” is a true game-changer. Layer cakes eliminate the tedious and time-consuming process of cutting individual fabric pieces from yardage. They often come in coordinated collections, ensuring your quilt has a cohesive and aesthetically pleasing look without the stress of matching fabrics. This not only speeds up the project but also helps guarantee a professional and harmonious finish, even for novices. Imagine starting your day with a stack of beautiful, perfectly cut fabrics and ending it with a completed quilt top – that’s the delightful promise of the Snippet Four-Patch Quilt!
Beyond its practicality, this project is incredibly rewarding. There’s a unique sense of accomplishment that comes with creating something beautiful and functional with your own hands. Whether you’re making it for yourself to add a touch of handmade comfort to your home, as a thoughtful gift for a loved one, or for a charitable cause, the Snippet Four-Patch Quilt is a project that delivers joy from start to finish. It’s a wonderful way to express creativity without getting bogged down by complex techniques. Let’s gather our materials and embark on this exciting and satisfying quilting journey together.
Essential Materials for Your Throw Size Quilt
To create a cozy and beautiful throw-sized Snippet Four-Patch Quilt, you’ll need a selection of quality materials. Choosing the right supplies is the first step towards a successful and enjoyable quilting experience. The quantities listed below are specifically for a throw quilt, but remember you can adjust them for larger or smaller projects as needed. Investing in good quality materials will ensure your quilt is durable and comfortable for years to come.
- 42 – 10″ Print Fabric Squares (Layer Cakes): These pre-cut squares are the heart of your quilt. Opt for a coordinated collection to ensure your finished quilt has a harmonious and visually appealing look. The beauty of layer cakes is that the fabrics are typically designed to complement each other perfectly.
- 1/2 Yard Binding Fabric: This fabric will frame your quilt, giving it a neat, professional edge, and protecting the raw edges. Choose a color that either complements your main fabrics or provides a striking contrast to make your quilt pop.
- 3 & 3/4 Yards Backing Fabric: The backing forms the underside of your quilt, adding another layer of softness and design. Flannel, minky, or a coordinating cotton print are all excellent choices. Consider a wide-back fabric to avoid piecing the backing, or choose two smaller cuts that you can sew together.
- 66″ x 75″ Batting: Batting provides the warmth, loft, and structure to your quilt. Common types include cotton (breathable, soft), polyester (lofty, quick-drying), wool (warm, lightweight), or blends, each offering different qualities in terms of drape, warmth, and care.
- (For a detailed cutting diagram and additional information, click here for the free pattern. This downloadable pattern will be an invaluable resource as you work through the steps, providing visual aids and specific measurements.)
Essential Tools for Quilting Success
Beyond your fabrics, having the right tools on hand will make your quilting process smoother, more accurate, and ultimately more enjoyable. While some tools are optional for very basic sewing, these are highly recommended for any quilting project, especially for beginners who are developing their skills and seeking precision:
- Sewing Machine: A reliable sewing machine with a quarter-inch foot attachment is crucial for achieving consistent seam allowances, which are fundamental to accurate quilt piecing.
- Rotary Cutter: A sharp rotary cutter (45mm or 60mm) is essential for precise, clean, and efficient fabric cutting, far superior to scissors for straight lines.
- Self-Healing Cutting Mat: Protect your work surface and your rotary blade with a large self-healing cutting mat. A mat with grid lines will also assist in accurate measuring.
- Quilting Rulers: A long ruler (like 6.5″ x 24″) and a smaller square ruler (such as 9.5″ or 12.5″) are invaluable for accurate cutting, squaring up blocks, and trimming. Clear acrylic rulers are best.
- Fabric Scissors: Keep a pair of sharp scissors exclusively for fabric to ensure clean cuts and prevent dulling.
- Iron and Ironing Board: Proper pressing is just as important as sewing for a flat, professional-looking quilt. A good steam iron is recommended.
- Pins or Fabric Clips: To hold fabric pieces together securely while sewing, especially when matching seams. Long, fine-tipped pins are often preferred for quilting.
- Coordinating Thread: High-quality 100% cotton thread is usually recommended for piecing quilts due to its strength and ability to blend with cotton fabrics.
- Seam Ripper: Every quilter needs one! Don’t be afraid to use it to correct mistakes and ensure perfect seams; even experienced quilters use them frequently.
Directions: Your Step-by-Step Guide to Quilting
Preparation: Getting Started on the Right Foot
Before you even make your first cut or stitch, a little preparation goes a long way towards a smooth and enjoyable quilting experience. Ensure your workspace is clean, well-lit, and organized. Gather all your materials and tools within easy reach. While pre-washing fabric is a personal choice for quilters, with pre-cuts like layer cakes, it’s often skipped to maintain their exact dimensions and factory crispness. However, if you choose to pre-wash, do so carefully to avoid excessive fraying. Make sure your sewing machine is threaded with fresh thread and has a clean bobbin, and your rotary cutter has a fresh, sharp blade for the cleanest, most accurate cuts.
Step 1: Crafting the Four-Patch Blocks
The four-patch block is the foundation of this quilt, and its creation is straightforward and repetitive, allowing you to get into a relaxing rhythm of cutting and sewing.
- Sub-cut Your Layer Cakes: Begin by selecting 21 of your 10″ printed fabric squares. Each of these original squares will yield four 5-inch squares for your four-patch blocks. To achieve this, first, lay a 10″ square flat on your cutting mat and cut it in half to create two 5″ x 10″ rectangles. Next, cut each of these 5″ x 10″ rectangles in half again to get two 5″ squares. You will thus end up with four perfectly sized 5″ squares from each original 10″ layer cake. Take your time with these cuts to ensure utmost accuracy, always using your rotary cutter, mat, and ruler safely and precisely.
- Forming Four-Patch Units: Now it’s time to assemble your four-patch blocks. Take four different 5″ squares. For optimal visual interest and a dynamic final look, try to select squares that contrast nicely in color or pattern, or come from different parts of your layer cake collection. Arrange them into a 2×2 grid on your design wall or workspace, playing with their placement until you are pleased with the combination.
- Sewing the Rows: With a consistent 1/4-inch seam allowance (this is crucial for accurate block piecing), sew two of your chosen 5″ squares together along one edge to form a row. Then, sew the remaining two 5″ squares together to form a second row. After stitching, press your seams. For a flatter block, you can press seams open, or press them to one side (alternating the direction for adjoining rows can help with “nesting” seams later, reducing bulk).
- Joining the Rows: Take your two freshly sewn rows and place them right sides together, carefully matching the center seams where the blocks meet. Use pins if necessary to keep them aligned perfectly. Stitch them together using that same precise 1/4-inch seam allowance. Once joined, press this final seam. Congratulations, you’ve just made a perfect four-patch block!
- Repeat and Accumulate: Continue these steps until you have created enough four-patch blocks for your desired quilt size. For a throw quilt, you’ll be making quite a few, so consider techniques like chain piecing (sewing multiple sets of blocks one after another without lifting the presser foot) to significantly speed up the process and make it more efficient.
Step 2: Assembling the Quilt Top – The Grand Design
With all your four-patch blocks complete, it’s time to bring your quilt top to life. This exciting step involves combining your patterned four-patch blocks with solid squares to create a visually dynamic and cohesive layout that forms the overall design of your quilt.
- Prepare Solid Squares: Take your remaining 10″ layer cake squares (you should have 21 of these left from your original 42 squares, untouched in their original 10-inch format). You will need to trim these down to match the finished size of your four-patch blocks. Carefully trim each 10″ square down to a 9 & 1/2″ square using your rotary cutter and ruler. Precision here is paramount for ensuring a flat quilt top where all blocks align perfectly.
- Layout Your Quilt: This is arguably the most creative and exciting part! Find a large, flat surface—such as your design wall, a clean floor, or a large table—and begin to lay out your quilt blocks according to the design plan. The Snippet Four-Patch design calls for an alternating pattern: start your first row with a 9 & 1/2″ trimmed solid square, followed by one of your assembled four-patch blocks, then another solid square, and so on, continuing across the row.
- Alternate Rows: For your next row, you will start with a four-patch block, followed by a solid square, then another four-patch block, effectively creating a charming checkerboard effect across your quilt. Continue alternating rows in this manner until your entire quilt top is laid out in your desired arrangement. Step back periodically and admire your design! This is your crucial chance to make any adjustments to color placement, block rotation, or overall balance before committing to sewing.
- Sewing Rows Together: Once you are completely satisfied with your layout, carefully begin sewing the blocks within each row together, always using a consistent 1/4-inch seam allowance. Press the seams within each row, typically pressing them in opposite directions for adjacent rows. This technique, commonly called “nesting seams,” helps reduce bulk at seam intersections and makes joining your rows together much easier and more accurate.
- Joining the Rows: With all your individual rows sewn and pressed, it’s time to join them to form the complete quilt top. Place two finished rows right sides together, carefully aligning all the seams (this is where those nested seams come in incredibly handy, allowing them to fit snugly). Pin generously, especially at the seam intersections, to prevent shifting. Stitch the rows together with a precise 1/4-inch seam. Continue adding rows until your entire quilt top is fully assembled. Give the completed quilt top a final, thorough press to ensure it lays perfectly flat.
Step 3: Quilting, Basting, and Binding – The Final Touches
While the video tutorial focuses primarily on the quilt top assembly, no quilt is truly complete without the crucial steps of basting, quilting, and binding. These stages transform your pieced quilt top into a finished, durable, and wonderfully cozy textile that will last for years.
- Preparing the Quilt Sandwich (Basting): This step involves layering your quilt components. First, lay your backing fabric right side down, taping it securely to a clean floor or a large, flat table to keep it taut and wrinkle-free. Next, place your batting smoothly on top of the backing, ensuring it’s slightly larger than your quilt top on all sides (usually 2-3 inches extra). Finally, center your finished quilt top right side up on the batting, smoothing out any wrinkles. Secure these three layers together by basting, using either safety pins spaced every 4-6 inches, basting spray adhesive, or long hand stitches (thread basting). The goal is to prevent any shifting during the quilting process.
- Quilting: This is where you stitch through all three layers of the quilt sandwich to hold them together, prevent the batting from shifting, and add beautiful texture to your quilt. For a beginner-friendly project like this, straight-line quilting is an excellent and achievable choice. You can stitch in the ditch (along the seam lines), echo your blocks, or create simple parallel lines across the quilt using a ruler as a guide. Always use your walking foot on your sewing machine, as it helps feed all three layers evenly, preventing puckering.
- Trimming: Once your quilting is complete, it’s time to trim the excess backing and batting. Lay your quilted piece flat and, using your rotary cutter and a long ruler, carefully trim all four edges even with the edges of your quilt top. Ensure all edges are straight and perfectly square, as this will affect how neatly your binding lies.
- Binding: The binding provides a clean, finished edge to your quilt, protects the raw seams, and adds a decorative frame. Prepare your binding strips by cutting your 1/2 yard of fabric into 2.5-inch wide strips (or your preferred width), then sew them end-to-end with diagonal seams to create one long continuous strip. Press the strip in half lengthwise. Attach the binding to the front of the quilt using a 1/4-inch seam, mitering the corners for a professional look. Finally, hand-stitch or machine-stitch the folded edge of the binding down to the back of the quilt for a beautiful and durable finish.
Tips for a Perfect Snippet Four-Patch Quilt
Even with an easy pattern, a few expert tips can significantly elevate your quilting experience and ensure a more professional and satisfying final product:
- Consistent Seam Allowance: The 1/4-inch seam allowance is the golden rule in quilting. Consistency is critical; even a slight variation can throw off the alignment of your blocks. Practice on scraps to ensure your seams are uniform. A quarter-inch presser foot for your sewing machine can be an incredibly helpful tool for achieving this precision.
- Press, Don’t Iron: When joining fabric pieces, always remember to “press” your seams rather than “ironing” them. Ironing involves pushing the iron back and forth, which can distort your fabric’s grain and stretch your pieces out of shape. Pressing means lifting and placing the iron gently, which helps maintain the fabric’s shape and keeps your blocks square and flat.
- Sharp Tools: Always use a sharp rotary blade and good quality, fine-tipped pins. Dull blades can snag and fray fabric edges, leading to inaccurate cuts, and bent pins can distort seams or leave marks. Regularly replace your rotary blade for the cleanest cuts.
- Take Breaks: Quilting should be an enjoyable and relaxing hobby! If you find yourself feeling frustrated, tired, or your precision starts to waiver, step away from your machine for a bit. A short break and returning with fresh eyes can make a world of difference.
- Embrace Imperfection: Especially as a beginner, remember that handmade items have unique character and charm. While accuracy is important, don’t strive for absolute perfection on your first few quilts. Focus instead on learning new techniques, enjoying the creative process, and celebrating your progress.
- Get Creative with Layout: While the tutorial suggests a specific alternating layout, feel free to play with the arrangement of your four-patch blocks and solid squares. Experiment with different color combinations and patterns on your design wall before committing to sewing. This is your chance to infuse your personality into the quilt!
Final Thoughts on Your Quilting Journey
The Snippet Four-Patch Quilt is more than just a project; it’s a delightful introduction to the rewarding art of quilting. Its reliance on convenient pre-cut layer cakes and simple block construction makes it accessible to everyone, ensuring a delightful and productive day of crafting. Whether you’re making your very first quilt and discovering the joy of creating with fabric, or simply enjoying the simplicity of a quick make, this pattern delivers on its promise of a beautiful, handmade item without overwhelming complexity.
We highly encourage you to watch the full video tutorial by Moonkin Stitchery for detailed visual guidance and to download the free pattern to ensure you have all the precise measurements and instructions at your fingertips. Once your Snippet Four-Patch Quilt is complete, don’t hesitate to share your finished creations with us and the wider quilting community – your beautiful work is sure to inspire others to pick up a needle and thread! Happy quilting!