
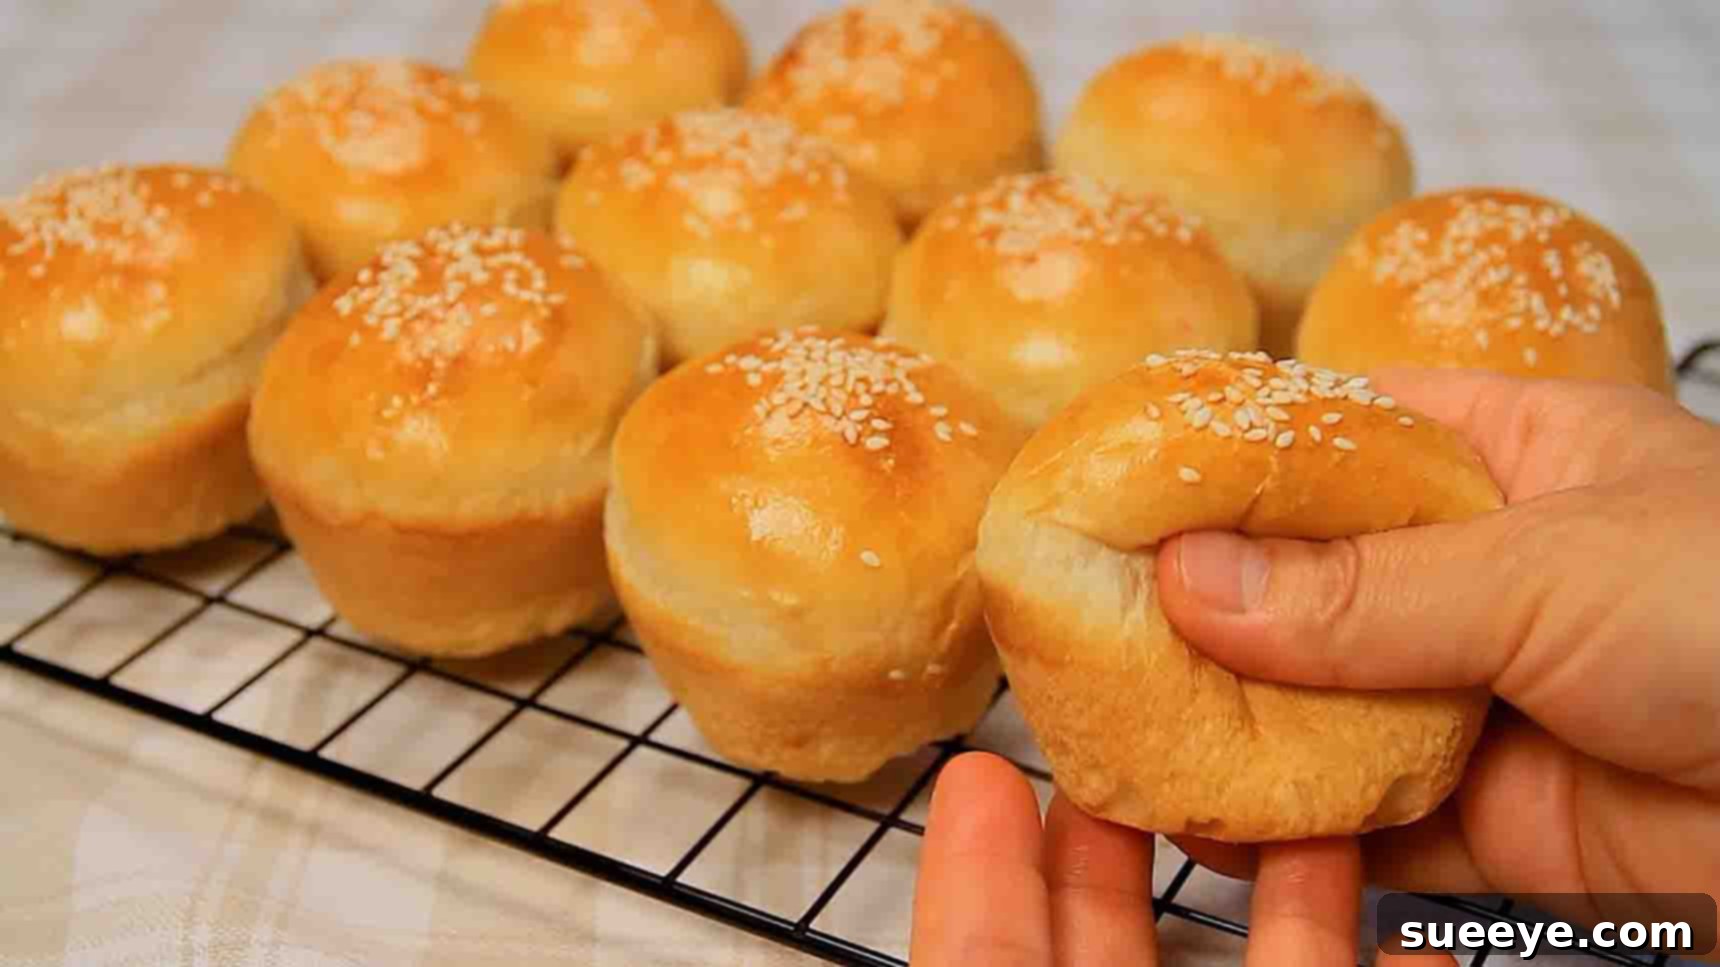
The Ultimate Guide to Baking Irresistibly Soft Potato Buns
Are you searching for a bread recipe that transcends the ordinary, offering unparalleled softness, a delightful texture, and a subtle richness that will captivate your family and friends? Look no further! This comprehensive guide reveals the secrets behind creating the most exquisite homemade potato buns, inspired by Helly’s Simple Recipe. These aren’t just any dinner rolls; the magic of incorporating potatoes into the dough transforms them into incredibly tender, moist, and flavorful buns that are simply addictive. Prepare to elevate your baking skills and delight everyone with these super soft, perfectly golden potato buns – they’re guaranteed to be a new family favorite!
Why Potato Buns Are a Game-Changer in Homemade Bread
The addition of humble potatoes to a traditional bread dough might seem unconventional, but it’s a time-honored technique that yields spectacular results. Mashed potatoes contribute moisture, tenderness, and a unique, subtle sweetness to the bread, resulting in a crumb that’s incredibly soft and stays fresh longer than conventional buns. They add an almost cloud-like texture and a depth of flavor that sets these buns apart. Whether you’re serving them as a side with a hearty meal, using them for sliders, or simply enjoying them with butter, these potato buns offer a comforting and satisfying experience that homemade bread connoisseurs will truly appreciate.
This particular recipe is designed for ease and success, even if you’re new to bread making. We break down each step, providing clear instructions and helpful tips to ensure your potato buns come out perfectly every time. Get ready to embark on a delightful baking adventure that culminates in the most delicious, fluffy buns you’ve ever tasted!
Gather Your Essentials: Ingredients for Perfect Potato Buns
Success in baking begins with the right ingredients. For these marvelous potato buns, you’ll need a few common pantry staples. The quality of each component plays a role in the final texture and flavor, so choose fresh ingredients whenever possible. Here’s what you’ll need to create twelve delightful buns:
- 1 Medium Potato: The star ingredient, providing moisture, softness, and a unique texture. A russet or Yukon Gold potato works wonderfully.
- 180 ml Water: Essential for activating the yeast and hydrating the dough, ensuring a soft crumb.
- 2 tbsp White Sugar: Feeds the active dry yeast, promoting a good rise, and adds a touch of sweetness to balance the flavors.
- 1 tsp Active Dry Yeast: The leavening agent responsible for giving your buns their light and airy structure. Ensure it’s fresh and active.
- 1 Large Egg: Adds richness, helps with binding, contributes to a golden crust, and enhances the overall flavor. We’ll save a small portion for an egg wash.
- 1/2 tsp Salt: Crucial for enhancing the flavor of the bread and controlling yeast activity. Don’t skip it!
- 30 ml Unsalted Butter, Melted: Provides richness, tenderness, and a beautiful aroma. Using unsalted butter allows you to control the salt content precisely.
- 2.4 cups All-Purpose Flour (or Bread Flour): The primary structural component of the dough. All-purpose flour yields a tender crumb, while bread flour can offer a slightly chewier texture.
- Sesame Seeds (Optional): For a classic finish, adding a nutty flavor and appealing visual texture to the tops of your buns.
Step-by-Step Perfection: Crafting Your Potato Buns
Follow these detailed instructions to create the ultimate soft potato buns. Each step is designed to guide you through the process, ensuring a successful and enjoyable baking experience.
Step 1: Preparing the Potato and Activating the Yeast
Begin by preparing your potato, the heart of these incredibly soft buns. Take your medium potato and carefully cut it into small, manageable pieces. Smaller pieces will cook more quickly and evenly. Transfer these potato pieces into a microwave-safe bowl. Add just 15 ml of water to the bowl – this small amount helps generate steam, ensuring the potatoes cook thoroughly without drying out. Microwave the potato pieces for approximately four to five minutes, or until they are completely tender when pierced with a fork. Cooking times may vary depending on your microwave’s wattage and the size of your potato pieces, so keep an eye on them.
Once the potatoes are cooked, carefully remove them from the microwave. Using a potato masher or a fork, thoroughly mash the potatoes until they are smooth and free of any large lumps. A smooth mash is key to a uniform and soft bun texture. Transfer the mashed potato into a larger mixing bowl. Gradually add 180 ml of water to the mashed potato, mixing well after each addition. This process creates a potato “slurry” that integrates seamlessly into the dough. Next, stir in 2 tablespoons of white sugar and 1 teaspoon of active dry yeast. The sugar will serve as food for the yeast, helping it activate. Mix everything together gently, then cover the bowl and let it rest for five minutes. During this time, the yeast should become foamy on the surface, indicating it’s active and ready to work its magic.
After five minutes, check for yeast activity. If you see a bubbly, foamy layer, proceed. Crack open your egg and lightly beat it. Add the majority of the beaten egg to your potato-yeast mixture, reserving about 10 ml (roughly two teaspoons) for a later egg wash – this will give your baked buns a beautiful golden sheen. Now, add all-purpose flour and 1/2 teaspoon of salt to the bowl. Mix thoroughly, either with a sturdy spoon or a stand mixer with a dough hook, until a shaggy dough forms and all the flour is incorporated. The dough might feel a bit sticky at this stage, which is perfectly normal. Cover the bowl with a clean kitchen towel or plastic wrap and let the dough rest for an initial 20 minutes. This resting period, known as autolyse, allows the flour to fully hydrate, making the dough easier to knead and contributing to a better gluten structure.
Step 2: Kneading, First Rise, and Shaping the Buns
After the initial 20-minute rest, your dough is ready for the next crucial stage: kneading. Add 2 tablespoons of melted unsalted butter to the dough. The butter enriches the dough, making the buns incredibly tender and flavorful. Now, it’s time to knead! You can do this by hand on a lightly floured surface or using a stand mixer with a dough hook. Knead the dough for about 8-10 minutes, or until the butter is fully incorporated and the dough becomes smooth, elastic, and less sticky. A well-kneaded dough will pass the “windowpane test” – you should be able to stretch a small piece thinly enough to see light through it without tearing.
Once adequately kneaded, place the dough back into a lightly oiled bowl, turning it once to coat the entire surface. This prevents it from sticking. Cover the bowl tightly with plastic wrap or a damp kitchen towel and let it rise in a warm, draft-free place until it doubles significantly in size. This first rise, known as bulk fermentation, typically takes 1 to 1.5 hours, depending on your room temperature. You’ll know it’s ready when it looks puffy and springs back slowly when gently poked.
After the dough has doubled, gently deflate the bubbles by pressing it down. This releases trapped gases, resulting in a finer, more even crumb in your finished buns. Transfer the dough to a lightly floured surface. Sprinkle a little flour on top of the dough to prevent sticking. Gently shape the dough into a cohesive ball, then divide it into 12 equal pieces. For best results and even baking, you can use a kitchen scale to ensure each piece weighs approximately the same amount.
Now, it’s time to shape each individual bun. Take one piece of dough, lightly flour your hands and the dough, and shape it into a smaller, smooth ball. The key here is to create surface tension, which helps the buns hold their shape and rise beautifully. You can do this by tucking the edges underneath and rolling it against your palm on the counter. Repeat this process for all 12 pieces of dough. Arrange the shaped balls in a non-stick baking pan, leaving a little space between each bun as they will expand during their final rise and baking. A 9×13-inch pan usually works well for 12 buns.
Step 3: Final Rise, Egg Wash, and Baking
Once your buns are shaped and placed in the baking pan, cover them again with a clean kitchen towel or plastic wrap. Let them rise for a second time, which is called proofing, for approximately 45 minutes in a warm environment. During this final rise, the buns will become visibly puffier and larger, almost doubling in size once more. This ensures a light and airy texture after baking. While they are rising, preheat your oven to 350°F (175°C).
After 45 minutes, gently uncover the buns. Retrieve the reserved 10 ml of beaten egg from Step 1. Using a pastry brush, carefully brush the top of each bun with this egg wash. The egg wash will give your potato buns a beautiful golden-brown color and a lovely sheen. If desired, sprinkle each bun generously with sesame seeds for an added layer of flavor and texture. This step is optional but highly recommended for that classic bun appearance.
Carefully transfer the baking pan to your preheated oven. Bake the potato buns for 15 to 18 minutes. Keep an eye on them; they are done when they turn a beautiful golden brown on top and sound hollow when tapped on the bottom. If you have a kitchen thermometer, an internal temperature of around 200-210°F (93-99°C) indicates they are fully baked. Once baked, remove the pan from the oven and let the buns cool slightly in the pan for a few minutes before transferring them to a wire rack to cool completely. This allows any steam to escape, preventing the bottoms from becoming soggy.
Tips for Success with Your Easy Potato Buns Recipe
Achieving bakery-quality potato buns at home is entirely within reach with a few helpful tips:
- Warm Environment for Rising: Yeast loves warmth! Find a cozy spot for your dough to rise, like a slightly warm oven (turned off, with the light on), or near a sunny window. Avoid cold, drafty areas.
- Don’t Rush the Rise: The rising times are estimates. Always go by the visual cues (doubled in size, puffy) rather than strictly by the clock. Under-proofed dough will result in dense buns, while over-proofed dough can collapse.
- Accurate Measurements: Especially for baking, precision is key. Use kitchen scales for flour if possible, and level off your dry ingredients.
- Mashed Potato Consistency: Ensure your mashed potato is smooth. Lumps can create inconsistencies in the dough’s texture.
- Kneading is Key: Don’t skimp on kneading. It develops the gluten, which is essential for the structure and elasticity that gives these buns their signature chew and softness.
Creative Variations for Your Homemade Potato Buns
While delicious on their own, these potato buns can be customized to suit your taste:
- Herb Infusion: Add 1-2 tablespoons of finely chopped fresh herbs like rosemary, thyme, or chives to the dough during the kneading stage for an aromatic twist.
- Cheesy Delight: Incorporate ½ cup of shredded cheddar or Parmesan cheese into the dough towards the end of kneading for savory cheese buns.
- Garlic & Herb Butter Topping: Instead of plain egg wash, mix melted butter with minced garlic and dried herbs (like parsley or oregano) to brush on top before baking.
- Sweet Buns: Increase the sugar by another tablespoon and add a touch of vanilla extract for a slightly sweeter bun, perfect with jam or as a breakfast treat.
Serving Suggestions: Enjoying Your Soft Potato Buns
These versatile potato buns are perfect for a multitude of occasions:
- Classic Dinner Rolls: Serve them warm with butter alongside any meal – they’re especially delightful with soups, stews, or roasts.
- Mini Sandwich Sliders: Their soft texture and perfect size make them ideal for homemade sliders filled with pulled pork, shredded chicken, or mini burgers.
- Breakfast Delights: Toast them lightly and serve with scrambled eggs, bacon, or your favorite preserves.
- With Chili or BBQ: Use them to soak up delicious sauces from your favorite chili or barbecue dishes.
Storing Your Homemade Potato Buns
These buns are best enjoyed fresh, but they also store well. Keep them in an airtight container at room temperature for up to 2-3 days. For longer storage, you can freeze them for up to 3 months. Thaw at room temperature and warm gently in the oven or microwave before serving for that freshly baked taste.
By following this detailed recipe, you’re not just baking bread; you’re creating an experience. The aroma of freshly baked potato buns filling your kitchen is truly one of life’s simple pleasures. This recipe promises not only incredible flavor and texture but also the immense satisfaction of crafting something truly special from scratch. So, roll up your sleeves, gather your ingredients, and prepare to impress your loved ones with these unbelievably soft and delicious homemade potato buns!