
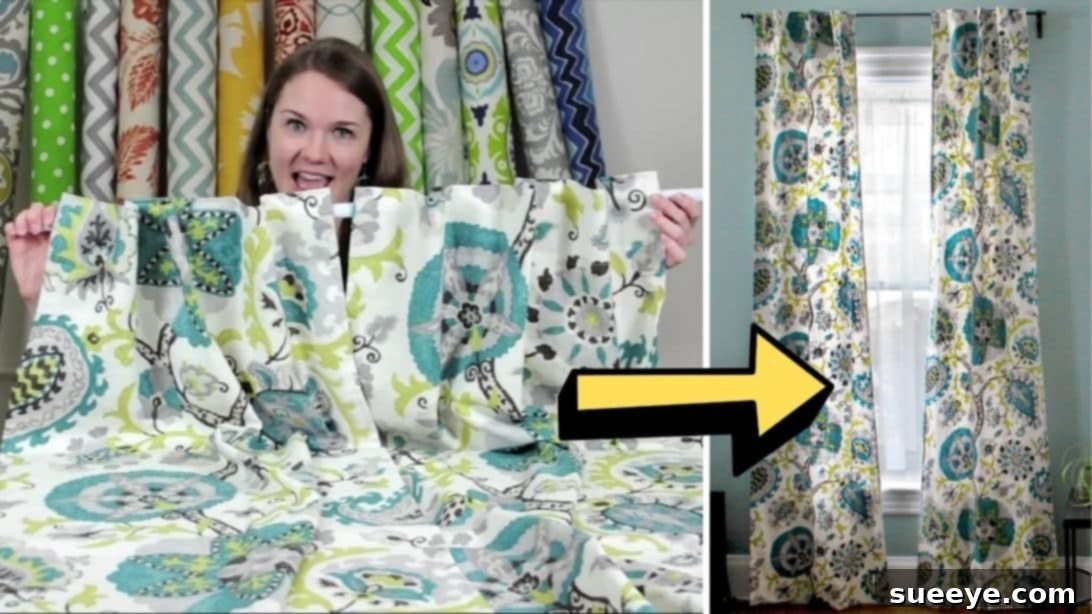
Effortless Elegance: A Complete Guide to Sewing Lined Back Tab Curtains
Transforming your living space doesn’t have to break the bank. With a little creativity and some basic sewing skills, you can craft beautiful, custom window treatments that perfectly complement your home’s aesthetic. Did you know that sewing your own curtains, especially the stylish lined back tab variety, is surprisingly achievable even for absolute beginners? This comprehensive guide, inspired by expert instructions, will walk you through every step, ensuring a professional and polished result. Get ready to add a touch of handmade elegance to any room, whether you’re aiming for long, flowing drapes or short, neat panels.
Lined back tab curtains offer a clean, contemporary look with their hidden tabs creating soft, elegant folds. They provide excellent light control and insulation, making them both beautiful and functional. Follow along with our detailed directions and prepare to impress yourself with your newfound curtain-making prowess!
Why Choose Lined Back Tab Curtains? Discover Their Benefits
Beyond the immense satisfaction of completing a DIY project, lined back tab curtains offer several distinct advantages that make them a popular choice for discerning homeowners:
- Sleek Appearance: The defining feature of back tab curtains is their hidden hanging mechanism. The tabs are neatly sewn onto the back of the curtain panel, allowing the fabric to cascade in neat, soft, and uniform pleats without any visible rings, hooks, or hardware. This creates a sophisticated, uncluttered, and minimalist look that seamlessly integrates with any decor style.
- Enhanced Durability and Longevity: The addition of a lining fabric acts as a protective shield for your main drapery fabric. It guards against the damaging effects of sunlight, preventing premature fading, discoloration, and general wear and tear. This significantly extends the life of your curtains, keeping them looking vibrant and new for longer.
- Improved Insulation for Energy Efficiency: A quality lining adds an extra layer of fabric to your window treatments, which acts as a barrier against external temperatures. This insulation helps to keep your home warmer during colder months and cooler during the summer, potentially leading to noticeable reductions in your energy bills.
- Superior Light Control and Privacy: Lined curtains are significantly more effective at blocking out unwanted external light compared to unlined panels. This makes them ideal for bedrooms, nurseries, media rooms, or any space where you desire greater light control and enhanced privacy from the outside world.
- Professional Drape and Fuller Look: The added weight and structure provided by the lining fabric help the curtains hang beautifully. This results in a fuller, more substantial, and luxurious drape, giving your windows a custom, high-end designer finish that unlined curtains often lack.
- Noise Reduction Qualities: The extra layers of fabric in lined curtains can also help to absorb and muffle outside noise, contributing to a quieter and more peaceful indoor environment, especially beneficial for homes in busy areas.
Essential Materials: Gathering Your Supplies for Success
Before you embark on your curtain-sewing journey, gathering the right tools and materials is crucial. Investing in quality supplies will make the entire process smoother, more enjoyable, and ensure a long-lasting, beautiful end product. Here’s a detailed list of everything you’ll need:
- Drapery Fabric: This is the main fabric that will be visible. Choose a fabric that perfectly suits your style and the room’s function. Consider factors like weight (lightweight for sheers, heavier for formal drapes), texture, pattern, and color. Popular choices include cotton, linen blends, damask, or specialized decorator fabrics known for their excellent drape and durability. Ensure you purchase enough for your desired curtain length and width, accounting for any pattern repeats.
- Drapery Lining Fabric: This fabric will be sewn to the back of your main drapery fabric. Standard lining provides structure, UV protection, and a neat finish. For enhanced light blocking, consider a blackout lining. If thermal benefits are a priority, a thermal lining will provide extra insulation. The type of lining you choose will significantly impact the curtain’s overall function and performance.
- Iron and Ironing Board: An absolute essential for achieving a professional finish. An iron is indispensable for pressing seams flat, creating crisp folds, and ensuring every edge is perfectly defined. Pressing as you go is key!
- Sharp Fabric Scissors: Invest in a dedicated pair of high-quality fabric scissors and use them exclusively for cutting fabric to prevent dulling. Sharp scissors ensure clean, precise cuts, which are vital for accurate measurements and a neat final product.
- Fabric Marker or Tailor’s Chalk: Used for marking cutting lines, fold lines, and placement guides directly onto your fabric. Choose a marker that is easily removable with water or air, or a tailor’s chalk that brushes off without leaving a trace.
- Plenty of Sewing Pins: You’ll need a generous supply of pins to hold fabric layers securely together, align edges, and secure hems before you begin sewing. Ballpoint pins are excellent for knit or delicate fabrics, while sharp, regular pins work well for most drapery materials.
- Sewing Machine: A reliable sewing machine with basic straight stitch capabilities is all you truly need for this project. Before starting, ensure your machine is properly threaded, the bobbin is full, and you have a fresh needle suitable for the weight of your chosen fabrics.
- Matching Thread: Select a high-quality polyester all-purpose thread that matches your main drapery fabric as closely as possible. This ensures your stitches are practically invisible, contributing to a professional appearance.
- Measuring Tape: Both a flexible tape measure and a rigid ruler are invaluable for taking accurate measurements of your window and for precise fabric cutting and marking.
- Large Flat Work Surface: A spacious table, a clean floor, or even a large cutting mat provides ample room to lay out and cut your fabric precisely, which is crucial for large projects like curtains.
Step-by-Step Directions: Crafting Your Lined Back Tab Curtains
Precision and patience are your best allies when sewing curtains. Take your time with each step, and remember that consistent pressing of your fabric will make an extraordinary difference in the crispness and overall professional appearance of your finished curtains.
Step 1: Measuring Your Windows and Preparing Fabric Pieces
Accurate measurements form the foundation of well-fitting, beautiful curtains. Take your time with this initial stage.
- Determine Finished Curtain Length: First, measure how tall your window is from where you intend to hang the curtain rod to your desired bottom edge (e.g., just above the sill, just below the apron, or touching the floor). To this measurement, add a generous 10 inches (approximately 25 cm) for the top and bottom hems. This sum represents the total length you will cut for your main drapery fabric.
- Determine Finished Curtain Width: Next, measure the width of your window. For adequate fullness, you’ll typically want your curtain panel(s) to be 1.5 to 2.5 times the width of your window or curtain rod. For a single panel, add approximately 3 inches (about 7.5 cm) to your desired finished width for side hems. Cut your main drapery fabric to these calculated dimensions.
- Cut Your Lining Fabric: For the lining fabric, cut it to the total *finished* width and height of your curtain panel *without* adding any extra allowances for hems. The lining will be slightly smaller than the main fabric, allowing the main fabric to wrap neatly around the lining to create clean, finished edges.
- Prepare the Back Tabs: Cut several rectangular pieces of fabric for your back tabs. Each tab should measure approximately 4.5 inches wide by 6 inches long (approximately 11.5 cm x 15 cm). The number of tabs you’ll need depends on the width of your curtain panel; a good rule of thumb is to calculate enough tabs to be spaced about 6 inches (15 cm) apart across the top edge.
- Construct the Tabs: Take one tab piece. Fold it in half lengthwise, ensuring the right sides of the fabric are facing each other. Sew along the raw long edge with a 1/4 inch (0.6 cm) seam allowance. Crucially, remember to backstitch at both the beginning and end of your seam to secure the stitches and prevent unraveling.
- Turn and Press Tabs: Carefully turn the sewn tab right side out. Use a point turner, a chopstick, or even the blunt end of a pen to gently push out the corners, ensuring they are crisp. Once turned, carefully fold the tab so that the seam you just sewed is centered along one edge. Press it flat with a hot iron to create a crisp, professional finish. Repeat this entire process for all your tab pieces, then set them aside temporarily.
- Align Main and Lining Fabrics: Lay your main drapery fabric flat on your large work surface with its right side facing down. Carefully place the lining fabric on top of the main fabric, ensuring it is perfectly centered. You should observe an approximate 5-inch (12.7 cm) border of the main fabric showing at the top and bottom edges, and about a 1.5-inch (3.8 cm) border of main fabric on each side. This margin is essential for wrapping the main fabric around the lining, which creates neat, self-finished hems. Pin the lining fabric securely to the main fabric, working from the center outwards, to prevent any shifting during subsequent steps.
Step 2: Crafting the Side and Bottom Hems with Precision
This stage involves creating the side and bottom hems, meticulously encasing the lining fabric within the main drapery fabric for a clean, professional, and durable edge.
- Hem the Lining Sides: Starting with one vertical side of the curtain panel (where the lining is), fold its raw edge over by 3/4 inch (1.9 cm) towards the wrong side of the lining fabric. Press this initial fold nicely and firmly with your iron to create a crisp crease. Then, fold it over again by another 3/4 inch (1.9 cm) and press once more. This creates a durable double-fold hem. Pin this double-fold hem securely in place along its entire length.
- Sew Lining Side Hems: Stitch down the length of this precisely folded edge, sewing approximately 1/8 inch to 1/4 inch (0.3 – 0.6 cm) from the inside fold. This creates a neat, narrow hem that secures the lining. Repeat this exact process for the other vertical side of the lining fabric, ensuring consistency.
- Prepare the Bottom Hem: For the bottom hem of the curtain (where the main fabric has a 5-inch allowance), first fold the main fabric and lining together upwards by 1 inch (2.5 cm) towards the wrong side of the fabric. Press this initial fold firmly to set the crease. Then, fold it over once more by a generous 4 inches (10 cm) and press again. This substantial double-fold creates a weighted bottom hem that helps the curtain hang beautifully and offers a luxurious finish. Pin this double-fold hem securely in place along the entire bottom edge.
- Sew Bottom Hem Corners: This technique creates a tidy corner finish. Starting at one bottom corner of your curtain panel, sew up the side of the 4-inch fold for about an inch. Pivot your fabric 90 degrees at the top of the fold, and then sew horizontally across the folded edge to the next corner. Pivot again and sew along the side of the hem to the bottom corner. This approach neatly finishes the corners of your substantial bottom hem without the complexity of traditional mitering.
- Prepare Top Hem (Do Not Sew Yet): Repeat the folding and pressing process for the top hem of the curtain, similar to the bottom hem, but *do not* sew it down yet. This prepared top fold will create the essential channel where your back tabs will be integrated.
Step 3: Attaching the Back Tabs and Final Finishing Touches
This final stage involves carefully securing the back tabs and completing the top hem, bringing your elegant lined back tab curtains to life with a polished, ready-to-hang finish.
- Prepare Tabs for Attachment: Take one of your pre-made back tabs (from Step 1, item 6). Fold over one end of the tab by 1 inch (2.5 cm) and press it firmly. This creates a neat, finished edge on the tab that will be hidden within the curtain’s top hem.
- Position and Pin Tabs: Carefully place this folded and pressed end of the tab, tucking it snugly *under* the bottom edge of your already pressed top fold on the main curtain fabric. Ensure that the raw edge of the tab is completely concealed within this fold. Evenly space out all your prepared tabs along the entire top edge of the curtain, ensuring consistent distances between each tab for a perfectly uniform and aesthetic look when hung. Pin each tab securely in place, ensuring they are firmly anchored to the top hem allowance.
- Fold and Press Tab Tops: Now, fold under the top raw end of each tab so that it is perfectly even and flush with the very top edge of the curtain panel. Press these folds nicely to hold them precisely in their final position. Pin them once more to further secure them, making sure they won’t shift during sewing.
- Topstitch Tabs and Complete Top Hem: With all your tabs meticulously pinned in place, it’s time to sew them permanently. Topstitch along both the upper and lower edges of each tab. Ensure your stitches go through all layers of fabric to firmly secure the tabs. This step not only attaches the tabs but also adds a clean, decorative finish. Finally, sew along the entire bottom edge of your main top hem. This action completes the channel for your curtain rod and fully encloses the raw edges of the tabs, giving a neat, professional appearance. Remember to backstitch at the beginning and end of your seams for extra durability and to prevent stitches from unraveling.
Tips for Sewing Success: Achieve Professional Results
Even seasoned sewers benefit from a few tried-and-true tips that can elevate a handmade project from good to exceptional. Keep these insights in mind as you work on your curtains to ensure the best possible outcome:
- Pre-wash and Press All Fabrics: This is a non-negotiable step for any washable fabric. Always pre-wash your drapery and lining fabrics according to their care instructions *before* cutting and sewing. This crucial step prevents shrinking, distortion, or color bleeding after your curtains are completed and laundered. Once dry, press them thoroughly to remove all wrinkles and creases for accurate cutting and sewing.
- Utilize a Walking Foot for Tricky Fabrics: If your sewing machine struggles with feeding multiple layers of fabric evenly, or if you’re working with slippery or thick materials, a walking foot attachment can be incredibly helpful. It feeds the top and bottom layers of fabric through the machine at the same rate, preventing shifting, puckering, and uneven seams.
- Always Check Your Machine’s Tension: Before commencing your main project, always test your sewing machine’s tension on a scrap piece of your actual fabric combination (main fabric + lining). Sew a few lines and check both the top and bobbin stitches. Adjust the tension as needed until your stitches are balanced, neither too tight nor too loose, and look identical on both sides of the fabric.
- Press As You Go: The Golden Rule: This cannot be stressed enough! Pressing each seam, fold, and hem immediately after you create it will make an enormous difference in the crispness, flatness, and overall professionalism of your finished curtains. It sets stitches, refines edges, and creates sharp creases that are impossible to achieve at the end.
- Don’t Skimp on Pins: Especially when aligning large pieces of fabric, securing long hems, or attaching the tabs, use plenty of pins. Place them perpendicular to your sewing line, spaced closely enough to keep fabrics from shifting. Remove them just before the needle reaches them.
- Measure Twice, Cut Once: This classic adage is incredibly relevant in sewing. Double-check all your measurements – for window dimensions, fabric cuts, and hem allowances – before making any permanent cuts. A small error here can have significant consequences later.
- Patience is a Virtue in Sewing: Sewing is a meditative process that rewards precision and calmness. If you start to feel rushed or frustrated, take a break. Step away, clear your head, and return to your project with fresh eyes. Rushing often leads to mistakes that take more time to fix than a paused break.
Customization and Beyond: Personalize Your Window Treatments
Once you’ve mastered the basic lined back tab curtain, the possibilities for customization are truly endless. This foundational project opens the door to a world of personalized home decor:
- Fabric Play and Texture: Experiment with different fabric textures, weights, and patterns. Heavy brocades can add a touch of grandeur, sheer linens can offer an airy feel, while vibrant prints can dramatically change the room’s mood. Don’t be afraid to mix and match.
- Add Decorative Trim: Embellish the leading edges, bottom hem, or even the top with decorative trims, tassels, fringe, or pom-poms for an extra touch of flair and unique personality.
- Consider Interlining: For even greater insulation, superior light blocking, and a truly luxurious, hotel-like feel, consider adding a layer of interlining (often flannel or cotton bump) between your main fabric and the standard lining. This adds significant body and a beautiful, plush drape.
- Upgrade Your Lining: Tailor your lining choice to specific functional needs. Opt for a total blackout lining for bedrooms requiring complete darkness, or choose a thermal lining for enhanced energy efficiency in rooms prone to temperature fluctuations.