
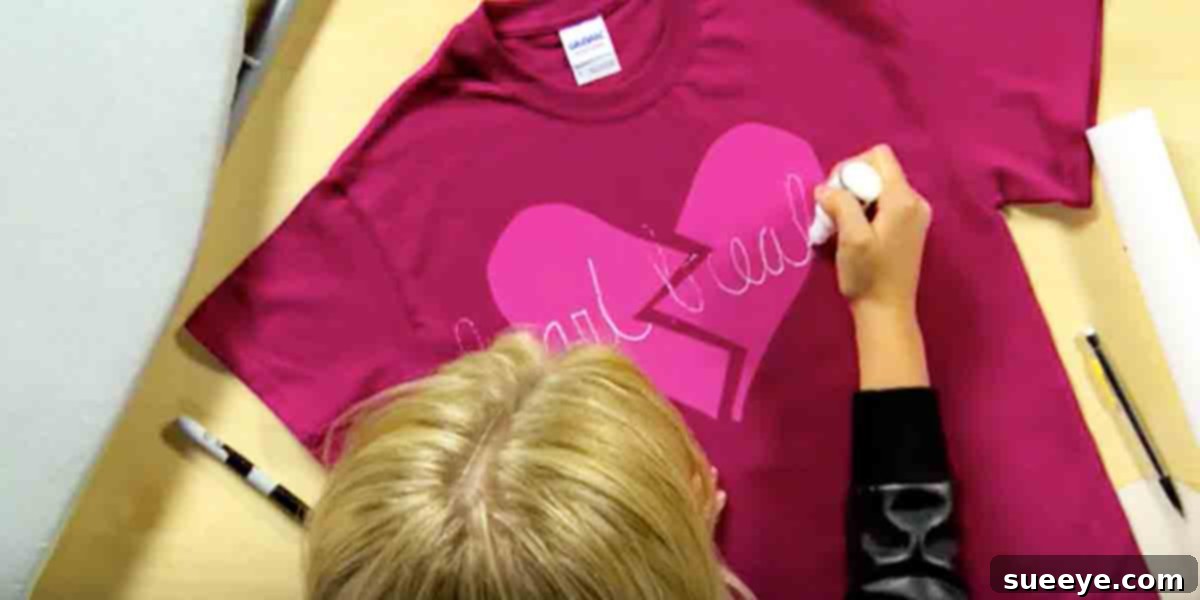
DIY Heart Breaker T-Shirt: Craft a Custom Look in Minutes!
Are you searching for a fun, creative project that delivers instant gratification? Look no further! This DIY “Heart Breaker” t-shirt project is not just incredibly simple but also undeniably cute. Whether you’re preparing for Valentine’s Day, looking for a unique gift, or simply want to add a personalized touch to your wardrobe, this craft is perfect. It’s one of those delightful creations you can wear year-round, making a subtle yet sassy statement wherever you go.
The beauty of this project lies in its remarkable ease and speed. Imagine crafting a stylish, custom t-shirt from start to finish in as little as 15-20 minutes. Yes, you read that correctly! This is precisely the kind of DIY endeavor we all love – quick to execute, simple to master, and yielding impressive results in no time. It’s the perfect way to tap into your creative side without committing to hours of intricate work.
Why You’ll Fall in Love with This DIY T-Shirt Project
Beyond its speed, there are numerous reasons why this “Heart Breaker” t-shirt will become your new favorite craft. It offers a fantastic blend of personal expression, gifting potential, and even a unique opportunity for a small home-based business.
Unleash Your Inner Fashion Designer
There’s immense satisfaction in wearing something you’ve created with your own hands. This project allows for endless customization. Choose your favorite colors, fabrics, and shirt styles to reflect your personality. The “Heart Breaker” motif, while playful, can be interpreted in many ways – from sweet and charming to bold and edgy. It’s a fantastic conversation starter and a testament to your crafty spirit.
Perfect for Gifting
Handmade gifts carry a special sentiment that store-bought items simply can’t replicate. I’ve personally made these shirts for my granddaughters, and they absolutely adore them! The 13-year-old, with her blossoming sense of humor and confidence, particularly loves the “Heart Breaker” theme – it perfectly captures her vivacious spirit. Imagine the joy on a friend’s face receiving a custom-made shirt tailored just for them!
An Entrepreneurial Opportunity Awaits
The efficiency and low cost of this project also make it an ideal candidate for those considering a creative side hustle. With how quickly you can whip these out, there’s genuine potential for profit. Before next Valentine’s Day, or any occasion that calls for unique, handmade apparel, you could easily create a collection to sell on platforms like Etsy, at local craft fairs, or through social media. This project is a prime example of how simple crafts can turn into profitable ventures.
Gather Your Materials: What You’ll Need
One of the best aspects of this DIY project is that it requires only a handful of readily available and affordable materials. You likely have many of these items in your craft stash already!
- Plain T-Shirt: Choose any color, size, and style. Cotton or cotton-blend shirts work best for fabric adhesive and paint. Make sure it’s clean and pre-washed to prevent shrinking after customization.
- Fabric Scraps: A small piece of fabric for your heart appliqué. This can be patterned, solid, glittery, or textured – let your imagination run wild! Old clothes, bandanas, or quilting scraps are perfect.
- HeatnBond (or similar iron-on adhesive): This is the magic ingredient that makes this a “no-sew” project (though optional sewing adds durability). There are various types, such as Lite, UltraHold, or Featherlite. Lite is great for projects where you might want to sew later, while UltraHold provides a stronger, permanent bond.
- Fabric Scissors: Sharp scissors are crucial for clean, precise cuts, especially when creating the heart shape.
- Fabric Marker or Pencil: For drawing your heart shape and “Heart Breaker” text onto the fabric.
- Iron and Ironing Board: Essential for activating the HeatnBond adhesive.
- Protective Cloth (e.g., pillowcase or thin towel): To protect your iron and garment during the ironing process.
- Fabric Paint: Specifically designed for textiles. Choose a color that stands out against your shirt and appliqué. Puffy paint, glitter paint, or standard fabric paint markers are all excellent options for the text.
- Optional: Stencils for text/heart: If you prefer not to freehand.
- Optional: Sewing Machine or Needle and Thread: For adding a decorative or reinforced stitch around the heart, if desired.
Step-by-Step Tutorial: Crafting Your “Heart Breaker” Tee
Let’s dive into the simple steps to create your very own custom “Heart Breaker” t-shirt. Follow these instructions carefully for the best results!
Step 1: Prepare Your Fabric Appliqué
First, take your chosen fabric scrap for the heart. Iron out any wrinkles to ensure a smooth application. Place the HeatnBond adhesive sheet onto the wrong side (the back) of your fabric scrap. Follow the specific instructions on your HeatnBond package for ironing time and temperature. Generally, you’ll press a warm iron onto the paper-backed adhesive, allowing it to bond securely to the fabric. Once bonded, let it cool completely.
Step 2: Design and Cut Your Heart
Now, it’s time to create your heart shape. On the paper backing of your fabric (which now has HeatnBond attached), draw your heart. You can freehand it for a rustic look, use a cookie cutter, or print a stencil for perfect symmetry. Consider the size of your shirt and where you want the heart to be placed. Once drawn, carefully cut out the heart shape using your sharp fabric scissors. Take your time for clean edges.
Step 3: Position and Iron On the Heart Appliqué
Peel off the paper backing from your heart shape. You should now have a fabric heart with a shiny adhesive layer on the back. Position this heart exactly where you want it on your clean t-shirt. Ensure it’s centered, aligned, or placed asymmetrically – whatever suits your style! Once positioned, place a protective cloth (like a thin pillowcase) over the heart. Using a hot iron (again, refer to HeatnBond instructions for exact temperature and pressing time), firmly press down on the protective cloth over the heart for the recommended duration. Move the iron slowly to ensure even heat distribution. The heat will activate the adhesive, bonding the heart securely to your t-shirt. Allow it to cool completely before moving on.
Step 4: Add the “Heart Breaker” Text
This is where your shirt gets its signature message! Using a fabric marker or pencil, lightly sketch the words “Heart Breaker” onto the shirt, either directly on the heart or perhaps just above or below it. Experiment with fonts and sizes. If you’re not confident in your freehand lettering, use stencils for a polished look. Once you’re happy with the placement and size, go over your sketch with fabric paint. Apply the paint carefully and evenly. If using puffy paint, don’t press too hard. If using standard fabric paint, a thin brush might be helpful. Allow the fabric paint to dry completely according to the manufacturer’s instructions, which can sometimes take several hours.
Step 5: Optional Enhancements and Finishing Touches
While the basic project is complete, you can elevate your design with these optional steps:
- Sewing for Durability and Style: If you want to ensure maximum durability, or simply love the look, sew around the edges of your fabric heart appliqué. A simple straight stitch, a decorative zigzag stitch, or even a hand-embroidered blanket stitch can add a professional and charming finish.
- Embellishments: Consider adding other embellishments. Small rhinestones glued with fabric adhesive, glitter fabric paint, or even tiny iron-on patches can further personalize your shirt.
- Reverse Appliqué: For a different look, consider cutting out a heart shape directly from the t-shirt, then backing it with a contrasting fabric applied with HeatnBond for a “window” effect.
Care Instructions for Your Custom Tee
To ensure your “Heart Breaker” t-shirt lasts, always follow these general care guidelines:
- Cure Time: Allow fabric paint to fully cure (usually 72 hours) before washing.
- Washing: Turn the shirt inside out before washing. Use a gentle cycle with cold water.
- Drying: Air dry or tumble dry on low heat.
- Ironing: If ironing is needed, iron the shirt inside out, or place a protective cloth over the appliqué and painted areas.
Unleash Your Creativity Today!
This DIY “Heart Breaker” t-shirt project is more than just a craft; it’s an invitation to express yourself, create meaningful gifts, and even explore entrepreneurial possibilities. Its simplicity and speed make it accessible to everyone, regardless of crafting experience. You’ll be amazed at how quickly you can transform a plain t-shirt into a unique, custom piece that truly stands out.
So, what are you waiting for? Gather your materials, follow these easy steps, and get ready to create your own super cute “Heart Breaker” shirt. Share your creations, inspire others, and enjoy the satisfaction of a job well done. Happy crafting!