
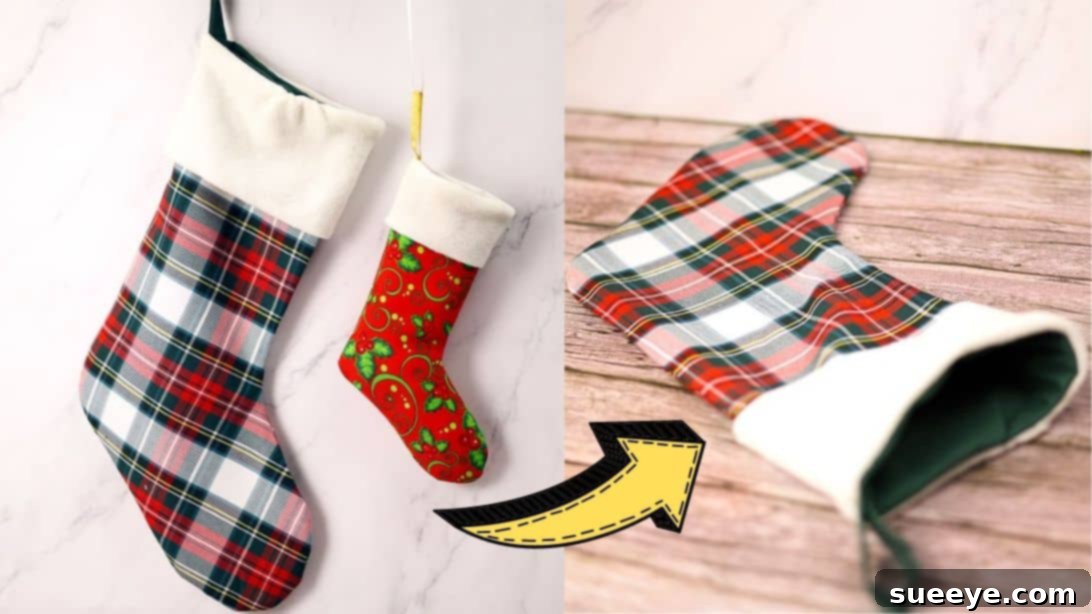
This Christmas, elevate your holiday decor with a touch of handmade charm! Learn how to create beautiful, custom Christmas stockings with this incredibly easy-to-follow sewing project from Hello Sewing. Whether you’re a beginner or an experienced crafter, this tutorial will guide you through making a lovely stocking that your family will cherish for years to come. Best of all, it’s quick to assemble and comes with a free pattern, available in two convenient sizes, allowing you to perfectly match your festive vision. Imagine these personalized treasures hanging by your fireplace, brimming with holiday cheer!
Sew a Charming DIY Christmas Stocking: A Free Pattern Tutorial for the Holidays
There’s something uniquely special about handmade Christmas decorations. They carry a warmth and personal touch that mass-produced items simply can’t replicate. A custom-sewn Christmas stocking isn’t just a place for Santa to leave gifts; it’s a family heirloom in the making, a canvas for your creativity, and a delightful addition to your festive home. This comprehensive guide will walk you through every step of crafting your very own holiday masterpiece. We’ll delve into fabric choices, essential tools, and detailed instructions to ensure your project is a resounding success, culminating in a beautiful stocking ready for Christmas morning.
Why Sew Your Own Christmas Stocking?
Beyond the simple act of crafting, making your own Christmas stocking offers a plethora of benefits. Firstly, it allows for unparalleled personalization. You can choose fabrics that perfectly complement your existing decor, reflect individual family members’ personalities, or introduce a fresh, new theme each year. Secondly, it’s a budget-friendly alternative to often expensive store-bought options, especially when you consider the quality and sentimentality of a handmade item. Thirdly, the process itself can be a wonderfully relaxing and rewarding holiday activity, perfect for getting into the festive spirit. Finally, these stockings become cherished traditions, brought out year after year, filled with memories and anticipation. This project is not only satisfying but also practical, providing durable, beautiful stockings that will stand the test of time.
Essential Materials You’ll Need for Your Christmas Stocking
Gathering your materials before you begin is key to a smooth and enjoyable sewing experience. For this project, you’ll need a few common sewing supplies and some festive fabrics. Remember, the choice of fabric can dramatically change the look and feel of your finished stocking, so choose wisely!
- Outer Fabric (18″ x 26″ / 46 x 66cm): Select a festive cotton, cozy flannel, luxurious wool, or elegant velvet in a delightful Christmas print. This fabric will be the star of your stocking, visible on the outside. Consider how it drapes and holds its shape. Cotton is versatile and easy to work with, flannel adds warmth, while wool and velvet offer a more sophisticated, rich texture perfect for holiday glamour.
- Lining Fabric (18″ x 26″ / 46 x 66cm): A good quality woven cotton is ideal for the lining. This provides structure, helps the stocking hold its shape, and gives a neat, professional finish to the inside. You can choose a solid color that coordinates with your outer fabric or even a subtle print for an extra touch of hidden charm.
- Cuff Fabric (16″ x 5″ / 40 x 13cm): This piece adds a beautiful decorative flourish to the top of your stocking. Faux fur provides a classic, luxurious feel; flannel offers a soft, traditional look; and fleece gives a warm, playful touch. Select a fabric that contrasts or complements your outer fabric for visual interest.
- Hanging Loop (2.5″ x 6″ / 6.5 x 15cm): A sturdy ribbon or a matching piece of your lining fabric will work perfectly for the hanging loop. Ensure it’s strong enough to hold the weight of a filled stocking. If using fabric, consider folding and pressing it to create a durable strap.
- Needle and Matching Thread: Always choose high-quality thread that matches or subtly blends with your outer fabric. A sharp sewing machine needle appropriate for your fabric type will prevent skipped stitches and ensure smooth sewing.
- Scissors or Rotary Cutter and a Cutting Mat: Precision is important! Sharp fabric scissors are a must. A rotary cutter with a self-healing cutting mat and a quilting ruler can offer even greater accuracy and speed, especially for straight lines.
- Ruler or Measuring Tape: Essential for accurate measurements and marking seam allowances.
- Iron and Ironing Board: Crucial for pressing seams open and flat. Pressing as you go makes a huge difference in the professional appearance of your finished project. Don’t skip this step!
- Fabric Pins or Clips: To hold fabric pieces together securely while sewing. Clips are especially useful for thicker fabrics like faux fur or multiple layers.
- Sewing Machine: A reliable sewing machine is your best friend for this project, making quick work of seams.
- Pattern: Don’t forget to download the free pattern! Click here to download the pattern. This printable template is the foundation for your stocking, ensuring correct sizing and shape.
Step-by-Step Guide to Crafting Your Christmas Stocking
Follow these detailed instructions to bring your festive vision to life. Take your time with each step, and don’t be afraid to pause and re-read if anything is unclear. Precision and patience will lead to the best results.
Step 1: Preparation and Main Stocking Assembly
This initial phase focuses on preparing your pattern and constructing the foundational shapes of your stocking.
1.1 Print and Assemble Your Pattern Pieces: Begin by downloading the free pattern. Print all pages at 100% scale, ensuring your printer settings do not resize the document. Once printed, carefully cut out each template piece. Align them according to the pattern’s markings and tape them together securely to form a single, complete stocking shape. Double-check measurements against a ruler to confirm accuracy.
1.2 Cut Your Fabric Pieces: Lay your outer fabric flat, ensuring it’s smooth and free of wrinkles. Place your assembled pattern piece on top, paying attention to any grainline arrows if present. Trace the stocking shape onto your outer fabric. Repeat this process to cut two identical pieces for the front and back of your outer stocking. Next, trace and cut two identical lining fabric pieces using the same template. Finally, cut your rectangular cuff piece and your hanging loop piece according to the specified dimensions. Set the cuff and hanging loop pieces aside for now.
1.3 Sew the Outer Stocking: Take your two outer fabric pieces. Place them right sides together, carefully aligning all edges. Pin them securely around the curved edges and along the sides, leaving the top opening completely unsewn. Using your sewing machine, stitch around the pinned edges with a 3/8-inch (or 1cm) seam allowance. Remember to backstitch at the beginning and end of your seam to reinforce it. The top edge of the stocking should remain open.
1.4 Create Notches and Press: To ensure your stocking has smooth, rounded curves once turned right side out, make small notches into the seam allowance around all the curved edges. Be careful not to cut through your stitch line. These notches will help the fabric lay flat and prevent bulk. Once notched, turn the outer fabric right side out. Using a hot iron, give the entire outer stocking a thorough press. This step is crucial for achieving a crisp, professional finish and defining the shape.
1.5 Sew the Lining Stocking: Repeat the exact same sewing and notching process for your two lining fabric pieces. Place them right sides together, sew with a 3/8-inch (1cm) seam allowance, leaving the top open. Notch the curves, but *do not* turn the lining right side out yet. Leave it with the wrong sides facing out.
Step 2: Assembling the Lining, Cuff, and Hanging Loop
This final stage brings all the components together, adding the finishing touches that make your stocking truly special.
2.1 Insert the Lining into the Outer Stocking: Carefully insert the lining fabric (which is still wrong side out) into the outer stocking (which is now right side out). Align the top raw edges of both the outer and lining stockings precisely. Ensure that the seams of both pieces are aligned as much as possible for a neat finish. Pin the top edges together all the way around, keeping the layers flush.
2.2 Prepare the Cuff Piece: Take your rectangular cuff fabric. Fold it in half lengthwise, with right sides together. Pin along the two shorter sides. Stitch these two short sides together using a 3/8-inch (1cm) seam allowance, creating a fabric loop. Turn the cuff piece right side out and give it a gentle press. This forms the decorative band for the top of your stocking.
2.3 Attach the Cuff to the Stocking: Now, carefully insert the prepared cuff piece into the top of the stocking (which contains both the outer fabric and the lining). The raw edge of the cuff should align with the raw edges of the outer and lining fabrics. The right side of the cuff should be facing the right side of the outer stocking. Pin all three layers (cuff, outer fabric, lining fabric) together securely around the entire top opening.
2.4 Incorporate the Hanging Loop: Before you sew these layers together, it’s time to add the hanging loop. Take your ribbon or fabric loop piece. Fold it in half to create a loop. Insert the raw ends of this loop in between the outer fabric and the lining fabric, aligning them with the top raw edges you’ve just pinned. Place the loop on one of the side seams of the stocking for a balanced look, ensuring the loop itself faces downwards into the stocking body. Pin it firmly in place, making sure it won’t shift during sewing. This step is crucial for ensuring the loop is securely integrated into the stocking’s structure.
2.5 Final Stitching: With all layers—cuff, outer fabric, lining fabric, and hanging loop—pinned securely at the top opening, sew all these layers together. Use a consistent 3/8-inch (1cm) seam allowance. Remember to backstitch at the beginning and end, and especially over the hanging loop area for extra reinforcement. Go slowly to ensure all layers are caught evenly.
2.6 The Grand Reveal: Once sewn, gently pull the cuff out and up, then fold it down over the top of the stocking. The cuff will now sit perfectly, revealing the beautiful outer fabric and the neat lining. Give your newly finished Christmas stocking a final press to smooth out any wrinkles and define its shape. Step back and admire your beautiful, handmade creation!
Tips for Customizing Your Christmas Stocking
Making your own stocking offers endless possibilities for personalization. Here are a few ideas to make yours truly unique:
- Monograms and Appliqués: Add embroidered initials, a name, or fun holiday-themed appliqués like snowflakes, reindeers, or Christmas trees to the front of your stocking before sewing the outer pieces together.
- Embellishments: Attach small jingle bells, decorative buttons, pom-poms, or a touch of lace to the cuff for extra festive flair. Ensure any embellishments are securely attached, especially if the stocking will be handled frequently.
- Fabric Mixing: Don’t be afraid to mix and match patterns and textures. A plaid outer fabric with a solid velvet cuff, or a whimsical print with a faux fur cuff, can create stunning effects.
- Sizing Variations: Remember the free pattern comes in two sizes! You can make a larger stocking for generous gifts or a smaller one for treats and trinkets. Consider making a set of varying sizes for a dynamic display.
- Themed Stockings: Dedicate stockings to specific family members or even pets, choosing fabrics and embellishments that reflect their personality or interests. For example, a dog-themed print for a pet’s stocking.
Caring for Your Handmade Stocking
To ensure your beautiful Christmas stocking lasts for many holidays to come, proper care is essential. The best cleaning method will depend largely on the fabrics you chose. For most cotton and flannel stockings, a gentle machine wash in cold water with mild detergent is usually safe. If you used delicate fabrics like wool, velvet, or faux fur, dry cleaning or spot cleaning might be more appropriate. Always air dry your stockings to prevent shrinking or damage to embellishments. Store them flat or gently rolled in a clean, dry place to maintain their shape and prevent creasing.
Easy-To-Sew Christmas Stocking (with Free Pattern) – Conclusion
Congratulations! You’ve successfully created a charming, handmade Christmas stocking that’s ready to be filled with festive treats and treasured memories. This project is a testament to the joy and satisfaction that comes from crafting something beautiful with your own hands. Not only have you added a unique touch to your holiday decor, but you’ve also gained valuable sewing skills along the way. We hope you enjoyed this sewing adventure and are delighted with your finished project. Feel free to experiment with different fabrics and embellishments for future stockings, making each one truly unique. Don’t forget to explore more wonderful tutorials from Hello Sewing for endless creative inspiration. Happy holidays and happy crafting!
*All image credit belongs to Hello Sewing via YouTube. Follow and subscribe to her channel for more inspiring sewing projects!