
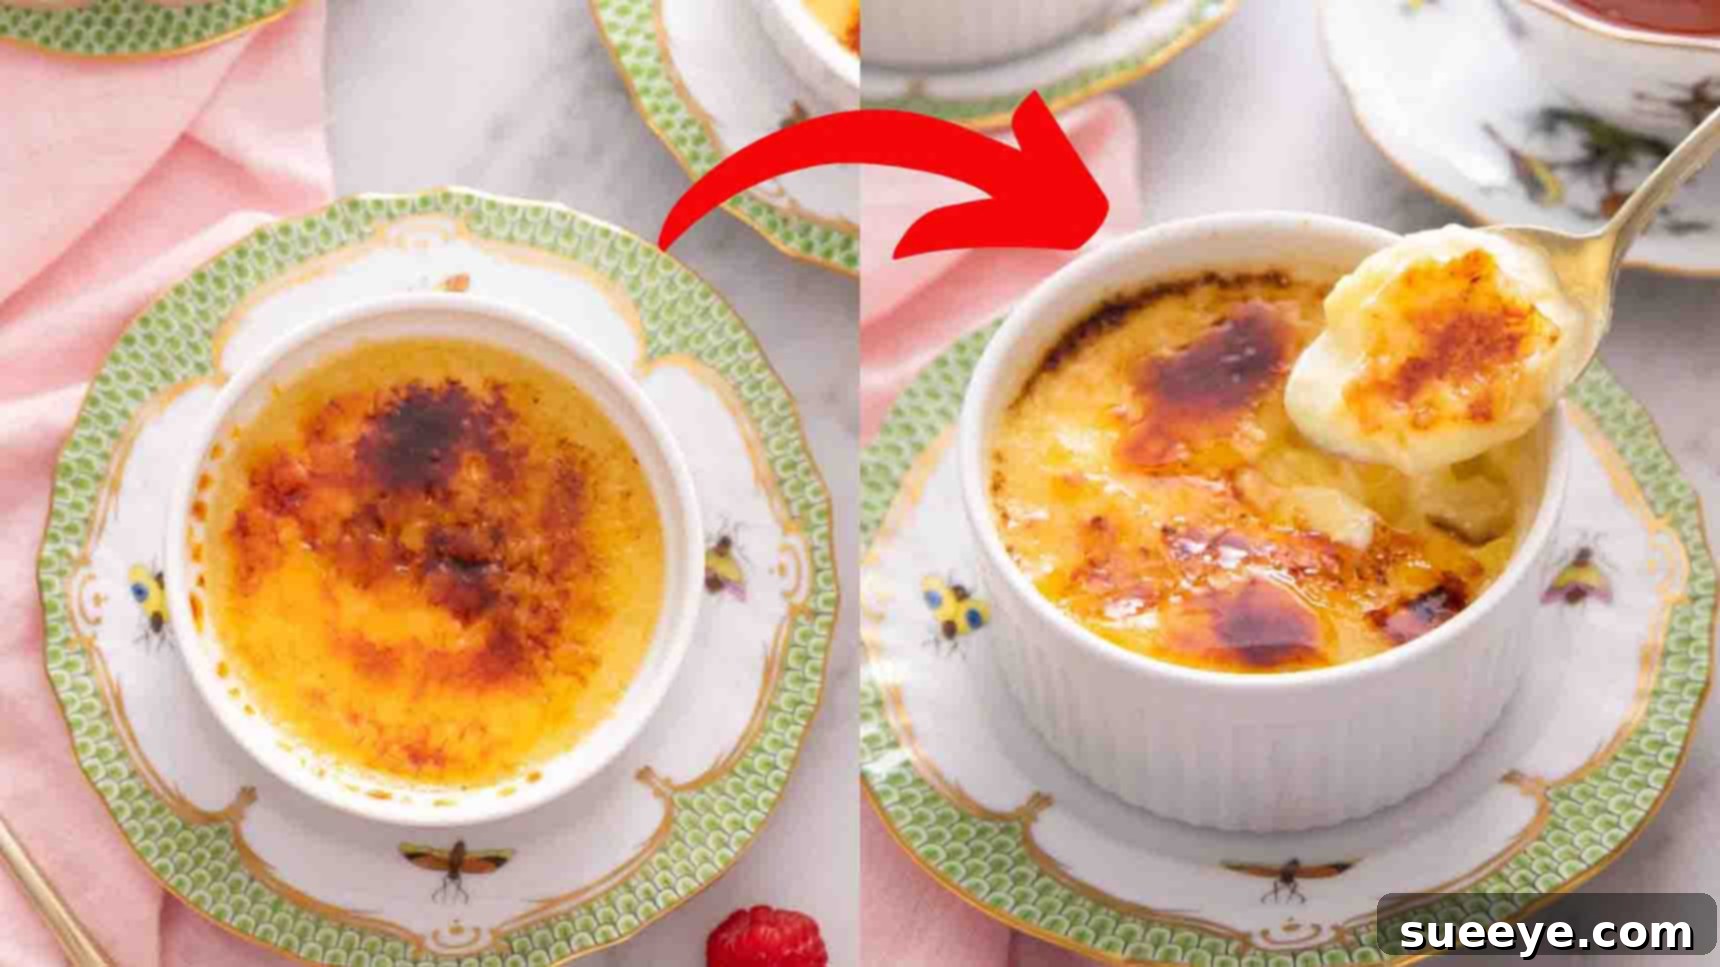
Master the Art of Easy 5-Ingredient Creme Brulee: A Foolproof Recipe for Perfect Indulgence
Imagine a dessert that’s luxuriously rich, incredibly creamy, and crowned with a perfectly crisp, caramelized sugar shell that shatters with the tap of a spoon. Now, imagine achieving all that with just five simple ingredients. Sounds like a dream, right? Welcome to the world of our foolproof 5-ingredient creme brulee recipe, designed to make this classic French delight accessible to every home cook, regardless of their baking experience.
This isn’t just another dessert recipe; it’s a game-changer. Creme brulee often intimidates with its sophisticated reputation, but we’re here to demystify the process. With our streamlined approach, you’ll create a dessert so exquisite, your family and friends will think you spent hours in the kitchen. It’s the ultimate make-ahead dessert, perfect for impressing guests at a Sunday brunch, a special dinner party, or simply treating yourself to a moment of pure culinary bliss.
Forget complex techniques and extensive ingredient lists. We’ve stripped this indulgent classic down to its delicious essentials, ensuring a high-quality result every single time. Get ready to embark on a delightful culinary journey that culminates in a dessert so rich and flavorful, it will undoubtedly become one of your go-to recipes. Let’s dive into creating the best creme brulee recipe you’ll ever encounter.
Why You’ll Love This Easy Creme Brulee Recipe
There are countless reasons to fall head over heels for this simplified yet elegant dessert. Firstly, its sheer simplicity is unparalleled. By focusing on just five core ingredients, we eliminate unnecessary steps and potential complications, making it a truly foolproof creme brulee for beginners and seasoned bakers alike. You won’t need to hunt for obscure components; everything on this list is readily available at any grocery store.
Secondly, the make-ahead aspect is a host’s dream. You can prepare these ramekins several hours or even a couple of days in advance, allowing you to focus on other preparations when entertaining. When dessert time arrives, simply pull them from the fridge, caramelize the sugar, and serve. This convenience makes it an ideal candidate for any gathering, from casual family dinners to elegant celebrations, ensuring you spend more time enjoying your company and less time stressed in the kitchen.
Finally, and most importantly, the taste is absolutely divine. This recipe yields a velvety smooth custard with an incredibly rich vanilla flavor, perfectly complemented by the crisp, slightly bitter notes of the caramelized sugar topping. It’s a symphony of textures and flavors that will leave a lasting impression on anyone who tastes it. Prepare to receive endless compliments and requests for this truly special dessert.
The Simple Magic of 5 Ingredients
It might seem unbelievable that such a decadent dessert can be crafted from so few items, but the secret lies in the quality and balance of these fundamental components. Each ingredient plays a crucial role in creating the iconic texture and flavor of a perfect creme brulee. Let’s gather what you’ll need to create this culinary masterpiece.
Ingredients:
- 3 cups of heavy cream: Opt for full-fat heavy cream (at least 36% milk fat) for the richest, most decadent custard. This is the backbone of your creme brulee, providing its signature creamy texture.
- 1 vanilla bean, split and scraped (or 1-2 teaspoons vanilla extract): For an authentic, intense vanilla flavor, a fresh vanilla bean is highly recommended. Scrape out the aromatic seeds and infuse them along with the pod. If a vanilla bean isn’t accessible, a good quality vanilla extract (pure, not artificial) will still yield delicious results.
- 5 large egg yolks: The egg yolks are the emulsifier and thickener, giving the custard its silky smooth consistency. Ensure they are separated cleanly from the whites.
- 1/2 cup + 9 teaspoons granulated sugar, divided: Granulated sugar serves two purposes here. The 1/2 cup is incorporated into the custard for sweetness, while the 9 teaspoons (approximately 1.5 teaspoons per ramekin) are reserved for the iconic caramelized topping.
- 1/8 teaspoon salt: A tiny pinch of salt enhances all the other flavors, balancing the sweetness and bringing out the depth of the vanilla. Don’t skip this seemingly small but mighty addition.
Essential Kitchen Tools
While the ingredients are minimal, having the right tools on hand will make the process even smoother and more enjoyable. These aren’t necessarily specialized gadgets, but they will certainly contribute to your success in crafting the perfect homemade creme brulee.
- Small saucepan: For gently heating and infusing the heavy cream.
- Medium-sized bowl: For whisking the egg yolks and sugar.
- Fine-mesh sieve: Crucial for straining the infused cream and custard mixture, ensuring a super smooth texture free from any vanilla bean bits or cooked egg particles.
- Ramekins (4-6 individual ceramic dishes): These shallow, oven-safe dishes are essential for cooking and serving creme brulee.
- Casserole dish or roasting pan: Large enough to hold your ramekins and create a water bath (bain-marie) during baking.
- Whisk: For combining ingredients smoothly.
- Rubber spatula: For scraping bowls and folding.
- Kitchen torch: While an oven broiler can be used in a pinch, a kitchen torch provides the most control for creating that beautiful, uniform caramelized sugar crust. It’s a worthy investment for any dessert enthusiast.
Step-by-Step Directions to Your Perfect Creme Brulee
Follow these detailed steps closely for a truly magnificent result. Each stage is crucial in building the rich flavor and luxurious texture that makes creme brulee so beloved.
Step 1: Infusing the Cream and Preparing the Custard Base
Begin by preheating your oven to 325 degrees F (160 degrees C). This ensures your oven is at the correct, stable temperature when the custards are ready to bake. In a small, heavy-bottomed saucepan, combine the 3 cups of heavy cream, the scraped vanilla bean seeds, and the empty vanilla bean pod. The pod still contains a lot of flavor, so don’t discard it yet!
Place the saucepan over medium heat, gently bringing the cream mixture to a scald. You’ll know it’s scalding when small bubbles begin to form around the edges of the pan and steam starts to rise, but it’s not boiling vigorously. This heating process helps to extract the maximum flavor from the vanilla bean. Once scalded, remove the pan from the heat, cover it, and let it infuse for a minimum of fifteen minutes. This infusion period is vital for a truly aromatic vanilla experience.
While the cream is infusing, carefully separate five large eggs, placing the yolks into a medium-sized bowl. Reserve the whites for another use (like an omelet or meringue). To the egg yolks, add the 1/2 cup of granulated sugar and the 1/8 teaspoon of salt. Whisk these ingredients together vigorously until the mixture is pale yellow and creamy. It should be well combined and slightly thickened.
Once the cream has infused and cooled slightly (it shouldn’t be boiling hot, but still warm), carefully strain it through a fine-mesh sieve directly into the whisked egg yolk mixture. This step removes the vanilla bean pod and any potential cooked egg particles, ensuring a perfectly smooth custard. Gradually whisk the cream into the egg yolks. This process, known as tempering, slowly brings the egg yolks up to temperature without scrambling them. Continue whisking gently until the cream and egg mixture is thoroughly combined and uniform in consistency.
Step 2: Baking to Perfection in a Water Bath
Arrange your ramekins in a larger casserole dish or roasting pan. This setup is crucial for creating a water bath, or “bain-marie,” which ensures the custards bake gently and evenly. The water bath provides moist, indirect heat, preventing the edges from overcooking before the center sets, and results in that wonderfully silky texture. Carefully pour the strained custard mixture into each ramekin, filling them almost to the top.
Now, carefully pour hot water into the casserole dish around the ramekins, ensuring the water level comes at least halfway up the sides of the ramekins. Be mindful not to splash any water into the custard itself. Carefully transfer the entire casserole dish with the ramekins and hot water into your preheated oven at 325 degrees F (160 degrees C). Bake for approximately thirty to forty minutes. The exact baking time can vary depending on your oven and the size of your ramekins.
To check for doneness, gently jiggle one of the ramekins. The edges should be set, but the center should still have a slight wobble, like gelatin. The custards will continue to set as they cool. Overbaking can lead to a rubbery texture, so it’s better to slightly underbake than overbake. Once baked, carefully remove the casserole dish from the oven. Using tongs or oven mitts, carefully lift the individual ramekins out of the water bath and place them on a wire rack to cool completely at room temperature.
After they have cooled to room temperature, transfer the ramekins to the refrigerator. Chill them for several hours, ideally four hours, or even better, overnight. This chilling period is essential for the custard to fully set and for the flavors to meld beautifully. You can prepare these up to two days in advance, making them an excellent choice for a make-ahead dessert.
Step 3: Chilling and the Grand Finale of Caramelization
When you are ready to serve your delightful creme brulee, remove the chilled ramekins from the refrigerator. Evenly sprinkle about 1 1/2 teaspoons of granulated sugar (or caster sugar, which melts more quickly) over the surface of each custard. Ensure the sugar forms an even, thin layer for the best caramelization. For a professional finish, lightly tilt and rotate the ramekin to distribute the sugar evenly, then tap off any excess.
Now comes the show-stopping part: the caramelization. Using a kitchen torch, carefully heat the sugar layer. Keep the flame moving constantly over the sugar in circular motions to ensure even melting and prevent burning. Watch as the sugar bubbles, melts, and transforms into a beautiful, amber-colored, hard candy shell. This process usually takes just 1-2 minutes per ramekin. If you don’t have a kitchen torch, you can place the ramekins under a preheated broiler for a very short time (keep a close eye on them, as sugar burns quickly!).
Once the sugar is perfectly caramelized and hardened, serve your caramelized sugar creme brulee immediately. The contrast between the warm, crisp topping and the cold, creamy custard beneath is what makes this dessert truly magical. Enjoy the satisfying crack as you break through the sugar crust with your spoon to reach the luscious custard below.
Expert Tips for Flawless Creme Brulee
Achieving restaurant-quality creme brulee at home is entirely possible with a few insider tips. These pointers will help you avoid common pitfalls and elevate your dessert to perfection.
- Temperature Control is Key: Ensure your oven is accurately preheated. A gentle, consistent temperature is vital for the custard to set properly without curdling or becoming rubbery.
- Don’t Skip the Water Bath (Bain-Marie): This step is non-negotiable for a silky smooth custard. It insulates the ramekins, provides even heat, and prevents the custards from cracking or drying out. Always use hot water for the bath to maintain oven temperature consistency.
- Chill Thoroughly: Patience is a virtue when it comes to chilling. A minimum of 4 hours, or preferably overnight, allows the custard to fully set and firm up, ensuring the perfect creamy texture when served.
- Even Sugar Layer: When adding sugar for caramelization, aim for a thin, even layer. Too much sugar can create a very thick, hard crust, while an uneven layer will result in burnt or under-caramelized spots. Caster sugar (superfine sugar) works wonderfully as it melts faster and more uniformly than regular granulated sugar.
- Torch Technique: Keep your kitchen torch moving constantly in small circles. This ensures the sugar melts and caramelizes evenly without burning. Hold the torch a few inches away from the sugar. If you see smoke, you’re burning it!
- Serve Immediately After Torching: The magic of creme brulee lies in the contrast between the warm, crisp sugar topping and the cold, creamy custard. Serve within minutes of caramelizing for the ultimate experience.
Flavor Variations and Customization
While the classic vanilla creme brulee is divine, this recipe provides an excellent base for experimentation. Feel free to explore other exciting flavors to suit your palate or occasion.
- Coffee Creme Brulee: Add 1-2 tablespoons of instant espresso powder or strong brewed coffee to the heavy cream as it infuses.
- Chocolate Creme Brulee: Melt 2-3 ounces of good quality dark chocolate into the warm cream before straining.
- Citrus Zest: Infuse the cream with strips of orange or lemon zest for a bright, refreshing twist. Remove the zest before straining.
- Spiced Creme Brulee: Add a cinnamon stick, a few cardamom pods, or a pinch of ground nutmeg to the cream while it infuses for a warm, aromatic flavor.
- Lavender Creme Brulee: Infuse 1-2 teaspoons of culinary dried lavender buds with the cream for a delicate, floral note.
Remember to adjust the sugar content slightly if adding very sweet or bitter ingredients.
Serving Suggestions and Presentation
Creme brulee is an elegant dessert on its own, but a few simple touches can elevate its presentation and overall experience. Serve it alongside fresh berries (raspberries, strawberries, or blueberries complement the richness beautifully) or a light dusting of cocoa powder or powdered sugar around the base of the ramekin. A small sprig of mint can add a pop of color. For a truly decadent treat, pair it with a small scoop of vanilla bean ice cream or a dollop of freshly whipped cream. The contrasting temperatures and textures will create a memorable dining experience.
Make-Ahead and Storage Tips
One of the greatest advantages of this easy creme brulee recipe is its make-ahead potential. Once baked and cooled, the custards can be stored in the refrigerator, covered tightly with plastic wrap, for up to 2-3 days. This makes them ideal for entertaining, as you can prepare them well in advance and simply perform the final caramelization just before serving. Do not caramelize the sugar ahead of time, as it will absorb moisture from the refrigerator and lose its crispness. Always torch the sugar right before serving for that perfect, satisfying crack.
Troubleshooting Common Creme Brulee Issues
Even with a foolproof recipe, minor issues can sometimes arise. Here’s how to address them:
- Custard is Rubbery: This is a sign of overbaking. Ensure you don’t bake past the point where the edges are set but the center still slightly wobbles.
- Custard is Curdled or Scrambled: This usually happens if the hot cream is added too quickly to the egg yolks without tempering, or if the cream was too hot when added. Always whisk gradually and ensure the cream has cooled slightly from boiling.
- Sugar Topping Burns Easily: You’re likely holding the torch too close or keeping it in one spot for too long. Keep the flame moving constantly.
- Sugar Topping Doesn’t Harden: Ensure the custards are thoroughly chilled. A cold surface helps the caramelized sugar set quickly. Also, ensure you’re using granulated or superfine sugar, which caramelizes well.
Conclusion: Your Journey to Perfect Creme Brulee Starts Here
You’ve now uncovered the secrets to crafting a truly spectacular 5-ingredient creme brulee that is both easy and incredibly delicious. This recipe proves that elegant desserts don’t have to be complicated. With just a handful of ingredients and a few straightforward steps, you can create a luxurious, creamy custard topped with a captivating, crisp sugar shell that will delight everyone who tastes it.
Whether you’re a seasoned baker or just starting your culinary adventures, this foolproof creme brulee recipe is designed for success. So go ahead, gather your ingredients, embrace the simple magic of this classic French dessert, and prepare to impress with your newfound dessert-making prowess. Enjoy the sweet rewards of your kitchen endeavors!