
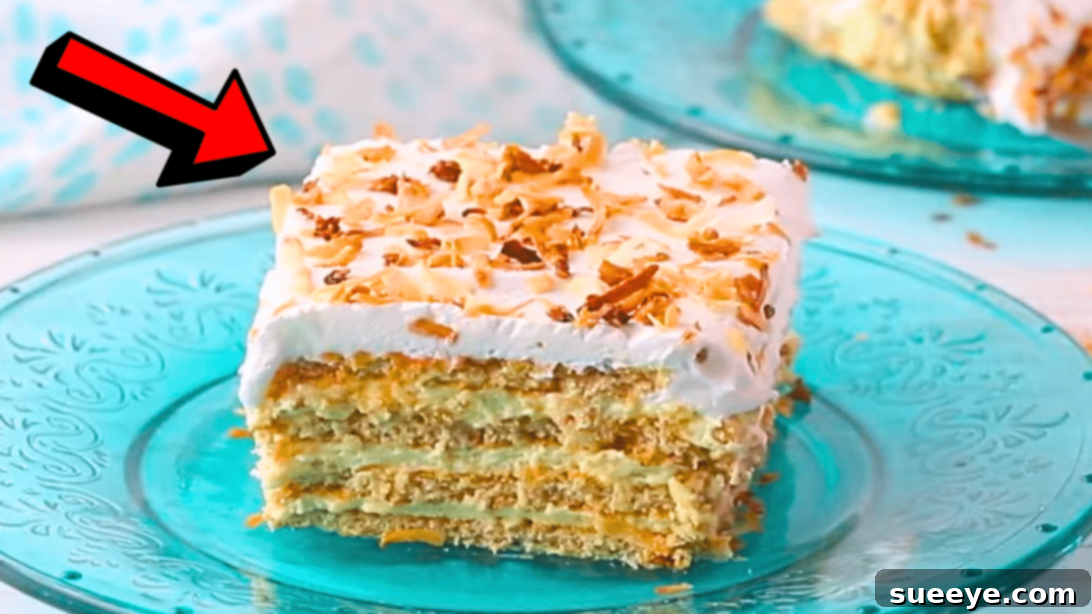
Prepare to delight your taste buds with an unbelievably simple yet incredibly satisfying dessert: the 5-Ingredient Coconut Icebox Cake. This no-bake wonder, inspired by classic homemade goodness, promises a refreshing treat perfect for any season, especially during warm summer days. Whether you’re hosting a lively backyard barbecue, a special family gathering, or simply craving a sweet escape, this recipe is guaranteed to be a crowd-plepleaser. It’s designed for convenience, requiring minimal effort and no oven, making it an ideal choice for busy schedules or beginner bakers.
Imagine layers of creamy, coconut-infused pudding, softened graham crackers, and a luscious whipped topping, all culminating in a slice of pure bliss. This dessert isn’t just easy to make; it’s also wonderfully versatile, allowing you to prepare it ahead of time and simply chill until ready to serve. The anticipation builds as it rests in the refrigerator, allowing the flavors to meld and the crackers to transform into a cake-like texture. Once you try this delightful creation, we’re confident it will earn a permanent spot in your dessert rotation. Get ready to impress your family and friends with this effortlessly elegant and utterly delicious coconut icebox cake.
RELATED: Easy Old-Fashioned Preacher Cake Recipe
Why You’ll Love This Easy Coconut Icebox Cake
This Coconut Icebox Cake stands out as a beloved dessert for numerous reasons. Firstly, its incredible simplicity is unparalleled. With just five readily available ingredients and a few straightforward steps, even novice cooks can achieve a show-stopping dessert. There’s no baking involved, which means less time in the kitchen and no worries about oven temperatures or tricky techniques. This makes it a perfect option for scorching summer days when turning on the oven is the last thing you want to do.
Beyond its ease, the flavor profile is simply irresistible. The delicate, sweet notes of coconut are perfectly balanced with the creamy texture of the pudding and whipped topping, complemented by the slightly crisp, yet softened, graham cracker layers. Each bite offers a harmonious blend of textures and tastes that is both refreshing and deeply satisfying. It’s a nostalgic dessert that evokes memories of childhood and simpler times, making it a comforting choice for any occasion.
Furthermore, this icebox cake is a fantastic make-ahead dessert. Preparing it the day before not only saves you time on the day of your event but also allows the cake to properly chill and set, intensifying its flavors and achieving that perfect melt-in-your-mouth consistency. It’s a reliable option for potlucks, parties, barbecues, or simply as a special treat for your family. Its beautiful layered appearance, especially when garnished with toasted coconut, makes it an attractive centerpiece for any dessert spread. Once you experience the effortless elegance and delightful taste of this Coconut Icebox Cake, you’ll understand why it’s a true dessert gem.
Essential Ingredients for Your No-Bake Coconut Icebox Cake
One of the true beauties of this recipe lies in its minimal ingredient list, proving that you don’t need a pantry full of exotic items to create something truly spectacular. Each component plays a crucial role in building the layers of flavor and texture that make this icebox cake so special. Here’s a closer look at the five stars of this recipe:
- 2 (3.4 oz) boxes of Instant Coconut Cream Pudding Mix: The heart of our cake’s flavor, instant pudding mix provides that rich, authentic coconut taste and creamy base without any fuss. Opt for a good quality brand for the best results. This ensures your pudding sets beautifully and delivers a consistent flavor throughout the dessert.
- 3 cups of Whole Milk: Whole milk is essential for creating a lusciously thick and rich pudding. Its higher fat content contributes to the creamy texture and helps the pudding set properly. While other milk varieties can be used, whole milk is highly recommended for the classic, indulgent taste and consistency of this icebox cake.
- 2 (8 oz) containers of Whipped Topping, thawed: Whipped topping is a secret weapon in no-bake desserts. It adds an airy, light texture and a delicate sweetness, beautifully complementing the coconut pudding. It’s crucial to ensure your whipped topping is completely thawed but still cold before using it, as this will allow for smooth incorporation and prevent the mixture from becoming runny. We’ll be using one container for the creamy filling and reserving the second for a delightful top layer.
- 3 sleeves of Graham Crackers: These humble crackers form the structural backbone of our icebox cake. As they absorb the creamy pudding mixture during chilling, they transform into soft, cake-like layers that are wonderfully satisfying. Their subtle honey-graham flavor also provides a lovely contrast to the sweet coconut. Ensure you have enough to create multiple layers, breaking them as needed to fit your dish.
- ½ cup of Toasted Coconut: This ingredient is the perfect finishing touch, adding both an enhanced coconut flavor and a delightful textural contrast. Toasted coconut flakes bring out a deeper, nuttier aroma and a slightly crisp chew that elevates the entire dessert. If you can’t find pre-toasted coconut, simply spread regular coconut flakes on a baking sheet and toast them in a preheated oven at 350°F (175°C) for 5-10 minutes, stirring occasionally, until golden brown. Let them cool completely before using.
How to Create Your Delicious Coconut Icebox Cake: Step-by-Step
Crafting this irresistible Coconut Icebox Cake is a straightforward and enjoyable process. Follow these detailed steps to assemble your no-bake masterpiece:
Step 1: Prepare the Creamy Pudding Base
Begin by taking a large mixing bowl, ensuring it’s spacious enough to accommodate all your ingredients comfortably. Pour in the contents of both instant coconut cream pudding mix boxes, followed by the three cups of cold whole milk. Using a whisk, thoroughly combine the pudding mix and milk. Whisk continuously for about one minute, or until the mixture is smooth, free of lumps, and visibly starts to thicken. The goal here is a creamy, well-incorporated base that will set perfectly. Set this mixture aside for a moment to allow it to firm up slightly while you prepare the next component.
Step 2: Fold in Whipped Topping and Build the First Layer
Now, gently fold in one of the thawed 8 oz containers of whipped topping into your prepared pudding mixture. The key here is to fold, not stir vigorously, to maintain the airy lightness of the whipped topping. Continue folding until the pudding and whipped topping are seamlessly combined, creating a smooth, velvety, and light creamy filling. Once combined, set this luscious mixture aside. Next, retrieve a 9×13-inch baking dish (a standard casserole dish works perfectly). Arrange a single layer of graham crackers at the bottom of the dish, breaking them as necessary to cover the entire base. Then, carefully spoon approximately one-third of your creamy pudding mixture over the graham crackers and spread it evenly from edge to edge, ensuring every cracker is covered.
Step 3: Layer the Remaining Ingredients
Repeat the layering process two more times. Place another layer of graham crackers over the pudding mixture, followed by another third of the creamy pudding mixture, spreading it out smoothly. Complete the layering with a final layer of graham crackers. For the very top, generously spread the remaining creamy pudding mixture (which now incorporates the first container of whipped topping) until it evenly covers the entire surface. Finally, take your second reserved 8 oz container of thawed whipped topping and gently spread it over the top layer of the cake, creating a smooth, white canvas that will be perfect for garnishing. Ensure the entire surface is covered for a beautiful finish.
Step 4: Chill, Garnish, and Serve Your Masterpiece
Once all your layers are complete, carefully cover the baking dish with plastic wrap, ensuring it’s sealed tightly to prevent any refrigerator odors from affecting the cake and to keep the topping fresh. Place the covered dish into the refrigerator and allow it to chill for a minimum of six hours, though for optimal results and a truly set, cake-like texture, chilling it overnight is highly recommended. This crucial step allows the graham crackers to soften and absorb the creamy goodness, transforming them into a delightful cake texture, and lets all the flavors meld together beautifully. Just before serving, remove the cake from the fridge, uncover it, and generously sprinkle the toasted coconut over the top. Slice into squares, serve cold, and savor every refreshing bite of your homemade Coconut Icebox Cake!
Pro Tips for a Perfect Coconut Icebox Cake
While this recipe is incredibly simple, a few expert tips can elevate your Coconut Icebox Cake from great to absolutely extraordinary. Paying attention to these small details will ensure your dessert is consistently delicious and perfectly textured every time.
- Don’t Rush the Chill Time: This is arguably the most critical step. The minimum 6-hour chill time is essential for the graham crackers to fully soften and absorb the pudding mixture, transforming them into a cake-like consistency. Chilling overnight is even better, allowing the flavors to deepen and the cake to set perfectly, making for cleaner slices and a more integrated taste. Patience truly pays off here.
- Ensure Whipped Topping is Thawed but Cold: For the best results, your whipped topping should be fully thawed in the refrigerator before you begin. However, it should still be very cold. If it’s too warm, it might make your pudding mixture runny, affecting the final texture of your cake.
- Whisk Pudding Thoroughly: When mixing the instant pudding with milk, whisk vigorously for the recommended minute (or slightly more) to ensure there are no lumps and the pudding starts to thicken properly. A smooth base is crucial for a smooth final product.
- Layer Evenly: Take your time spreading each layer of the creamy pudding mixture. An even spread ensures that every part of the graham crackers gets saturated, leading to a uniform, delightful texture throughout the cake. This also makes for a more aesthetically pleasing dessert when sliced.
- Cover Tightly: Always cover your baking dish with plastic wrap, pressing it gently onto the surface of the top layer to prevent a skin from forming and to keep the cake fresh. This also protects it from absorbing any unwanted odors from the refrigerator.
- Toast Coconut for Enhanced Flavor: While store-bought toasted coconut works, taking a few minutes to toast your own fresh coconut flakes can make a significant difference. The heat brings out a richer, nuttier aroma and flavor, adding an extra layer of deliciousness to your garnish. Just be sure to let it cool completely before sprinkling.
Creative Variations and Serving Suggestions
While the classic Coconut Icebox Cake is undeniably delicious, its simple base makes it incredibly adaptable to various tastes and occasions. Don’t be afraid to experiment and make this recipe truly your own! Here are some ideas to inspire your culinary creativity:
Variations:
- Pudding Flavor Swap: Instead of coconut cream pudding, try instant vanilla, banana, or even chocolate pudding for a completely different flavor profile. A chocolate pudding base with graham crackers and whipped topping makes a classic “chocolate lasagna” style icebox cake.
- Add-Ins for Extra Texture: Fold in mini chocolate chips, chopped nuts (like pecans or walnuts), or even a drizzle of caramel or chocolate sauce into the pudding layers for added decadence and texture.
- Fruity Freshness: Layer sliced fresh fruits like bananas, strawberries, or raspberries between the graham cracker and pudding layers. The natural sweetness and slight tartness of the fruit will provide a wonderful contrast. Just be aware that some fruits can release more moisture, so plan to serve sooner rather than later.
- Different Cookie Base: Graham crackers are traditional, but you can experiment with other cookies! Vanilla wafers, chocolate wafers, shortbread cookies, or even gingersnaps could create unique and exciting variations.
- Spiced Up Crackers: Lightly brush your graham crackers with a thin layer of melted butter mixed with a pinch of cinnamon or nutmeg before layering for an extra layer of flavor complexity.
- Individual Servings: Instead of a large baking dish, assemble the cake in individual parfait glasses or small ramekins for elegant, single-serving desserts. This is perfect for parties and makes portion control a breeze.
Serving Suggestions:
- The Ultimate Summer Dessert: This icebox cake truly shines as a refreshing finale to summer barbecues, picnics, and outdoor gatherings. Its no-bake nature means less time in a hot kitchen, and its cool, creamy texture is a welcome relief on a warm day.
- Party Perfect: Its impressive layered appearance and crowd-pleasing flavor make it an excellent choice for birthday parties, anniversaries, or any celebration where a delicious yet easy-to-manage dessert is desired.
- Simple Family Treat: You don’t need a special occasion to enjoy this cake. It’s a fantastic everyday dessert that can be prepared on a Sunday and enjoyed throughout the week as a sweet snack or after-dinner treat.
- Coffee Companion: Serve a slice alongside a steaming cup of coffee or a refreshing iced tea for a delightful afternoon pick-me-up.
- Light Fruit Garnish: While toasted coconut is the primary garnish, a few fresh berries or a sprig of mint can add a pop of color and freshness, especially if you’ve chosen a fruit-based variation.
No matter how you choose to customize or serve it, this Coconut Icebox Cake is sure to be a hit. Its blend of simplicity, versatility, and undeniable deliciousness makes it a recipe you’ll return to again and again.
Storing Your Coconut Icebox Cake for Maximum Freshness
Proper storage is key to maintaining the deliciousness and integrity of your Coconut Icebox Cake. Since it’s a no-bake dessert, refrigeration is essential from start to finish, not just for setting but also for preserving its fresh taste and creamy texture.
- Immediate Refrigeration: As soon as the cake is assembled, it must be covered tightly with plastic wrap and placed in the refrigerator. This step prevents the cake from absorbing any unwanted odors from other foods in your fridge and helps maintain its moisture content.
- Longevity: When stored correctly in the refrigerator, your Coconut Icebox Cake will remain fresh and delightful for 3 to 4 days. After a few days, the graham crackers might become overly soft, and the flavors may start to diminish slightly, but it will still be enjoyable.
- Airtight is Key: Ensure the plastic wrap creates an airtight seal around the dish. If you have an airtight container large enough, transferring the cake to one after it has set can provide even better protection.
- Avoid Freezing: While some desserts fare well in the freezer, icebox cakes generally do not. The graham crackers can become soggy and crumbly upon thawing, and the texture of the whipped topping may change, becoming watery or grainy. It’s best to enjoy this cake fresh from the refrigerator.
- Pre-Garnish Only When Serving: If you’re making the cake ahead of time, it’s best to add the toasted coconut garnish just before serving. This ensures the coconut remains delightfully crisp and aromatic, offering the perfect textural contrast to the soft cake. If added too early, it might absorb moisture and lose its crunch.
By following these simple storage guidelines, you can ensure that every slice of your Coconut Icebox Cake is as fresh, creamy, and delicious as the first, allowing you to enjoy this wonderful treat for days.
*These amazing images are provided courtesy of The Country Cook via YouTube. We highly recommend visiting her channel for more delightful and easy-to-follow recipes!
Indulge in the Simplicity of This 5-Ingredient Coconut Icebox Cake Recipe
In conclusion, this 5-Ingredient Coconut Icebox Cake is more than just a dessert; it’s a testament to the fact that extraordinary flavor and delightful experiences don’t always require complex ingredients or lengthy preparation. It embodies the perfect blend of convenience, refreshing taste, and crowd-pleasing appeal, making it an indispensable recipe for any home cook.
From its creamy coconut layers to its softened graham cracker base, every element comes together harmoniously to create a dessert that is both comforting and exhilarating. It’s the ideal companion for summer festivities, a comforting treat for a quiet evening, or a stress-free option when you need a quick yet impressive dessert. The ease of preparation, combined with the magic of overnight chilling, transforms simple ingredients into a true culinary delight that tastes like it took hours, not minutes, to prepare.
So, gather your five ingredients, follow our straightforward steps, and let the refrigerator do the rest. You’re just a few simple layers away from enjoying a refreshing, creamy, and utterly delicious Coconut Icebox Cake. We encourage you to try this recipe for yourself and experience the joy of creating a fantastic dessert with minimal fuss. Share your creations, experiment with variations, and most importantly, savor every delightful bite!