
In the chilly grip of colder months, or when persistent muscle aches and stiffness strike, a heating pad often emerges as a true household hero. Far more than just a source of instant warmth for frigid hands, these versatile tools are indispensable for soothing sore muscles, alleviating tension, and reducing swelling. While store-bought options are readily available, why not embrace the satisfaction of creating your own personalized comfort? Crafting a DIY microwavable heating pad is not only incredibly easy and budget-friendly but also allows for complete customization to suit your specific needs and preferences.
Forget the hassle and expense of store-bought pads; this guide will walk you through making a delightful, scented heating pad right at home, utilizing common items you likely already possess. Inspired by the clever ingenuity of creators like ehow on YouTube, we’ll transform a simple old sock into a comforting, therapeutic companion. Prepare to discover the joy of personalized warmth and natural pain relief.
RELATED ARTICLE: Easy-to-Make DIY Scented Gnome Gift Idea
Why a DIY Microwavable Heating Pad? Benefits Beyond Warmth
The appeal of a homemade heating pad extends far beyond its simplicity. These versatile creations offer a myriad of benefits, making them an invaluable addition to any home wellness toolkit:
- Effective Pain Relief: Heat therapy is a time-honored method for easing muscle aches, cramps, and joint stiffness. The warmth from your heating pad increases blood flow to the affected area, helping to relax tight muscles, reduce spasms, and alleviate discomfort, whether it’s a stiff neck, lower back pain, menstrual cramps, or general body aches.
- Instant Comfort in Cold Weather: When the temperature drops, a warm heating pad can be a game-changer. It quickly warms cold hands and feet, providing a comforting embrace that helps you feel cozy and relaxed, making those brisk days a little more bearable.
- Stress and Tension Reduction: The soothing warmth, especially when combined with aromatic essential oils, offers a calming effect that can significantly reduce stress and promote relaxation. Applying a warm pad to your neck or shoulders after a long day can melt away tension and foster a sense of well-being.
- Cost-Effective Solution: Why spend a premium on store-bought options when you can create a high-quality heating pad for a fraction of the cost? Utilizing simple, readily available materials like an old sock and rice makes this an incredibly economical choice.
- Environmentally Friendly: Repurposing an old sock gives new life to an item that might otherwise end up in landfill. This eco-conscious approach to crafting aligns with sustainable living practices.
- Customizable Experience: Unlike generic store-bought pads, a DIY version allows you to tailor every aspect. Choose your favorite essential oils for a personalized aromatherapy experience, select the ideal size and shape for specific body parts, and even pick the type of filler for desired weight and heat retention.
Essential Materials for Your Homemade Microwavable Heating Pad
One of the most appealing aspects of this project is the simplicity of the materials. You likely have most, if not all, of these items on hand. Each component plays a crucial role in creating a functional and comforting heating pad:
- Rice: The primary filler for your heating pad. Uncooked rice (any variety, though long-grain white rice is common) is excellent because it holds heat well and provides a gentle, conforming weight. It’s also readily available and inexpensive.
- An Old Sock (or similar fabric): The vessel for your rice. A clean, old sock, especially a thicker one like a knee-high sock or a tube sock, works perfectly. Its tubular shape is ideal for filling, and the fabric should be sturdy enough to withstand heat and stitching. Alternatives include flannel, fleece, or cotton fabric sewn into a pouch.
- Essential Oil (your favorite scent): This is where the “scented” magic happens. Essential oils like lavender (for relaxation), peppermint (for muscle relief), eucalyptus (for respiratory comfort), or chamomile (for soothing effects) can transform your heating pad into an aromatherapy tool. Choose a high-quality, pure essential oil for the best experience.
- Scissors: For cutting the sock or thread.
- Needle and Thread: To securely seal the sections and the opening of your heating pad. Choose a strong thread that matches or complements your sock color.
- Chalk (or fabric marker): For marking the sections on your sock, ensuring even distribution of the rice.
- Ruler or Measuring Tape: To accurately measure the sections for stitching, creating an evenly segmented heating pad.
- Large Bowl: For mixing the rice and essential oil evenly.
- Funnel (optional but recommended): To make filling the sock with rice much easier and less messy.
How to Make a Microwavable Heating Pad: A Step-by-Step Guide
Follow these simple steps to craft your very own soothing, scented heating pad. This process is beginner-friendly and requires minimal crafting experience.
Step 1: Prepare the Scented Rice Filler
Begin by taking a large, clean mixing bowl. Pour approximately one cup of uncooked rice into the bowl. This amount can be adjusted based on the size of your sock and your desired pad length. Next, add 8 to 10 drops of your chosen essential oil to the rice. For a stronger scent, you can add a few more drops, but start conservatively. Stir the rice and essential oil thoroughly until the oil is evenly distributed. This ensures that every section of your heating pad will release a consistent aroma when warmed. Set this aromatic rice mixture aside while you prepare your sock.
Step 2: Section Your Sock for Even Heat Distribution
Take your clean, long piece of sock. If it’s a standard crew or ankle sock, you might only get one or two sections. For a longer pad, a knee-high or tube sock is ideal. Lay the sock flat and smooth it out. Using your ruler and chalk, mark sections along the length of the sock, about 4 to 5 inches apart. These marks will guide your stitching, creating individual compartments within the heating pad. Segmenting the pad prevents the rice from clumping at one end, ensuring even heat distribution and flexibility when using the pad. For example, if you want a pad that’s 20 inches long, you might create 4 sections.
Step 3: Fill and Stitch the Sections Securely
Now, it’s time to bring your heating pad to life! Start by filling the very bottom section of the sock with your scented rice mixture. A funnel can be incredibly helpful here to prevent spills and mess. Fill the section until it’s comfortably plump but not so tight that it can’t bend. Once the first section is filled, take your needle and thread and stitch straight across the first mark you made. Use a strong, tight stitch (like a running stitch or backstitch) to ensure the rice is securely contained. Repeat this process: fill the next section with rice, then stitch across the next mark. Continue filling and stitching all the marked sections until you reach the top of the sock, leaving enough room at the very end to seal the opening.
Step 4: Seal the Heating Pad and Test
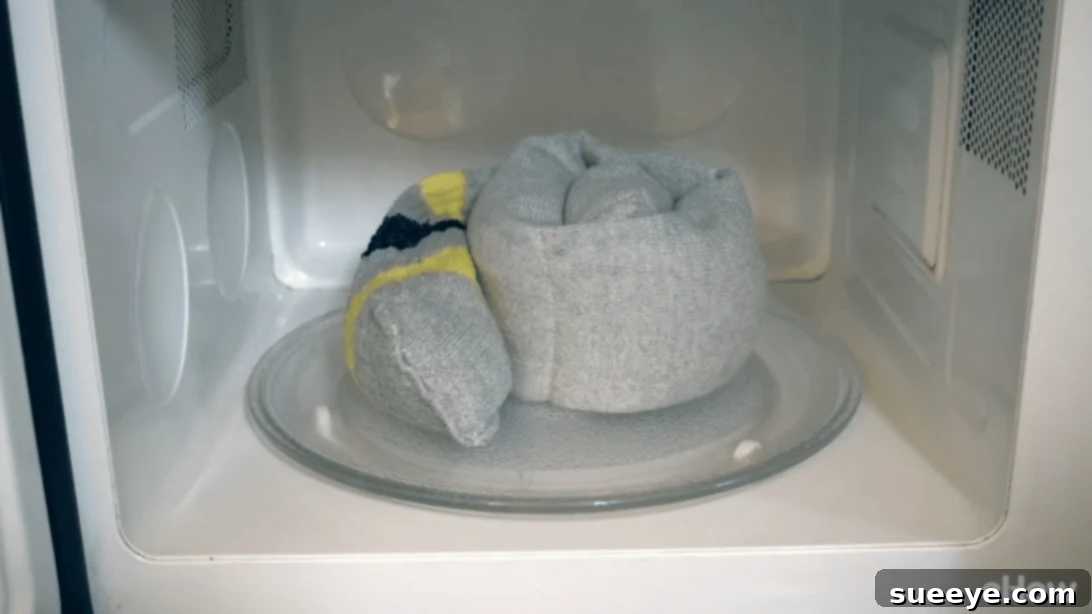
Once all your sections are filled and stitched, you’ll have one final opening at the very top of the sock. Stitch this opening closed just as you did the internal sections, ensuring it’s completely sealed to prevent any rice from escaping. Double-check all your stitches for security. Your DIY scented microwavable heating pad is now complete! To use it, place the finished heating pad in your microwave. Heat it on high for 1 to 3 minutes, depending on your microwave’s wattage and your desired level of warmth. Start with 1 minute and increase in 30-second increments until it reaches a comfortable temperature. Always test the temperature on your wrist before applying it to your skin to prevent burns.
Customization and Enhancements for Your DIY Heating Pad
The beauty of a DIY project lies in its potential for personalization. Here are some ideas to make your heating pad truly unique:
- Alternative Fillers: While rice is excellent, other natural fillers offer different benefits.
- Flaxseed: Smaller and denser than rice, flaxseed creates a softer, more pliable pad that conforms well to the body. It also retains heat for a longer duration.
- Corn (Dried): Whole corn kernels also retain heat effectively and provide a slightly different texture. Ensure it’s dried feed corn, not popcorn kernels.
- Lentils or Barley: These provide good weight and heat retention, similar to rice.
- Cherry Pits: A popular choice for their excellent heat retention and pleasant, subtle aroma when warmed.
- Aromatherapy Blends: Experiment with different essential oils or blends for various therapeutic effects:
- Relaxation: Lavender, Chamomile, Bergamot, Ylang Ylang.
- Muscle Relief: Peppermint, Eucalyptus, Rosemary, Marjoram.
- Headache Relief: Peppermint (on temples, not directly in eyes), Lavender.
- Uplifting: Orange, Lemon, Grapefruit.
Always ensure essential oils are skin-safe and follow dilution guidelines if applying directly to the skin (though in a heating pad, they are diffused by heat).
- Fabric Choices: If you’re not using a sock, consider other fabrics:
- Flannel: Soft, cozy, and retains heat well.
- Fleece: Extremely soft and comforting, though it might be thicker to sew.
- Cotton: Breathable and durable.
Ensure any fabric chosen is 100% natural fiber to be safe for microwave use (synthetic fibers can melt or scorch).
- Shapes and Sizes:
- Neck Wrap: A longer, narrower design with multiple sections can drape comfortably around the neck and shoulders.
- Eye Pillow: A small, rectangular pad, often filled with flaxseed and lavender, can be gently warmed and placed over tired eyes (ensure it’s not too hot).
- Lower Back Pad: A wider, slightly curved pad can target specific areas of the back.
- Hand Warmers: Small, individual pouches can be made for warming hands.
How to Use and Care for Your DIY Heating Pad
To maximize the life and effectiveness of your homemade heating pad, proper usage and care are essential:
- Heating Instructions:
- Place the heating pad flat in a clean microwave. Do not overheat.
- Start with 1 minute on high power. Carefully remove and test the temperature on your wrist or forearm.
- If more heat is desired, microwave in additional 30-second increments, checking the temperature each time. Most pads will be adequately warm after 1-3 minutes.
- Never leave the heating pad unattended while in the microwave.
- Ensure the pad does not feel excessively hot to the touch, as this could cause burns.
- Application:
- Apply the warm pad directly to sore muscles, stiff joints, or any area needing comfort.
- Can be placed on the stomach for menstrual cramp relief, on the neck and shoulders for tension, or on the lower back for pain.
- Cold Therapy Option: Many rice/flaxseed heating pads can also be used as cold packs! Simply place the pad in a sealed plastic bag and chill it in the freezer for 1-2 hours. This can be effective for reducing swelling or soothing headaches.
- Care and Maintenance:
- Cleaning: Due to the rice filler, your heating pad cannot be submerged in water. Spot clean only with a damp cloth and mild soap if needed. Allow it to air dry completely before storing or reheating.
- Storage: Store your heating pad in a cool, dry place away from moisture when not in use. An airtight container or Ziploc bag can help preserve the essential oil scent and protect the filler.
- Lifespan: Over time, the essential oil scent will diminish, and the rice may lose some of its heat retention properties. You can refresh the scent by adding a few more drops of essential oil to the rice (you might need to carefully open a seam, add oil, mix, and re-stitch) or simply make a new one!
- Safety Precautions:
- Do Not Overheat: Overheating can cause the rice to scorch, potentially creating a fire hazard or damaging the fabric. Always use caution and monitor heating times.
- Check Temperature: Always test the temperature of the pad before placing it directly on your skin, especially for children or individuals with sensitive skin.
- Never Use on Broken Skin: Avoid placing hot pads on open wounds, irritated skin, or areas of reduced sensation.
- Inspect for Damage: Regularly check your heating pad for any signs of wear, tear, or scorching. Discontinue use if you notice any damage.
*All these amazing images are thanks to ehow via YouTube. Do visit their channel to see more videos like this!
Embrace Homemade Comfort with Your DIY Scented Microwavable Heating Pad
Creating your own DIY scented microwavable heating pad is a wonderfully rewarding project that brings immediate benefits. It’s an accessible craft for anyone looking to add a touch of homemade comfort to their lives, alleviate minor aches and pains, or simply enjoy a moment of soothing warmth. By repurposing common household items, you not only save money but also contribute to a more sustainable lifestyle while gaining a fully customizable tool for relaxation and wellness.
From the subtle aroma of your favorite essential oil to the gentle weight of the warm rice, every aspect of this homemade heating pad is designed to provide a personalized therapeutic experience. Whether you’re battling the winter chill, nursing sore muscles after a workout, or simply seeking a moment of peace, your DIY heating pad will be there to offer a comforting embrace. So gather your materials, follow these simple steps, and prepare to enjoy the blissful warmth and natural relief that your very own handmade creation provides. It’s a small project with big returns in comfort and well-being.