
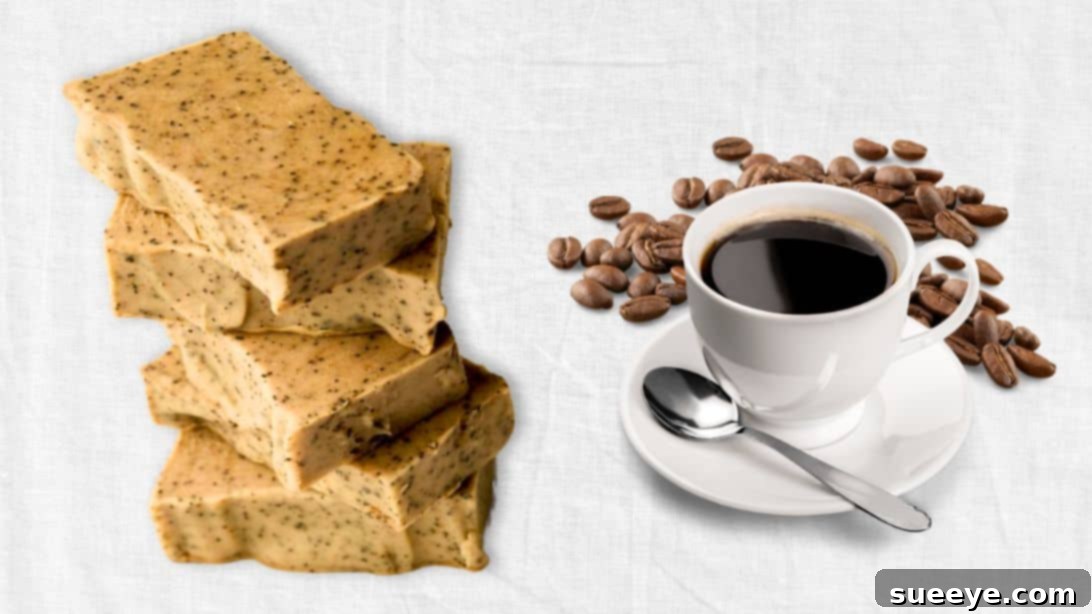
Craft Your Own Invigorating Coffee Soap: A Complete DIY Guide
Searching for a truly unique, aromatic, and genuinely beneficial gift for the coffee connoisseur in your life? Or perhaps you’re simply eager to delve into the rewarding world of homemade skincare products that nourish and invigorate? Look no further! This comprehensive guide will walk you through crafting your very own batch of luxurious, exfoliating, and odor-neutralizing coffee soap using the timeless cold process method. Many believe that making soap from scratch is an intimidating endeavor, but with the right instructions, a few essential safety precautions, and a little patience, it’s an incredibly satisfying and empowering craft. Inspired by fantastic tutorials, such as those found on channels like Heart’s Content Farmhouse, we’ve refined the process to ensure amazing results. You’ll create beautiful bars that not only boast the rich, comforting aroma of fresh coffee but also feature real coffee grounds for gentle, natural exfoliation. Get ready to transform simple, natural ingredients into a luxurious, skin-loving product that you’ll be proud to use or gift!
RELATED: Discover more ingenious ways to incorporate coffee into your DIY projects. Learn How to Make a Candle Using Coffee for a cozy ambiance, and explore Why You Should Never Throw Away Coffee Grounds for even more sustainable and creative ideas!
Understanding the Cold Process Method for DIY Coffee Soap
There are several distinct methods for crafting homemade soap, each possessing its own unique characteristics and appeal. For this particular coffee soap recipe, we will be employing the classic cold process method. This traditional technique involves the precise combination of carefully measured oils and a lye solution (sodium hydroxide dissolved in liquid—in our case, brewed coffee) to initiate a chemical reaction known as saponification. This reaction transforms the oils and lye into glorious soap and glycerin, a natural humectant that draws moisture to the skin.
While the mention of “lye” might sound a bit daunting to those new to soap making, rest assured that with proper safety precautions, accurate measurements, and clear, step-by-step guidance, the cold process is very manageable and incredibly rewarding. This method allows for greater creative control over ingredients, colors, and fragrances, ultimately yielding a truly natural, long-lasting, and conditioning bar of soap. It’s an excellent choice for beginners looking to understand the fundamentals of soap making and produce a high-quality product. Don’t be intimidated; our instructions are designed to be straightforward and easy to follow, empowering you to create beautiful, aromatic coffee soap right from your kitchen.
For a visual complement to these written instructions, we always recommend watching a video tutorial from an experienced soap maker. Visual aids can provide invaluable insights into technique, consistency, and troubleshooting that can be incredibly helpful for first-time soap makers.
Why Make Your Own Coffee Soap? Unveiling the Benefits
Beyond the sheer satisfaction of creating something beautiful and useful with your own hands, homemade coffee soap offers a plethora of tangible benefits for your skin and daily routine. Here’s why investing your time in this DIY project is truly worthwhile:
- Natural Exfoliation: The finely ground coffee particles cleverly embedded within the soap provide a gentle yet highly effective natural exfoliant. This helps to slough away dead skin cells, stimulating circulation and revealing smoother, softer, and more radiant skin underneath. It’s particularly excellent for rough elbows, knees, feet, or for hands that need a good scrub after gardening or messy crafts.
- Powerful Odor Neutralization: Coffee is famously renowned for its exceptional odor-absorbing properties. This makes coffee soap an outstanding choice for neutralizing strong, lingering scents like garlic, onion, fish, pungent spices, or even automotive grease on your hands after cooking, gardening, or working on household projects. Many soap makers consider it an essential “kitchen soap” for this very reason.
- Antioxidant Boost for Skin: Coffee is naturally rich in potent antioxidants, which are vital compounds that can help protect the skin from environmental damage, oxidative stress, and free radicals. While the full extent of topical caffeine benefits is an ongoing area of research, many anecdotal reports suggest a revitalizing and stimulating effect on the skin, contributing to a healthier, more vibrant complexion.
- Invigorating Natural Aroma: The rich, deep, and comforting scent of coffee is undeniably uplifting and energizing, making it an ideal choice for your morning shower or a refreshing hand wash. It provides a natural, pleasing fragrance that can awaken the senses without the need for artificial or synthetic perfumes often found in commercial soaps.
- Deeply Moisturizing & Conditioning: The carefully selected blend of nourishing oils—such as olive, coconut, castor, palm, and shea butter—ensures that your homemade coffee soap will be incredibly moisturizing and conditioning. This formulation leaves your skin feeling supple, hydrated, and soft, without the stripped or dry sensation often associated with harsh commercial detergents.
- Eco-Friendly & Sustainable Choice: By crafting your own soap, you gain complete control over the ingredients, allowing you to ensure they are natural, sustainable, and free from harsh chemicals, synthetic dyes, or unnecessary additives often found in mass-produced products. Moreover, it presents a wonderful opportunity to repurpose used coffee grounds, contributing to a more sustainable lifestyle and reducing waste.
Essential Ingredients for Your DIY Coffee Soap Creation
Crafting exceptional coffee soap begins with the meticulous selection and precise measurement of high-quality ingredients. Each component plays a vital role in determining the final product’s texture, lather quality, hardness, and moisturizing properties. Remember, soap making is a scientific process that demands accuracy, so always gather all your materials before you begin and measure them precisely using a reliable digital scale.
- 10 oz of Cooled Brewed Coffee: This ingredient is a cornerstone of this recipe. It replaces the water typically used in lye solutions, directly infusing your soap with a natural coffee aroma and a subtle, appealing color. Crucially, ensure the coffee is completely cool (ideally chilled) before mixing with lye, as hot liquid can cause a dangerous flash reaction.
- 4.3 ounces of Lye (100% Sodium Hydroxide): This is the indispensable ingredient that, when combined with oils, initiates the chemical reaction of saponification. It transforms fats and oils into soap. Always use 100% pure lye and handle it with extreme caution. It is a caustic substance in its raw form but is entirely consumed during the saponification process, leaving behind a mild, skin-safe soap.
- 9 oz of Coconut Oil: A staple in soap making, coconut oil is renowned for producing a hard bar of soap with excellent cleansing properties and a wonderfully rich, bubbly lather.
- 9 oz of Olive Oil: This versatile oil is a cornerstone of many natural soap recipes, contributing to a conditioning, mild bar with a creamy, luxurious lather. It is gentle on the skin.
- 2 oz Castor Oil: A unique oil that acts as a humectant, drawing moisture to the skin. It also significantly boosts and stabilizes the lather, creating a dense, stable foam that enhances the user experience.
- 8 oz Palm Oil: Palm oil contributes significantly to the hardness and stable lather of your soap bars, making them long-lasting. If you prefer to avoid palm oil due to environmental or sustainability concerns, ethical sourcing is vital, or you can consider alternatives such as increasing shea butter, using kokum butter, or lard/tallow, remembering to adjust your lye calculations accordingly with a reliable lye calculator.
- 2 oz Shea Butter: A highly prized and nourishing butter that adds exceptional conditioning properties to the soap, contributing to a harder, more luxurious, and moisturizing bar.
- 2 tablespoons of Ground Coffee: These are your natural, gentle exfoliants. You can use fresh, finely ground coffee or repurpose spent coffee grounds (ensure they are thoroughly dried to prevent mold) for an eco-friendly touch. Finer grounds are generally preferred to avoid scratching the skin.
Crucial Safety Note for Lye Handling: When working with lye, safety is paramount. Always wear robust, chemical-resistant gloves, complete eye protection (safety goggles that seal around the eyes), and a long-sleeved shirt to protect your skin. Work in a well-ventilated area, preferably outdoors or near an open window with a fan. Keep children and pets away from your workspace at all times. Have a bottle of white vinegar on hand as an emergency neutralizer for any accidental lye spills, though prevention through careful handling is always the best approach!
How to Make Your Invigorating Coffee Soap: A Step-by-Step Guide
With your ingredients precisely measured and all necessary safety gear in place, you’re ready to embark on the exciting and rewarding journey of making your own coffee soap. Follow these steps carefully and methodically for the best, safest, and most satisfying results.
Step 1: Preparing Your Lye-Coffee Solution
Begin by making your lye solution, substituting the traditional water with your cooled brewed coffee. Carefully pour the **10 ounces of thoroughly cooled (preferably chilled) brewed coffee** into a heat-resistant container. Suitable containers include sturdy, lye-resistant plastic pitchers (like HDPE or polypropylene), or stainless steel bowls. It is absolutely essential that the coffee is cool, as mixing lye with hot liquid can cause a dangerous flash reaction, creating excessive heat and potentially toxic fumes. Slowly and carefully, **add the 4.3 ounces of lye (sodium hydroxide) to the coffee**, stirring gently with a heat-resistant silicone spatula or spoon until the lye crystals are fully dissolved. Always remember the crucial safety rule: “Lye into Liquid, never Liquid into Lye” to prevent splashes. During this exothermic reaction, the solution will generate significant heat and release a distinct, somewhat burned coffee smell. This is a normal part of the process. Once dissolved and clear, set the lye-coffee solution aside in a cool, safe, and well-ventilated area to allow it to cool down. It typically needs to reach a temperature between 100°F and 115°F (38°C – 46°C).
Step 2: Melting and Combining Your Nourishing Oils
Next, in a large, heavy-bottomed pot (stainless steel is ideal; avoid aluminum, as lye reacts with it), add your precisely measured oils and butters: **9 oz of coconut oil, 9 oz of olive oil, 2 oz castor oil, 8 oz palm oil, and 2 oz shea butter**. Place the pot over a medium-low heat setting on your stovetop. Gently heat the mixture, stirring occasionally, until all the solid oils and butters (coconut oil, palm oil, and shea butter) are completely melted and thoroughly integrated with the liquid olive and castor oils. Once everything is liquified and uniformly combined, remove the pot from the heat. Set it aside to cool. Similar to the lye solution, the oil mixture also needs to cool to a temperature between 100°F and 115°F (38°C – 46°C). It is critical that both your lye solution and oil mixture are within 10 degrees Fahrenheit of each other when you combine them for optimal saponification and to prevent false trace or separation.
Step 3: Achieving “Trace” – The Magic of Emulsification
This is often described as the most exciting part of the soap-making process, where the magic truly begins! Once both your lye-coffee solution and your oil mixture have cooled to a temperature range of approximately 100°F to 115°F (38°C – 46°C) and are within a 10-degree differential of each other, it’s time to blend. Carefully and slowly **pour the lye-coffee solution into the large pot containing your melted oils**. Using a stick blender (immersion blender) specifically designated for soap making (it should not be used for food preparation after this!), begin to mix the ingredients. Start by pulsing the blender without turning it on to release any trapped air bubbles, then turn it on and blend in short bursts, alternating with periods of hand stirring using the turned-off blender as a whisk. This technique helps prevent cavitation and ensures a smooth emulsification. Continue blending until you reach what is known as “trace.”
What is “Trace”? Trace is the crucial point at which the lye water and oils have fully and irreversibly emulsified, meaning they are no longer able to separate back into individual components. You’ll recognize it when the mixture thickens to a consistency similar to thin pudding or custard. When you lift the stick blender and drizzle some of the mixture back onto the surface, it should leave a temporary “trace” or visible mark on the surface before slowly sinking back in. A “light trace” resembles thin pancake batter, while a “medium trace” is akin to thin pudding. For this coffee soap recipe, aiming for a medium trace is ideal, as it ensures that any added coffee grounds or other inclusions are well suspended throughout the batter and won’t sink to the bottom of the mold.
Step 4: Incorporating Additions and Molding Your Coffee Soap
Once you’ve successfully reached a good, thick trace, it’s time to incorporate your final, delightful additives. Quickly **add the 2 tablespoons of ground coffee** to the thickened soap batter. If you wish to enhance the aroma with additional fragrance (e.g., coffee essential oil, vanilla oleoresin, or even a hint of cinnamon or sweet orange essential oil for a spiced coffee scent) or introduce natural colorants (like a tiny bit of cocoa powder for a darker hue), now is the optimal moment. Stir these additions in thoroughly but quickly, as the soap batter will continue to thicken rapidly after trace. Ensure everything is evenly distributed.
Immediately after mixing in the grounds and any optional additives, smoothly **pour the entire mixture into your prepared soap mold**. Silicone molds are highly recommended for their flexibility and ease of removal, but sturdy wooden loaf molds lined with parchment paper also work exceptionally well. Gently tap the mold on your work surface a few times to release any trapped air bubbles and ensure the batter settles evenly. You can optionally insulate the mold by covering it with a piece of cardboard or wrapping it in a towel. This encourages a “gel phase,” which can lead to a slightly more translucent appearance, a harder bar, and sometimes a more vibrant final color, though it’s not strictly necessary for beginners.
Step 5: Curing Your Homemade Coffee Soap for Perfection
Patience is not just a virtue in soap making; it’s an absolute necessity for truly great homemade soap! After pouring the soap batter into the mold, allow your soap to **remain in the mold for 1 to 2 full days** (24 to 48 hours). During this initial period, the saponification process continues, and the soap mixture gradually hardens. After 24-48 hours, carefully check the hardness. If it’s firm enough, gently remove the solid soap block from the mold. If it still feels too soft or sticky, give it another day or so in the mold.
Once unmolded, **slice the large soap block into individual bars** using a sharp, un-serrated knife or a dedicated soap cutter. Arrange the freshly cut bars in a single layer on a drying rack, a cooling rack, or a parchment-lined tray, ensuring there is ample airflow around all sides of each bar. Now comes the longest, yet most vital, step for superior quality: the cure. Your coffee soap needs to be **cured for a minimum of 3 to 6 weeks** (and honestly, the longer, the better!) in a cool, dry, and well-ventilated space, away from direct sunlight and excessive humidity. Curing allows the excess water content to gradually evaporate from the soap bars, resulting in a harder, longer-lasting, milder bar of soap with a richer, more luxurious lather. Resist the temptation to use it too soon – proper curing vastly improves the quality, durability, and skin-friendliness of your exquisite homemade coffee soap.
Tips for Perfecting Your Homemade Coffee Soap and Troubleshooting
Even with clear instructions, a few extra tips can help ensure your soap making journey is smooth and successful, especially for beginners:
- Precise Measurement is Key: Always, without exception, use a reliable digital scale for exact measurements of all ingredients, particularly lye and oils. Soap making is a chemical process that requires precision; eyeballing quantities can lead to unreliable results or unsafe soap.
- Maintain Optimal Temperature Control: Aim for both your lye solution and oil mixture to be within a 10°F (approx. 5°C) range of each other when combining, ideally between 100°F and 115°F (38°C – 46°C). This temperature window promotes consistent saponification.
- Ensure Excellent Ventilation: Always work in a well-ventilated area to minimize exposure to any lye fumes. An open window or working outdoors is highly recommended.
- Designate Dedicated Equipment: It is highly advisable to have a separate set of equipment (pots, stick blender, spatulas, measuring cups, and containers) exclusively for soap making. Do not use these items for food preparation after they’ve come into contact with lye or raw soap batter.
- Proper Storage During Curing: Ensure your curing area has good air circulation. A simple wire rack or a cooling rack allows air to flow freely around all sides of the bars, facilitating even drying and hardening.
- Experiment with Coffee Grounds: While finely ground coffee is generally best for gentle exfoliation and even suspension, you can experiment with slightly coarser grounds for a more intense scrub, perhaps for a dedicated foot or gardener’s soap. Ensure grounds are dry to prevent mold.
- Natural Scent Enhancements: For an enhanced aroma profile, consider using natural essential oils or fragrance oils. Coffee essential oil or vanilla oleoresin can deepen the coffee scent. Complementary notes like sweet orange, cinnamon, or even a touch of peppermint essential oil can create unique and invigorating coffee soap variations.
- Troubleshooting Common Issues: If your soap doesn’t harden after 48 hours, it might need more time in the mold or a warmer environment. If you notice an oily residue, it could be “oil sweating” (superfatting) or separation (false trace). Keep notes of your process to learn and improve with each batch.
Embrace the Art of Homemade Coffee Soap
Crafting your own homemade coffee soap is so much more than just a simple DIY project; it’s an immersive art form that yields tangible, beneficial, and deeply satisfying results. From the initial precise measurement of ingredients and the careful handling of lye to the magical transformation into soap and the final, perfectly cured bar, each step offers a profound sense of accomplishment and creative fulfillment. The end product is a luxurious, exfoliating, and powerfully odor-neutralizing soap that stands far superior to many commercial alternatives. It’s free from harsh chemicals, synthetic additives, and infused with the natural goodness and invigorating aroma of coffee.
Whether you’re creating thoughtful, personalized gifts for fellow coffee enthusiasts, stocking your own bathroom with natural, handmade skincare, or simply exploring a new and rewarding hobby, this comprehensive coffee soap recipe is a fantastic and accessible starting point. Embrace the learning process, enjoy the wonderful and comforting aromas that fill your home, and savor the immense satisfaction of creating something truly special, functional, and handmade with love and care. Your skin will undoubtedly thank you, and you’ll have beautiful, high-quality bars of soap to show for your creative efforts!