
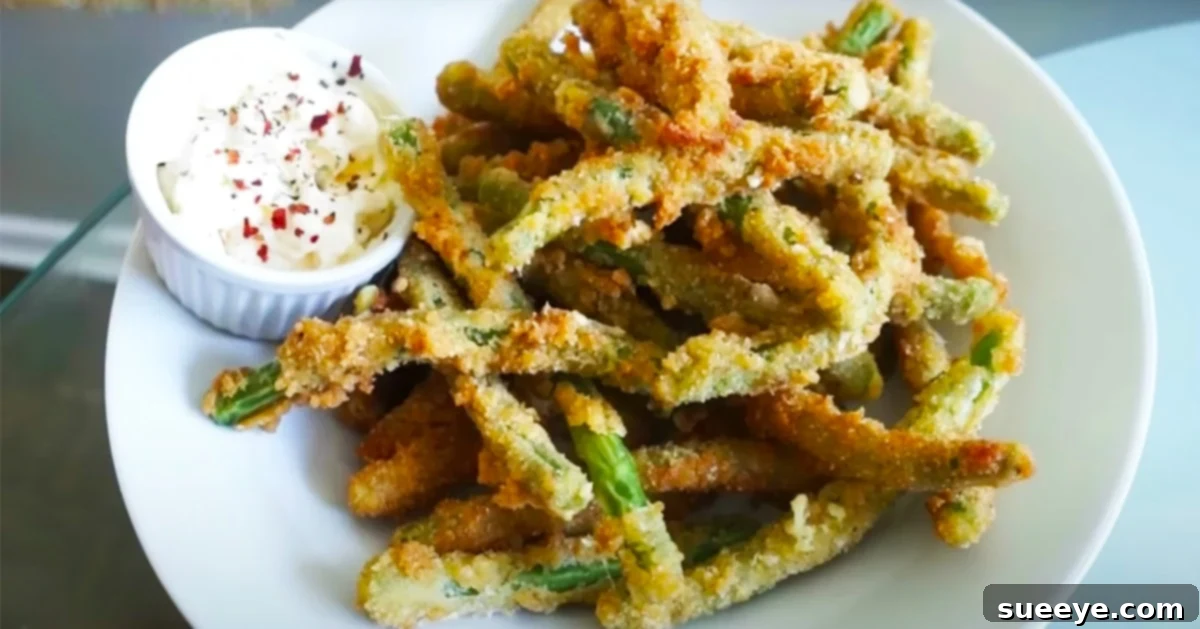
Irresistibly Crispy Fried Green Beans: Your New Favorite Snack
Craving a crispy, savory snack but looking for a healthier alternative to traditional french fries? Look no further than perfectly fried green beans! This incredibly simple recipe transforms humble green beans into a delightful, crunchy treat that’s ready in under 10 minutes. Far from just a side dish, these “green bean fries” are addictive, versatile, and can be customized to your exact taste preferences. Forget the pre-packaged, often bland versions from the store; homemade fried green beans offer unparalleled freshness, flavor, and an impressive crunch that will have everyone asking for more.
This fantastic recipe, inspired by This Is MOMS Kitchen on YouTube, demonstrates just how effortless it is to create these delectable bites. Requiring only a handful of common ingredients and minimal effort, you’ll wonder why you haven’t made them sooner. The key to truly spectacular fried green beans lies in generous seasoning and achieving that ultimate crispy coating – elements we’ll master together in this guide.
While deep-frying provides an undeniably satisfying crisp, those seeking an even healthier option can easily adapt this recipe for an air fryer. With a light mist of cooking oil, the air fryer method drastically reduces the oil absorption, offering a guilt-free crunch without sacrificing flavor. Whether deep-fried or air-fried, these homemade fried green beans are a game-changer for snack time, appetizers, or even as a unique side dish to your favorite meals. They’re more economical, fresher, and infinitely more customizable than any store-bought alternative, making them a must-try for any home cook.
Why Choose Homemade Fried Green Beans?
There are numerous compelling reasons to opt for making your fried green beans from scratch. Firstly, freshness is paramount. When you prepare them at home, you ensure that you’re using vibrant, crisp green beans, leading to a superior texture and taste compared to processed, pre-packaged varieties. Secondly, homemade means control. You have complete command over the quality of ingredients, the type of oil used, and, crucially, the amount and variety of seasonings. This allows you to tailor the flavor profile to perfectly match your palate or dietary needs.
Beyond taste, consider the cost-effectiveness. Buying fresh green beans and a few pantry staples is significantly cheaper than repeatedly purchasing small bags of specialty fried green beans. You can produce a much larger batch for a fraction of the cost, making it an ideal snack for families or entertaining guests. Furthermore, the satisfaction of creating something delicious and healthy from your own kitchen is incredibly rewarding. It’s a simple recipe that yields impressive results, proving that healthy eating doesn’t have to be complicated or time-consuming.
Essential Ingredients for Crispy Fried Green Beans
One of the beauties of this recipe is its simplicity. You only need a few core ingredients, most of which you likely already have on hand. The magic happens when these components come together to create that signature crispy exterior and tender interior.
- Fresh Green Beans: The star of our show. Look for firm, vibrant green beans that snap easily. Both thin haricots verts and thicker traditional green beans work wonderfully. Ensure they are washed and thoroughly dried before use.
- All-Purpose Flour: This forms the foundational layer for our breading, helping the egg wash adhere evenly to the green beans. It creates a thin, initial coating that contributes to the overall crispness.
- Eggs: Beaten eggs act as the crucial binding agent, allowing the breadcrumbs to stick firmly to the floured green beans. Without eggs, your breading would simply fall off.
- Breadcrumbs: The key to ultimate crispiness! Standard breadcrumbs work well, but for an extra crunchy texture, consider using Panko breadcrumbs. Seasoned breadcrumbs can also add an extra layer of flavor.
- Salt, Pepper, and Spices of Your Choice: This is where you can truly personalize your fried green beans. Beyond basic salt and pepper, think about adding garlic powder, onion powder, paprika, chili powder, a pinch of cayenne for heat, or even a blend like Italian seasoning or Old Bay. Generous seasoning is vital for making these taste truly exceptional and preventing them from being bland.
- Cooking Oil for Frying: A neutral-flavored oil with a high smoke point is best, such as vegetable oil, canola oil, sunflower oil, or peanut oil.
Step-by-Step Guide to Perfect Fried Green Beans
Preparing these crispy delights is a straightforward process, broken down into simple stages. Follow these directions for consistently delicious results.
1. Preparation and Setting Up Your Breading Station
Before you begin frying, it’s crucial to have your green beans prepped and your breading station organized. First, wash your fresh green beans thoroughly and pat them completely dry with a paper towel. Moisture is the enemy of crispiness, so ensure they are as dry as possible. Trim off the tough stem ends; you can leave the tail ends on if you prefer, or snip them off for a neater appearance.
Next, set up a simple breading station. You’ll need three shallow dishes or bowls:
- Dish 1 (Flour): Pour your all-purpose flour into the first dish.
- Dish 2 (Egg Wash): In the second dish, whisk 2-3 large eggs until well combined. For an even lighter egg wash, you can add a tablespoon of milk or water, though it’s not strictly necessary.
- Dish 3 (Breadcrumbs): Place your breadcrumbs into the third dish. This is also the ideal time to mix in your chosen seasonings. Combine salt, pepper, garlic powder, paprika, or any other spices directly into the breadcrumbs for maximum flavor infusion.
Ensure your dishes are wide enough to easily toss or roll the green beans. Having everything laid out in a logical order will make the coating process much smoother and less messy.
2. Coating the Green Beans
The coating process is key to achieving that perfect crunchy exterior. Work in small batches to avoid overcrowding and ensure each green bean is evenly coated.
- Flour First: Take a handful of green beans and place them into the flour dish. Toss them gently or use your hands to ensure they are lightly coated all over. Shake off any excess flour.
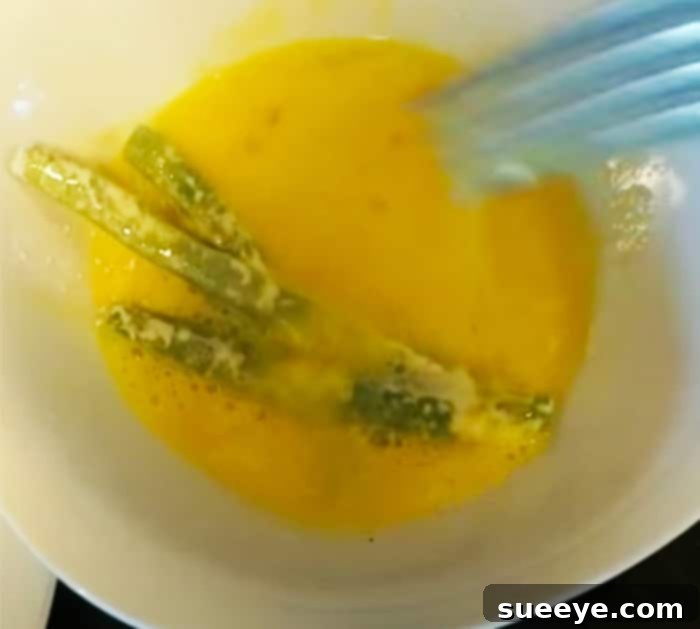
- Egg Wash Next: Transfer the floured green beans into the egg wash. Dip and swirl them until they are thoroughly covered in the egg mixture. Allow any excess egg to drip off briefly before moving to the next step.
- Breadcrumb Finish: Finally, place the egg-coated green beans into the breadcrumbs. Toss them, gently pressing the breadcrumbs onto the beans, until they are completely covered. For an extra thick and crunchy coating, you can double-coat: simply repeat the egg wash and breadcrumb steps after the first coating. This adds a delightful extra layer of crispness.
Place the coated green beans on a clean plate or baking sheet as you finish them. Don’t let them sit for too long before frying, as the coating can become soggy.
3. Frying the Green Beans (Deep-Fry Method)
Now for the exciting part – frying! Heat is crucial here, so ensure your oil is at the right temperature for best results.
- Heat the Oil: Fill a sturdy pot or deep skillet with about 2-3 inches of cooking oil. Heat the oil over medium-high heat until it reaches approximately 350-375°F (175-190°C). If you don’t have a thermometer, you can test the oil by dropping a tiny pinch of breadcrumbs into it; they should sizzle vigorously and turn golden brown within a few seconds.
- Fry in Batches: Carefully drop the coated green beans into the hot oil, working in small batches. Do not overcrowd the pot, as this will lower the oil temperature and result in soggy, greasy green beans. Give them enough space to fry evenly.
- Cook Until Golden: Fry for about 1 to 1.5 minutes, or until the breading is golden brown and delightfully crispy. The green beans inside will become tender-crisp. Flip them gently if necessary to ensure even browning.
- Drain Excess Oil: Using a slotted spoon or tongs, carefully remove the fried green beans from the oil. Transfer them to a plate lined with paper towels to drain any excess oil. This step is important for maintaining their crispness.
Repeat the frying process with the remaining coated green beans, ensuring the oil temperature remains consistent between batches. Serve immediately for the best texture and flavor.

Healthier Alternative: Air Fryer or Oven Method
For a lighter version of these crispy green beans, the air fryer or oven is an excellent choice. You’ll still achieve a wonderful crunch with significantly less oil.
- Prepare as Directed: Coat the green beans exactly as described in steps 1 and 2 (flour, egg wash, breadcrumbs).
- Air Fryer Method: Preheat your air fryer to 375-400°F (190-200°C). Lightly spray the bottom of the air fryer basket with cooking oil or line with parchment paper designed for air fryers. Arrange the coated green beans in a single layer, ensuring they are not overlapping. Lightly mist the tops of the green beans with cooking spray. Air fry for 6-10 minutes, shaking the basket halfway through, until they are golden brown and crispy. Cooking time may vary depending on your air fryer model.
- Oven Method: Preheat your oven to 400°F (200°C). Lightly grease a baking sheet or line it with parchment paper. Arrange the coated green beans in a single layer, ensuring they don’t touch. Lightly mist the green beans with cooking spray. Bake for 15-20 minutes, flipping halfway through, until golden brown and crispy.
Both methods yield a delicious, guilt-free crispy green bean experience. While the deep-fried version offers a distinct richness, the air-fried or oven-baked options are fantastic for everyday enjoyment.
Serving Suggestions and Dipping Sauces
Fried green beans are delightful on their own, but pairing them with the right dipping sauce can elevate the experience even further. The choice of dip can complement their savory crunch and introduce new layers of flavor. My personal go-to is a classic ranch dressing; its creamy tanginess perfectly balances the crispness of the green beans, creating a harmonious bite that’s incredibly satisfying.
However, the possibilities are endless. For those seeking a healthier dipping option, a homemade Greek yogurt dip is fantastic. Simply mix plain Greek yogurt with a squeeze of lemon juice, a dash of garlic powder, fresh herbs like dill or chives, and a pinch of salt and pepper. This provides a refreshing, protein-packed accompaniment. Other excellent choices include:
- Sriracha Mayo: For a spicy kick, mix mayonnaise with sriracha to taste.
- Marinara Sauce: A warm, savory marinara can turn these into an Italian-inspired appetizer.
- Honey Mustard: Sweet and tangy, a great option for those who enjoy a contrasting flavor.
- Garlic Aioli: A rich, garlicky mayonnaise-based dip that adds gourmet flair.
- Spicy Ketchup: Elevate your ordinary ketchup with a dash of hot sauce.
Serve these fried green beans immediately after cooking for the ultimate crispy texture. They make an excellent appetizer for parties, a fun side dish, or a satisfying snack that’s far more nutritious than typical fried fare.
Tips for Success and Creative Variations
Achieving perfectly crispy and flavorful fried green beans is simple with a few insider tips and the courage to experiment.
Achieving Maximum Crispiness:
- Dry Green Beans: This cannot be emphasized enough. Any moisture on the green beans will lead to a soggy coating and splattering oil.
- Proper Oil Temperature: If the oil isn’t hot enough, the green beans will absorb too much oil and become greasy. If it’s too hot, the coating will burn before the beans cook through. Aim for 350-375°F (175-190°C).
- Don’t Overcrowd: Frying in small batches is essential. Overcrowding lowers the oil temperature and prevents even cooking and browning.
- Panko Power: For an extra-crunchy texture, swap regular breadcrumbs for Panko breadcrumbs. Their larger, flakier structure delivers superior crispness.
- Double Coating: As mentioned, repeating the egg and breadcrumb steps provides a thicker, more durable, and crispier crust.
Flavorful Variations and Customization:
Don’t be afraid to get creative with your seasonings and coatings:
- Spicy Kick: Add cayenne pepper, chili powder, or a dash of your favorite hot sauce to the flour or breadcrumb mixture.
- Garlic Herb: Mix garlic powder, onion powder, dried oregano, basil, or Italian seasoning into your breadcrumbs. Freshly minced garlic can also be added to the egg wash.
- Cheesy Goodness: Grate some Parmesan cheese into your breadcrumbs for a savory, cheesy crust.
- Smoky Flavor: A pinch of smoked paprika can add a wonderful depth to the coating.
- Gluten-Free Option: Use gluten-free all-purpose flour and gluten-free breadcrumbs to make this recipe suitable for those with dietary restrictions.
- Spice Blends: Experiment with pre-made spice blends like Old Bay, Cajun seasoning, or lemon pepper for an effortless flavor boost.
Storage and Reheating
While fried green beans are best enjoyed fresh, you can store leftovers and reheat them. Place any cooled fried green beans in an airtight container in the refrigerator for up to 2-3 days. To reheat and restore their crispness, avoid the microwave, as it will make them soggy. Instead, spread them in a single layer on a baking sheet and reheat in an oven or air fryer at 350°F (175°C) for 5-10 minutes, or until heated through and crispy again.
Conclusion: A Healthier, Quicker, and Delicious Choice
Fried green beans are a revelation – a simple, quick, and incredibly satisfying snack or side dish that easily rivals traditional french fries. With just a few ingredients and minimal effort, you can create a healthier, fresher, and more flavorful alternative right in your own kitchen. Whether you opt for the classic deep-fried method for ultimate indulgence or the lighter air-fried approach, you’re guaranteed a delicious outcome. This recipe’s adaptability, from seasoning variations to dipping sauces, ensures it can be tailored to please any palate. So, next time a snack craving hits, skip the processed options and treat yourself to the delightful crunch of homemade fried green beans. You’ll be glad you did!