
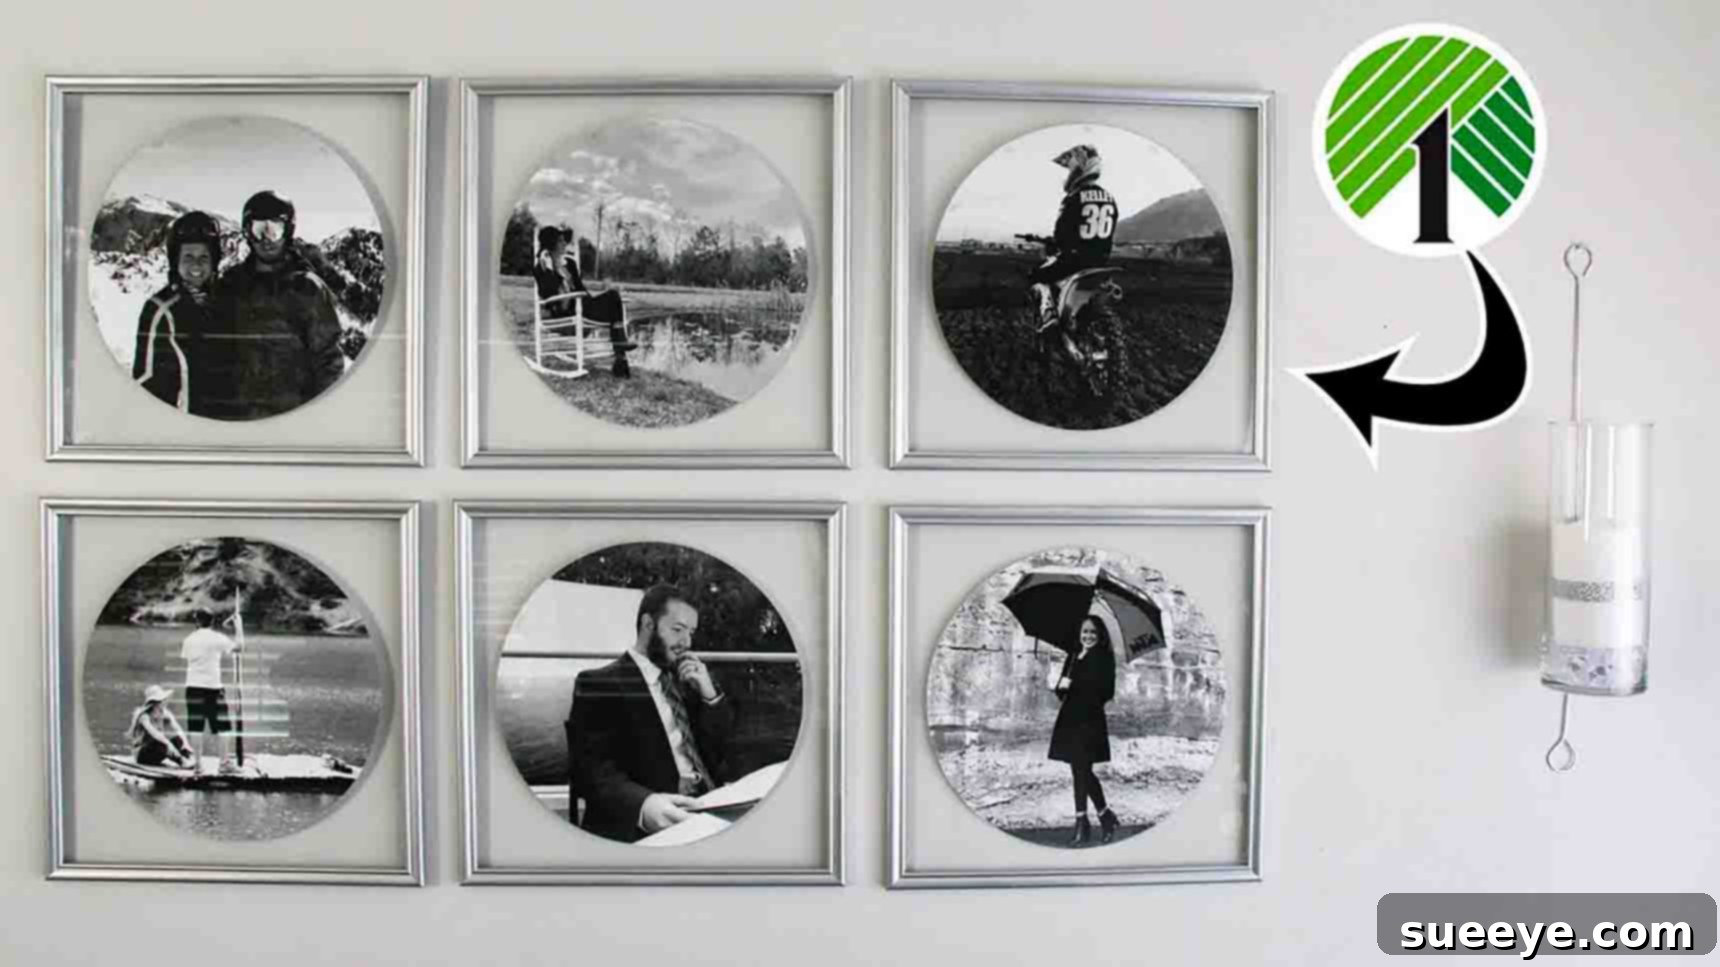
Are you looking to refresh your home decor without breaking the bank? This incredible DIY floating frame art project, inspired by StoreeOfMyLife on Youtube, offers the perfect solution! Transform dated walls into a stylish display with sleek, modern art pieces that look far more expensive than they are. The best part? All the essential materials are readily available at your local Dollar Tree, making this an incredibly budget-friendly and accessible craft for anyone. Get ready to add a touch of elegance and personal flair to your living space with this simple, yet impactful, DIY upgrade. Let’s dive into the step-by-step instructions and discover how easy it is to create your very own custom wall art.
Create Stunning Floating Frame Art with Dollar Tree Finds
Modern interior design often features clean lines and minimalist aesthetics, and floating frame art perfectly embodies this trend. The illusion of your artwork “floating” within the frame creates a sophisticated and contemporary look that can elevate any room. While similar pieces can cost a significant amount in high-end decor stores, this ingenious DIY project allows you to achieve the same upscale feel for a fraction of the price. Whether you’re a seasoned crafter or a complete beginner, you’ll find this project both rewarding and straightforward.
This tutorial is designed to guide you through each stage, from gathering your Dollar Tree materials to hanging your finished masterpiece. We’ll cover essential tips for achieving a professional finish, discuss customization options, and ensure your new wall art perfectly complements your home’s style. Prepare to be amazed at what you can create with a little creativity and a trip to Dollar Tree!
Why Choose DIY Floating Frame Art for Your Home?
There are numerous compelling reasons to embark on this Dollar Tree DIY floating frame art project. Beyond the sheer satisfaction of creating something beautiful with your own hands, the benefits extend to aesthetics, cost-effectiveness, and personalization:
- Unbeatable Affordability: With most supplies sourced from Dollar Tree, this project dramatically reduces the cost of updating your wall decor. You can create a stunning gallery wall for less than the price of a single store-bought piece.
- Modern Aesthetic: Floating frames offer a sleek, contemporary look that instantly modernizes any room. They draw attention to the artwork itself, giving it a gallery-like presentation.
- Customization at Its Best: Unlike mass-produced art, your DIY floating frames can feature any print, photograph, or even fabric that speaks to your personal style. This allows for endless creative possibilities to match your existing decor or introduce new themes.
- Easy and Accessible: This project requires minimal crafting experience and basic tools. The instructions are straightforward, making it an excellent weekend project for individuals or families.
- Personalized Touch: Displaying art you’ve made adds a unique and personal touch to your home. It’s a conversation starter and a reflection of your creativity.
- Perfect for Any Room: Whether it’s for the living room, bedroom, hallway, or even a home office, these versatile frames can enhance the ambiance of any space.
Essential Materials for Your Dollar Tree Floating Frames
The beauty of this project lies in its simplicity and the accessibility of its materials. Most items can be found at Dollar Tree, ensuring a budget-friendly approach to sophisticated home decor. Here’s a detailed list of what you’ll need to gather before you begin:
- 6 pieces 1 ft x 1 ft frames: These are the backbone of your project. Dollar Tree often carries simple, square frames that are perfect for this DIY. Ensure they have glass inserts.
- Pliers: Essential for safely removing the metal tabs from the back of the frames.
- Metallic Spray Paint: Choose a color that complements your home decor. Gold, silver, copper, or even a sleek black can add a luxurious touch. This will give your frames a high-end look.
- Automotive Enamel Spray: This serves as a protective top coat, adding durability and a professional finish to your painted frames. It helps seal the metallic paint and provides a smooth, often slightly glossy surface.
- Dry Eraser: For marking the glass and easily wiping away guidelines. A fine-tipped marker that erases cleanly is ideal.
- E6000 Glue: A strong adhesive known for its industrial strength and versatility. It’s crucial for securely bonding the glass to the frame.
- Double-sided Tape: Small pieces of this tape will hold your chosen prints in place on the glass.
- Scissors: For cutting your chosen prints to size.
- Hardware Kit (for hanging): This should include small screws and D-rings or sawtooth hangers to attach to the back of your frames, along with nails or picture hooks for your wall.
- Your chosen “circle print”: This is the artwork you want to feature. You can print these at home, find free printables online, or even cut shapes from wallpaper or decorative paper. Consider abstract designs, botanical illustrations, or meaningful photographs.
Step-by-Step Guide to Crafting Your DIY Floating Frame Art
With all your materials gathered, it’s time to bring your vision to life. Follow these detailed steps carefully to create beautiful and long-lasting floating frame art. Remember to work in a well-ventilated area, especially when spray painting.
Step 1: Frame Preparation and Painting
Begin by preparing your Dollar Tree frames for their transformation. First, use your pliers to carefully remove all the small metal tabs from the back of each frame. These tabs hold the backing and glass in place, and you’ll need them gone for the floating effect. Once the tabs are removed, gently pop out both the backing and the glass from each frame. Set the glass aside in a safe place where it won’t get scratched or broken.
Now, it’s time for painting. Take the empty frames to a well-ventilated area, preferably outdoors or in a garage with open windows. Lay them down on a drop cloth or newspaper to protect your work surface. Apply two thin, even coats of your chosen metallic spray paint. Allow sufficient drying time between coats, typically 15-20 minutes, to prevent drips and ensure a smooth finish. Once the metallic paint is dry to the touch, apply one final coat of automotive enamel. This clear coat will protect the paint, add durability, and give your frames a professional, sleek finish. Again, allow ample time for the enamel to cure completely according to the product instructions, which might be several hours or overnight.
While your frames are drying, retrieve one of your glass pieces. Using a glass cleaner, meticulously clean both sides of the glass to ensure there are no smudges, dust, or fingerprints. A clean surface is crucial for a flawless floating effect. Next, on one side of the glass, use your dry eraser marker and a ruler to draw a line 6 inches in from one edge. This mark will serve as a guide. From that 6-inch mark, measure another 1 inch inwards and place a small, clear mark. This 1-inch inner mark is where your artwork will eventually be centered. Repeat this marking process for all six glass pieces.
Once your frames are completely dry and cured, apply a thin bead of E6000 glue to the inside perimeter of each frame, where the glass will rest. Be careful not to apply too much glue, as excess can squeeze out and be visible. Carefully place one piece of marked glass into each frame, ensuring that the marked side of the glass is facing downwards (so the marks are on the back of the finished art piece and won’t be visible from the front). Gently press the glass into place. Repeat this for all six frames and allow them to sit undisturbed for at least 24 hours to ensure the E6000 glue fully cures and creates a strong bond.
Step 2: Attaching Prints and Hanging Your Art
Once the glue has fully dried and the glass is securely set in the frames, it’s time to add your chosen artwork. Take your “circle prints” (or whatever shape you’ve decided on) and carefully cut them out using scissors. Ensure the edges are clean and precise. Flip each print over and place tiny pieces of double-sided tape around the edge of the back of the print. These small pieces will provide enough adhesion without being visible through the glass.
Now, working with one frame at a time, carefully flip the print over and align it with the 1-inch markings you made on the glass (which should now be on the underside of the glass). Take your time to center the print perfectly within that 1-inch margin. Once satisfied with the placement, gently press the print onto the glass to secure it with the double-sided tape. After the print is attached, wipe away any remaining dry eraser marks from the underside of the glass with a soft cloth to ensure a completely clean finish. Repeat this process for all six frames.
To prepare your floating frame art for hanging, you’ll need to attach the hanging hardware. For each frame, screw a D-ring or sawtooth mount to the top portion of the frame’s back, ensuring it is perfectly centered. Use the small screws provided in your hardware kit, being careful not to crack the frame. Repeat this step for all six frames. This ensures they will hang straight and evenly on your wall.
Finally, it’s time to hang your stunning new art. For a visually cohesive gallery wall with six frames, a common and striking arrangement is a 2×3 grid (two frames wide, three frames high). To achieve this, measure and mark where your nails or picture hooks will go on the wall. For a balanced look, position your nails 14 inches apart horizontally and 14 inches apart vertically. Use a level to ensure each nail is perfectly straight. This precise spacing will create a harmonious and professional-looking display. Carefully hang each frame, stepping back often to assess the overall composition. Your wall will be transformed!
Tips for a Flawless Finish and Enhanced Durability
Achieving a professional look with your DIY projects often comes down to attention to detail and a few clever tips:
- Patience is Key: Don’t rush the drying times for paint and glue. Skipping this step can lead to a less durable and less attractive finish. Allow each coat and adhesive to fully cure.
- Ventilation for Spray Painting: Always work in a well-ventilated area when using spray paints and enamels to ensure safety and prevent lingering odors.
- Practice Spraying: If you’re new to spray paint, practice on a piece of scrap cardboard first to get an even stroke and avoid drips.
- Clean Glass Meticulously: Any dust or smudges on the glass will be magnified once the frame is assembled. Use a lint-free cloth and glass cleaner for a streak-free shine.
- Use a Level for Hanging: A small level is indispensable when hanging multiple frames to ensure they are all perfectly aligned horizontally and vertically.
- Consider Different Prints: While circles are featured here, experiment with other shapes like squares, rectangles, or even abstract cutouts to create varied visual interest.
- Explore Frame Colors: Don’t limit yourself to metallic. Matte black, bright white, or even a pop of color can completely change the aesthetic of your floating frames.
Beyond the Basics: Customization & Care for Your Floating Art
This Dollar Tree floating frame art project is incredibly versatile. Once you’ve mastered the basic technique, you can explore countless ways to personalize your creations:
- Vary Your Artwork: Instead of prints, consider using pressed flowers, small fabric swatches, intricate lace, or even dried leaves for a unique botanical or textural display.
- Mix and Match Frame Sizes: If you’re creating a larger gallery wall, incorporate frames of different sizes (if available at Dollar Tree or other stores) to add dynamic visual interest.
- Create Themed Collections: Design a series of frames around a specific theme – nature, abstract patterns, travel photos, or family memories.
- Layering Effect: For an even more complex look, consider placing a smaller, colored piece of paper behind your main print to create a subtle background “float” as well.
Maintaining Your Floating Frame Art
Once your beautiful floating frames are on display, a little care will keep them looking pristine:
- Dust Regularly: Use a soft, dry microfiber cloth to gently dust the frames and glass.
- Spot Clean: For fingerprints or smudges on the glass, use a small amount of glass cleaner on a cloth, being careful not to get liquid between the glass and the frame.
- Avoid Direct Sunlight: While durable, prolonged exposure to direct sunlight can fade prints over time. Consider placing your art in an area with indirect light to preserve its vibrancy.
Final Thoughts on Your Dollar Tree DIY Floating Frame Art
This Dollar Tree DIY floating frame art project is a fantastic way to infuse your home with modern elegance on a budget. It demonstrates that you don’t need to spend a fortune to achieve a high-end look. By following these clear instructions, you can create a collection of beautiful, personalized wall art that will be the envy of your guests.
We encourage you to experiment with different prints, colors, and arrangements to truly make these pieces your own. The satisfaction of transforming inexpensive materials into stunning home decor is unparalleled. So, gather your supplies, unleash your creativity, and get ready to enjoy your stylish new floating frame art. Special thanks once again to StoreeOfMyLife for inspiring such a brilliant and accessible DIY project!