
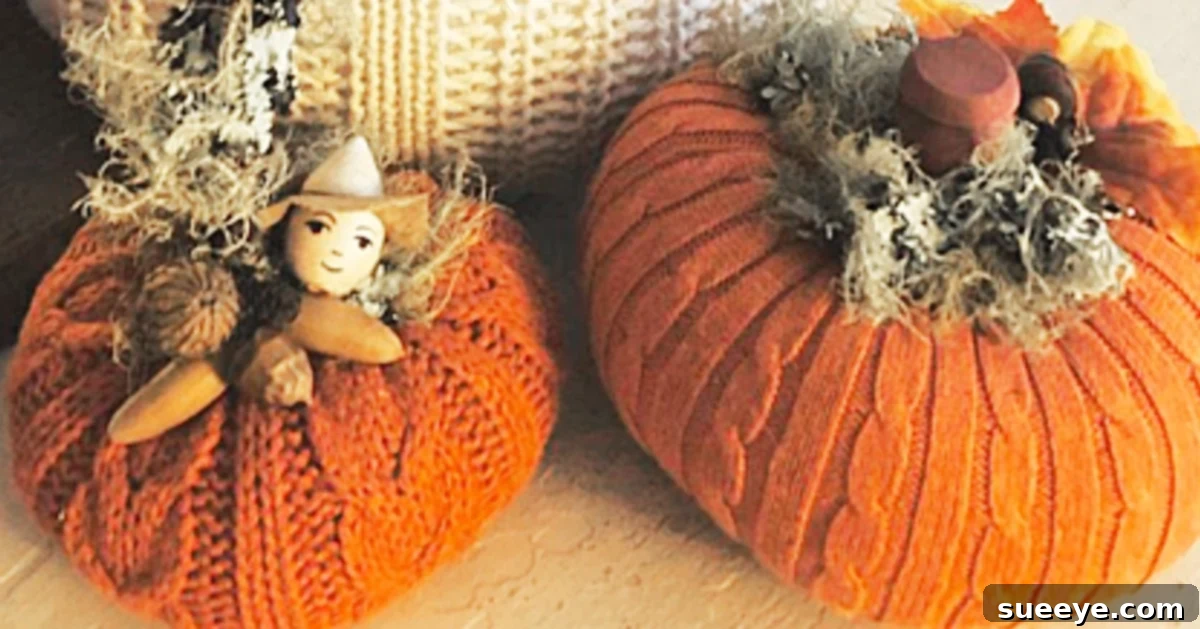
Cozy Charm: DIY Dollar Tree Sweater Pumpkins for Affordable Fall Decor
As the leaves begin to turn vibrant shades of red and gold, and a crisp coolness fills the air, we know that the beautiful autumn season is upon us. For many DIY enthusiasts, this transition signals the perfect time to refresh our living spaces with warm and inviting fall decor. There’s an undeniable magic in autumn aesthetics – from rustic farmhouse elements to snug textures – that brings a sense of comfort, clarity, and peace to any home. Even the simplest seasonal update can profoundly uplift your mood and transform your environment.
While I cherish the fall decorations I’ve collected over the years, the excitement of creating something new is always irresistible. Lately, I’ve been immersed in searching for fresh, inspiring autumn craft ideas, and the internet did not disappoint! I stumbled upon countless wonderful projects, making it delightfully difficult to choose just one to start with. However, a particular craft immediately caught my eye: this fantastic Dollar Tree sweater pumpkin decoration tutorial by Moma Dares To DIY on YouTube. What made this project truly stand out was its delightful prerequisite: a trip to the thrift store, which, for me, is always an adventure and a treasure trove of possibilities!
This project perfectly blends creativity, budget-friendliness, and the joy of upcycling. Using inexpensive materials, predominantly from Dollar Tree and a forgotten sweater, you can craft charming, textile-covered pumpkins that add a touch of handcrafted elegance to your fall display. These aren’t just decorations; they’re expressions of autumnal coziness, ready to grace your fireplace mantle, bookshelves, or any nook that needs a sprinkle of seasonal warmth.
Why Embrace DIY Fall Decor This Season?
DIY fall decor offers numerous advantages beyond just saving money. It allows for complete personalization, ensuring your home reflects your unique style and taste. Instead of mass-produced items, you create pieces with character and a story. The act of crafting itself can be incredibly therapeutic, providing a mindful escape from daily stresses. Furthermore, upcycling materials like old sweaters is a sustainable choice, giving new life to items that might otherwise be discarded. It’s a win-win: beautiful decor for your home and a healthier planet.
Essential Materials For Your Dollar Tree Sweater Pumpkins:
Gathering your supplies is part of the fun! Most items can be found at Dollar Tree or a local thrift store, making this an incredibly cost-effective project. Here’s what you’ll need:
- An Old Sweater: The star of the show! Look for sweaters with interesting textures, chunky knits, or subtle patterns. Wool, acrylic, or blends all work well. A trip to a thrift store is ideal for finding unique options, but an old, unused sweater from your own closet is perfect for repurposing. Ensure it’s clean before use.
- A Styrofoam Carvable Pumpkin: Dollar Tree often carries these, especially as autumn approaches. They are lightweight and easy to work with. If you can’t find a carvable one, any foam pumpkin will do.
- Rope Twine: Available at Dollar Tree, this will be used to create the pumpkin’s stem, giving it a natural, rustic look.
- Chalk Paint: White or a light cream chalk paint works wonderfully as a base coat. Chalk paint adheres well to foam and provides a beautiful matte finish. Acrylic craft paint can also be used.
- Burlap Ribbon: Another Dollar Tree gem, burlap ribbon adds a touch of rustic charm to the finished pumpkin. Look for various widths and patterns.
- A Hot Glue Gun: An essential tool for quickly and securely attaching fabric and embellishments.
- Plenty of Glue Sticks: You’ll want to have a good supply on hand to avoid interruptions during your crafting session.
Step-by-Step Directions: Crafting Your Cozy Sweater Pumpkins
Making these adorable sweater pumpkins is simpler than you might imagine, and the results are truly stunning. Follow these easy steps to bring your vision to life:
Step 1: Preparing Your Pumpkin Canvas with Chalk Paint
Begin by giving your styrofoam pumpkin a fresh, clean base. While it might seem counterintuitive to paint a pumpkin that will be covered, this step is crucial. Painting the pumpkin with white (or a light-colored) chalk paint ensures that no original orange or colored foam shows through any gaps in the sweater fabric, especially if your sweater is a lighter color or has a looser weave. Apply one to two coats, allowing each coat to dry completely before applying the next. Chalk paint dries relatively quickly and provides an excellent surface for the glue to adhere to later.
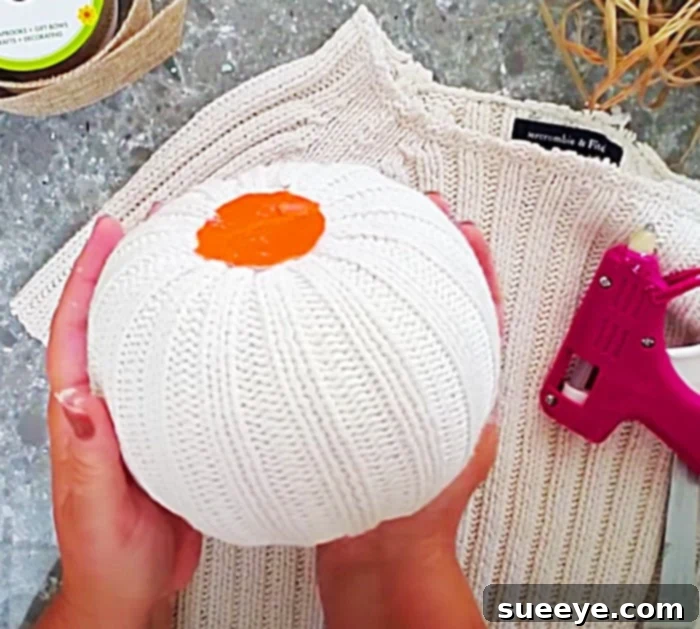
Step 2: The Sweater Transformation – Covering Your Pumpkin
Once your painted pumpkin is dry, it’s time for the magic to happen with the sweater. Carefully cut a section from your chosen sweater that is large enough to completely wrap around your pumpkin, with some extra fabric to tuck and glue. Lay the pumpkin on the fabric, centering it. Begin to gather the sweater fabric around the pumpkin, pulling it taut and smoothing out any major wrinkles. Use your hot glue gun to secure the fabric to the top and bottom of the pumpkin. For the top, you’ll gather the fabric around the stem area and glue it down neatly. For the bottom, tuck and glue the excess fabric inwards, creating a flat base. Work in small sections, applying glue and pressing the fabric firmly until the entire pumpkin is snugly covered. The goal is a smooth, fitted look, showcasing the sweater’s texture.
Step 3: Crafting a Realistic Stem with Rope Twine
A beautiful stem elevates your sweater pumpkin from a simple covered ball to a true piece of decor. Take your rope twine and begin wrapping it tightly around the top center of the pumpkin, where the natural stem would be. Start at the base and wind the twine upwards, forming a conical shape. Secure the ends with hot glue, ensuring there are no loose pieces. You can make the stem as tall or as short as you like, creating a sturdy, rustic look. For added realism, you could even twist two strands of twine together before wrapping, or glue a small, real twig or cinnamon stick on top.
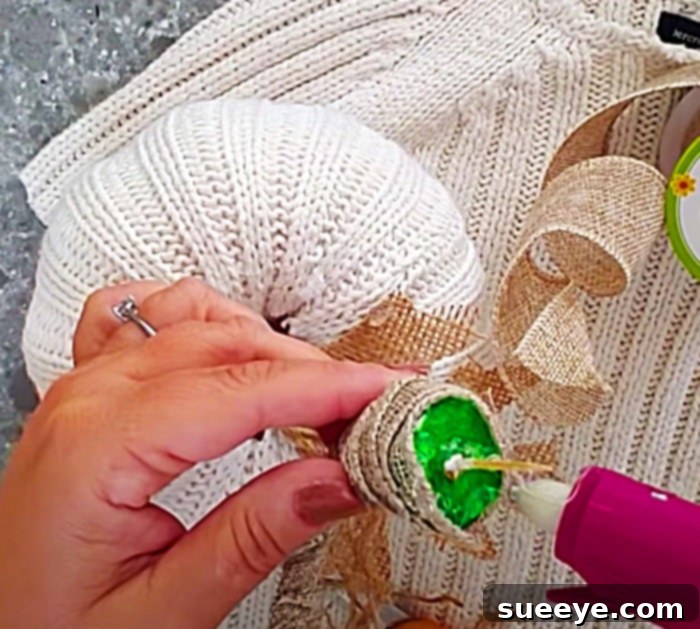
Step 4: Embellish with Fall Flair – The Finishing Touches
Now comes the most creative part: decorating the stem and the base of your pumpkin with Fall-themed elements. The burlap ribbon from Dollar Tree is a perfect choice. You can tie a simple bow around the base of the stem, or wrap a strip of burlap around it for added texture. Don’t stop there! Think about other small, autumnal items you might have: small artificial leaves, berries, tiny pinecones, cinnamon sticks, buttons, or even a personalized tag. A touch of faux moss around the stem can also enhance the natural look. This is where you can truly let your personality shine and make each pumpkin unique.
These pumpkins are incredibly versatile and charming! I am genuinely delighted with how these new decorations complement my fireplace mantle and add a significant dose of warmth and personality to my home. They effortlessly blend with existing decor while bringing that fresh, seasonal update I crave.
Tips for Personalizing Your Sweater Pumpkins
While the basic tutorial provides a fantastic foundation, don’t hesitate to experiment and make these pumpkins uniquely yours:
- Sweater Selection: Experiment with different sweater textures and colors. A cable knit sweater offers a classic, cozy look, while a fine knit might give a more elegant feel. Don’t be afraid to mix and match colors and patterns if you’re making a grouping of pumpkins.
- Embellishments Galore: Beyond burlap, consider lace ribbons, plaid fabric scraps, velvet ribbons, or even twine tied into a simple bow. Add miniature faux flowers, rustic buttons, or small wooden tags with autumnal sayings.
- Stenciling and Painting: For a personalized touch, once the sweater fabric is glued, you could gently stencil a small design onto the fabric (like a leaf, monogram, or even “Fall”). Use fabric paint for the best results.
- Varying Sizes: Create a visually appealing display by crafting pumpkins of different sizes. Purchase various sized foam pumpkins or even use old plastic pumpkins and cover them similarly.
- Scented Pumpkins: For an extra sensory experience, glue a few drops of fall-scented essential oil (like cinnamon, clove, or pumpkin spice) onto a hidden part of the sweater fabric or the rope stem.
Where to Display Your Charming Creations
These Dollar Tree sweater pumpkins are so versatile, they can enhance almost any area of your home. Here are some ideas:
- Fireplace Mantle: As mentioned, they look fabulous on a mantle, especially when grouped with candles, garlands, and other autumnal elements.
- Dining Table Centerpiece: Arrange a cluster of varying sized sweater pumpkins in the center of your dining table, perhaps on a rustic tray with some faux leaves and candles.
- Entryway Console: Welcome guests with a cozy fall display by placing them on an entryway table.
- Bookshelves and Shelving: Tuck them among your books or on open shelves to add pops of seasonal texture.
- Covered Porch or Patio: If protected from the elements, they can add a welcoming touch to your outdoor seating areas.
- Window Sills: A small pumpkin can brighten up a window sill and catch the autumn light.
The Magic of Thrift Store Finds: A Crafter’s Paradise
One of the true joys of this project, and many other DIY endeavors, lies in the thrill of the thrift store hunt. Thrift stores are an absolute goldmine for crafters. Not only do they offer materials at a fraction of the cost of new supplies, but they also provide a unique opportunity to find unexpected treasures. That old sweater, with its perfectly worn-in texture or unique knit pattern, holds far more character than a new piece of fabric. It’s a sustainable way to source materials, reducing waste and supporting local communities. Each thrifted item comes with a history, adding an extra layer of charm to your finished project. So, embrace the adventure – you never know what wonderful material awaits you!
Embrace the Autumn Spirit with Handcrafted Beauty
Creating these Dollar Tree sweater pumpkins is more than just a craft; it’s an invitation to slow down, engage your creativity, and infuse your home with the unparalleled warmth and beauty of the autumn season. They are simple to make, incredibly affordable, and yield stunning results that look far more expensive than their humble origins. Whether you’re an experienced crafter or just starting your DIY journey, this project is a wonderful way to celebrate fall.
So, gather your materials, perhaps enjoy that delightful trip to the thrift store, and prepare to transform some simple items into charming, cozy decor. Your home (and your spirit!) will thank you for this touch of handcrafted autumn magic. Share your creations and inspire others to embrace the joy of DIY fall decorating!