
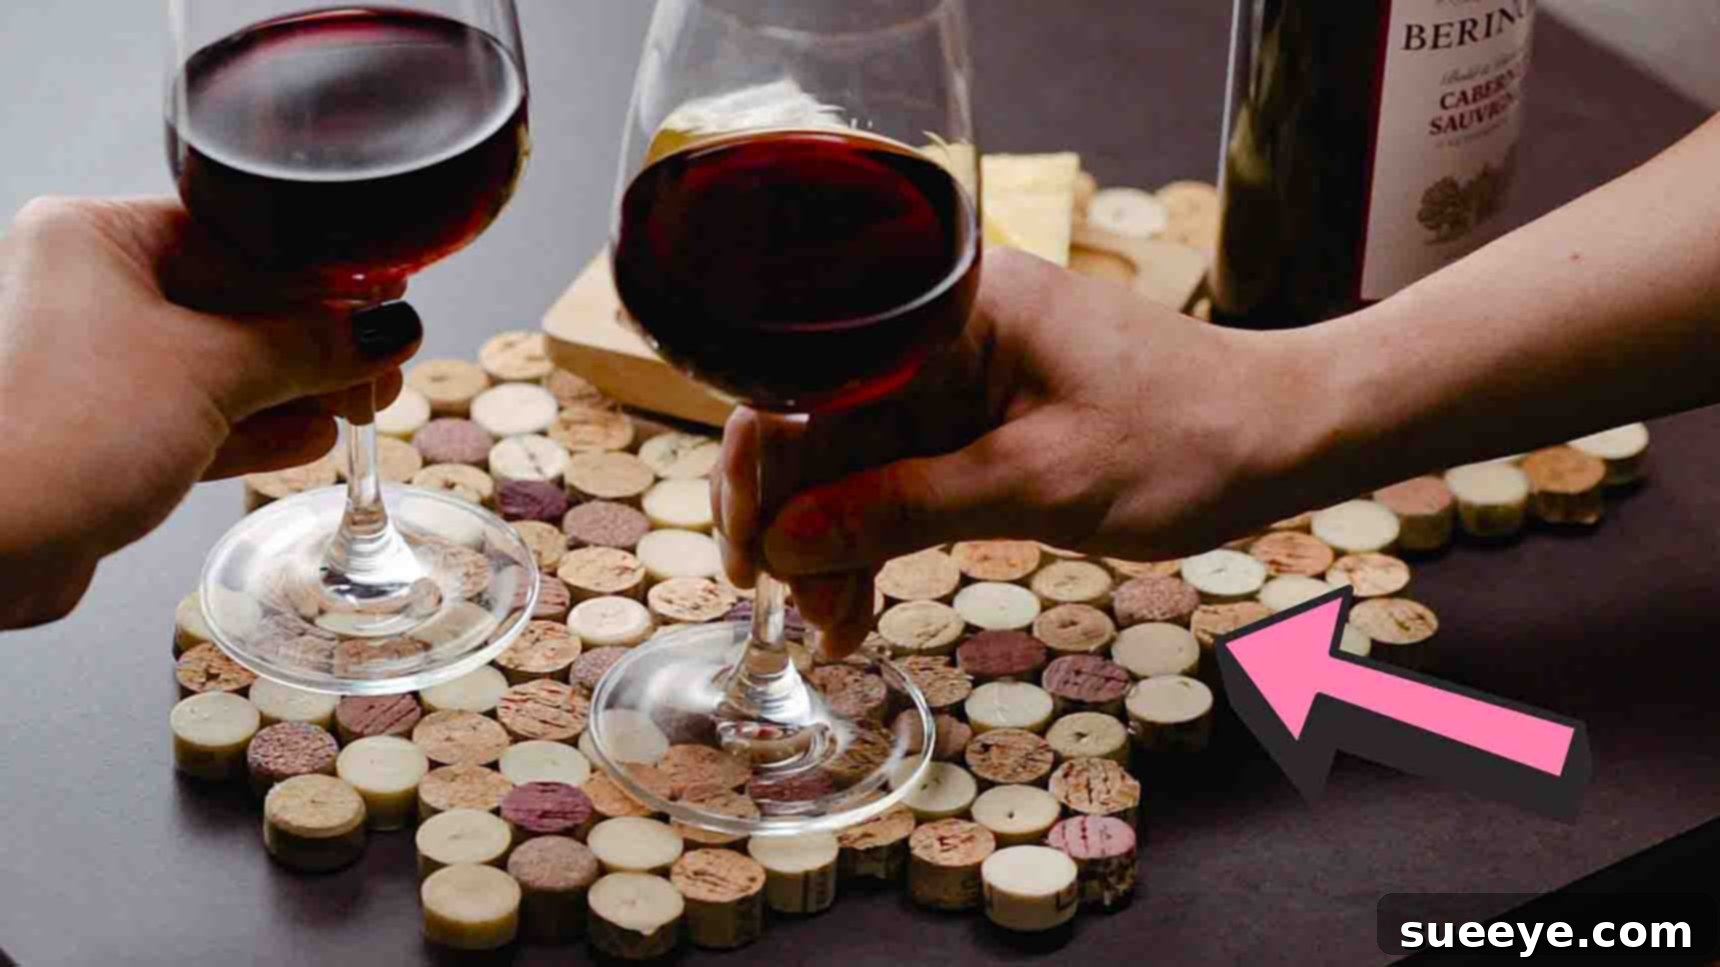
Are you a devoted wine enthusiast with a growing collection of wine corks, unsure what to do with them? Instead of simply tossing them out or letting them gather dust, why not transform these humble corks into something beautiful and functional for your home? This comprehensive guide will walk you through creating stunning and eco-friendly DIY wine cork placemats. These aren’t just practical additions to your dining table; they’re also a fantastic way to add a touch of rustic charm and personalization to your decor, all while championing sustainability. You’ll be amazed at how simple it is to craft these unique pieces with just a few basic materials and a bit of creativity.
The beauty of this project lies in its simplicity and the satisfaction of upcycling. Whether you’re an experienced crafter or just starting, making wine cork placemats is an accessible and rewarding endeavor. Not only will you create a durable and attractive item for your home, but you’ll also be giving new life to materials that would otherwise be discarded. Get ready to uncork your creativity and embark on a fun, eco-conscious DIY adventure that will elevate your dining experience and impress your guests.
Why Choose Wine Corks for Your Next DIY Project?
Wine corks are an often-overlooked material that boasts incredible potential for crafting. Beyond their primary function of sealing wine bottles, corks offer unique properties that make them ideal for DIY projects, especially for items like placemats. Here’s why they stand out:
- Sustainability and Upcycling: Every wine cork you repurpose means one less item in a landfill. This project is a fantastic way to contribute to environmental conservation by embracing the principles of reduce, reuse, and recycle. It’s a tangible way to make a difference with your crafting.
- Natural Aesthetic and Rustic Charm: Cork has a distinct, earthy texture and a warm, inviting appearance. It effortlessly brings a natural, rustic elegance to any setting, making your placemats feel both sophisticated and cozy. The varying shades and textures of different corks add character and depth.
- Durability and Resilience: Cork is naturally water-resistant, durable, and surprisingly resilient. These qualities make it an excellent choice for placemats, as they can withstand spills and daily wear and tear. With proper care, your wine cork placemats will last for years.
- Insulation Properties: Cork is an excellent insulator. This means your placemats will effectively protect your table surface from hot dishes, preventing heat damage and extending the life of your furniture.
- Texture and Grip: The natural grippy texture of cork helps prevent plates and glasses from sliding, adding a practical safety element to your dining setup.
- Cost-Effectiveness: If you’re a regular wine drinker, your material cost is essentially zero! Even if you need to source corks, they are often available in bulk at very affordable prices from craft stores or online retailers.
- Limitless Creativity: Corks can be cut, arranged, and finished in countless ways, offering endless possibilities for personalization. You can create placemats that perfectly match your home decor and personal style.
Embracing wine corks in your DIY projects is not just about crafting; it’s about celebrating sustainability, appreciating natural materials, and adding a unique, personal touch to your home.
Gather Your Crafting Essentials: Materials You’ll Need
Before diving into the creation process, it’s essential to gather all your materials. The beauty of this DIY project is its minimal material requirement, making it accessible and budget-friendly. Here’s a detailed look at what you’ll need, along with some tips for selection:
-
A Collection of Wine Corks:
This is, of course, the star of our project! You’ll need a significant number of corks, depending on the size and shape of the placemats you plan to make. For a standard placemat (approximately 12×18 inches), you might need anywhere from 80-150 corks. Start collecting them from your own bottles, ask friends and family to save theirs, or look for bulk corks online or at craft supply stores. Natural corks are generally easier to cut and glue than synthetic ones, which can be tougher and sometimes crumble. Aim for corks of similar diameters if you want a uniform look, but a mix can also create a wonderfully eclectic pattern.
-
Sharp Cutter or Craft Knife:
A very sharp cutter or a heavy-duty craft knife (like an X-Acto knife with a fresh blade) is crucial for making clean, even cuts through the corks. A dull blade will only tear or splinter the corks, making the process frustrating and yielding less appealing results. Safety is paramount here; consider a self-healing cutting mat to protect your work surface and your blade.
-
Hot Glue Gun and Ample Glue Sticks:
A reliable hot glue gun is your best friend for this project. Hot glue provides a strong, fast-drying bond that is perfect for assembling the cork pieces quickly and securely. Make sure you have plenty of glue sticks on hand; you’ll go through more than you might expect. High-temperature glue guns often provide a stronger, more lasting bond, but a low-temperature one can be sufficient if you prefer to avoid higher heat.
-
Optional but Recommended Tools:
- Cutting Mat: Essential for protecting your work surface and providing a stable base for cutting.
- Ruler and Pencil: For precise measurements when cutting corks into equal pieces, especially if you desire a very uniform look.
- Sandpaper (fine-grit): To smooth any rough edges on the cut cork pieces, ensuring a comfortable and polished finish.
- Sealant or Varnish (Food-safe): A clear, waterproof sealant (such as a polyurethane or clear craft varnish) can be applied to the finished placemat to enhance durability, protect against spills, and make cleaning easier. Ensure it’s food-safe if direct food contact is possible.
- Felt or Cork Backing: For an extra layer of protection for your table and to give the placemat a more finished look, you can glue a piece of felt or thin cork sheet to the underside of the completed placemat.
- Protective Gloves: To prevent accidental cuts and protect your hands from hot glue.
Having everything ready before you begin will ensure a smooth and enjoyable crafting experience.
Step-by-Step Directions: Crafting Your Wine Cork Placemats
Creating your wine cork placemats is a straightforward process that can be incredibly satisfying. Follow these detailed steps to bring your vision to life:
Step 1: Preparing Your Wine Corks – The Art of Cutting
This initial step requires a steady hand and careful attention to detail for the best results.
- Safety First: Always work on a stable surface, preferably a self-healing cutting mat. Use a very sharp cutter or craft knife and direct the blade away from your body. Consider wearing protective gloves.
- Measure and Mark (Optional but Recommended): If you want a uniform look, use a ruler and pencil to mark your corks. The original suggestion is to cut them into three equal pieces, which means cutting each cork horizontally twice. You can also opt for two pieces (halving them) for a thicker placemat, or even thinner slices for a mosaic-like effect. Consistency in thickness will help your placemat lie flat.
- The Cutting Technique: Gently roll the cork under the blade, applying even pressure as you cut. Don’t try to saw through it; a firm, continuous slicing motion works best. For longer corks, you might score all the way around first, then deepen the cut. Take your time to ensure each slice is clean and as even as possible.
- Inspect and Refine: After cutting, check the edges of your cork pieces. If they are rough or uneven, you can gently sand them with fine-grit sandpaper for a smoother finish. This step significantly improves the overall feel and appearance of your finished placemat.
- Gather Your Pieces: Continue cutting all your collected corks until you have a sizable pile of uniform pieces. This pre-cutting will make the assembly process much faster and more enjoyable.
Step 2: Designing Your Placemat – Layout and Vision
Before reaching for the glue gun, take some time to plan the layout of your cork pieces. This is where your creativity truly shines.
- Determine Shape and Size: Decide on the desired shape (rectangular, square, oval, circular, or even an abstract form) and size of your placemat. A standard dinner placemat is usually around 12×18 inches (30×45 cm).
- Preliminary Arrangement: On a flat, clean surface (like your cutting mat or a large piece of craft paper), arrange your cut cork pieces without glue. Experiment with different patterns. You might arrange them in neat rows and columns, in a staggered brick-like pattern, in a concentric circle, or even a free-form mosaic.
- Color and Texture Variation: If you have corks of different shades, consider how you can use them to create visual interest. You could alternate light and dark corks, create a border, or even form a simple design within the placemat.
- Finalize Your Layout: Once you’re happy with the arrangement, take a picture of it or make a sketch so you can refer to it during the gluing process. This pre-planning prevents mistakes and ensures a cohesive final product.
Step 3: Assembling Your Placemat – The Gluing Process
Now, it’s time to bring your design to life with the hot glue gun.
- Heat Your Glue Gun: Plug in your hot glue gun and allow it to fully heat up.
- Start in Sections: It’s easiest to work in small sections or rows. If you’re making a rectangular placemat, start by gluing two cork pieces together along their cut sides. Apply a small bead of hot glue to one of the flat, cut surfaces, then firmly press another cork piece against it. Hold for a few seconds until the glue sets.
- Build Rows or Clusters: Continue adding cork pieces one by one, forming small clusters or complete rows. Ensure the pieces are aligned as closely as possible to minimize gaps. The goal is to create a solid, continuous surface.
- Joining Sections: Once you have several rows or clusters, glue them together to form larger sections of your placemat. Pay attention to keeping the overall shape flat and even. It can be helpful to periodically press the growing placemat flat against your work surface.
- Address Gaps: If you notice small gaps between corks, you can fill them with a tiny amount of hot glue to reinforce the structure and create a more uniform appearance.
- Allow to Dry: Continue this process until your placemat reaches the desired size and shape. Once all cork pieces are glued, set the placemat aside to dry completely. Although hot glue sets quickly, a full cure may take an hour or two.
Step 4: Adding the Finishing Touches – Protection and Polish
This final step ensures your placemats are durable, easy to maintain, and look professionally made.
- Trim Excess Glue: Once the glue is completely dry, carefully inspect your placemat for any visible strings of hot glue or excess glue squeezed out between the corks. You can gently peel or trim these away with your craft knife.
- Apply a Sealant (Highly Recommended): For enhanced durability and water resistance, apply a clear, food-safe sealant or varnish to the top surface of your placemat. This will protect the cork from spills, stains, and moisture, making it much easier to clean. Follow the manufacturer’s instructions for application and drying time. A few thin coats are usually better than one thick coat.
- Add a Backing (Optional): If desired, cut a piece of felt or thin cork sheet to the exact shape and size of your placemat. Apply a generous amount of craft glue or hot glue to the back of the cork placemat and carefully press the felt/cork backing onto it. This backing protects your table from scratches and adds stability and a polished finish.
- Final Inspection: Give your placemat one last check. Ensure all pieces are securely attached, the edges are neat, and the surface is smooth.
Your beautiful, handmade wine cork placemat is now complete and ready to grace your dining table!
Creative Variations and Personalization
The beauty of DIY is the freedom to customize. Here are some ideas to make your wine cork placemats truly unique:
- Shape and Size: Don’t limit yourself to rectangles. Create circular placemats by arranging corks in a spiral, or design unique oval or even abstract shapes to complement your table setting. You can also make smaller versions for coasters or larger ones for trivets.
- Pattern Play: Experiment with different cork arrangements. Instead of simple rows, try a herringbone pattern, a chevron design, or even a geometric mosaic. If you have corks with varying branding or colors, strategically place them to create visual interest.
- Coloring Corks: For a pop of color, consider painting some of your cork pieces before gluing them. Use acrylic paints in colors that match your decor, or use food-safe stains for a subtle tint.
- Adding Embellishments: Once sealed, you could subtly add small decorations like thin twine, ribbons, or even small metal charms to the edges for a decorative flair.
- Mix and Match Cork Types: Combine standard wine corks with champagne corks (which are larger and mushroom-shaped) for a varied texture and appearance. Champagne corks can be cut in half vertically or horizontally for different effects.
Maintenance and Care for Your Wine Cork Placemats
To ensure your handcrafted wine cork placemats remain beautiful and functional for years, a little care goes a long way:
- Cleaning: For everyday spills, simply wipe the placemat with a damp cloth. If you’ve applied a sealant, cleaning will be even easier. For more stubborn messes, use a mild soap solution and a soft brush, then rinse gently and allow to air dry completely. Avoid submerging the placemat in water, especially if it’s not thoroughly sealed, as this can weaken the glue bond.
- Drying: Always allow your placemats to dry thoroughly after cleaning to prevent mold or mildew, which cork is naturally resistant to but not entirely immune from in prolonged damp conditions.
- Storage: When not in use, store your placemats flat to maintain their shape. Avoid placing heavy objects on top of them for extended periods, as this could cause indentations.
- Avoid Extreme Heat: While cork is heat resistant, direct contact with extremely hot cookware (e.g., a pan directly from the oven) should still be avoided, especially if not adequately sealed. For very hot items, use a dedicated trivet.
Troubleshooting Common Issues
Even simple DIY projects can sometimes present small challenges. Here’s how to tackle a few common issues you might encounter:
- Corks Breaking During Cutting: This often happens if your blade is dull or if you’re trying to cut too quickly. Ensure your blade is sharp, apply steady, even pressure, and take your time. You can also try slightly wetting older, drier corks to make them more pliable.
- Glue Not Holding: Make sure your hot glue gun is fully heated. If the glue is too cool, it won’t form a strong bond. Also, ensure the cork surfaces are clean and free of dust or debris before applying glue.
- Placemat Not Lying Flat: This usually occurs if the cork pieces are not cut to uniform thickness or if the gluing process pulls the pieces unevenly. To prevent this, focus on consistent cuts and press down firmly and evenly as you glue sections together. If a finished placemat has a slight warp, you can sometimes place it under heavy books for a few days to flatten it out, especially if it’s still relatively fresh.
- Visible Glue Strings: Hot glue guns are notorious for leaving fine strings. These can usually be gently peeled off once the glue is dry. A hairdryer on a low setting can sometimes help melt and remove very fine strings, but be careful not to overheat the corks.
Uncork Your Creativity: A Final Thought
Creating DIY wine cork placemats is more than just a craft; it’s an opportunity to transform discarded materials into cherished household items, showcasing your personal style and commitment to sustainable living. This project offers immense satisfaction, from the initial collection of corks to the moment you set your beautifully crafted placemats on the table for guests.
They make wonderful gifts, personalized keepsakes, or simply a charming addition to your own home decor. So, next time you pop open a bottle of wine, remember that the cork isn’t just a stopper—it’s the beginning of your next creative masterpiece. Gather your corks, unleash your imagination, and enjoy the process of crafting something truly unique and eco-friendly. Happy crafting!