
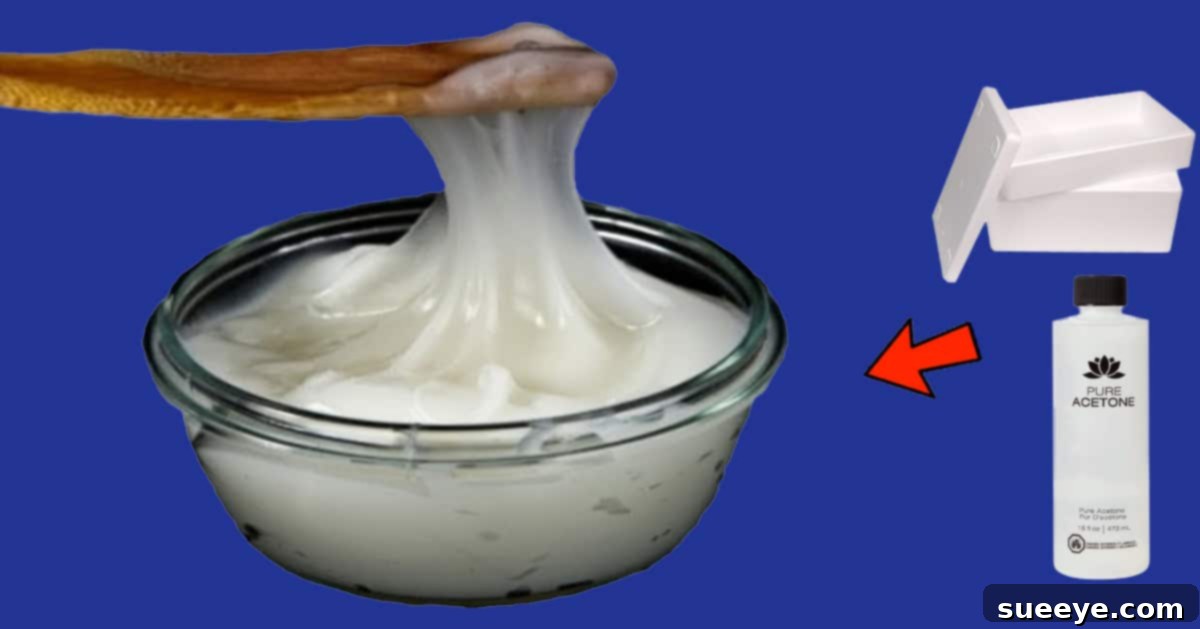
DIY Super Glue: Transform Styrofoam and Acetone into a Powerful Homemade Adhesive
In a world where household repairs and creative projects often demand a strong, reliable adhesive, finding an affordable and readily available solution is invaluable. While commercial super glues are commonplace, a fascinating and surprisingly effective alternative can be conjured from just two common household items: styrofoam and acetone. This guide delves into the ingenious process of creating your own super glue, offering a sustainable, cost-effective, and remarkably strong adhesive for a multitude of applications.
The concept of making your own super glue might seem unconventional, especially given the affordability of store-bought options. However, the DIY approach, as wonderfully demonstrated by creators like MrScrew TV, presents distinct advantages. Imagine being in the middle of a crucial repair or a beloved craft project only to find your super glue bottle empty. This homemade solution provides an immediate, potent adhesive, ensuring your creative flow or essential tasks are never interrupted. Beyond emergency fixes, consistently purchasing super glue can add up over time. Crafting your own significantly cuts down on these recurring expenses, offering an economical alternative that also repurposes materials typically destined for landfills.
Furthermore, this innovative DIY method taps into the growing trend of sustainability. Styrofoam, or expanded polystyrene (EPS), is notorious for its slow degradation and environmental impact. By transforming it into a functional adhesive, you’re not just making glue; you’re actively engaging in creative recycling, giving new life to a material that would otherwise contribute to waste. This guide will walk you through every step, from gathering your simple materials to applying your freshly made super glue, ensuring you achieve a strong, durable bond every time.
The Magic Behind the Bond: Understanding Styrofoam and Acetone
To truly appreciate this DIY marvel, it helps to understand the fundamental interaction between styrofoam and acetone. Styrofoam is a thermoplastic material, meaning it can be melted and reformed. Its lightweight, foamy structure is primarily composed of polystyrene, with air making up the vast majority of its volume. Acetone, on the other hand, is a powerful organic solvent. It’s commonly found in nail polish remover and certain paint thinners due to its ability to dissolve various plastics, resins, and other organic compounds.
When acetone comes into contact with styrofoam, it doesn’t just melt it; it dissolves the polystyrene polymer chains. The air pockets within the styrofoam collapse, and the solid polystyrene reorganizes into a dense, viscous liquid. As the acetone evaporates, the dissolved polystyrene solidifies, creating a remarkably strong and durable bond. This chemical reaction is the cornerstone of our homemade super glue, yielding an adhesive with impressive strength and versatility.
Essential Supplies for Your Homemade Super Glue
The beauty of this DIY project lies in its simplicity. You only need two primary ingredients, both of which are surprisingly easy to acquire and often already present in many homes or readily available at hardware stores, art supply shops, or even drugstores.
- Styrofoam: This is the backbone of your glue. You can use various forms of styrofoam, such as packaging peanuts (ensure they are actual polystyrene, not cornstarch-based biodegradable ones), discarded takeaway containers, old cooler pieces, or even insulation boards. The cleaner the styrofoam, the purer your glue will be. Make sure it’s free from food residue, dirt, or other contaminants.
- Acetone: The solvent that performs the magic. Pure acetone is ideal, often sold as nail polish remover (check the label for “100% acetone”) or as a solvent in hardware stores. Avoid removers with added conditioners or fragrances, as these can affect the glue’s purity and performance.
Optional but Recommended Safety Gear:
- Protective Gloves: Acetone can dry out and irritate skin. Nitrile or neoprene gloves are recommended.
- Safety Glasses: To protect your eyes from splashes.
- Ventilation Mask: If working in a poorly ventilated area, though working outdoors or near an open window is always best.
Step-by-Step Guide to Crafting Your Super Glue
Creating your homemade super glue is a straightforward process, but attention to detail and safety is key. Follow these steps carefully to ensure a successful and effective adhesive.
Step 1: Prepare Your Workspace and Styrofoam
Before you begin, set up your workspace in a well-ventilated area. This is crucial because acetone fumes can be strong and potentially harmful if inhaled in large quantities. Working outdoors or in a garage with open doors is ideal. Lay down some newspaper or a protective sheet to catch any spills.
Next, take your styrofoam and break it down into smaller, manageable pieces. The size isn’t critical, but smaller pieces will dissolve faster and more evenly. Aim for pieces roughly the size of a thumb or smaller. This increases the surface area exposed to the acetone, speeding up the dissolution process. Place these styrofoam pieces into a glass or metal container. Avoid plastic containers, as acetone can dissolve many types of plastic.
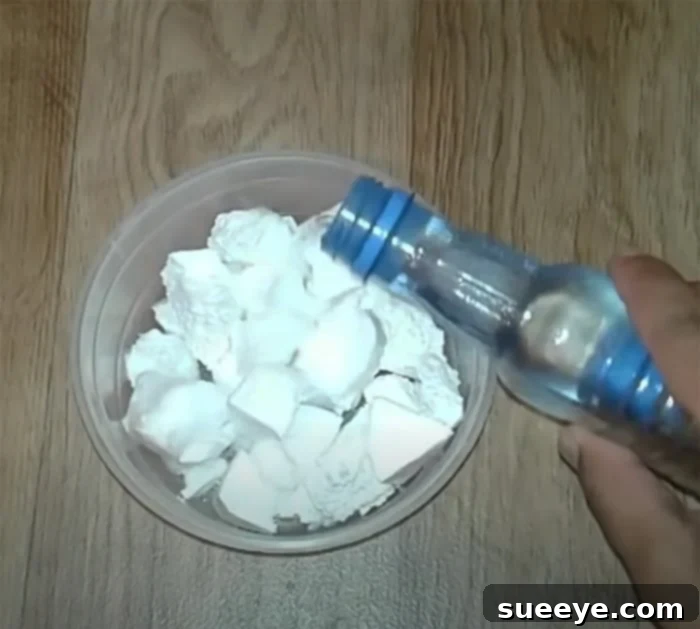
Step 2: The Dissolution Process – Adding Acetone
With your styrofoam ready in its container, it’s time to introduce the acetone. Slowly pour the acetone over the styrofoam pieces. You’ll immediately notice the styrofoam beginning to shrink and dissolve. It’s quite a fascinating sight! Start with a moderate amount of acetone, just enough to cover or slightly immerse the styrofoam. You can always add more if needed.
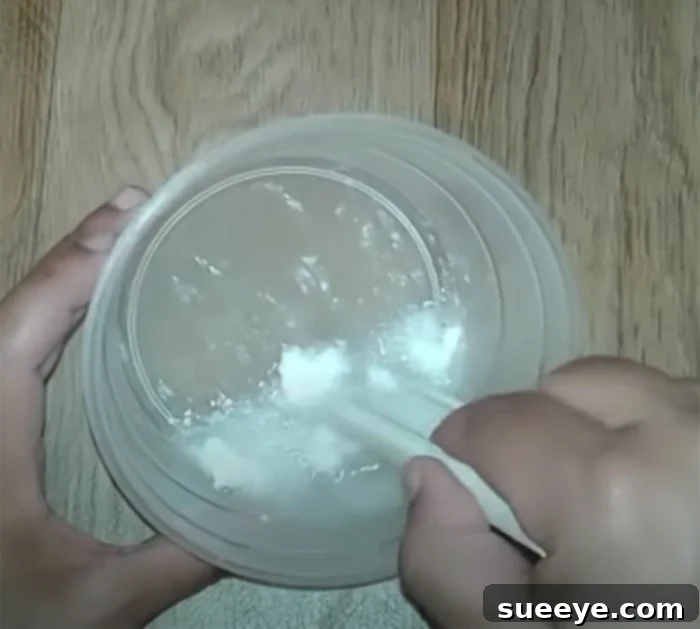
Using a stir stick (a wooden dowel, old spoon, or anything you don’t mind getting messy – again, avoid plastic), gently stir the mixture. This helps break down any larger chunks and ensures that all the styrofoam comes into contact with the acetone. Continue stirring until the styrofoam pieces are completely dissolved, forming a thick, gooey liquid. The consistency of your glue will depend on the ratio of styrofoam to acetone. For a thicker, stronger glue, use more styrofoam relative to the acetone. For a thinner, more spreadable glue, use a bit more acetone. You’re aiming for a consistency similar to honey or a very thick syrup. If it’s too thick, add a tiny bit more acetone; if too thin, add more small pieces of styrofoam to dissolve.
Step 3: Application and Curing
Once you’ve achieved your desired consistency, your homemade super glue is ready to use! This adhesive is incredibly versatile and can bond a wide array of materials. Apply a thin, even layer of the glue to one of the surfaces you wish to bond. Press the two surfaces firmly together and hold them in place for a few minutes. The initial set time will depend on the amount of acetone remaining and the humidity, but a strong bond will typically form within 15-30 minutes, with full curing taking several hours, or even up to 24 hours for maximum strength.
This glue works exceptionally well on porous materials like wood, cardboard, paper, and fabric. Its ability to create a strong, durable bond makes it suitable for various craft projects, household repairs, and even model building. Experiment with different materials, but always test on an inconspicuous area first, especially with plastics, as acetone can react differently with various plastic types.
Performance, Properties, and Storage of Your DIY Adhesive
Understanding the characteristics of your homemade super glue will help you maximize its potential and ensure effective use.
Bonding Strength and Durability
Many users are genuinely surprised by the strength of this styrofoam-acetone glue. While it may not replicate the exact chemical properties of cyanoacrylate (true super glue), it creates a robust bond that is often sufficient for most household repairs and craft projects. The polystyrene, once dried, forms a rigid plastic film that adheres strongly to many surfaces. Its durability is quite good, especially when bonding porous materials, and it can withstand a fair amount of stress.
Drying Time and Curing
The drying time is primarily dependent on the rate at which the acetone evaporates. Factors such as room temperature, humidity, the thickness of the glue layer, and the porosity of the materials being bonded will all play a role. In general, a touch-dry surface can be achieved within an hour, but for optimal strength, allow at least 6-12 hours for a good cure, and up to 24 hours for a full, maximum-strength bond. Good ventilation also aids in faster acetone evaporation.
Odor and Ventilation
One notable characteristic of this glue is the strong smell of acetone during its creation and initial drying phase. Acetone has a distinctive, pungent odor. This is another reason why excellent ventilation is paramount. Once the acetone has completely evaporated and the glue has fully cured, the odor will dissipate. If the smell bothers you, consider working with a fan, using a respirator, or simply ensuring a continuous flow of fresh air.
Storage Considerations
A common question revolves around the storability of this homemade super glue. Unlike commercial super glues that often dry out quickly once opened, this DIY version can be stored for future use. The key is to keep it in an airtight container to prevent the acetone from evaporating. A glass jar with a tight-fitting lid is ideal. Over time, some acetone might still evaporate, causing the glue to thicken. If this happens, you can rejuvenate it by adding a small amount of fresh acetone and stirring until it reaches the desired consistency. Stored properly, a batch of this glue can last for several weeks or even months.
Versatile Applications for Your Homemade Super Glue
The utility of styrofoam and acetone glue extends far beyond simple fixes. Its strong adhesive properties make it suitable for a wide range of creative and practical applications:
- Craft Projects: Perfect for papercrafts, scrapbooking, fabric embellishments, creating mixed-media art, and assembling intricate models.
- Household Repairs: Repairing broken ceramics (non-food contact items), mending torn fabrics, reattaching loose wooden pieces on furniture (where less stress is applied), or fixing cardboard boxes.
- Model Making: Excellent for hobbyists working with foam, wood, or plastic model kits (always test on a small, inconspicuous area of plastic first, as some plastics may react negatively with acetone).
- Filling Gaps: Its thick consistency can be useful for filling small gaps or cracks in certain materials before painting or finishing.
- Recycling Projects: Integral to projects that repurpose other styrofoam materials, acting as both a binder and a structural element.
Safety First: Important Precautions When Working with Acetone
While the process of making this glue is simple, working with acetone requires careful attention to safety. Acetone is a chemical solvent and should be handled responsibly.
- Ventilation is Key: Always work in a well-ventilated area to avoid inhaling excessive fumes. Outdoors is best, or near an open window with a fan.
- Flammability: Acetone is highly flammable. Keep it away from open flames, sparks, heat sources, and anything that could ignite it. Do not smoke while working with acetone.
- Skin and Eye Contact: Avoid direct contact with skin and eyes. Acetone can cause skin irritation and dryness. Wear protective gloves and safety glasses. If contact occurs, rinse thoroughly with water.
- Ingestion: Never ingest acetone. Keep it out of reach of children and pets.
- Container Choice: Always use glass or metal containers for mixing and storing the glue, as acetone will dissolve many plastics.
- Disposal: Dispose of any leftover acetone or contaminated materials according to local hazardous waste guidelines. Do not pour down drains.
It’s important to note that while some older tutorials might mention gasoline as an alternative solvent, this is an extremely dangerous and unsafe practice. Gasoline is far more flammable, toxic, and poses significant health risks. Stick to acetone for safety and effectiveness.
Conclusion: An Ingenious and Practical DIY Solution
The journey from discarded styrofoam and a bottle of acetone to a functional, strong adhesive is a testament to the power of DIY ingenuity. This homemade super glue not only provides a reliable solution for those moments when you’re caught without a store-bought alternative but also champions the principles of sustainability and resourcefulness. You’re not just making glue; you’re actively reducing waste and embracing a more self-sufficient approach to common household needs.
While acknowledging the strong smell of acetone during its creation and the necessity for proper safety precautions, the benefits of this DIY hack are undeniable. It’s a versatile, cost-effective, and surprisingly powerful adhesive that’s perfect for a wide range of craft projects and minor repairs. So, the next time you find yourself with a pile of styrofoam packaging, consider giving it a new life as a valuable tool in your DIY arsenal. You might just discover your new favorite adhesive.