
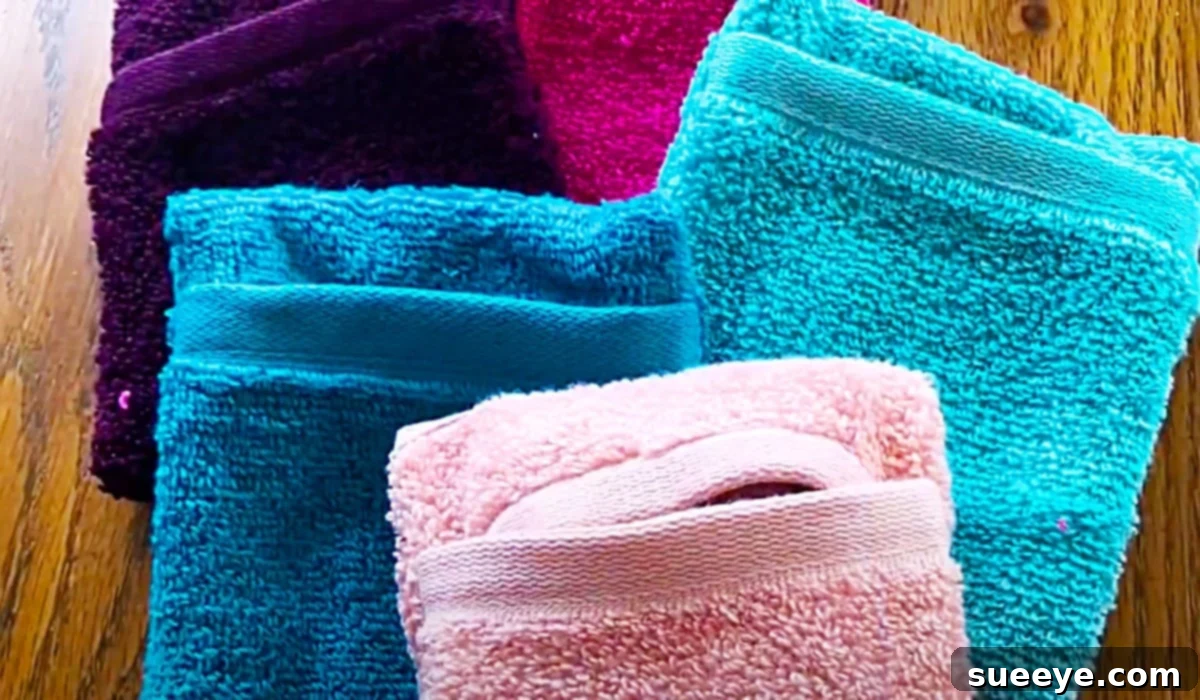
DIY Washcloth Soap Pouch: Your Ultimate Guide to Zero-Waste Bathing
Are you tired of messy bar soap leaving unsightly residue on your shower ledge or soap dish? Do you find your soap dissolving away too quickly, leading to unnecessary waste and expense? The solution to these common bathroom woes might be simpler and more eco-friendly than you think: a handmade washcloth soap pouch. This clever little accessory transforms your bathing routine, offering a practical way to prolong the life of your bar soap, keep your bathroom tidy, and even provide gentle exfoliation.
In a world increasingly conscious of waste, embracing reusable items like a DIY soap saver pouch is a small but significant step towards a more sustainable lifestyle. Not only does it help you save money by extending the life of your soap, but it also reduces the need for plastic soap dishes or liquid soap dispensers. This project is incredibly straightforward, perfect for beginner sewers, and yields a highly functional item you’ll wonder how you ever lived without.
Inspired by ingenious crafting tutorials, such as the one shared by Posh By Shaleen Ague on YouTube, creating your own soap-saving washcloth pouch is a rewarding endeavor. It’s not just a practical addition to your own bathroom; these delightful pouches make fantastic, thoughtful gifts for friends, family, or even as unique stocking stuffers during the holidays. Let’s dive into how you can craft this essential zero-waste bathing accessory.
Why a Soap-Saving Washcloth Pouch Is a Must-Have
Before we gather our materials, let’s explore the myriad benefits of incorporating a handmade washcloth soap pouch into your daily routine. Understanding these advantages will undoubtedly motivate you to get sewing!
1. Extends Bar Soap Life and Reduces Waste
One of the most significant benefits of using a soap saving pouch is its ability to significantly prolong the life of your bar soap. When bar soap sits directly on a soap dish or shower ledge, it often remains wet, leading to “melted” soap residue and accelerated depletion. A washcloth pouch allows the soap to dry more effectively between uses, preventing it from turning into a mushy mess. This means you buy less soap, saving money and reducing unnecessary packaging waste.
2. Eliminates Messy Soap Scum
Say goodbye to the dreaded soap scum rings and slimy residue that accumulate on your bathroom surfaces. Encased within the washcloth pouch, your soap is contained. No more gooey build-up on the side of the tub or in your soap dish. Your bathroom will look cleaner, and you’ll spend less time scrubbing!
3. Provides Gentle Exfoliation
The texture of the washcloth itself acts as a mild exfoliator, turning your regular shower into a mini-spa experience. As you lather up, the fabric gently buffs away dead skin cells, leaving your skin feeling smoother and more refreshed. It’s a two-in-one tool: an effective soap saver and a gentle skin enhancer, perfect for daily use.
4. Improves Grip and Prevents Slipping
Small or worn-down soap bars can be notoriously slippery and hard to hold, leading to frustrating drops in the shower. Tucking them into a washcloth pouch solves this problem instantly. The fabric provides an excellent grip, making it easier to handle your soap, especially for children, seniors, or individuals with limited dexterity. No more fumbling or dropping soap on your toes!
5. Perfect for Travel and Gym Bags
Traveling with bar soap can be a hassle, often requiring special containers that can still get messy. A DIY soap bag neatly contains your bar soap, keeping your toiletries bag clean and dry. It’s also ideal for the gym, camping trips, or any on-the-go situation where you want to bring your favorite bar soap without the mess, ensuring a hygienic and convenient experience.
6. An Eco-Friendly Bathroom Essential
Opting for bar soap over liquid soap already reduces plastic waste. Enhancing that choice with a reusable washcloth pouch further cements your commitment to a zero-waste lifestyle. It’s a simple, effective way to minimize your environmental footprint in the bathroom, contributing to a greener planet one wash at a time.
Materials You Will Need for Your DIY Soap Pouch
One of the beauties of this easy sewing project is its simplicity and the minimal materials required. You likely have most of these items around your home already!
- A Hand Towel or Washcloth: Choose a clean, absorbent towel. Cotton is an excellent choice for its durability and exfoliating properties. You can repurpose old towels, giving them a new life, or purchase new washcloths specifically for this project. Standard washcloths (approximately 12×12 inches or 30×30 cm) are ideal, but you can adjust the size based on your preferred soap bar dimensions.
- Matching Thread: Polyester all-purpose thread is usually best for its strength and durability, especially in damp environments. Choose a color that blends well with your towel for a professional and seamless finish.
- A Sewing Machine: While a sewing machine will make the process quicker and the stitches more uniform, this project is absolutely doable by hand. For hand-sewing, a simple backstitch or running stitch will work perfectly, making it accessible to all skill levels.
- Straight Pins: Essential for holding your fabric securely in place before sewing, ensuring your seams are straight and even. This prevents shifting and ensures a neat final product.
- Fabric Scissors: Sharp scissors are crucial for clean, precise cuts. Dull scissors can fray fabric and make cutting more difficult.
- Measuring Tape or Ruler: For accurate measurements when cutting your fabric, ensuring your pouch is the right size for your soap.
- Iron and Ironing Board (Optional but Recommended): Pressing your fabric after cutting and before sewing can make a significant difference in the neatness and crispness of your finished pouch, giving it a professional look.
Step-by-Step Directions: Crafting Your Washcloth Soap Saver
Now, let’s get to the fun part! Follow these detailed instructions to create your very own practical and charming soap-saving pouch. Remember, patience and precision are key to a beautiful and functional finish.
Step 1: Prepare Your Washcloth Fabric
Begin by laying your clean hand towel or washcloth flat on a sturdy, clean surface. The original tutorial suggests folding a standard hand towel down the middle and cutting along that midline to create two equal pieces. For a typical soap bar, one of these halves, or a piece roughly 12 inches long and 6 inches wide, is a good starting point. This size provides ample room for folding and seam allowances. Ensure your fabric is free of wrinkles for accurate cutting.
Step 2: Fold and Pin the Fabric for the Pouch Shape
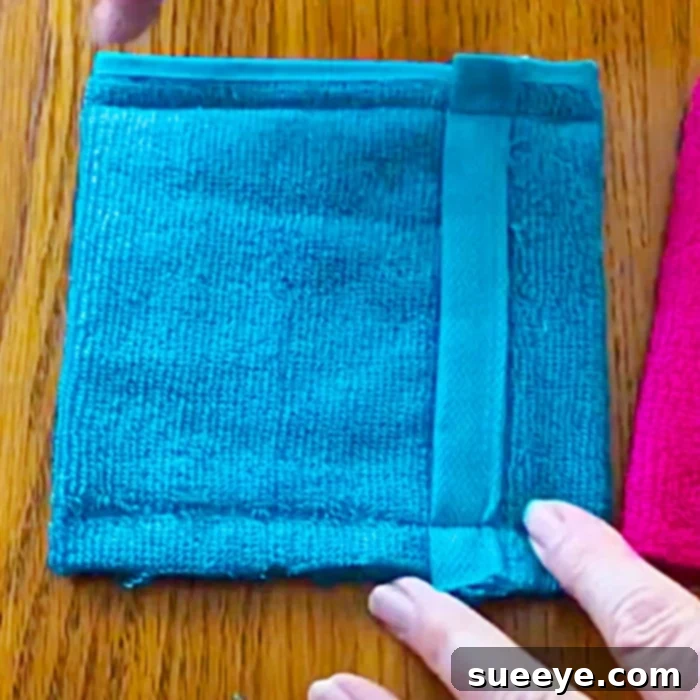
Take one of your cut washcloth pieces. If it has a “right” and “wrong” side (though many washcloths are reversible), place it with the wrong side facing up. Fold the bottom edge up towards the top, creating the main pocket section. The fold should be approximately two-thirds of the way up the fabric, leaving an overlap at the top. For instance, if your fabric is 12 inches long, fold it so that the bottom edge meets the 8-inch mark, leaving about 4 inches unfolded at the top. This top flap will help secure the soap. Secure the folded sides with straight pins, placing them perpendicularly to the edge every inch or so. This will hold the fabric layers together securely, preventing shifting during sewing.
Step 3: Stitch the Sides of the Pouch
Using your sewing machine (or hand-sewing), carefully sew down both pinned sides of the pouch. Start with a backstitch at the beginning and end of each seam to reinforce it, which is crucial for preventing unraveling, especially in a frequently used item. Use a straight stitch with a seam allowance of about 1/2 inch (1.25 cm) from the raw edge of the fabric. Ensure your stitches are even and neat for a professional look. Trim any excess threads close to the seam after sewing.
Step 4: Hem the Top Edge (Optional but Recommended for Durability)
The top edge of your pouch, where the soap will be inserted, can be left as a raw edge for a more rustic or minimalist look, especially if your washcloth doesn’t fray easily. However, for a more polished and durable finish that withstands repeated use and washing, consider hemming this edge. Fold the top raw edge down by about 1/2 inch (1.25 cm) towards the inside of the pouch. Press it flat with an iron to create a crisp fold, and then stitch it down using a straight stitch. This creates a neat, finished opening that is more resistant to wear and tear.
Step 5: Turn Right Side Out and Finish Your Pouch
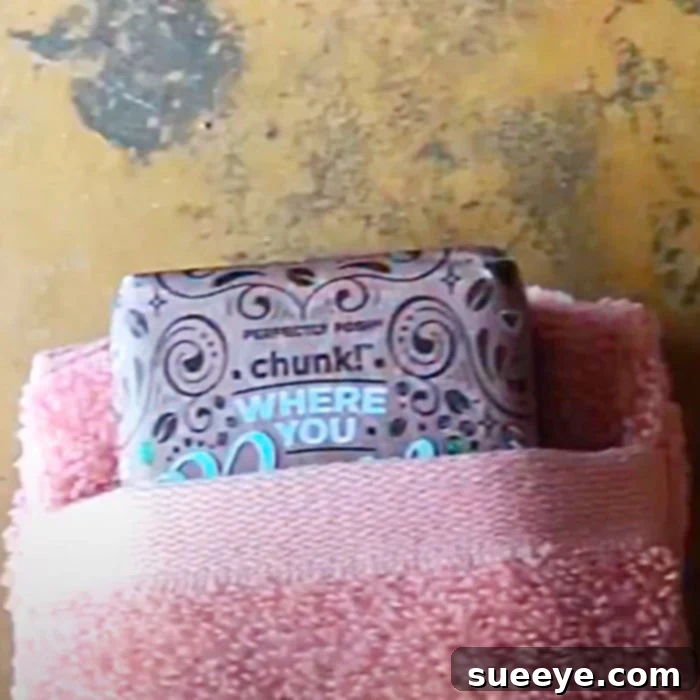
Once you’ve completed all the necessary stitching, carefully turn your washcloth pouch right side out. Use a blunt object like a knitting needle, a chopstick, or the tip of your scissors (carefully, to avoid piercing the fabric!) to gently push out the corners, making them crisp and well-defined. Give your finished pouch a final press with an iron to smooth out any wrinkles and set the seams, giving it a professional and neat appearance. Your awesome new DIY soap-saving washcloth pouch is now complete and ready for immediate use!
Tips for Success and Customization
- Choosing Your Fabric Wisely: While cotton washcloths are excellent, consider experimenting with other fabrics like linen or even a softer loofah material for different exfoliating textures. For a particularly gentle touch, bamboo or microfiber can be lovely alternatives.
- Add a Hanging Loop: For added convenience and to promote faster drying, sew a small fabric loop or a piece of durable ribbon to one of the top corners of your pouch before sewing the side seams. This allows you to easily hang your soap pouch in the shower or on a hook, facilitating better drainage and air circulation.
- Experiment with Sizes: Don’t limit yourself to one size! Create pouches of various dimensions to comfortably accommodate different bar soaps, from small guest soaps to larger, artisanal bars, or even slivers of leftover soap.
- Personalize Your Pouch: Get creative and make your soap savers truly unique! You can add simple embroidery, a small fabric appliqué, or even use fabric dye to personalize your pouches with patterns or initials.
- Care and Maintenance: To keep your soap pouch fresh, hygienic, and long-lasting, periodically wash it with your regular laundry. Simply remove any soap remnants, toss the pouch in the washing machine on a gentle cycle, and let it air dry completely.
Beyond the Basics: Creative Uses and Gifting Ideas
The washcloth soap pouch isn’t just for your own bathroom! Its versatility and charm make it an excellent item for various purposes:
- Guest Bathroom Essential: Offer a fresh, clean pouch with a new bar of exquisite soap for your guests, elevating their stay.
- Spa Gift Baskets: Combine several handmade soap pouches with homemade soaps, bath bombs, essential oils, and lotions for a thoughtful, personalized, and luxurious gift.
- Travel Kits: A must-have for frequent travelers who prefer solid toiletries, ensuring their luggage stays clean and their soap lasts longer.
- Kid-Friendly Bathing: Makes it easier for small hands to grip and hold onto slippery soap bars, encouraging independence during bath time.
- Eco-Friendly Favors: Perfect as party favors for bridal showers, baby showers, or any event promoting sustainable living.
Embrace Simplicity and Sustainability with Your DIY Soap Saver
This DIY washcloth soap pouch is a testament to how small, simple projects can have a significant and positive impact on your daily life and the environment. By crafting this easy-to-make accessory, you’re not only creating a practical tool for a cleaner, more organized bathroom but also actively contributing to a more sustainable, zero-waste lifestyle. It’s a project that brings immense satisfaction, helps you save money, and champions eco-consciousness in a tangible way.
So, grab your chosen washcloth and sewing machine – or a trusty needle and thread – and embark on this delightful crafting journey. You’ll be amazed at how quickly and easily you can create a batch of these incredibly useful soap savers for your home and as thoughtful, handmade gifts. This simple project is a gateway to a more organized, economical, and environmentally friendly bathing experience. Happy sewing!