
Mastering DIY Rod Pocket Curtains: A Comprehensive Sewing Guide
Curtains are more than just functional window coverings; they are powerful elements of home decor that significantly influence a room’s aesthetic and ambiance. Whether you’re aiming for a fresh seasonal look or a complete room transformation, updating your curtains can make a dramatic difference. While store-bought options are plentiful, creating your own custom curtains offers unparalleled personalization, saves money, and provides immense satisfaction. This detailed guide will walk you through the process of making beautiful rod pocket curtains, a classic and versatile style perfect for sewers of all skill levels. With a little fabric and some basic sewing tools, you can craft elegant window treatments that perfectly complement your home.
Why Choose Rod Pocket Curtains?
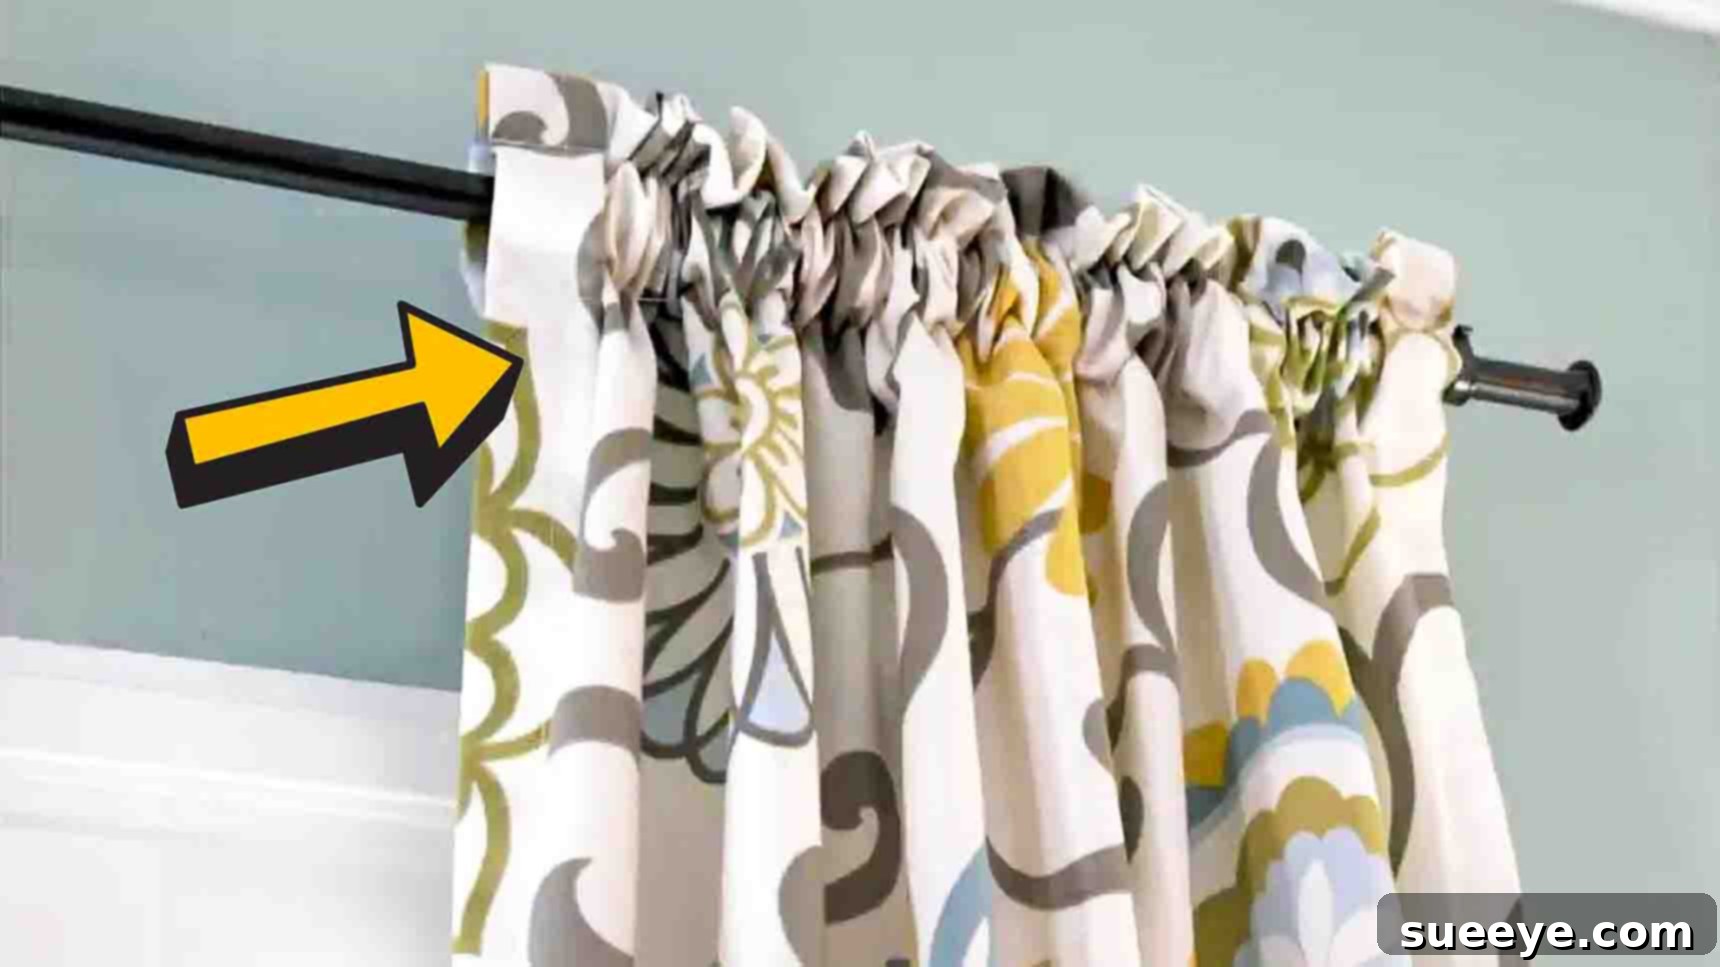
Rod pocket curtains, sometimes called “cased heading” curtains, are a popular choice for their simplicity and timeless elegance. They feature a channel sewn into the top of the fabric through which a curtain rod is threaded. This creates soft gathers across the top, offering a relaxed yet sophisticated look. They are ideal for various interior styles, from farmhouse chic to traditional and contemporary. Their straightforward design makes them an excellent beginner-friendly sewing project, allowing you to quickly enhance your living room, bedroom, or dining area with custom touches.
Preparing for Your Rod Pocket Curtain Project
Choosing the Right Fabric
- Drapery Fabric: The foundation of your curtains! Consider the room’s function and your desired aesthetic. Light fabrics like sheer cotton or linen allow more light, while heavier options like damask or velvet offer privacy and insulation. Patterns can add visual interest, but ensure they align with your overall decor. Always pre-wash and press your fabric if it’s washable to prevent shrinking after your curtains are made.
- Fabric Weight: Lighter fabrics drape more softly, while heavier fabrics provide more structure and light blockage.
- Pattern Matching: If using patterned fabric, consider buying extra yardage to ensure pattern repeats align across multiple panels, creating a more professional finish.
Accurate Window Measurements Are Key
Precision is paramount when it comes to curtains. Before cutting any fabric, carefully measure your windows and decide on your desired curtain length and width. This step ensures your finished curtains hang beautifully and achieve the look you envision.
- Curtain Width: For proper fullness, your finished curtain panel(s) should be at least 1.5 to 2 times the width of your window frame or curtain rod. This allows for attractive gathers when the curtain is closed. For example, if your window is 40 inches wide, you’ll want a panel that is 60 to 80 inches wide (before hem allowances). If you’re making multiple panels, divide this desired width by the number of panels.
- Curtain Length: Decide where you want your curtains to fall. Common lengths include:
- Window Sill: Just touching the window sill (ideal for kitchens or where furniture is placed directly under the window).
- Apron Length: Falling a few inches below the window sill.
- Floor Length: Hovering just above the floor (classic and popular).
- Puddled: Resting on the floor by a few inches, creating a luxurious, dramatic effect.
Measure from the top of your curtain rod to your desired finished length.
Essential Materials for Your Custom Rod Pocket Curtains
Gathering all your tools before you begin will ensure a smooth and enjoyable sewing experience. Most of these items are standard for any sewing enthusiast.
- Drapery Fabric: As discussed above, choose a fabric that suits your style and needs.
- Sharp Scissors or Rotary Cutter: For precise, clean cuts. A rotary cutter with a self-healing mat is excellent for long, straight lines.
- Cutting Mat: (If using a rotary cutter) Protects your work surface and provides grid lines for accurate cutting.
- Pins: Essential for holding fabric layers together, securing hems before sewing, and ensuring accurate alignment.
- Thread: Match the color of your fabric as closely as possible for a professional, seamless look. A good quality polyester thread is strong and durable.
- Ruler or Measuring Tape: For all your measuring needs, from initial window dimensions to hem allowances. A long clear ruler is particularly helpful for cutting straight lines.
- Fabric Marker or Chalk: For marking cutting lines, fold lines, and hem allowances directly on your fabric. It disappears with washing or pressing.
- Sewing Gauge (optional but highly recommended): A small, adjustable ruler that helps quickly and accurately measure small hems and seam allowances.
- Iron and Ironing Board: Crucial for pressing seams flat, creating crisp folds, and ensuring professional-looking hems. Do not skip this step!
- Sewing Machine: Any basic sewing machine capable of a straight stitch will work perfectly.
Step-by-Step Guide: How to Sew Rod Pocket Curtains
Step 1: Prepare and Cut Your Fabric
This initial step involves translating your measurements into the actual fabric cuts, factoring in all necessary allowances for a polished finish.
First, ensure your fabric is pre-washed (if applicable) and thoroughly ironed to remove any wrinkles. This prevents future shrinkage and ensures accurate measurements.
To determine the exact size to cut your fabric, take your desired finished curtain panel dimensions (width and height). Now, you’ll add allowances for all the hems:
- For Width: Add 4 inches to your desired finished width (2 inches for each side hem, as each side hem typically involves folding over 1 inch twice).
- For Height: Add 12 inches to your desired finished height. This accounts for the rod pocket at the top (typically 6 inches total for a double 3-inch fold) and the bottom hem (typically 6 inches total for a double 3-inch fold). If you plan a smaller bottom hem, adjust accordingly.
For example, if you want a finished panel of 40 inches wide by 80 inches long:
- Cut Width: 40 inches (desired) + 4 inches (side hems) = 44 inches.
- Cut Height: 80 inches (desired) + 12 inches (top rod pocket & bottom hem) = 92 inches.
Carefully measure and cut your fabric to these calculated dimensions using your scissors or rotary cutter. Always ensure your cuts are straight and true for a professional result.
Step 2: Crafting the Side Hems
The side hems provide a clean, finished edge to your curtain panels, preventing fraying and adding structure.
Working on one long side of your fabric panel at a time, follow these steps:
- First Fold and Press: Fold the raw edge of the fabric over towards the wrong side by 1 inch. Press this fold firmly with a hot iron. The iron’s heat sets the crease, making the next fold much easier and more precise.
- Second Fold and Press: Fold the same edge over another 1 inch, again towards the wrong side. Press firmly once more. This conceals the raw edge entirely within the hem, creating a neat, double-folded finish.
- Secure and Sew: Pin the hem in place to prevent it from shifting while sewing. Then, using your sewing machine, sew down the entire length of the panel. Aim to sew about 3/4 inch from the folded edge of the fabric, or approximately 1/8 to 1/4 inch from the inner folded edge. This secures both folds of the hem.
- Repeat: Turn the panel over and repeat these exact steps for the other long side of the fabric. Always make sure your stitches are straight and even for the best appearance.
Step 3: Creating the Rod Pocket and Optional Header
The top hem forms the critical rod pocket, which must be wide enough to accommodate your curtain rod comfortably. For smooth gliding, the pocket’s circumference should be at least twice the diameter of your curtain rod.
- First Fold and Press: On the top raw edge of your fabric panel, fold the fabric over towards the wrong side by 3 inches. Press this fold firmly with your iron to create a sharp crease.
- Second Fold and Press: Fold the fabric over another 3 inches towards the wrong side. Press again. This creates a 3-inch wide channel for your curtain rod, with the raw edge neatly enclosed.
- Sew the Pocket: Pin the hem securely. Then, sew along the very bottom crease of this double-folded hem, approximately 1/4 inch from the edge. This line of stitching creates the defined channel for your rod.
- Optional Header: At this point, you have a functional rod pocket. However, you might choose to add a “header.” A header is an extra flap of fabric that extends above the rod pocket, providing a decorative ruffle at the top of your curtain. To create a header, you would sew a *second* line of stitching 1 to 2 inches (or your desired header height) *above* the first stitch line you just made. This second stitch line forms the actual top edge of the rod pocket, leaving the fabric above it to create the header. If you opt for a header, ensure you accounted for the extra height in your initial fabric cutting.
Step 4: Perfecting the Bottom Hem
The bottom hem is where your curtain’s finished length is truly determined. This step requires careful attention to ensure an even, elegant drape.
To ensure your curtain falls exactly where you want it, it is highly recommended to hang the curtain panel on its rod first. This allows you to accurately judge how much fabric needs to be hemmed up from the bottom.
- Marking the Hem: While the curtain is hanging, use pins or a fabric marker to mark your desired finished length. If you want the curtain to just skim the floor, mark that point. If you prefer a puddled look, mark a few inches below the floor.
- Take Down and Measure: Carefully take the curtain panel down. Lay it flat. Measure from your marked line to the raw bottom edge of the fabric. Let’s say you need to hem it up by 3 inches for the first fold. You’ll then fold up another 3 inches for the second fold, totaling a 6-inch hem allowance (similar to the top pocket).
- First Fold and Press: Fold the raw bottom edge of the fabric up towards the wrong side by the determined amount (e.g., 3 inches). Press firmly with an iron.
- Second Fold and Press: Fold it up another equal amount (e.g., another 3 inches). Press again, making sure the raw edge is completely enclosed.
- Secure and Sew: Pin the bottom hem securely in place. Then, sew down the width of the panel, approximately 1/4 inch from the top folded crease. This final stitch secures your bottom hem, completing your custom curtain panel.
Expert Tips for Flawless Curtains
Pressing is Key
Do not underestimate the power of your iron. Pressing each fold and seam as you go creates crisp, professional-looking finishes. It also makes sewing easier and more accurate.
Thread Matching
Always choose thread that matches your fabric as closely as possible. If an exact match isn’t available, opt for a shade slightly darker than your fabric rather than lighter, as darker threads tend to blend in more seamlessly.
Practice Makes Perfect
If you’re new to sewing, practice on a scrap piece of fabric first. This helps you get a feel for your machine and ensures your stitches are straight and even before working on your main project.
Customization Ideas
Once you master the basic rod pocket curtain, don’t hesitate to get creative! You can add decorative trim, use contrasting fabrics for the header, or even line your curtains for extra light blocking and insulation.
Beyond the Sewing Machine: Styling Your New Curtains
Curtain Rod Selection
The rod you choose plays a significant role in the overall look. Select a rod that complements your curtain fabric and room decor. Ensure it’s sturdy enough to support the weight of your finished curtains. The rod should extend at least 4-6 inches beyond the window frame on each side to allow the curtains to be pulled completely open, maximizing light and views.
Achieving the Perfect Gather
Once hung, adjust the gathers of your rod pocket curtains evenly across the rod. Gently slide the fabric until the folds are distributed symmetrically, creating a pleasing, uniform ripple effect. This final touch will make your handmade curtains look professionally styled.
Conclusion: Your Custom Curtains Await!
Creating your own rod pocket curtains is a rewarding DIY project that empowers you to tailor your home’s decor precisely to your taste. With this detailed, step-by-step guide, even novice sewers can achieve beautiful, custom window treatments that enhance any room. Remember that patience and precision are your best tools, and the pride of seeing your handmade curtains adorning your windows is truly unmatched. So, grab your fabric, fire up your sewing machine, and embark on this delightful journey to transform your living spaces with personalized style. Share your creations and inspire others to embrace the joy of DIY home decor!