
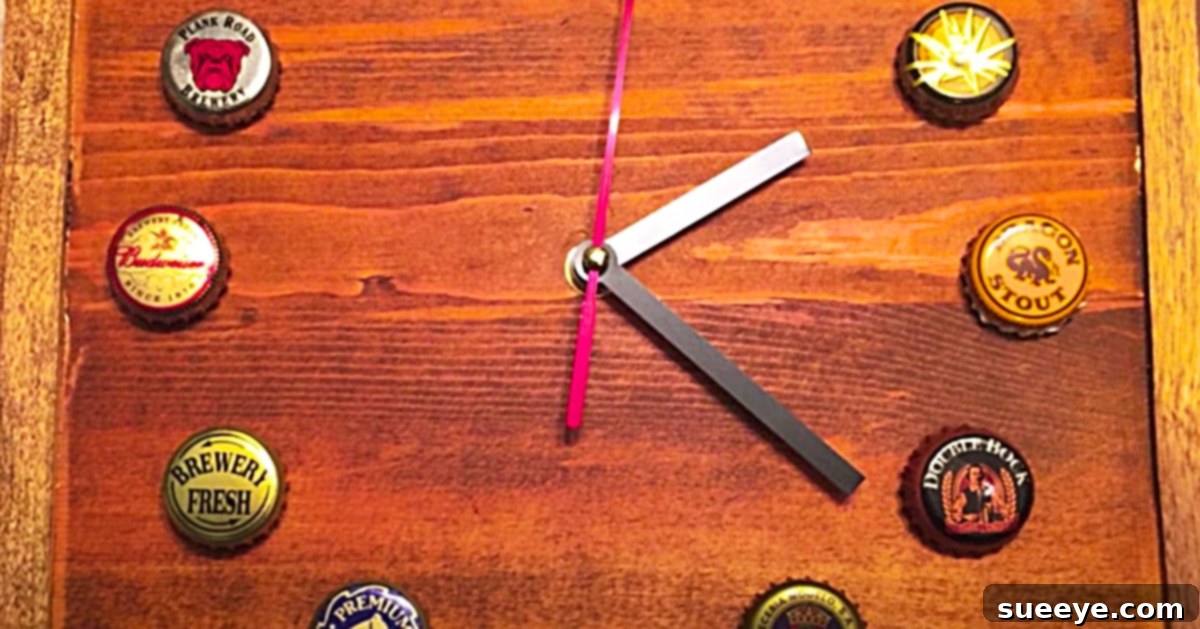
Step back in time and infuse your living space with a touch of charming nostalgia by creating your very own **vintage bottle cap clock**. This unique DIY project, inspired by a captivating video tutorial from Michael Volpe on YouTube, transforms humble bottle caps into a functional piece of art that exudes old-world charm. Imagine a timepiece that looks perfectly at home in a cozy backwoods bar, a quaint small-town cafe, or even as a rustic focal point in your kitchen or man cave. Its distinctive character and handmade appeal make it far more than just a way to tell time; it’s a conversation starter, a nod to simpler days, and a testament to the beauty of upcycled creativity.
The beauty of this project lies not only in its aesthetic appeal but also in its surprising simplicity. With just a few basic materials and a couple of hours of your time, you can construct a personalized clock that rivals store-bought decor in uniqueness and character. This project brings to mind cherished memories of classic, quirky establishments – like the memorable clock at Jake’s Cafe in downtown Austin from the late seventies, a beloved timepiece crafted from tourist pens collected from businesses across the South. Just as that clock captured the essence of a bygone era, your bottle cap creation will tell its own story, adding a warm, handcrafted touch to any room.
Why a DIY Vintage Bottle Cap Clock is the Perfect Project
In an age of mass-produced items, handmade decor offers a refreshing authenticity. A vintage bottle cap clock stands out as an exceptional choice for several reasons:
- **Unmatched Personalization:** You choose the bottle caps, the wood finish, and the overall design, ensuring your clock perfectly reflects your style or commemorates special memories.
- **Eco-Friendly Crafting:** Give new life to discarded bottle caps, turning potential waste into a beautiful and functional item. This upcycling aspect makes it a sustainable choice.
- **Budget-Friendly:** Most materials are inexpensive, and you might even have many of them already on hand, making this an accessible project for any budget.
- **Skill-Building Fun:** It’s an excellent project for beginners and seasoned crafters alike, involving basic woodworking, assembly, and artistic arrangement.
- **Versatile Decor:** Whether your home boasts a farmhouse, industrial, rustic, or eclectic aesthetic, this clock can seamlessly blend in or serve as an intriguing accent piece.
Materials For Your Charming DIY Vintage Bottle Cap Clock:
Gathering your supplies is the first exciting step toward bringing your vintage vision to life. You’ll find most of these items readily available at craft stores, hardware stores, or even in your own recycling bin!
- **Bottle Caps:** The star of your clock! Collect a variety of metal bottle caps. Consider a theme (e.g., specific soda brands, beer caps, international caps) or a vibrant mix of colors and designs for an eclectic look. You’ll need enough to cover the clock face, typically 12 for the hour markers and more for the inner surface if desired.
- **Plywood or Wood Board:** A sturdy base for your clock. Plywood (around 1/4 to 1/2 inch thick) is ideal, but you could also use a solid wood board, reclaimed wood, or even a pre-cut wooden round. The size will depend on your desired clock diameter.
- **Small Wooden Frame (Optional but Recommended):** To give your clock a finished, professional look. You can purchase a new frame, repurpose an old picture frame, or even build one from scratch using wood strips. Alternatively, a shadow box frame can also work beautifully, eliminating the need for a separate base.
- **Battery-Operated Clock Mechanism:** Essential for a functional timepiece. Look for a quartz movement kit that includes the mechanism, hands (hour, minute, second), and mounting hardware (washers, nut). Ensure the shaft length is appropriate for the thickness of your wood base.
- **Wood Stain or Paint:** To enhance and protect your wood base and frame. Minwax offers a wide range of popular wood stains, providing a beautiful finish. Alternatively, chalk paint or acrylic paint can create a different aesthetic.
- **Strong Adhesive:** Hot glue, E6000, or a similar strong craft adhesive will be needed to securely attach the bottle caps to the wood base.
- **Drill with appropriate bit:** For creating the central hole for the clock mechanism.
- **Ruler or Measuring Tape and Pencil:** For marking the clock face and center point.
- **Sandpaper:** For smoothing rough edges of your wood.
- **Clear Sealant (Optional):** To protect the bottle caps and wood finish, especially if the clock will be in a high-traffic area.
Directions: Crafting Your Timeless Vintage Bottle Cap Clock
Creating this amazing clock, as demonstrated by Michael Volpe in his YouTube tutorial, is a rewarding process that breaks down into a few manageable steps. Even if you’re new to DIY, you’ll find these instructions straightforward and easy to follow.
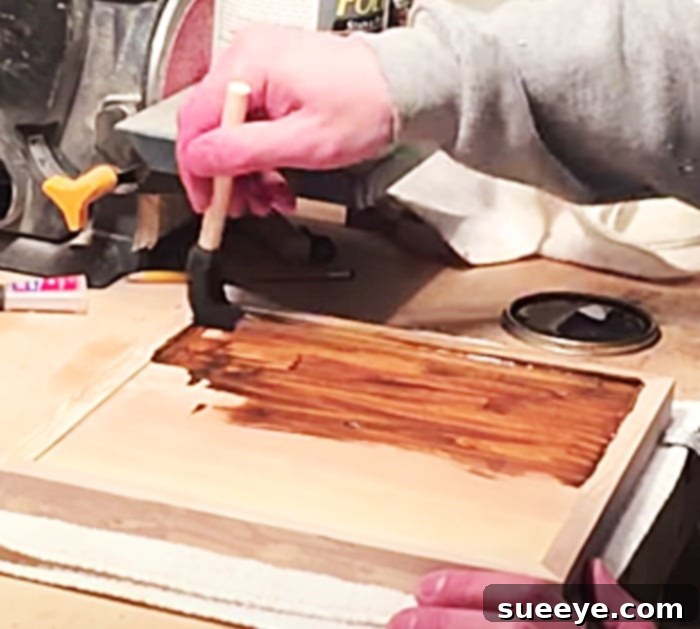
Step 1: Prepare Your Wood Base and Frame
This foundational step ensures your clock has a solid and aesthetically pleasing core. If you’re building a new frame, assemble it now according to your desired dimensions, ensuring it can snugly hold your clock face. If using a pre-made frame or shadow box, ensure it’s clean and ready for treatment.
- **Cut and Shape (if needed):** If your plywood isn’t already the desired shape (round or square), carefully cut it using a jigsaw or circular saw. Remember to account for the frame’s inner dimensions if you’re using one.
- **Sand Smooth:** Use sandpaper (medium grit, then fine grit) to smooth all edges and surfaces of your wood base and frame. This creates a professional finish and prepares the wood for staining or painting.
- **Stain or Paint:** Apply your chosen wood stain or paint to the plywood base and the frame. For a true vintage look, a dark wood stain like Minwax’s Dark Walnut or Special Walnut works wonderfully. If painting, consider distressed techniques for an aged appearance. Allow ample drying time as per the product instructions. You may need multiple coats for desired depth.
Step 2: Mark the Clock Face and Drill the Center Hole
Accuracy here is key to a functional clock. Locate the exact center of your wood base, as this is where the clock mechanism will be installed.
- **Find the Center:** For a square board, draw diagonal lines from corner to corner; their intersection is the center. For a round board, use a ruler to find multiple chords and their perpendicular bisectors, or simply balance a ruler across the diameter multiple times to find the center point.
- **Mark Hour Positions:** Using your ruler or a protractor, lightly mark the positions for the 12, 3, 6, and 9 o’clock bottle caps. Then, divide the remaining sections to mark the positions for the other eight hour markers. Ensure even spacing around the perimeter where your bottle caps will sit. You can use a compass to draw a light circle guideline for cap placement.
- **Drill the Center Hole:** Using a drill bit slightly larger than the shaft of your clock mechanism, carefully drill a hole through the precise center of your wood base. Make sure the hole is clean and smooth.
Step 3: Arrange and Attach the Bottle Caps
This is where your clock truly begins to take shape and its personality shines through. Lay out your bottle caps carefully before committing to glue.
- **Layout the Design:** Place your chosen bottle caps around the marked hour positions. Experiment with different arrangements, colors, and brands until you achieve a look you love. Consider alternating patterns or creating a random, eclectic display. Ensure the logos or designs on the caps are oriented as you desire.
- **Secure the Hour Markers:** Once satisfied with the layout, apply a small amount of strong adhesive to the back of each bottle cap designated for the hour markers (12, 1, 2, 3, etc.). Press them firmly onto the wood base. Allow them to set for a few minutes before proceeding.
- **Fill the Gaps (Optional):** If you desire a fuller look, you can continue to glue additional bottle caps in the spaces between the hour markers, or create an inner circle of caps. This adds texture and visual interest to the clock face.
- **Curing Time:** Let the adhesive dry completely according to the manufacturer’s instructions. This is crucial for the longevity of your clock.
Step 4: Install the Clock Mechanism
This step transforms your decorative piece into a functional timepiece. Handle the delicate clock hands with care.
- **Insert the Mechanism:** From the back of your wood base, push the shaft of the clock mechanism through the drilled center hole.
- **Secure the Mechanism:** On the front side, place the rubber washer (if included), then the brass washer, followed by the hex nut onto the mechanism’s shaft. Tighten gently with your fingers, then carefully with pliers, ensuring the mechanism is snug and centered, but not overtightened to avoid damaging the wood or mechanism.
- **Attach the Clock Hands:** Carefully press the hour hand onto the shaft, followed by the minute hand, and finally the second hand (if included). Ensure they are aligned at 12 o’clock and do not touch each other as they rotate. There are usually specific steps for attaching each hand, so refer to your clock kit’s instructions.
Step 5: Final Assembly and Finishing Touches
Bring all the elements together and prepare your clock for display.
- **Mount into Frame (if using):** If you’re using a frame, carefully fit your finished bottle cap base into it. Secure it from the back using small nails, brads, or appropriate frame hardware.
- **Add Hanging Hardware:** Attach a picture hanger or a sawtooth hanger to the back of your clock frame or directly to the wood base if not framed. Ensure it’s securely fastened and centered for stable hanging.
- **Insert Battery and Test:** Insert a fresh AA battery (or the size specified by your mechanism) into the clock movement. Set the time and observe for a few minutes to ensure the hands move freely and accurately.
- **Optional Sealant:** For added durability, especially if your clock will be exposed to moisture or frequent handling, consider spraying a clear protective sealant over the entire front surface, including the bottle caps.
Personalizing Your Vintage Bottle Cap Clock
The beauty of DIY is the endless possibilities for customization. Here are some ideas to make your vintage bottle cap clock truly yours:
- **Themed Bottle Caps:** Focus on caps from a specific era, local breweries, family events, or travel destinations to tell a story.
- **Numbering Styles:** Instead of relying solely on bottle caps for hour markers, you could paint numbers directly onto the wood, add small metal numbers, or even use different-colored caps for the 12, 3, 6, and 9 positions.
- **Distressed Wood Finish:** Beyond staining, try techniques like dry brushing, crackle paint, or rough sanding to give the wood base an even more aged and rustic appearance.
- **Background Elements:** Before gluing caps, you could stencil a design, add a faux vintage map, or even adhere a piece of burlap to the wood base for added texture.
- **Unique Frame Choices:** Look for antique frames at thrift stores, or use industrial elements like metal strapping around the edges for a mixed-media look.
This vintage clock idea is truly awesome, offering a perfect blend of creativity, sustainability, and rustic charm. It’s more than just a craft; it’s an opportunity to create a unique, functional piece of art that reflects your personality and adds a warm, inviting touch to your home. Enjoy the process of bringing this old-world idea to life, and delight in the satisfaction of admiring your very own handmade **vintage bottle cap clock**!