
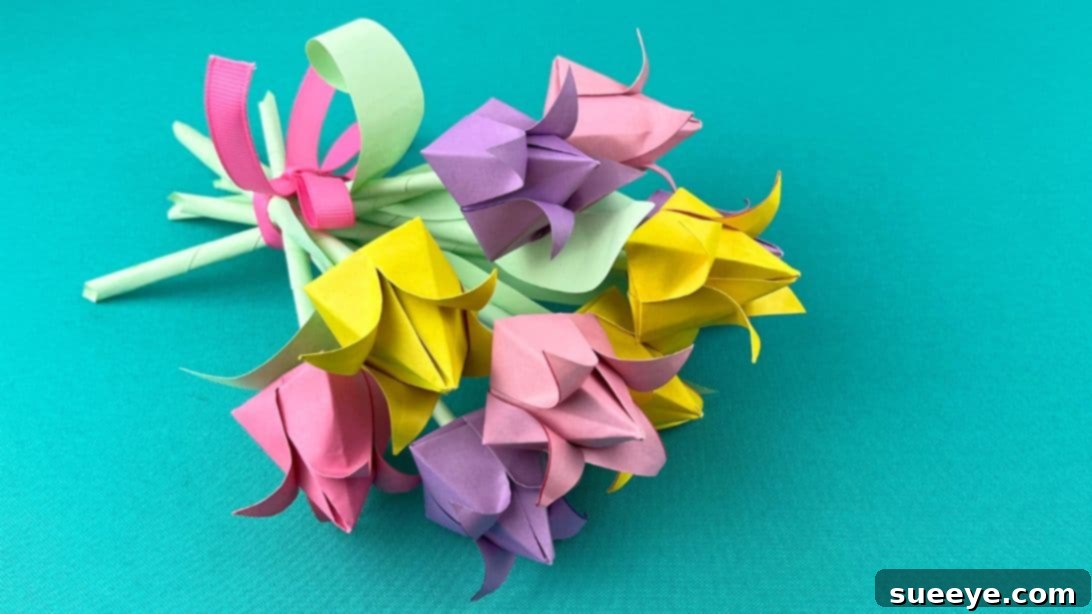
As spring awakens, so does the desire to infuse our homes with vibrant color and a touch of nature’s beauty. While fresh blooms are always delightful, creating your own paper flower bouquet offers a lasting charm and a wonderfully rewarding crafting experience. This comprehensive guide will walk you through crafting exquisite paper tulips, perfect for adorning your living space or presenting as thoughtful handmade gifts to cherished friends and family. Even if you’re new to paper crafting, our step-by-step instructions, accompanied by a detailed YouTube video tutorial, will make learning how to make paper tulips an enjoyable and effortless journey. Prepare to transform simple sheets of paper into a stunning floral display!
RELATED: How to Make An Origami Heart Bookmark
Embark on this delightful crafting adventure without intimidation! These paper flowers are specifically designed for beginners, featuring straightforward steps that yield impressive results. We are confident you’ll find as much joy and satisfaction in crafting these paper tulips as we did. It’s an excellent way to unwind, engage your artistic side, and practice mindfulness. Imagine the beauty of a vibrant DIY paper tulip bouquet, meticulously crafted with various colors, adding a personal touch to any room. This project is more than just a craft; it’s an opportunity to create something truly special and lasting.
What is Origami? The Ancient Art of Paper Folding
Origami, originating from Japan, is the elegant art of folding paper into intricate and beautiful shapes. Traditionally, this craft emphasizes transforming a single flat sheet of paper into a finished sculpture without cutting, gluing, or marking. It’s a testament to patience, precision, and geometric understanding. However, for our enchanting paper tulip project, we’ll make a slight deviation from strict traditional origami by incorporating a small amount of glue and scissors to securely attach the stems and leaves, enhancing the structural integrity and realism of your finished flowers. Rest assured, the core folding techniques remain true to origami principles, and the entire process is as accessible and enjoyable as folding simple paper airplanes, making it perfect for crafters of all skill levels.
The history of origami dates back centuries, evolving from functional paper uses to an intricate art form. It’s more than just a pastime; it’s a creative outlet that sharpens focus, improves fine motor skills, and provides a calming, meditative experience. As you carefully fold each crease for your tulip, you’ll be participating in a tradition cherished across generations, creating not just a flower, but a piece of art born from thoughtful precision.
Essential Materials for Your Paper Tulip Craft
Gathering your materials is the first exciting step in creating your paper tulips. For the best results, quality supplies can make a significant difference in the finished look and durability of your bouquet. Here’s everything you’ll need:
- Origami Paper: Square sheets, ideally 6×6 inches (15×15 cm) for a good-sized tulip head. Thicker paper can be challenging to fold; lighter paper offers a crisp, clean crease.
- Green Colored Paper: This will be used for the stems and leaves. A sturdy yet flexible paper is ideal. You can use standard construction paper or slightly thicker craft paper.
- Skewer: A wooden skewer or a thin dowel is perfect for rolling the stems and delicately curling the petals.
- Scissors: A sharp pair of scissors will be needed for cutting the green paper for stems and leaves, and for making a small incision in the tulip base.
- Craft Glue: A fast-drying craft glue or a glue stick will work best for securing the stem and leaves.
- Ribbon (Optional): For tying your finished bouquet or adding decorative accents.
Note: To achieve a soft, ethereal appearance that beautifully mimics the natural colors and delicate texture of real tulips, we highly recommend using pastel-colored origami paper. Think blush pinks, soft yellows, light purples, and creamy whites for a truly authentic and charming tulip bouquet. Experiment with different shades to create depth and variety in your arrangement.
How to Make Stunning Tulip Flowers Out of Paper: A Step-by-Step Guide
Let’s begin the exciting process of folding your paper tulips. Remember, precision in your folds is key to a beautiful outcome. Take your time with each step, and don’t hesitate to refer to the accompanying images for visual guidance.
Step 1: Prepare Your Origami Paper
Begin by placing a square sheet of origami paper on a clean, flat surface. Ensure the side you want to be the primary color of your tulip is facing down if your paper is colored on one side and white on the other.
Step 2: First Diagonal Fold
Carefully fold the paper in half diagonally, bringing one corner to meet the opposite corner. Press firmly along the crease to create a sharp line. This initial fold is crucial for establishing the symmetry of your tulip.
Step 3: Second Diagonal Fold
Unfold the paper, then repeat the diagonal fold in the opposite direction. Bring the other two corners together and crease firmly. You should now have an “X” shape creased into your paper.
Step 4: Horizontal Fold
Unfold the paper once more. Now, fold the paper in half horizontally, ensuring the edges align perfectly. Crease firmly. You will now have horizontal, vertical, and diagonal creases.
Step 5: Open and Prepare for Base Fold
Open the paper completely. You should see a clear pattern of creases: two diagonal and one horizontal fold. This preparation is essential for creating the base of your tulip. Your paper should now look like the image, ready for the next transformation.
Step 6: Form the Triangle Base
Gently push the middle sides of the paper inwards along the creases you’ve made. This action will naturally bring the top and bottom edges together, forming a perfect triangle shape. This is a fundamental fold in many origami projects.
Step 7: Fold Down the Tips
Take the two tips on the open side of the triangle (the side with multiple layers) and fold them downwards towards the center point of the triangle. Ensure these folds are even on both sides to maintain symmetry for your tulip petals.
Step 8: Repeat on the Other Side
Flip your paper over to the other side. You’ll notice it looks identical to the previous side. Repeat Step 7, folding the two tips downwards toward the center. Now both sides of your tulip base will have these small triangular flaps.
Step 9: Expose the Flat Sides
Now, flip the folds you just made back so that the flat, unfolded sides are showing on both sides of your paper structure. This adjustment prepares your tulip for its volumetric shaping.
Step 10: Fold Sides Toward the Middle
Carefully fold the sides of your paper form inward toward the central vertical line. Make sure that one side slightly overlaps the other. This fold creates the initial curvature of your tulip petals and begins to define its shape.
Step 11: Repeat and Prepare for Inflation
Flip the paper over and repeat the previous step, folding the sides inward with an overlap. Your paper will now resemble the photo below, with two overlapping flaps on each side. Next, using your scissors, carefully cut a very small portion off the tip of the smaller triangle at the bottom. This creates the opening through which you will inflate your tulip. The cut should be just enough to create an opening, not too large to compromise the structure, nor too small to restrict airflow.
Step 12: Inflate the Tulip
Place your lips over the small hole you just cut at the bottom of the paper shape. Gently but firmly blow air into the hole. As you blow, the paper structure will expand and inflate, magically transforming into the recognizable hollow shape of a tulip bud. Be patient and blow steadily.
Step 13: Gently Fold the Bottom Edges
Once your tulip is inflated, gently fold the bottom edges of the opening inwards. This action helps to secure the shape of the tulip and provides a more stable base for attaching the stem later on.
Step 14: Curl the Petals
To give your tulip a more natural and elegant appearance, gently curl the tips of the petals outwards. You can achieve this by delicately wrapping the edge of each petal around a skewer. Apply slight pressure and pull the paper around the skewer to create a beautiful, soft curve. This step adds a professional finish to your paper flower.
Step 15: Create the Tulip Stem
Take your green colored paper and cut a long, thin strip – approximately 0.5 to 1 inch wide and long enough for your desired stem height. Tightly roll this green paper strip around a skewer, starting from one end. Once you reach the end of the strip, apply a small amount of glue to secure it, creating a sturdy yet flexible stem. You can also add a leaf or two by cutting a simple leaf shape from green paper and gluing it to the stem.
Step 16: Attach the Stem to the Flower
Carefully insert the paper stem you just created through the hole at the bottom of your paper tulip flower. Push it up gently until it snugly fits into the base of the tulip head. You can add a dab of glue inside the tulip’s base to secure the stem firmly in place, ensuring your beautiful paper tulip stands tall and proud.

Expert Folding Tip for Perfect Results
For the most exquisite and professional-looking paper tulips, always make sure your folds are incredibly sharp and precise. Press firmly along each crease, using a bone folder or even your fingernail, to ensure clean lines and a refined finished product. This attention to detail will elevate your paper crafting significantly.
Creating a Beautiful Paper Tulip Bouquet
Once you’ve crafted several individual paper tulips, the next exciting step is arranging them into a breathtaking bouquet. Experiment with different colors and sizes to create a dynamic and visually appealing arrangement. You can use a simple vase to display your tulips, or for a more elaborate look, consider wrapping the stems with floral tape to create a cohesive bundle. Tie a beautiful ribbon around the bouquet for an elegant touch, making it perfect for gifting or as a centerpiece.
Consider adding handmade paper leaves, cut from various shades of green paper, to your bouquet. These can be glued directly to the stems or nestled within the arrangement to enhance its natural appearance. The beauty of paper flowers is their versatility; they never wilt, requiring no water or sunlight, and will bring lasting joy and color to any space.
The Enduring Benefits of Paper Crafting
Engaging in paper crafting, such as making these stunning origami tulips, offers a myriad of benefits beyond just creating beautiful objects. It serves as a wonderful stress reliever, allowing you to focus on the task at hand and momentarily forget daily worries. The intricate nature of folding can improve concentration, develop fine motor skills, and enhance problem-solving abilities. For children, it’s an excellent educational tool that teaches geometry, patience, and creativity.
Moreover, handmade gifts carry a unique sentiment that store-bought items simply cannot replicate. A paper tulip bouquet crafted with your own hands speaks volumes about your care and effort, making it an incredibly personal and cherished present. Embrace the joy of creation and the satisfaction of seeing your artistic vision come to life, one fold at a time.
DIY Tulip Paper Flowers | Watch the Full Video Tutorial on YouTube
For a dynamic visual guide that complements these written instructions, be sure to watch our detailed YouTube video tutorial. It provides a clear, step-by-step demonstration of each fold and assembly process, ensuring you can follow along with ease. Visual learners will find this invaluable for mastering the art of creating these charming paper tulips. Don’t forget to pause, rewind, and rewatch sections as needed to perfect your technique!