
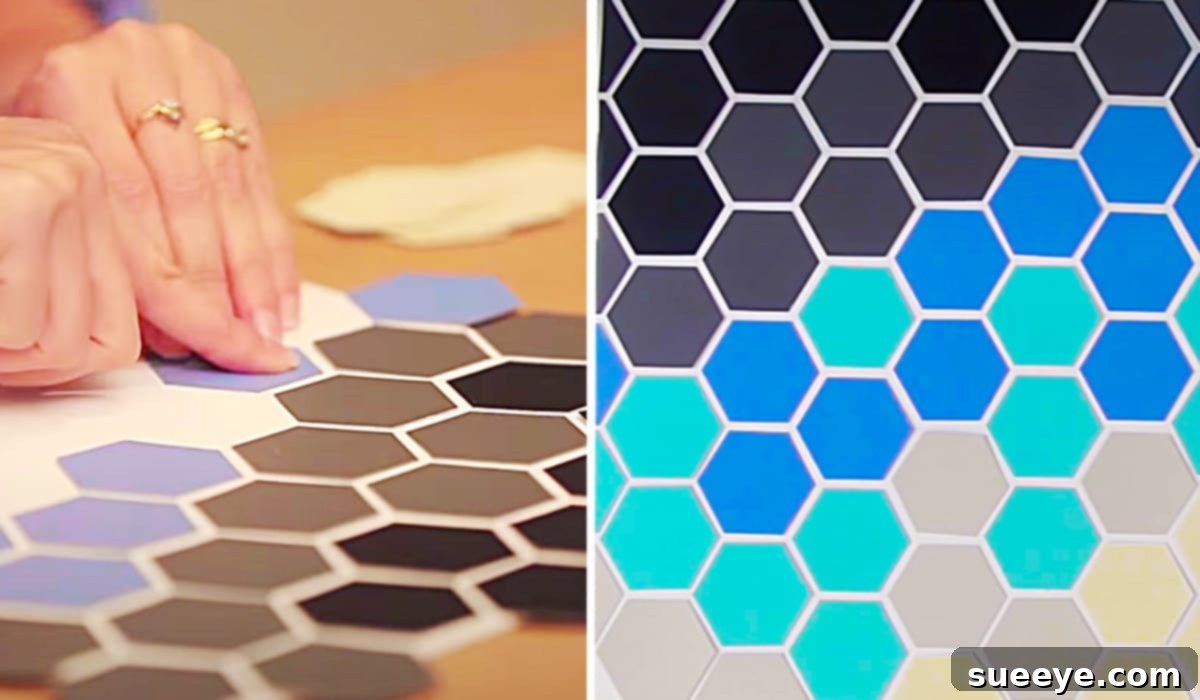
How To Create Stunning Paint Chip Wall Art: Your Guide to Affordable DIY Decor
Transforming a new living space or refreshing an existing room often comes with the desire for unique, personalized decor. When I recently moved into an apartment needing a creative touch, I stumbled upon an ingenious idea that marries affordability with artistic expression: paint chip wall art. Inspired by an incredible video tutorial from HGTV Handmade on YouTube, I quickly gathered my supplies, eager to embark on this simple yet impactful DIY project. What makes this project truly special is its accessibility – many of the essential materials are either free or incredibly inexpensive, making it a perfect choice for anyone looking to add a splash of color without breaking the bank. Forget generic, mass-produced wall hangings; this craft allows you to curate a piece that perfectly reflects your style and chosen color palette, turning humble paint samples into a striking focal point for any room.
The beauty of paint chip art lies in its versatility and ease. Even if you consider yourself a novice crafter, the straightforward steps outlined in this guide will empower you to create a professional-looking piece of art. This project is not just about decorating; it’s about the joy of creating something beautiful with your own hands, offering a rewarding experience from start to finish. From selecting your desired hues to arranging them into a captivating design, every stage is an opportunity for personal expression. Let’s dive into how you can bring this vibrant, budget-friendly art into your home, beginning with the few simple items you’ll need.
Why Choose Paint Chip Wall Art? The Benefits of This Brilliant DIY
Before we delve into the how-to, let’s explore why paint chip wall art stands out as an exceptional DIY project. Firstly, it’s incredibly budget-friendly. Paint chips themselves are typically free, readily available at any local hardware or paint store. This eliminates one of the most significant costs associated with purchasing art or even many other DIY projects. Secondly, it’s a fantastic way to personalize your space. You have complete control over the color scheme, allowing you to perfectly match existing decor, introduce new accent colors, or create a specific mood, whether it’s a serene ombre effect or a vibrant rainbow display. The possibilities for customization are virtually endless, far surpassing what you might find in a store.
Moreover, this craft encourages creativity and offers a wonderful opportunity for upcycling. Instead of these paint samples ending up in the trash, they are given a new life as a stunning piece of art. It’s an eco-conscious choice that results in something beautiful and unique. The process itself is therapeutic and enjoyable, making it a great activity for individuals, families, or even crafting groups. It requires minimal specialized tools, can be completed relatively quickly, and yields impressive results that often garner compliments. Whether you’re decorating a nursery, a home office, a living room, or a bedroom, paint chip wall art provides a fresh, modern, and personal touch that feels both high-end and handmade.
Essential Materials For Your Paint Chip Wall Art Project
Gathering your materials is the first exciting step in creating your custom wall art. The beauty of this project lies in its simplicity and the affordability of the items required. You likely have some of these already, and the rest are easily sourced without breaking your budget. Here’s what you’ll need to get started:
- Paint Chips: The star of our project! These colorful samples are freely available in the paint department of any hardware store or dedicated paint shop. The key is to select a cohesive color combination that speaks to your personal aesthetic and complements your home decor. Consider collecting a wide range of shades within a single color family for an ombre effect, or gather a mix of complementary colors for a more vibrant, dynamic piece. Don’t be shy about picking up plenty – it’s better to have too many options than to run out midway through your project.
- Craft Glue: A good quality craft glue is essential for securely attaching your paint chips to the backing. Elmer’s white school glue or any similar PVA-based craft glue will work perfectly. Look for glues that dry clear to ensure a clean finish. Alternatively, a spray adhesive can offer quicker application and a smooth, even bond, but ensure you work in a well-ventilated area if using this option.
- Foam Board: This will serve as the sturdy base for your artwork. Foam board is lightweight, inexpensive, and easy to cut, making it an ideal choice. You can find it at craft stores, office supply stores, or even discount retailers. Choose a size that suits your desired finished artwork; common sizes range from small 8×10 inches to larger 20×30 inches or more. Consider the space where your art will hang to determine the best dimensions.
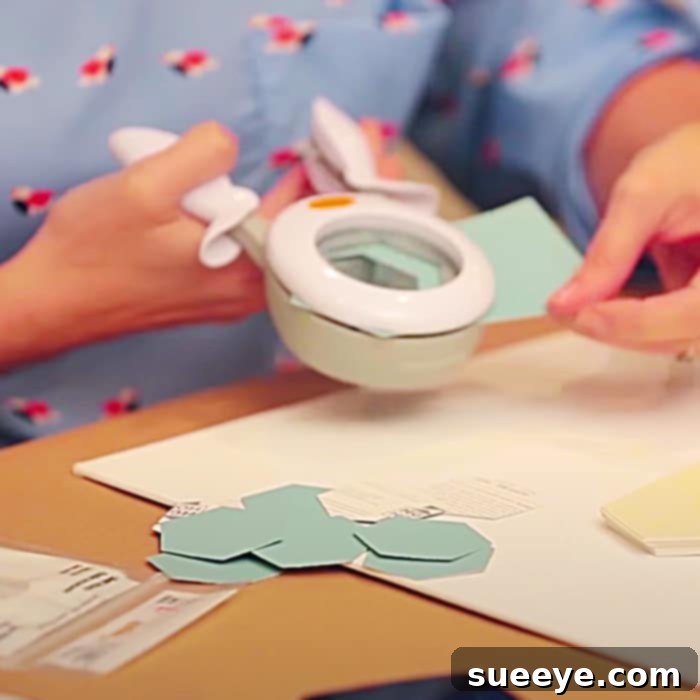
- Hexagon-Shaped Hole Puncher (Optional but Recommended): While you can cut shapes manually, a hexagon-shaped hole puncher makes the process incredibly fast, consistent, and gives your art a polished, geometric look. You can find these at most craft stores. If a hexagon isn’t your preference, feel free to use a circular, square, or even heart-shaped punch. If you opt not to use a punch, a sharp pair of scissors or a craft knife with a ruler will be necessary to cut your shapes.
Many of these items, like the foam board and hole puncher, can be found at craft stores such as Michael’s or Hobby Lobby. Remember to look for online coupons or check their weekly ads, as these often provide significant savings, as I discovered when I used my phone’s browser to pull up coupons that were easily scanned at checkout, saving me money on my supplies.
Step-by-Step Directions to Create Your Paint Chip Wall Art
This project is surprisingly simple, yet the impact of the finished piece is profound. Follow these easy steps to bring your vision to life, just as demonstrated in the inspiring HGTV Handmade tutorial on YouTube.
Step 1: Prepare Your Paint Chips and Punch Shapes
Once you’ve selected your desired paint chips and gathered them, the first hands-on step is to prepare your colorful shapes. If you’re using a hole puncher, this part is quick and satisfying. Lay your paint chips flat and systematically punch out as many hexagons (or your chosen shape) as you need. Try to maximize each paint chip by punching close to the edges and in a grid-like fashion to minimize waste. The number of shapes you’ll need will depend on the size of your foam board and the density of your design. It’s always a good idea to punch out a few extra, just in case. If you’re cutting shapes manually with scissors or a craft knife, carefully draw your desired shapes onto the back of the paint chips and then meticulously cut them out. Precision here will lead to a more polished final look.
Step 2: Plan Your Design on the Foam Board
This is a crucial step that allows you to visualize and refine your artwork before making anything permanent. Lay your foam board on a flat surface. Without applying any glue, begin to arrange your punched paint chip shapes onto the board. Experiment with different patterns:
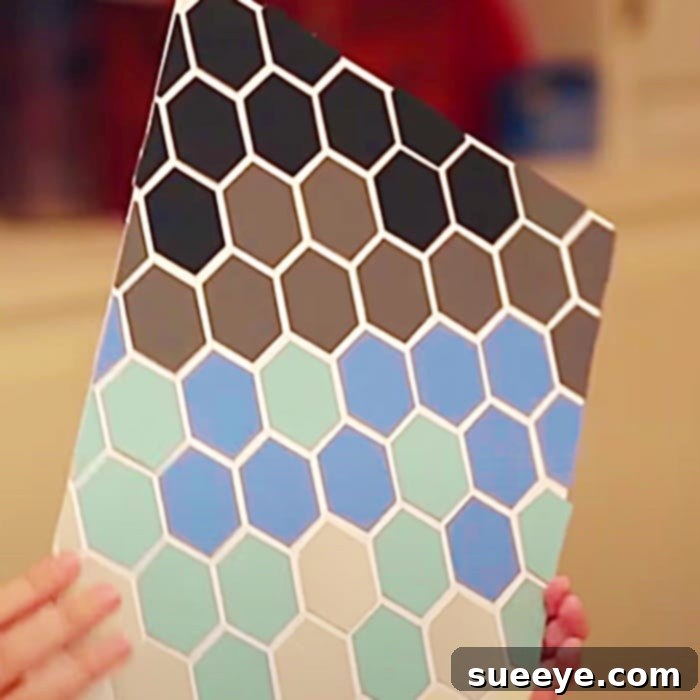
- Ombre Effect: Arrange colors from lightest to darkest, or vice versa, creating a smooth gradient.
- Rainbow Pattern: Follow the colors of the rainbow for a bright, cheerful look.
- Geometric Grid: Align the shapes in perfect rows and columns for a clean, modern aesthetic.
- Random Mosaic: Mix and match colors and positions for an abstract, dynamic piece.
- Monochromatic Blend: Use various shades of a single color to create depth and texture.
Take your time with this stage, shifting pieces around until you are completely happy with the composition. You might even take a photo of your preferred layout as a reference before you start gluing.
Step 3: Begin Adhering Your Shapes to the Foam Board
Now that your design is planned, it’s time to make it permanent. Start gluing your paint chip shapes onto the foam board. It’s often easiest to work in sections, starting from one corner or edge and moving across the board. Apply a small dot of craft glue to the back of each paint chip shape. Too much glue can cause the paper to warp or squeeze out from the edges, creating a messy appearance. Press each shape firmly onto the foam board for a few seconds to ensure a good bond. Maintain the pattern you established in Step 2, carefully placing each piece next to its neighbor. Consistency in spacing is key for a neat finish, especially if you’re aiming for a grid or tessellated pattern.
Step 4: Allow to Dry and Add Finishing Touches
Once all your paint chip shapes are glued down, set your artwork aside in a flat, undisturbed area to dry completely. Drying time can vary depending on the type of glue you used and the humidity, but typically, a few hours or overnight will suffice. Once dry, inspect your piece for any loose edges or areas that might need a bit more adhesive. For an extra layer of protection and a subtle sheen, you can apply a thin coat of Mod Podge or a clear craft sealant over the entire surface. This will help protect the colors and secure the shapes even further. Finally, consider how you’ll display your beautiful new artwork. You can frame it without glass for a textured look, or simply attach a picture hanger to the back of the foam board for easy wall mounting. This is such a cute and satisfying project!
Tips for Enhancing Your Paint Chip Wall Art and Customization
While the basic “punch and glue” method is straightforward, there are numerous ways to elevate your paint chip wall art and make it even more unique to your style. Here are some tips and customization ideas:
- Explore Different Shapes: Don’t limit yourself to hexagons. Consider circles, squares, triangles, or even custom-cut organic shapes. A mix of shapes can add an intriguing layer of complexity to your design.
- Varying Sizes: Instead of using uniformly sized punched shapes, try punching out shapes in two or three different sizes. Arranging these together can create a dynamic, multi-dimensional effect.
- Add Texture: Incorporate elements like small beads, sequins, or even tiny fabric scraps among your paint chips for added tactile interest. Be mindful not to overwhelm the clean lines of the paint chips.
- Dimensionality: To create a 3D effect, you can adhere some paint chips directly to the foam board and attach others with small foam squares (like those used for scrapbooking) to make them stand out slightly.
- Background Color: While white foam board provides a crisp background, consider painting your foam board a contrasting color before gluing on the paint chips. A dark background can make lighter chips pop, while a neutral tone can soften the overall look.
- Frame Integration: If you plan to frame your art, you can glue the paint chips directly onto a mat board that will then fit inside your frame. This gives a very professional finish.
- Seasonal Themes: Create different pieces for various seasons or holidays. Use warm reds and oranges for autumn, cool blues and silvers for winter, or bright pastels for spring.
- Kids’ Rooms: This project is fantastic for involving children. Let them choose their favorite colors and even help punch or glue shapes (with supervision). It’s a wonderful way to foster creativity and fine motor skills.
- Combine Art Forms: Integrate other craft elements. For example, you could paint a simple outline of an animal or object on your foam board and then fill it in with paint chips like a mosaic.
By experimenting with these ideas, you can move beyond a simple arrangement and create a truly custom piece of wall art that serves as a conversation starter and a testament to your personal creativity. The beauty of DIY is that there are no strict rules – only opportunities for expression.
Conclusion: Unleash Your Inner Artist with Paint Chip Decor
Creating paint chip wall art is more than just a craft project; it’s an invitation to explore your creativity, personalize your living space, and discover the joy of DIY home decor. From its incredibly low cost and easy-to-find materials to the endless possibilities for color combinations and design patterns, this project truly stands out as an accessible and rewarding artistic endeavor. Whether you’re a seasoned crafter or just starting your journey into the world of DIY, the simple steps outlined, combined with the inspiration from sources like HGTV Handmade, provide everything you need to succeed.
The satisfaction of stepping back and admiring a vibrant, unique piece of art that you crafted with your own hands is truly unparalleled. It’s a testament to the idea that beautiful decor doesn’t have to come with a hefty price tag. So, next time you’re in a hardware store, take a moment to browse the paint chip section, imagining the spectrum of possibilities. Gather your favorite hues, grab a foam board, and prepare to transform these humble samples into a stunning focal point that reflects your individual style and adds a personalized charm to any room in your home. Happy crafting!