
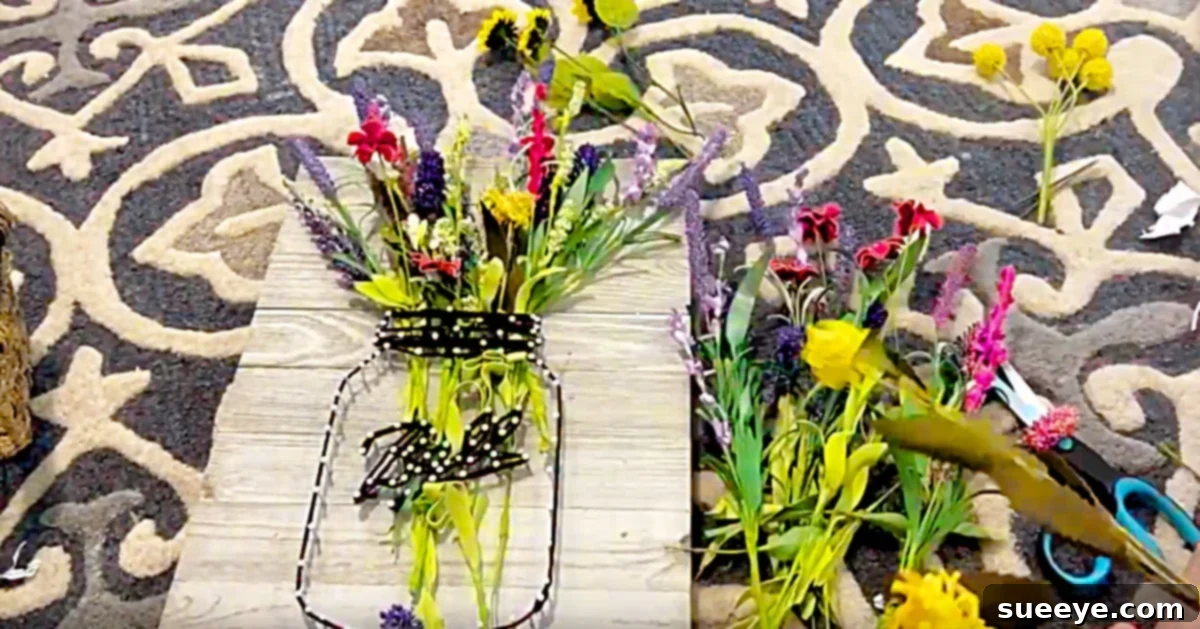
How To Make A Mason Jar String Art Vase: A Charming DIY Project
Mason jars have long transcended their original purpose as simple canning containers, evolving into iconic symbols of rustic charm and endless creative potential. From storage solutions to elegant decorative pieces, their versatility makes them a beloved staple for crafters and home decorators alike. If you’re anything like me, you probably have a collection of these versatile jars, just waiting for the next brilliant idea to come along.
Recently, I was tasked with coming up with a captivating decor idea for my daughter’s school class – something engaging, appealing to a diverse group, and, of course, featuring the timeless Mason jar. After some brainstorming, I stumbled upon a wonderful DIY Mason Jar String Art idea on YouTube, and it immediately clicked. This project perfectly combines the charm of Mason jars with the artistic appeal of string art, resulting in a beautiful faux vase that can hold real or artificial flowers. It’s an accessible craft that promises both fun and a stunning finished product, ideal for anyone who enjoys floral crafts and light woodworking.
The beauty of this project lies in its simplicity and the joy of creating something unique. Luckily, I had a supply of wood and colorful string that I’d previously purchased from a craft store. All that remained was a quick trip to the grocery store for some fresh flowers to adorn my new creation. For my string art plaque, I chose a delightful assortment including Daisies, Daffodils, Snap Dragons, Fern Leaves, Baby’s Breath, and Eucalyptus. However, the true magic of this DIY is that you can use whatever blooms or greenery you have on hand or that resonate with your personal style. There’s no wrong way to express your creativity here – just hammer, tie, and snip your way to a personalized masterpiece!
Why Choose Mason Jar String Art for Your Next Project?
Beyond its aesthetic appeal, creating a Mason jar string art vase offers numerous benefits:
- Creative Expression: It’s a fantastic outlet for personal creativity, allowing you to choose colors, string patterns, and floral arrangements that reflect your taste.
- Versatile Decor: Once completed, this plaque makes a charming addition to any room – from a cozy living area to a bright kitchen, or even a child’s bedroom. It also serves as an excellent classroom decoration that can be updated seasonally.
- Budget-Friendly: With common craft supplies and readily available wood, this project is an economical way to create high-impact decor.
- Therapeutic Process: The repetitive motions of hammering and stringing can be quite meditative and stress-relieving, offering a peaceful escape into crafting.
- Great for Gifting: A handmade string art vase is a thoughtful and personalized gift for birthdays, housewarmings, teacher appreciation, or any special occasion.
- Adjustable Skill Level: While simple enough for beginners, experienced crafters can explore intricate string patterns and design elements to challenge themselves.
This project is particularly special because it brings a touch of nature indoors in a unique way. Instead of a heavy glass vase, you’re crafting an artistic representation that beautifully frames your chosen flowers, adding depth and texture to your floral displays.
Materials You’ll Need: Crafting Your Mason Jar String Art
Gathering your materials is the first exciting step in any DIY project. For this Mason Jar String Art vase, most items are easy to find and might even be lingering in your craft stash already. Here’s a detailed list to ensure you’re well-prepared:
- Piece of Wood:
- Type: A flat, sturdy piece of wood is essential. Plywood, pine, or even reclaimed wood works wonderfully.
- Size: The size will depend on how large you want your string art to be. A common size might be 8×10 inches, 10×12 inches, or even larger for a statement piece. Ensure it’s thick enough (at least 1/2 inch to 3/4 inch) to hold nails securely without splitting.
- Preparation: You might want to sand the edges and surface for a smooth finish. Optionally, stain or paint the wood prior to starting for a background color that complements your string and flowers.
- Nails:
- Type: Small brad nails, finishing nails, or escutcheon pins are ideal. They should have small heads to prevent the string from slipping off easily.
- Length: Choose nails that are long enough to securely embed into your wood without poking through the back (e.g., 3/4 inch to 1 inch nails for 1/2 inch thick wood).
- Quantity: You’ll need quite a few, depending on the size and detail of your Mason jar outline. It’s always good to have extra.
- String/Yarn:
- Type: Embroidery floss, crochet thread, thin twine, or even a lightweight yarn works well. Consider the thickness; finer string allows for more detail, while thicker string creates a bolder look.
- Color: Choose colors that evoke the classic Mason jar aesthetic (clear, light blue, green) or opt for something vibrant and contrasting to make your “vase” pop.
- Quantity: A few skeins or balls should be sufficient.
- Flowers/Greenery:
- Type: This is where you bring your faux vase to life! You can use fresh cut flowers (like the Daisies, Daffodils, and Eucalyptus I chose), dried flowers, or high-quality artificial flowers.
- Arrangement: Think about variety – some larger blooms for focal points, smaller filler flowers like Baby’s Breath, and leafy greens (Fern Leaves) for texture and volume.
- Consideration: If using fresh flowers, you’ll need a small hidden water tube or replace them regularly. Artificial flowers offer longevity and require less maintenance.
- A Hammer:
- Type: A standard claw hammer is perfect. Ensure it’s comfortable to hold and has a good weight for controlled hammering.
- Scissors:
- Type: Sharp craft scissors are essential for clean cuts of your string and any floral stems (if using artificial).
- Optional Materials for Enhanced Results:
- Mason Jar Template: A printed outline of a Mason jar for easy tracing or direct placement.
- Pencil/Marker: For drawing your design on the wood.
- Masking Tape/Painter’s Tape: To secure your template.
- Sandpaper: Fine-grit sandpaper for smoothing wood edges and surfaces.
- Wood Stain or Paint: To prepare your wooden base.
- Small Pliers or Needle-Nose Pliers: Helpful for adjusting nails or pulling out misaligned ones.
- Adhesive/Glue Gun: To secure artificial flowers or greenery more permanently.
- Sawtooth Hanger or Command Strips: For displaying your finished art piece.
Having all your materials ready before you begin will make the crafting process much smoother and more enjoyable!
Step-by-Step Directions: Creating Your Mason Jar String Art Vase
Step 1: Prepare Your Wood and Outline Your Mason Jar Design
The foundation of your string art project is the wooden base and a precise outline. If you’ve chosen to stain or paint your wood, ensure it’s completely dry before moving on.
- Choose or Create Your Template: You can either freehand draw a Mason jar shape directly onto your wood with a pencil, or for a more precise outline, print a Mason jar template. Online searches for “Mason jar outline printable” will yield many options. Select a size that fits well on your chosen wood piece, leaving a border around the edges.
- Secure the Template: If using a printed template, carefully cut it out and position it on your wood. Use a small piece of masking tape or painter’s tape to hold it firmly in place, preventing it from shifting while you work.
- Outline with Nails: Begin hammering nails around the perimeter of your Mason jar outline. Aim for consistent spacing between the nails – typically about 1/4 to 1/2 inch apart, depending on the size of your project and the desired string density. Ensure all nails are hammered to a similar depth, about halfway into the wood, so they are secure but still provide enough height for the string. Pay close attention to corners and curves, placing nails a little closer together to maintain the shape accurately.
Step 2: String Your Mason Jar and Add Your Floral Arrangement
This is where your Mason jar truly takes shape with string, transforming into a beautiful art piece.
- Remove the Template: Once all your nails are in place, carefully tear away the paper template. If any small pieces remain under the nail heads, use tweezers or a small tool to remove them cleanly.
- Begin Stringing the Outline: Tie one end of your chosen string securely to a starting nail. Then, begin wrapping the string around the nails to create the outline of your Mason jar. You can do this by wrapping once around each nail to create a clean perimeter. This defines the shape clearly.
- Fill with String Art: Now, for the artistic part! You can choose different stringing patterns:
- Outline Only: Keep it simple with just the perimeter defined.
- Criss-Cross Pattern: Weave the string back and forth across the “body” of the jar, connecting non-adjacent nails. This creates a filled-in, web-like effect. Vary the angles to add depth.
- Radial Pattern: For the jar’s lid or base, you might string from a central nail outwards to the perimeter nails, creating a sunburst effect.
Experiment with different angles and tensions to achieve your desired look. Make sure the string is taut but not so tight that it pulls the nails out. Use different colors of string if you wish to highlight different parts of the jar (e.g., a darker blue for the glass, a silver for the lid). When you’re satisfied with your string pattern, tie the end securely to one of the nails and trim any excess string.
- Add Your Flowers: With your string art Mason jar complete, it’s time to bring in the natural elements. Arrange your fresh, dried, or artificial flowers and greenery within the “mouth” of the string art jar. You can gently tuck the stems behind the string and nails, or use a tiny dab of hot glue (for artificial flowers) to secure them if needed. Think about balance, color, and texture when arranging. You might want a focal bloom with smaller fillers and cascading greenery.
Displaying and Customizing Your Mason Jar String Art
Display Options
Once your beautiful Mason jar string art vase is complete, you’ll want to showcase it! For easy hanging, attach a sawtooth hanger to the back of the wood, or use heavy-duty command strips if you prefer not to make holes in your wall. This project was perfect for the classroom wall, allowing the teacher to easily change out the flowers every week or so to match lessons, seasons, or moods. Imagine it gracing a kitchen wall, adding a rustic touch to a living room, or brightening a nursery with cheerful blooms.
Creative Variations and Tips for Success
This DIY project is incredibly forgiving and ripe for personalization. Here are some ideas to make it uniquely yours:
- Change the Shape: While a Mason jar is classic, consider other shapes! A heart, a star, an animal silhouette, or even initials can be transformed into string art.
- Experiment with Wood Finishes: Try painting the wood a vibrant color, whitewashing it for a distressed look, or using different stains to highlight the wood grain.
- Vary String Colors: Don’t limit yourself to one string color. Use different shades for the jar itself, or incorporate a contrasting color for the lid or label area. Metallic threads can add a subtle shimmer.
- Add Embellishments: Consider gluing a small ribbon bow around the “neck” of the jar, or adding tiny faux berries or leaves directly into the string art for extra texture.
- Seasonal Themes: Adapt your floral choices to the seasons. Spring daffodils, summer sunflowers, autumn leaves, or winter evergreens can all be beautifully incorporated.
- Lighting: For an enchanting evening glow, weave tiny battery-operated fairy lights into the string art behind the flowers.
- Consider a Stencil for Text: Before nailing, you could stencil a word like “BLOOM” or “GATHER” onto the wood for added charm.
Maintenance and Longevity
If you’re using fresh flowers, remember to replace them every few days or keep them in small, hidden floral water tubes to maintain freshness. For a long-lasting display, high-quality artificial flowers are an excellent choice, requiring only occasional dusting. This string art piece is durable and designed to bring joy for years to come, adapting to your style as easily as you can swap out its floral contents.
Final Thoughts on Your DIY Mason Jar String Art
Crafting this Mason Jar String Art vase is more than just a project; it’s an invitation to unleash your creativity and bring a piece of handmade beauty into your home. It’s wonderfully satisfying to see a simple piece of wood, some nails, and string transform into such a charming and functional piece of decor. Whether you’re making it for your own home, as a thoughtful gift, or for a group activity, the process is enjoyable and the results are always rewarding. So, grab your hammer, pick your favorite string and flowers, and start creating a piece that will surely spark joy and compliments. Happy crafting!