
DIY Ginger Jar Makeover: Transform Ordinary Jars into Elegant Home Decor
There’s an undeniable joy that comes with turning something ordinary into a piece of art, especially when it costs next to nothing. This is precisely the magic of a jar makeover project. Whether you have a collection of old pasta sauce jars, jam jars, or a stash of beloved mason jars, the potential for transformation is immense. For many, including myself, the versatile mason jar holds a special place, making it the perfect canvas for creative expression. When it comes to thoughtful gift-giving or simply adding a unique touch to your living space, handmade DIY projects consistently stand out. People cherish items crafted with care and intention, often viewing them as perfect tokens of affection, regardless of any small imperfections they might possess.
Who doesn’t appreciate a beautiful accent piece that infuses color and character into their home decor? This particular DIY project promises to do just that, bringing a sophisticated touch to any room. We’re talking about giving humble jars a modern ginger jar makeover, resulting in truly exquisite pieces. The transformation is particularly striking when a sparkling crystal doorknob is elegantly placed atop a painted lid, instantly elevating the jar’s aesthetic from simple storage to a decorative masterpiece. This creative hack leverages readily available materials to achieve a high-end look without the corresponding price tag.
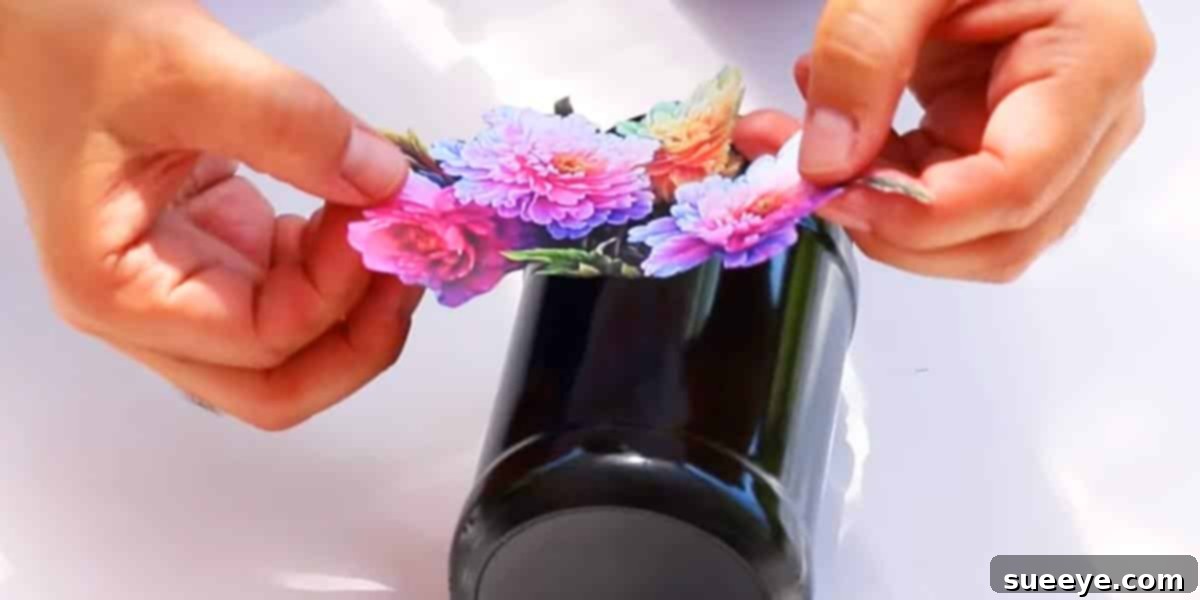
Imagine the rich contrast of a vibrant floral print meticulously glued onto a jar that has been perfectly spray-painted black. The visual impact is simply stunning, creating an effect that feels both luxurious and expensive. For those with a collection of floral fabric scraps, this project offers an excellent opportunity to repurpose them. Cutting out intricate floral patterns from fabric and adhering them to your jars can yield equally beautiful and unique results, adding texture and a bespoke feel. This DIY jar makeover is a testament to how simple materials, combined with a bit of creativity, can produce truly remarkable and visually appealing home decor.
The Timeless Appeal of Ginger Jars and Why You’ll Love This DIY Project
Ginger jars, with their distinctive bulbous shapes, narrow necks, and often intricate blue and white patterns, have been cherished decorative items for centuries. Originating in ancient China, they were initially used to store and transport precious spices, particularly ginger, which gave them their enduring name. Over time, their aesthetic beauty transcended their utilitarian purpose, transforming them into sought-after decorative accents in homes worldwide. This DIY project allows you to capture that classic elegance and charm, adapting it to a modern context and personalizing it to fit your unique style. By creating your own ginger jars, you’re not just crafting a decoration; you’re engaging with a rich history of artistry and bringing a piece of that heritage into your contemporary living space, infused with your own creative spirit.
One of the greatest advantages of this DIY endeavor is its accessibility and cost-effectiveness. You don’t need specialized skills or expensive tools to achieve professional-looking results. It’s a project that encourages experimentation and allows for a high degree of personalization. Whether your home aesthetic leans towards minimalist modern, rustic farmhouse, or classic traditional, these transformed jars can be adapted to complement any decor. They look particularly fabulous when arranged on bookshelves, providing a welcome visual break from the uniformity of rows of books. This common styling technique is frequently seen in high-end home decor magazines and popular online interior design platforms, underscoring their impact as stylish home accents.
Beyond their decorative function, these handmade ginger jars also make incredibly thoughtful and personal gifts. In an age of mass-produced items, a gift crafted with your own hands carries a special significance. It tells the recipient that you invested time, effort, and creativity specifically for them, making the present truly unique and memorable. They are perfect for housewarming parties, birthdays, holiday gifts, or even as a unique wedding or anniversary present. The satisfaction of giving and receiving such a personalized, handcrafted item is truly immeasurable, fostering connections and spreading joy through creativity.
Getting Started: What You’ll Need and How to Prepare Your Jars
Embarking on this creative journey requires just a few basic supplies, most of which you might already have around your home or can acquire very affordably. The core components include your chosen jars, some spray paint, decorative elements like floral prints, and the optional but highly recommended crystal doorknobs. Here’s a detailed look at what you’ll need and essential preparation steps to ensure your project is a success:
Choosing Your Jars: Mason Jars vs. Upcycled Containers
- Mason Jars: Known for their sturdy glass construction and classic, versatile appeal, mason jars are an excellent choice due to their consistent shape and readily available two-part lids. They come in various sizes (pint, quart, half-gallon), offering flexibility for different decorative impacts and arrangements. Their smooth surface is ideal for painting.
- Pasta, Jam, and Other Food Jars: Don’t overlook these common household staples! Thoroughly clean and remove labels from any glass jar that catches your eye. Their diverse shapes, from squat jam jars to tall olive oil bottles, can add an eclectic charm and variety to your collection. Just ensure the jar has a stable base and a lid that can accommodate a doorknob.
Essential Materials List for Your DIY Ginger Jars:
- Glass Jars: Select a variety of sizes and shapes for an interesting display. Ensure they are clean and dry.
- Spray Paint: Choose a high-quality spray paint in a color that complements your home decor. Black provides a striking contrast for floral prints, while traditional blues, whites, creams, or even metallics can mimic various classic ginger jar styles. Consider a primer spray paint for better adhesion and coverage on glass.
- Floral Prints: High-quality printouts of botanical illustrations, chinoiserie patterns, intricate flower designs, or any appealing floral imagery you love. You can find countless free printables online, use decorative scrapbook paper, or even cut designs from old magazines.
- Mod Podge or Decoupage Medium: This all-in-one glue, sealer, and finish is perfect for adhering paper prints smoothly and permanently to the jar surface, giving it a sealed, durable finish.
- Sharp Scissors or Craft Knife: For meticulously cutting out your chosen floral designs with clean edges.
- Crystal Doorknobs: These are the “crown jewels” of your ginger jars! They instantly elevate the look, adding sparkle and an undeniable touch of luxury. They can be found surprisingly inexpensively on platforms like Amazon, or often at discount home goods stores such as TJ Maxx, HomeGoods, or Marshalls. Craft stores also occasionally carry decorative knobs suitable for this purpose.
- Strong Adhesive: Such as E6000, Gorilla Glue, or super glue, for attaching the doorknobs securely to the jar lids. This is crucial for a lasting bond.
- Optional Supplies: Floral fabric scraps (for an alternative to paper prints), fine-grit sandpaper (for light scuffing), rubbing alcohol (for pre-painting cleaning), foam brushes or soft bristle brushes (for applying Mod Podge), protective gloves and mask (for spray painting in a well-ventilated area).
Preparation is Key for a Professional Finish:
Before you begin the exciting part of painting and decorating, proper preparation is crucial for a lasting and professional-looking finish. Start by thoroughly washing your jars with warm water and soap to remove any grease, dust, or residue. If using repurposed food jars, ensure all labels and adhesive remnants are completely gone. A good soak in warm, soapy water often helps, followed by scrubbing with a sponge or steel wool for stubborn glue. Once clean, dry the jars completely, inside and out. For an even better paint adhesion, you can gently scuff the glass surface with fine-grit sandpaper, then wipe it down with rubbing alcohol to remove any dust and fingerprints. This creates a slightly textured surface for the paint to grip onto, preventing chipping and ensuring a smooth, even coat.
Step-by-Step Transformation: Bringing Your Ginger Jars to Life
Now for the truly exciting part – bringing your ginger jars to life! While specific steps may vary slightly depending on the exact tutorial you follow (like the excellent one from Mark Montano, which is highly recommended for visual guidance), the general process is straightforward and incredibly rewarding. Follow these steps to craft your own beautiful decor pieces:
1. Achieving the Perfect Paint Job:
Take your clean, dry jars and lids to a well-ventilated area, preferably outdoors or in a garage with open windows. Lay down a drop cloth or old newspaper to protect your work surface from overspray. Apply your chosen spray paint in light, even coats, holding the can approximately 8-12 inches away from the jar. Multiple thin coats are always better than one thick coat, as this prevents drips, ensures uniform coverage, and creates a smooth, professional-looking finish. Allow each coat to dry according to the manufacturer’s instructions before applying the next, typically 15-30 minutes. For a deep, rich, and dramatic look, a glossy black spray paint works wonderfully, creating a striking background for your floral motifs. Alternatively, classic white, a soft cream, or a traditional “ginger jar blue” can evoke different moods and styles. Remember to paint the lids as well, ensuring full coverage.
2. Adorning with Floral Elegance:
Once your painted jars and lids are completely dry and cured (allow at least 24 hours for full curing, if possible), it’s time to add the beautiful floral designs. Carefully cut out your chosen floral prints using sharp scissors or a craft knife. For a seamless look that integrates well with the jar, try to cut closely around the edges of the designs. Apply a thin, even layer of Mod Podge or your chosen craft glue to the back of your floral cutouts. Carefully position the print onto the desired area of the jar. Smooth it down gently with your fingers or a soft brush, working from the center outwards to remove any air bubbles or wrinkles. If using fabric scraps, apply glue directly to the jar where you want the fabric to go, then carefully press the fabric onto it. Once the designs are in place and dry, you might want to apply a thin top coat of Mod Podge over the entire design for added durability, protection, and a uniform, sealed finish. This also helps seal the edges of your prints, preventing them from peeling.
3. The Grand Finale: Attaching the Crystal Doorknob:
This final step is what truly elevates these jars into sophisticated ginger jar masterpieces. The crystal doorknob acts as a beautiful finial, adding sparkle, dimension, and an undeniable touch of luxury that transforms the jar from a simple container into a true decorative accent. Using a strong adhesive like E6000 or super glue, apply a small, strategic amount to the flat base of the crystal doorknob. Carefully center the doorknob on top of the painted jar lid. Press firmly and hold for a few moments to ensure initial adhesion. It’s crucial to allow the adhesive to cure completely, ideally for 24 hours (or as per product instructions), before handling the lid or moving the jar by the doorknob. This ensures a secure and lasting bond, preventing your beautiful finial from detaching.
Displaying Your Beautiful Creations and Beyond
Now that your stunning DIY ginger jars are complete, it’s time to find them the perfect spot in your home. Their versatility means they can enhance almost any room, adding a pop of color, texture, and elegant charm. Their unique look can tie together different elements of your decor, making them a truly valuable addition. Here are some inspiring ideas for displaying and utilizing your new decorative accents:
- Bookshelves: As mentioned, these jars are fantastic for breaking up the visual monotony of rows of books. Place them individually or in stylish groupings of two or three alongside your literary collection for an artful and curated display that adds personality.
- Mantelpieces: Adorn your fireplace mantel with these elegant jars, perhaps flanking a mirror or a piece of artwork, to create a sophisticated and eye-catching focal point in your living room.
- Entryways and Console Tables: Welcome guests with a touch of handmade elegance by placing a jar on an entryway table or console. This provides an immediate impression of style and hospitality.
- Kitchen Decor: While not food-safe once painted, they can beautifully decorate kitchen shelves, counter corners, or a breakfast nook, adding charm and a touch of vintage flair.
- Bathroom Storage: Use them in the bathroom (perhaps without the lid if you need easy access) to hold cotton balls, bath salts, small soaps, or even spare toiletries, adding a spa-like and organized feel to the space.
- Bedroom Nightstands: A single, elegantly crafted jar can add a serene and decorative touch to your bedside table, enhancing the peaceful ambiance of your sleeping sanctuary.
Beyond Decoration: Creative Uses and Variations for Your Jars
While primarily decorative, these jars can also inspire further creativity and serve various functional purposes:
- Different Finishes: Experiment with matte spray paints for a softer, more contemporary look, or use a distressing technique with fine-grit sandpaper after painting and before sealing for a charming vintage or antique feel. Metallic accents like gold or silver spray paint or glitter spray can also add a unique flair for special occasions.
- Stenciling and Freehand Painting: Instead of gluing prints, consider stenciling intricate patterns directly onto the painted jars for a different kind of artistic expression. You could even try freehand painting designs if you’re confident in your artistic skills.
- Ribbons and Embellishments: Add bows made from satin ribbons, twine, or jute around the neck of the jar, or attach small charms or tags for extra personalized detail, especially when gifting.
- Seasonal Decor: Adapt the floral prints or paint colors to match different seasons or holidays – cherry blossoms for spring, vibrant sunflowers for summer, warm autumn leaves for fall, or festive holly and berries for winter. This allows your jars to evolve with your home’s seasonal styling.
- Themed Collections: Create a collection of jars with a specific theme, like all blue and white for a classic chinoiserie look, or a mix of botanical prints for a lush garden feel.
The Joy of Handmade: Why DIY is So Rewarding
Engaging in DIY projects like this ginger jar makeover offers benefits far beyond just acquiring a new decorative item. The process itself is incredibly therapeutic and provides a wonderful creative outlet. There’s immense satisfaction in taking raw, often discarded, materials and transforming them with your own hands into something beautiful, functional, and deeply personal. It’s an act of mindfulness, allowing you to focus on the present moment, relieve stress, and express your unique personal style without limits.
Moreover, embracing the DIY ethos contributes significantly to a more sustainable lifestyle. By upcycling old jars, you’re actively reducing waste and giving new life to items that might otherwise end up in a landfill. It’s a small but meaningful step towards conscious consumption and a greater appreciation for the resources we use. The cost-effectiveness of these projects also makes high-end, bespoke decor accessible to everyone, proving that elegance and personal style don’t always come with a steep price tag. It empowers you to create a home that truly reflects you, piece by piece.
Conclusion: Your Next Crafting Adventure Awaits!
This DIY ginger jar project is a truly delightful and impactful way to inject personality and elegance into your home decor. It’s an inexpensive, enjoyable, and surprisingly easy craft that yields truly stunning results, perfect for both personal enjoyment and thoughtful gift-giving. The transformation from a simple glass jar to a sophisticated ginger jar, complete with a dazzling crystal doorknob, is nothing short of magical. It’s a project that combines practicality with aesthetic appeal, proving that beautiful home accents are well within reach for any DIY enthusiast.
So, gather your materials, embrace your inner artisan, and prepare to unleash your creativity. For visual learners, watching a step-by-step tutorial (like the excellent one from Mark Montano) can provide invaluable guidance and inspiration. Break out those forgotten jars, spray paint, and pretty prints, and get ready to adorn your home with these beautiful, handmade masterpieces that are sure to draw compliments and add a touch of timeless charm to any space!