
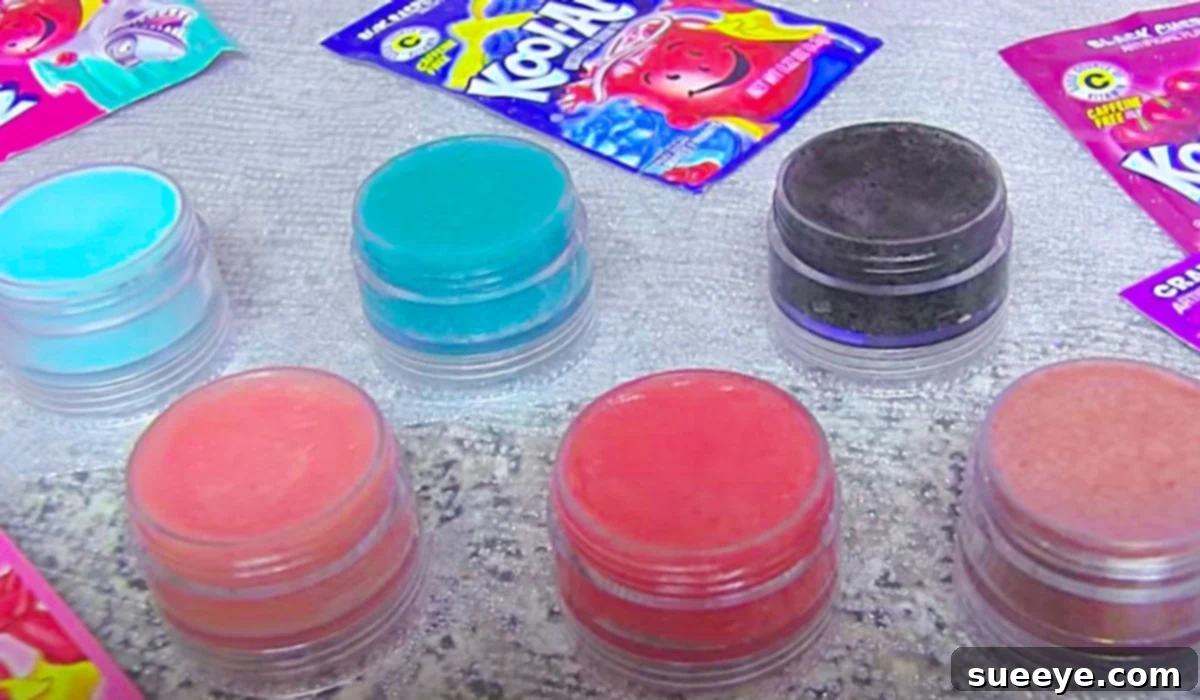
DIY Kool-Aid Lip Gloss: Craft Your Own Flavored & Tinted Balms at Home
In a world brimming with endless beauty products, there’s a unique charm in crafting your own. For those who appreciate the simple elegance of a subtly tinted and deliciously flavored lip gloss, the journey to find “the one” can often be a long one. Many store-bought options fall short, either lacking the perfect hue, the desired scent, or containing ingredients you’d rather avoid. What if you could create your ideal lip gloss right in your own kitchen, tailored precisely to your preferences?
Enter the wonderful world of DIY Kool-Aid lip gloss! This ingenious project offers a fantastic solution for anyone seeking a customizable, budget-friendly, and incredibly fun way to make their own lip care. The concept is refreshingly simple, leveraging common household items to produce a personalized balm that feels as good as it looks. The best part? It’s so straightforward, even beginners can achieve impressive results.
The inspiration for this delightful project comes from an excellent video tutorial by Socraftastic on YouTube. Their clear and concise instructions demystify the process, making it accessible to everyone. With just a handful of ingredients and minimal effort, you can whip up a batch of lip gloss that boasts the exact tint and flavor you’ve been dreaming of. This isn’t just about saving money; it’s about unlocking creativity and enjoying the satisfaction of a handmade beauty product.
Why Choose DIY Lip Gloss? The Benefits of Homemade Beauty
Beyond the sheer joy of a creative project, making your own lip gloss comes with a host of practical advantages:
- Unmatched Customization: Tired of limited color palettes and generic flavors? DIY allows you to mix and match Kool-Aid packets to achieve unique shades and taste profiles. Want a cherry-berry blend? Go for it! Craving a subtle peach tint? It’s entirely within your control.
- Cost-Effectiveness: High-quality lip gloss can be surprisingly expensive. By using inexpensive ingredients like Vaseline and Kool-Aid, you can produce several pots of custom lip gloss for a fraction of the cost of a single store-bought tube.
- Ingredient Awareness: When you make it yourself, you know exactly what goes into your lip gloss. This is particularly appealing for those with sensitive skin or who prefer to avoid certain synthetic chemicals often found in commercial products.
- Simple Ingredients, Real Results: The primary base, Vaseline, is renowned for its moisturizing and protective properties. Combined with the vibrant colors and flavors of Kool-Aid, you get a product that not only looks good but also helps keep your lips soft and hydrated.
- A Fun and Engaging Project: Whether you’re a seasoned crafter or looking for a quick and rewarding activity, this DIY lip gloss project is incredibly satisfying. It’s perfect for a solo creative session, a fun activity with friends, or even a safe and engaging project for older kids (with adult supervision).
- Eco-Friendly Potential: By reusing old lip gloss pots or small containers, you’re also contributing to less waste, giving new life to items that might otherwise be discarded.
The Magic Ingredients: Unpacking Vaseline and Kool-Aid
The beauty of this recipe lies in its simplicity and the readily available nature of its core components:
Vaseline (Petroleum Jelly): The Ultimate Lip Base
Vaseline, or petroleum jelly, has been a staple in medicine cabinets for over a century, and for good reason. It’s an occlusive agent, meaning it forms a protective barrier on the skin. For lips, this translates into exceptional moisture retention, preventing chapping and dryness. It’s non-comedogenic (won’t clog pores), hypoallergenic, and generally well-tolerated by most skin types. Its smooth, emollient texture provides the perfect base for lip gloss, offering a comfortable feel without stickiness.
While Vaseline is the classic choice, you have options! For those seeking a more natural or plant-based alternative, pure coconut oil works wonderfully. Coconut oil is also an excellent moisturizer, known for its nourishing fatty acids and pleasant, subtle scent. You could also experiment with shea butter or a blend of oils and waxes for different consistencies, though this recipe focuses on the simplest approach.
Kool-Aid: Your Flavor and Color Palette
The star of the show for flavor and tint is none other than Kool-Aid! This iconic powdered drink mix is perfect for DIY lip gloss because:
- Vast Flavor and Color Range: From classic Cherry and Grape to exotic Tropical Punch, Kool-Aid offers an incredible array of options. This allows for endless customization of both the lip gloss’s taste and its visual tint. Reds, pinks, and purples tend to yield the most natural and flattering lip colors.
- Food-Grade and Safe: Since Kool-Aid is designed for consumption, it’s generally considered safe for use in lip products that might be incidentally ingested. Always ensure you’re using plain, unsweetened Kool-Aid for the best results and to avoid any stickiness from added sugars.
- Potent Pigmentation: Even a small amount of Kool-Aid powder delivers a significant burst of color, meaning you don’t need much to achieve a beautiful tint.
- Accessibility: Kool-Aid packets are inexpensive and found in almost any grocery store, making this project accessible to everyone.
Consider mixing different Kool-Aid flavors to create unique blends – how about a raspberry-lemonade tint, or a hint of strawberry-kiwi? The possibilities are limited only by your imagination!
Essential Materials for Your Lip Gloss Project
Gathering your materials is the first exciting step in bringing your custom lip gloss to life. The beauty of this project lies in its simplicity; you likely have most of these items already on hand.
Materials You’ll Need:
- 1 tablespoon of Vaseline (Alternatively, you can use pure coconut oil for a natural base or a blend of both for a customized feel.)
- 1/4 teaspoon of Kool-Aid powder (Choose your favorite flavor and color! Reds, pinks, and berry shades tend to create the most natural and appealing lip tints.)
- Small pot or microwave-safe bowl to mix your ingredients (An old clean candle jar or a small glass ramekin works perfectly.)
- A microwave oven for melting the base.
- A few drops of water (This helps to dissolve the Kool-Aid evenly and incorporate it into the base.)
- Clean, empty lip gloss pots or small containers for storage (Reusing old balm containers is an excellent eco-friendly option!)
- A small spoon or spatula for stirring.
Step-by-Step Directions: Crafting Your Custom Kool-Aid Lip Gloss
Making your own Kool-Aid lip gloss is an incredibly straightforward process, broken down into just a few easy steps. Follow these instructions carefully, and you’ll have your personalized lip balm ready in no time!
Detailed Instructions:
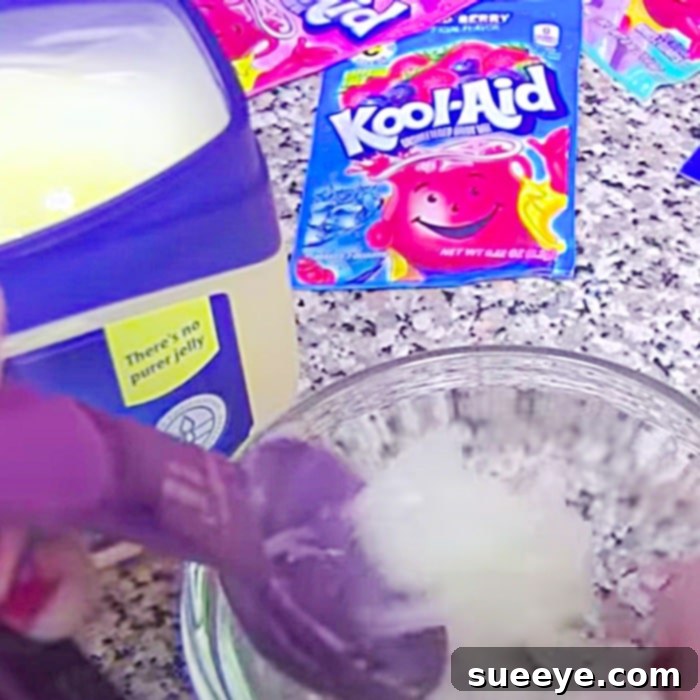
- Prepare Your Base: Begin by adding exactly one tablespoon of Vaseline (or coconut oil if you’re using it as an alternative) into your chosen microwave-safe mixing pot or bowl. Ensure the container is clean and dry before adding the petroleum jelly.
- Melt the Base: Place the bowl with Vaseline into the microwave. Heat it in short intervals, typically 15-20 seconds at a time, until the Vaseline is completely melted into a clear liquid. Be careful not to overheat it. Stir after each interval to check for consistency and ensure even melting. If using coconut oil, it will melt even faster.
- Introduce the Kool-Aid: Once the Vaseline is fully melted, carefully remove the hot bowl from the microwave. Now, add 1/4 teaspoon of your chosen Kool-Aid powder to the melted Vaseline. This is where your lip gloss gets its unique flavor and vibrant tint.
- Thoroughly Mix: Using your small spoon or spatula, stir the Kool-Aid powder into the melted Vaseline very well. You want to ensure there are no lumps or undissolved bits of Kool-Aid. Keep stirring until the color is evenly distributed throughout the mixture and the powder has completely blended into the liquid base. This step is crucial for an even tint.
- Add a Touch of Water: To help with the dissolution of the Kool-Aid and achieve a smoother consistency, add just a few drops of water to the mixture. A little goes a long way here; you only need enough to help everything combine seamlessly. Stir vigorously again until the water is fully incorporated and the mixture looks uniform.
- Pour into Containers: Carefully pour the liquid lip gloss mixture into your clean, empty lip gloss pots or small containers. Work quickly but steadily, as the mixture will begin to solidify as it cools. If you’re struggling to pour cleanly, a small funnel or a dropper can be very helpful. Fill each pot to your desired level, leaving a small space at the top.
- Set and Chill: Once poured, place the filled lip gloss pots into the freezer. Allow them to set for a minimum of two hours. Freezing helps the lip gloss solidify quickly and ensures a firm, stable consistency. Alternatively, you can let them set at room temperature, but this will take significantly longer (several hours to overnight) depending on your climate.
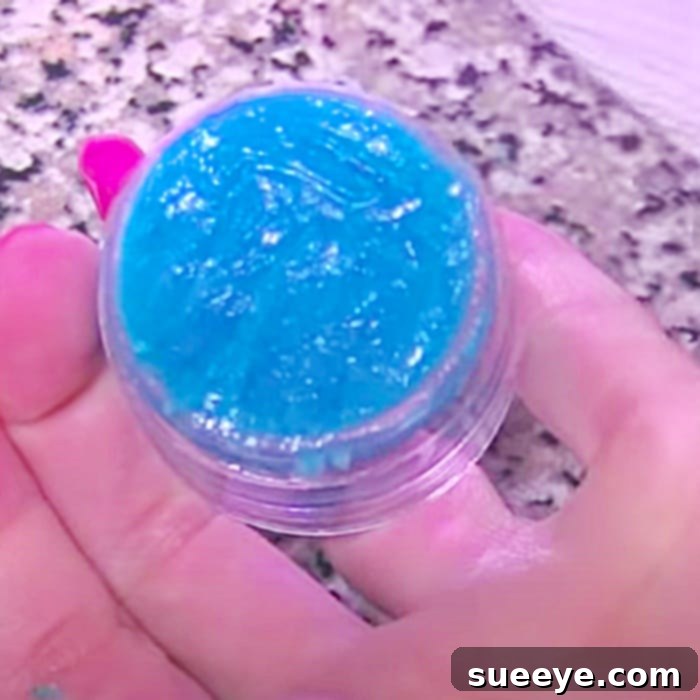
- Enjoy Your Creation: After your lip gloss has completely solidified, it’s ready to use! Remove the pots from the freezer, and you’ll be able to enjoy your custom-made, flavored, and tinted lip gloss right away. Apply it as you would any other lip balm or gloss, and revel in your handmade beauty product.
Tips for Customization and Advanced Variations
While the basic recipe is fantastic on its own, one of the greatest joys of DIY is the ability to customize. Here are some ideas to make your Kool-Aid lip gloss truly unique:
Experiment with Colors and Flavors:
- Mixing Kool-Aid Powders: Don’t limit yourself to single flavors. Combine a tiny pinch of Cherry with a dash of Grape for a unique berry blend, or mix Lemonade with Strawberry for a vibrant fruit punch.
- Adjusting Tint Intensity: For a more subtle tint, use slightly less Kool-Aid. For a bolder, more opaque color, gradually add a bit more powder until you reach your desired shade. Always add in small increments.
- Natural Color Alternatives: While Kool-Aid is great, you can also experiment with other food-grade powders like beet powder for a natural red or cocoa powder for a subtle brown tint (and chocolatey flavor!).
Enhancing the Texture and Feel:
- Firmer Gloss: If you prefer a firmer lip gloss, you can add a tiny amount (e.g., 1/8 teaspoon) of beeswax pellets to your Vaseline while melting. This will create a more solid balm consistency.
- Softer Gloss: For a slightly softer, more emollient gloss, you can add a few drops of a liquid oil like almond oil, jojoba oil, or vitamin E oil (which also offers antioxidant benefits) to your melted Vaseline before adding the Kool-Aid.
Optional Add-Ins for Extra Glam or Nourishment:
- Edible Glitter: For a touch of sparkle, add a minuscule amount of food-grade edible glitter (available in baking sections) to your mixture before it sets. Stir well to distribute evenly.
- Essential Oils (Use with Caution!): For added scent, you can include a single drop of lip-safe essential oil, such as peppermint (for a tingling sensation and fresh scent) or sweet orange. Always ensure the essential oil is food-grade and safe for topical use, especially on lips, and use sparingly as they are highly concentrated. Avoid oils that can irritate skin.
- Vitamin E Oil: A few drops of vitamin E oil can boost the nourishing properties of your lip gloss, offering additional antioxidant benefits for your lips.
Storage and Shelf Life: Keeping Your DIY Lip Gloss Fresh
To ensure your homemade Kool-Aid lip gloss remains fresh and effective, proper storage is key:
- Airtight Containers: Always store your lip gloss in clean, airtight containers. This prevents contamination and exposure to air, which can degrade the ingredients over time.
- Cool, Dry Place: Keep your lip gloss away from direct sunlight and extreme heat, as this can cause it to melt or affect its consistency. A cool, dry cupboard or drawer is ideal.
- Longevity: Since this recipe uses Vaseline and Kool-Aid, both of which have a long shelf life, your lip gloss should last for several months – typically 3 to 6 months. However, if you’ve added any other ingredients (especially natural oils or butters), the shelf life might be shorter. Always discard if you notice any changes in smell, color, or texture, or if any mold appears.
- Hygiene: To extend shelf life and prevent bacterial growth, always ensure your hands are clean when applying the lip gloss. Avoid double-dipping or sharing pots if possible.
Safety First: Important Considerations for DIY Beauty
While this recipe is generally safe, it’s always important to keep a few safety considerations in mind when making homemade beauty products:
- Cleanliness is Paramount: Ensure all your equipment – mixing bowls, spoons, and especially your lip gloss pots – are thoroughly cleaned and sanitized before use. This prevents introducing bacteria into your product.
- Food-Grade Ingredients: Stick to food-grade Vaseline (if available) and Kool-Aid. These are formulated to be safe for incidental ingestion.
- Patch Test: If you have sensitive skin or are prone to allergies, it’s a good idea to perform a patch test on a small, inconspicuous area of your skin (like your inner arm) before applying the lip gloss to your lips. Wait 24 hours to check for any adverse reactions.
- Microwave Safety: Be cautious when melting Vaseline in the microwave. Use microwave-safe containers and handle hot bowls with oven mitts or a towel to prevent burns.
- Supervision for Children: If children are participating in this project, ensure they are supervised by an adult, especially during the melting and pouring stages.
- Avoid Eye Contact: As with any lip product, avoid direct contact with your eyes. If contact occurs, rinse thoroughly with water.
Conclusion: Embrace Your Inner Lip Gloss Creator!
Making your own Kool-Aid lip gloss is more than just a simple craft; it’s an opportunity to embrace creativity, save money, and tailor a beauty product specifically to your desires. The process is incredibly simple, requiring minimal ingredients and equipment, making it accessible to anyone looking for a fun and rewarding DIY project.
From choosing your favorite Kool-Aid flavor to achieving the perfect tint and even experimenting with additional nourishing ingredients, this project puts you in control. You’ll not only end up with a stash of personalized lip glosses but also the immense satisfaction that comes from creating something beautiful and functional with your own hands. So, why wait? Gather your materials, watch the inspiring tutorial from Socraftastic, and embark on your journey to becoming a lip gloss artisan today. You’ll truly love the results!