
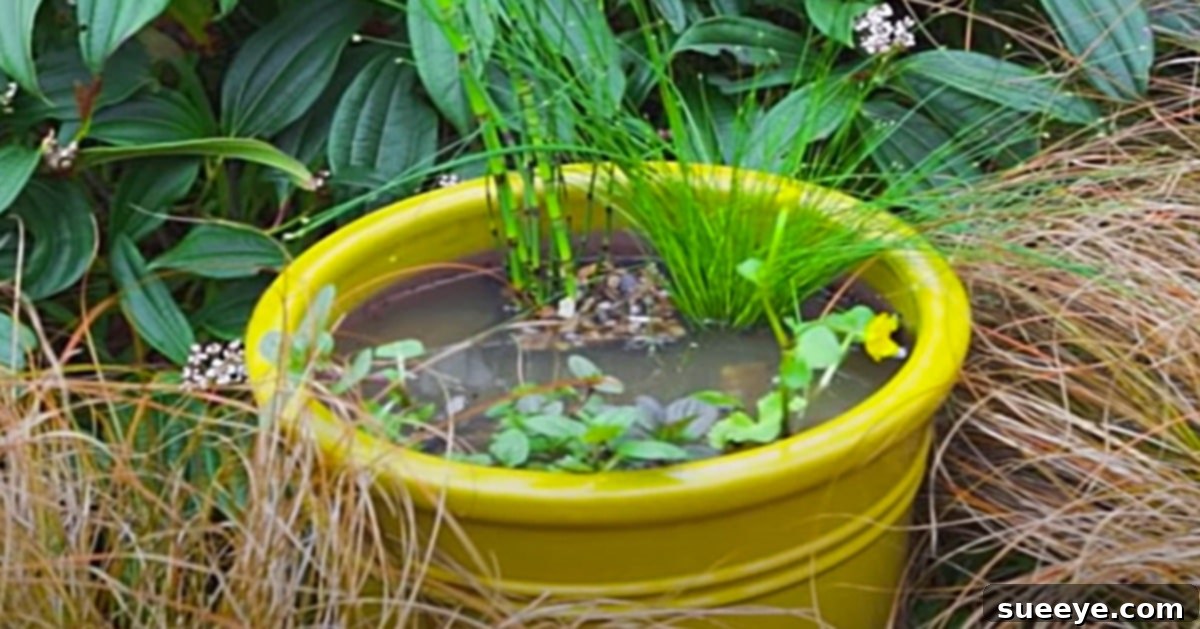
Create Your Own Tranquil Oasis: A Step-by-Step Guide to Building a Pond in a Pot
Imagine the soothing sound of trickling water, the gentle buzz of dragonflies, and the vibrant splash of green from aquatic plants, all within arm’s reach. Garden water features bring unparalleled serenity and beauty, transforming any outdoor space into a peaceful sanctuary. However, many believe that having a beautiful pond is a luxury reserved for those with expansive backyards. If you have a compact garden, a small patio, or even just a cozy balcony, you might think a water feature is out of the question. Thankfully, that’s a misconception we’re here to clear up! With a clever and simple DIY project known as a “pond in a pot,” you can bring the magic of a miniature ecosystem to virtually any setting.
This ingenious project offers all the charm and wildlife attraction of a traditional pond, scaled down into a beautiful container. Not only is it incredibly adorable and a fantastic focal point, but it’s also remarkably low-maintenance. The aquatic plants thrive in a self-contained, miniature ecosystem, constantly nourished and replenished by natural rainwater. This makes it a sustainable and rewarding endeavor for gardeners of all experience levels. Let’s dive into how you can create your very own charming pond in a pot.
Why Choose a Pond in a Pot? The Benefits of Miniature Water Features
Opting for a container pond isn’t just a clever space-saving solution; it comes with a host of advantages that make it an appealing project for any homeowner or apartment dweller looking to enhance their outdoor environment:
- Space Efficiency: The most obvious benefit is its adaptability to small spaces. Balconies, patios, front porches, or compact garden corners that wouldn’t accommodate a traditional pond are perfect for a pond in a pot.
- Low Maintenance: Unlike larger ponds that may require extensive filtration systems and regular cleaning, a well-balanced pond in a pot often maintains itself. The plants create a natural ecosystem, helping to keep the water clear and healthy.
- Attracts Wildlife: Even a small body of water can become a magnet for local wildlife. Birds will stop for a drink and a bath, beneficial insects like dragonflies will visit, and you might even attract frogs if your setup is inviting enough. It’s a fantastic way to boost biodiversity in your immediate surroundings.
- Aesthetic Appeal: A pond in a pot adds a unique and captivating visual element to your outdoor décor. The interplay of water, plants, and decorative elements creates a dynamic and calming focal point.
- Portability: Want to redecorate? No problem! A container pond can be moved to different locations within your space, allowing you to experiment with various layouts or even bring it indoors during harsh winter months, depending on the climate and plant choices.
- Educational Tool: For families, a pond in a pot can be a wonderful living classroom, demonstrating basic ecological principles, plant growth cycles, and the importance of water for life.
Essential Materials for Your DIY Container Pond
Gathering the right materials before you begin ensures a smooth and enjoyable building process. Most items can be found at your local garden center, hardware store, or even around your home. Here’s a detailed list of what you’ll need:
- A Ceramic or Glazed Pot: The foundation of your pond. Choose a pot that is at least 15-20 inches (38-50 cm) in diameter and depth to provide enough space for plants and water. Ceramic or glazed pots are ideal as they are typically non-porous, minimizing water evaporation and preventing chemicals from leaching into the water. Ensure it has a drainage hole, which you will plug.
- A Small Variety of Aquatic Plants: These are the stars of your miniature ecosystem. Select plants suitable for container ponds, considering their size and growth habits. Look for a mix of types:
- Floaters: Like Water Lettuce or Hyacinth, which provide shade and absorb nutrients.
- Submerged Plants: Such as Anacharis, which oxygenate the water.
- Marginal Plants: Such as Dwarf Cattail, Horsetail Rush, or Taro, which prefer shallow water with their roots submerged and foliage above the water line. These often come in small plastic pots, perfect for placement on elevated tiers.
- A Smooth Stone or Rubber Stopper: To effectively plug the drainage hole at the bottom of your pot. Choose a stone that is slightly larger than the hole and has a relatively flat surface for a secure seal. A rubber stopper designed for planters also works well.
- A Couple of Bricks or Small Rocks: These will serve as pedestals or “tiers” for your marginal plants, allowing them to sit at the correct water depth. You might need 2-4 bricks depending on the size of your pot and the number of plants.
- Construction-Grade Caulk Adhesive (Waterproof & Non-Toxic): Essential for creating a watertight seal around the drainage hole. Ensure it’s suitable for outdoor use, waterproof, and safe for plants (check the label for non-toxic properties once cured). Silicone sealants are a popular choice.
- Rainwater or Dechlorinated Tap Water: Natural water is crucial for a healthy aquatic environment. Rainwater is ideal as it’s free of chlorine, chloramines, and other additives found in tap water that can harm aquatic plants and any potential wildlife. If rainwater isn’t available, let tap water sit in an open container for 24-48 hours to allow chlorine to evaporate, or use a dechlorination product.
Step-by-Step Instructions to Build Your Pond in a Pot
Creating your pond in a pot is a straightforward and rewarding process. Follow these steps carefully to ensure a beautiful and functional water feature:
Step 1: Prepare the Pot and Plug the Drainage Hole
The very first and most critical step is to ensure your chosen pot can hold water without leaking. This involves securely plugging the drainage hole.
- Clean and Dry: Thoroughly clean the inside bottom of your ceramic pot and the stone you plan to use as a plug. Both surfaces must be completely dry and free of dirt, dust, or grease for the caulk to adhere properly.
- Apply Caulk Adhesive: Take your construction-grade, waterproof caulk adhesive. Apply a generous bead around the edge of the drainage hole from the inside of the pot. Then, apply another layer directly onto the flat side of your chosen stone or rubber stopper.
- Create a Seal: Firmly press the stone or stopper onto the drainage hole from the inside of the pot, ensuring it’s centered and creates a tight seal. Apply pressure for a few minutes. You may want to apply a thin layer of caulk around the base of the stone where it meets the pot for extra security.
- Cure Time: Allow the caulk adhesive to cure completely according to the manufacturer’s instructions. This usually takes 24 to 48 hours. Do not proceed to the next steps until the caulk is fully cured and hardened, as rushing this stage can lead to leaks.
- Test for Leaks (Optional but Recommended): Once cured, you can perform a quick leak test by adding a small amount of water to the pot and letting it sit for an hour. If there are no drips, your seal is successful!
Step 2: Create Tiers and Arrange Your Aquatic Plants
Once your pot is watertight, it’s time to create the internal structure for your plants. Different aquatic plants thrive at different water depths, so creating tiers allows you to accommodate a variety of species.
- Place Bricks or Rocks: Carefully place one or two bricks or sturdy rocks at the bottom of the pot. These will serve as submerged pedestals for your marginal plants. Arrange them to create varying heights if you have plants with different ideal water depths.
- Position Marginal Plants: Take your marginal aquatic plants (which are typically sold in small plastic pots). Place these plant pots directly on top of the bricks or rocks. The goal is for the top of the plant’s pot to be just below or at the water’s surface once the pond is filled, allowing the foliage to emerge above the water.
- Add Submerged and Floating Plants: If you have submerged oxygenating plants, you can gently place their potted forms directly onto the bottom of the pot, or even remove them from their pots and anchor them with some gravel if desired (though keeping them in pots helps control growth). For floating plants, simply set them on the surface of the water after the pot is filled.
- Consider Placement: Think about the aesthetic balance. Place taller plants towards the back (if your pot will be viewed from one side) or in the center (if viewed from all angles). Ensure there’s enough space for each plant to grow without overcrowding.
Step 3: Carefully Fill with Water
This is where your pond truly comes to life!
- Use Natural Water: Slowly and gently begin to fill your pot with rainwater or dechlorinated tap water. Pour the water directly into the pot, trying not to disturb the plants or dislodge the bricks. You can use a watering can with a gentle shower setting, or place a plate at the bottom to diffuse the water’s impact.
- Fill to Desired Level: Continue filling until the water level reaches just below the rim of the pot, typically covering the tops of the marginal plant pots by an inch or two, and allowing your floating plants to sit nicely on the surface.
- Initial Observations: Once filled, observe your mini pond. Are the plants at the correct depth? Do the floaters have enough space? Make any minor adjustments as needed.
Choosing the Perfect Spot for Your Container Pond
The location of your pond in a pot is crucial for its health and your enjoyment. Consider these factors:
- Sunlight: Most aquatic plants require at least 4-6 hours of direct sunlight per day to thrive. However, too much intense, full-day sun can lead to excessive algae growth and rapid water evaporation. A spot that gets morning sun and afternoon shade, or filtered light throughout the day, is often ideal.
- Stability: Ensure the surface where your pot will sit is level and stable. A full pot of water can be quite heavy, so avoid unstable tables or uneven ground.
- Visibility: Place your pond where you can easily see and enjoy it! Near a seating area, outside a window, or along a frequently used pathway are excellent choices.
- Proximity to Water Source: While rainwater is great for replenishment, you’ll still need to top up water occasionally due to evaporation. Placing it somewhat near a spigot or where you can easily carry water will be convenient.
- Safety: If you have small children or pets, ensure the pond is in a location where they cannot accidentally fall in. While shallow, any standing water can pose a risk.
Caring for Your Miniature Aquatic Ecosystem
A pond in a pot is generally low maintenance, but a little regular attention will keep it flourishing:
- Water Level: Due to evaporation, especially during warm, sunny weather, the water level will drop. Top up your pond regularly with rainwater or dechlorinated tap water to maintain consistent levels.
- Algae Control: Some algae growth is natural, but excessive algae can indicate too much sun or too many nutrients. Ensure your plants are healthy and growing, as they compete with algae for nutrients. Adding more floating plants can provide shade and help reduce algae. You can also manually scoop out excess algae with a small net.
- Plant Maintenance: Remove any yellowing or decaying leaves from your aquatic plants to keep the water clean and prevent nutrient spikes. Trim back overly vigorous plants to prevent overcrowding.
- Winter Care: In colder climates, you’ll need to protect your pond in a pot during winter. If the pot is frost-proof, you might be able to leave it out, but move it to a sheltered spot. For tender aquatic plants, they may need to be brought indoors to a cool, bright location, or replaced seasonally. If your pot isn’t frost-proof, drain it and store it to prevent cracking.
- Wildlife Observation: Enjoy the wildlife your pond attracts! Avoid adding fish unless your pot is large enough and you are committed to the extra care they require (filtration, feeding, oxygenation).
Creative Enhancements for Your Pond in a Pot
Once you have the basic pond established, consider these ideas to personalize and enhance its beauty:
- Decorative Rocks and Pebbles: Add smooth, colorful river rocks or polished pebbles to the bottom of the pot for an attractive look and to provide surfaces for beneficial microorganisms.
- Miniature Statuary: A small, weather-resistant statue or figurine can add a whimsical or serene touch to your miniature landscape.
- Solar-Powered Fountain: For a gentle gurgling sound and added water movement, consider a small solar-powered fountain pump. These are inexpensive, easy to install, and require no electricity.
- Lighting: Submersible LED lights or solar-powered string lights placed around the pot can create a magical glow in the evenings, extending your enjoyment into the night.
- Companion Plants: Place other potted plants around your container pond to create a cohesive garden display. Choose plants with complementary textures and colors.
I am so excited to place my finished pond in a pot in my garden. I’ve already picked out the perfect spot where it will catch the morning sun and be visible from my kitchen window. I hope it becomes a vibrant hub for many of my favorite birds and brings a touch of calm beauty to my outdoor space. This simple project proves that even with limited space, you can create an enchanting and eco-friendly water feature that provides endless enjoyment.
So, why wait? Gather your materials, follow these easy steps, and start building your own charming pond in a pot today. You’ll be amazed at how quickly this small addition can transform your environment and connect you with nature.