
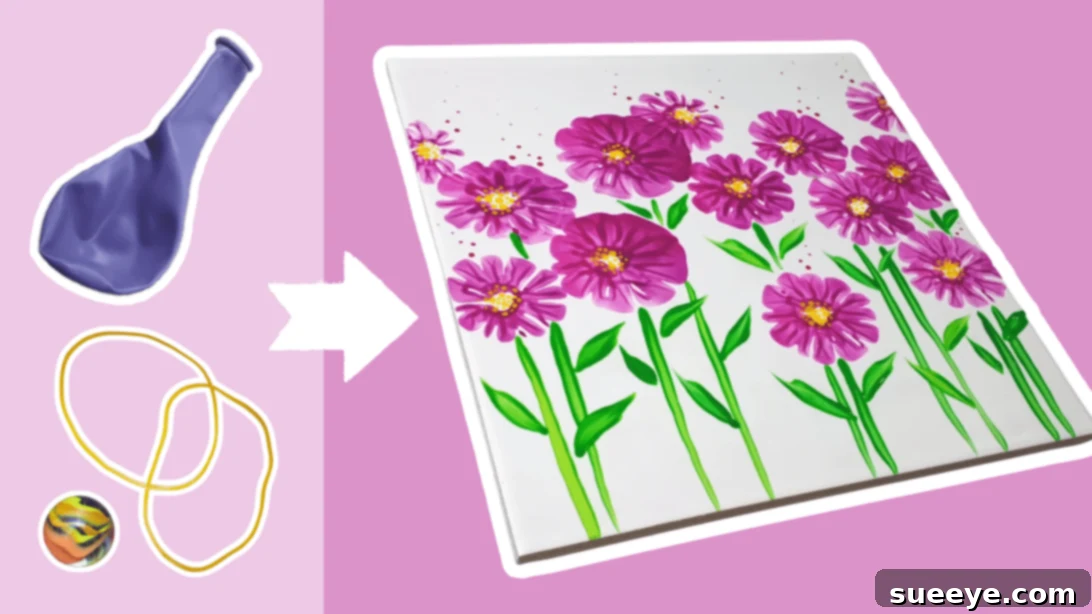
How to Paint Flowers with a Balloon: A Delightful and Easy Art Technique for Everyone
Tired of the same old brush strokes? Are you seeking innovative ways to unleash your creativity and explore new textures in your artwork? Prepare to be amazed by this ingenious craft idea from Designer Gemma77! For years, I’ve delved into painting, yet the simple idea of using a balloon to create beautiful floral patterns never crossed my mind. This unique method makes painting accessible to everyone, regardless of their artistic experience. You don’t need to be a seasoned artist to craft a stunning flower garden masterpiece. In fact, it’s an ideal summer activity for children, offering a fantastic pastime that encourages them to step away from screens and nurture their creative skills. Discover the joy of painting vibrant flowers with a balloon by following our comprehensive guide below.
Materials: Your Creative Toolkit
Gathering the right materials is the first step towards your balloon painting adventure. Most of these items are readily available, making this a budget-friendly and accessible art project. Here’s what you’ll need to transform a simple balloon into a magical flower-making tool:
- Canvas: Any size will do, depending on the scale of your envisioned flower garden. Small canvases are perfect for quick projects or for kids, while larger ones offer more space for elaborate designs. You can also use thick paper or cardstock for practice.
- Balloon: Standard party balloons work best. The size and shape of the balloon will influence the size and form of your flower petals, so consider experimenting with different ones.
- Rubber Band: Essential for securing the marble inside the balloon, ensuring it holds its unique shape for stamping.
- Paint (at least 3 different colors): Choose vibrant acrylic paints for their quick drying time and rich pigmentation. Make sure one color is green for the stems and leaves, and select two or more contrasting colors for your flower petals. Acrylics are versatile and easy to clean up with water.
- Marble Ball: A small marble is crucial for creating the distinctive rounded shape at the end of the balloon, which will form your petals. A small stone or bead of similar size could be an alternative if a marble isn’t available.
- Paint Brush: You’ll need a brush, preferably a medium-sized round or flat brush, for painting the delicate stems and leaves, and for any touch-ups.
- Dotting Tool / Toothpick / Stick: Perfect for adding small details like the center of the flowers or tiny dots, bringing your blossoms to life.
Having all your materials ready before you start will ensure a smooth and enjoyable painting experience.
Directions: Step-by-Step Balloon Flower Painting Guide
Follow these simple steps to create your charming balloon-painted flower garden. Remember, there’s no right or wrong way to be creative, so feel free to experiment and make it your own!
Step 1: Preparing Your Balloon Stamper
The secret to perfect balloon-stamped flowers lies in preparing your unique tool. This simple modification will transform a regular balloon into an effective petal creator.
First, take your balloon and gently pull its inside out, essentially reversing it. This creates a small pouch. Carefully insert the small marble into this inverted balloon, pushing it firmly until it settles at the very bottom. Once the marble is in place, use a rubber band to secure it tightly around the neck of the marble, making sure it’s snug and won’t slip. This creates a small, firm, rounded tip. Now, reverse the balloon back to its original orientation. Lightly blow some air into the balloon – just enough to give it shape but not too much that it becomes taut. Then, tie off the end of the balloon. This specially prepared balloon with its distinct marble-enhanced tip will be your primary tool for stamping the beautiful petals of your flowers.
Step 2: Stamping Your Petals and Adding Stems
Now, let the painting begin! Squeeze a generous dollop of your chosen flower petal color – perhaps a vibrant magenta, sunny yellow, or soft blue – onto your painting palette. If you don’t have a dedicated palette, a paper plate, a piece of cardboard, or even a clean, flat surface a few inches away from your canvas will work perfectly. Ensure the surface is stable so you don’t accidentally smudge your masterpiece.
Dip the rounded, marble-filled end of your prepared balloon into the paint. Make sure the tip is evenly coated but not overloaded with paint to avoid drips. Then, with a gentle yet firm press, stamp the balloon onto your canvas. The unique shape of the balloon will create a perfect, rounded petal. Lift the balloon straight up to avoid smudging. Repeat this process, rotating the canvas slightly or repositioning your balloon, to form clusters of petals, creating individual flowers. You can vary the pressure or angle slightly to give each flower a unique character. Create a few flowers across your canvas, spacing them out to allow room for stems and leaves.
Once you have your desired number of flower heads, it’s time to bring them to life with greenery. Using your paintbrush and the green paint, carefully connect each flower head to the bottom of the canvas with graceful, sweeping strokes to form the stems. Then, add delicate leaves branching out from the stems. You can vary the size and shape of the leaves to add natural diversity to your garden. Allow this layer of paint to dry slightly before moving on.
Step 3: Adding Finishing Touches and Details
With your petals and stems in place, it’s time to add those crucial finishing touches that truly make your flowers pop. Using your dotting tool, toothpick, or the end of a small stick, dip it into yellow paint (or any contrasting color you prefer for the flower centers). Carefully apply a small dot to the center of each balloon-stamped flower. This small detail instantly transforms your petals into complete, vibrant blossoms. You can also add tiny dots of different colors around the center for more texture, or even small highlights on the petals themselves. Once all your details are added, set your painting aside in a safe place and allow it to dry completely. The drying time will depend on the type of paint used and the thickness of application.
Congratulations! You have now created your very own enchanting flower garden painting using a surprisingly simple yet incredibly effective balloon technique!
Why Choose Balloon Painting for Your Next Project?
Balloon painting offers a refreshing departure from traditional methods, providing numerous benefits for artists of all ages and skill levels:
- Unique Texture and Effect: The irregular shape and soft surface of a balloon create distinct, organic textures that are difficult to achieve with brushes. Each stamp yields a slightly different, charmingly imperfect petal, giving your art a natural, whimsical feel.
- Beginner-Friendly: This technique requires no advanced artistic skills. If you can dip and press, you can create beautiful art! It’s perfect for those who feel intimidated by complex painting methods.
- Fun for All Ages: Kids adore the novelty and tactile experience of balloon painting. It’s a fantastic way to introduce them to art, improve their hand-eye coordination, and foster creative expression away from digital screens. Adults will find it a relaxing and surprisingly satisfying creative outlet.
- Surprising and Delightful Results: The spontaneity of balloon stamping often leads to unexpected and beautiful outcomes. You’ll be delighted by the vibrant, cheerful flower gardens you can create with such a simple tool.
- Cost-Effective: Balloons and basic paints are inexpensive, making this an accessible hobby that doesn’t require a significant investment in specialized art supplies.
- Stress Relief: Engaging in creative activities like painting has proven mental health benefits, reducing stress and promoting mindfulness. The playful nature of balloon painting makes it particularly therapeutic.
Tips for Success and Creative Experimentation
To make the most of your balloon painting experience, consider these helpful tips:
- Vary Your Colors: Don’t limit yourself to just one color for your petals. Try dipping your balloon into multiple colors simultaneously for a variegated, multi-toned petal effect. You can also layer different colors of petals once the first layer dries.
- Experiment with Balloon Sizes: Different sized balloons or even different parts of the same balloon (e.g., the wider base versus the marble tip) can create varied petal sizes and shapes. This adds depth and interest to your flower garden.
- Practice Makes Perfect (or Perfectly Unique!): Don’t be afraid to practice on scrap paper or an old canvas before committing to your final piece. This helps you get a feel for how much paint to use and how much pressure to apply.
- Consider Your Composition: Think about where you want your flowers to be on the canvas. Will they be clustered together, or spread out? Adding a horizon line or a soft background wash before you start stamping can give your painting more context.
- Layering for Depth: Once your first layer of stamped petals is dry, you can stamp another layer over them using a different color or a slightly smaller balloon to create more complex, layered flower designs.
- Clean as You Go: Keep a damp cloth handy to wipe excess paint from your balloon stamper between color changes or if it gets too messy. This prevents accidental smudges.
- Add Background Elements: Once your flowers are dry, you can add subtle background elements like a light blue sky, green hills, or even small dabs of white for clouds using a brush to make your garden scene more complete.
Taking Your Balloon Art Further: Variations and Inspiration
While flowers are a fantastic starting point, the balloon painting technique opens up a world of creative possibilities. Don’t stop at just one garden; let your imagination bloom!
- Different Flower Types: With slight variations in stamping, you can create various flower types. Larger, more circular stamps can be hydrangeas, while repeated stamps around a central point can mimic sunflowers or daisies.
- Abstract Art: Forget representational forms! Use the balloon to create dynamic, abstract patterns and textures. Overlap colors, swirl the balloon, or make random impressions for a modern art piece.
- Mixed Media: Combine balloon painting with other art techniques. Once your balloon flowers are dry, you can add details with colored pencils, markers, or even glitter for extra sparkle.
- Greeting Cards and Gifts: This technique is perfect for creating handmade greeting cards, gift tags, or personalized wrapping paper. Imagine a custom canvas bag adorned with balloon-stamped flowers!
- Home Decor: Beyond canvases, you can use balloon painting to decorate plant pots, wooden boxes, or even fabric items (with appropriate fabric paints). Brighten up your home with unique, handcrafted accents.
- Seasonal Themes: Adapt the technique for different seasons. Use autumnal colors for fall leaves or blues and whites for abstract winter scenes.
Unleash Your Inner Artist Today!
The beauty of balloon painting lies in its simplicity and the boundless potential for creativity. It’s a wonderful way to explore color, texture, and form without the pressure of needing perfect technique. Whether you’re looking for a relaxing solo activity, a fun project to share with children, or simply a new way to express yourself, painting flowers with a balloon is an experience that promises joy and delightful results.
So, grab your materials, inflate that balloon, and embark on a colorful journey into the world of creative stamping. Share your beautiful balloon flower masterpieces with friends and family, and inspire others to discover this incredibly easy and enjoyable art form. Your canvas awaits its vibrant transformation!