
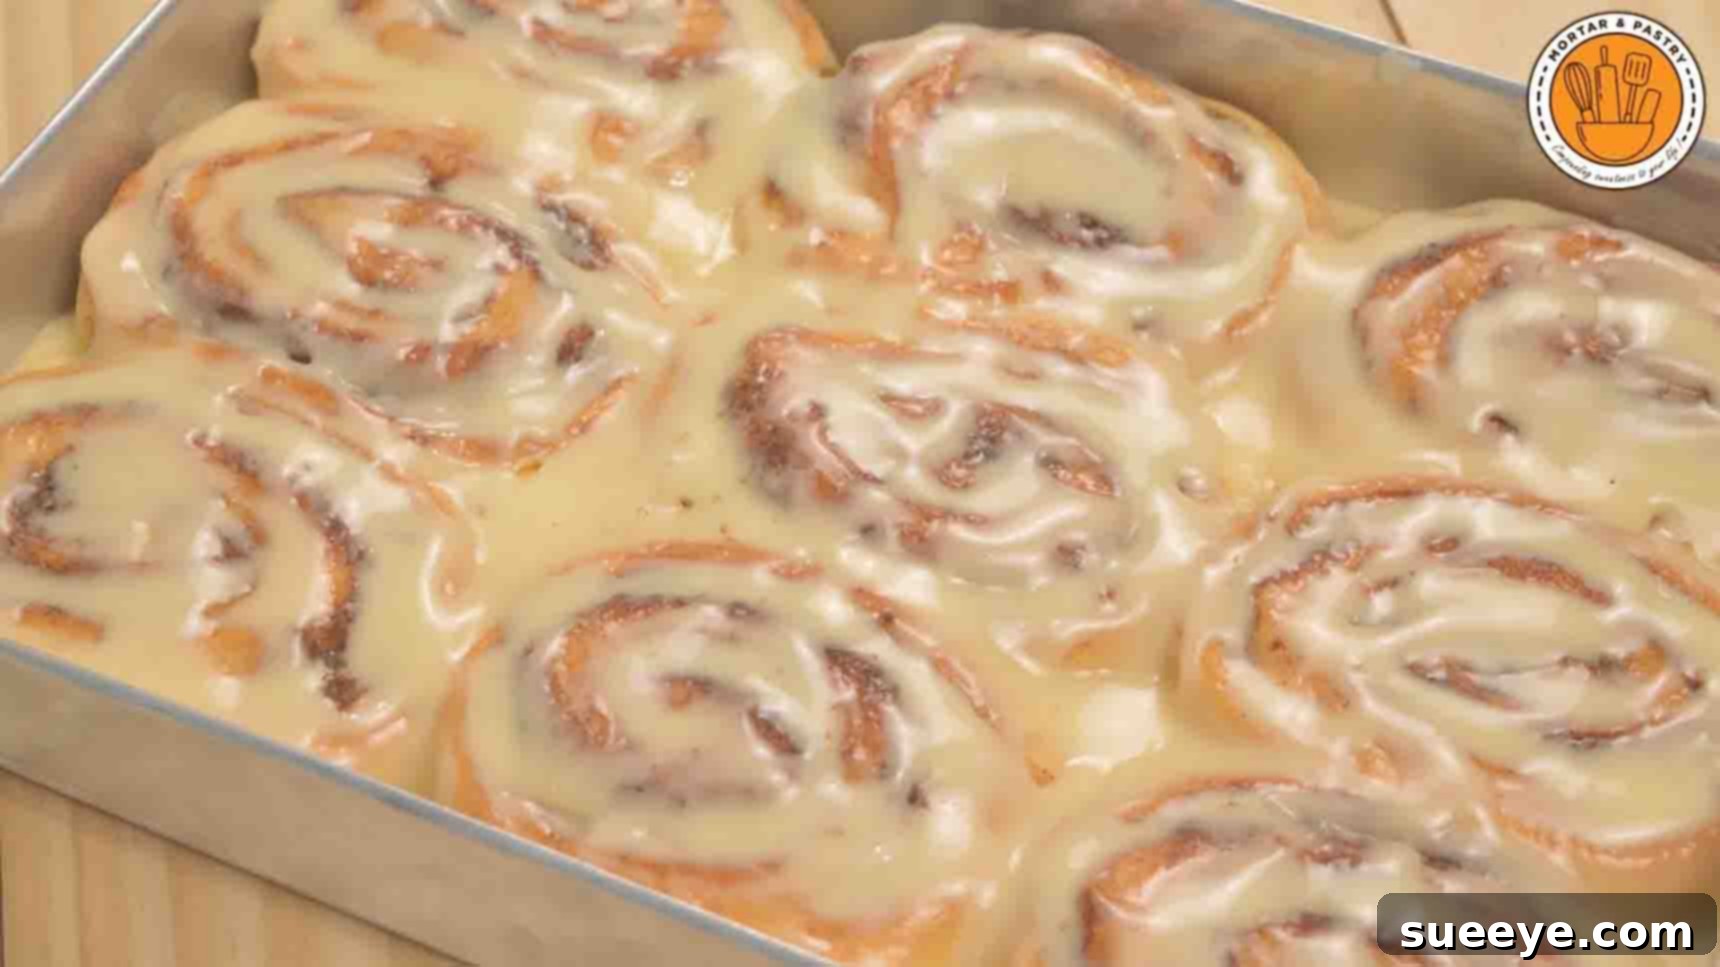
The Ultimate Homemade Cinnamon Rolls Recipe: Fluffy and Delicious
There’s nothing quite like the comforting aroma of freshly baked cinnamon rolls wafting through your home. This timeless treat, with its soft, fluffy dough, decadent cinnamon-sugar swirl, and luscious cream cheese glaze, is a beloved classic for a reason. While they might seem intimidating to make from scratch, this incredible recipe, inspired by the culinary experts at Mortar and Pastry on YouTube, simplifies the process, making it accessible even for novice bakers. Prepare to be amazed by how effortlessly you can create bakery-quality cinnamon rolls that are not only irresistibly creamy and flavorful but also incredibly easy to master. Say goodbye to store-bought pastries and get ready to impress your family and friends with these divine homemade delights!
Ingredients for Perfect Cinnamon Rolls
Crafting the perfect cinnamon roll begins with selecting high-quality ingredients. Each component plays a vital role in achieving that coveted soft texture, rich flavor, and irresistible sweetness. Gather these essentials, ensuring your butter is softened where specified and your milk is at a good temperature for activating yeast.
For the Dough:
- 4 cups of all-purpose flour
- 1/4 cup granulated sugar
- 2 & 1/2 teaspoons instant dry yeast
- 1 teaspoon salt
- 1/2 cup whole milk
- 1/2 cup water
- 1/4 cup unsalted butter, melted
- 1 large egg
For the Irresistible Filling:
- 1/2 cup unsalted butter, softened
- 1 cup light brown sugar, packed
- 2 tablespoons ground cinnamon
For the Dreamy Cream Cheese Glaze:
- 1/2 cup cream cheese, softened
- 1 tablespoon unsalted butter, softened
- 1 & 1/2 cups powdered sugar (confectioners’ sugar)
- 1/4 cup whole milk
- 1/2 teaspoon vanilla extract
Step-by-Step Directions for Baking Bliss
Follow these detailed instructions carefully to ensure your homemade cinnamon rolls turn out perfectly every time. From mixing the dough to drizzling the final glaze, each step is designed for success.
Step 1: Preparing and Proofing the Dough
Begin by combining your dry ingredients. In a large mixing bowl, or the bowl of a stand mixer, carefully sieve 4 cups of all-purpose flour. Sieving helps to aerate the flour and prevent lumps, contributing to a lighter dough. To the sifted flour, add 1/4 cup of granulated sugar, 2 & 1/2 teaspoons of instant dry yeast, and 1 teaspoon of salt. Mix these dry ingredients thoroughly using a whisk or the paddle attachment of your stand mixer until they are well combined. This ensures even distribution of the yeast and salt throughout the flour mixture.
Next, introduce the wet ingredients. Add 1/2 cup of whole milk, 1/2 cup of water, 1/4 cup of melted unsalted butter, and 1 large egg to the dry mixture. With your stand mixer on low speed, mix everything for approximately 12 minutes. This extended mixing time is crucial for developing the gluten in the dough, which will give your cinnamon rolls their characteristic chewy yet tender texture. The dough will be soft and slightly sticky.
Once mixed, transfer the dough to a lightly floured surface. Knead the dough by hand for about 8-10 minutes. During this process, you’ll feel the dough transform, becoming smooth, elastic, and less sticky. To check for proper kneading, perform the “windowpane test”: stretch a small piece of dough thinly; if you can see light through it without it tearing, it’s ready. Form the dough into a smooth ball.
Lightly grease a clean bowl with a little butter or cooking spray. Place the dough ball in the greased bowl, turning it once to coat the entire surface lightly with grease. This prevents the dough from drying out during proofing. Cover the bowl tightly with plastic wrap or a clean kitchen towel. Find a warm spot in your kitchen – perhaps near a sunny window, above a warm oven, or in a proofer – and let the dough proof for about 1 to 1.5 hours, or until it has visibly doubled in size. This first rise allows the yeast to work its magic, creating a light and airy dough.
After the dough has successfully proofed, gently punch down the gas from the dough. This releases the air bubbles formed during fermentation and prepares the dough for shaping. Transfer the dough back to your lightly floured surface. Using a rolling pin, roll the dough into a large rectangle, aiming for a thickness of about 1/4 to 1/3 inch. A size of approximately 18×12 inches is ideal. Ensure the edges are as straight as possible for uniform rolls.
Now, prepare the filling. In a small bowl, combine 1 cup of brown sugar and 2 tablespoons of ground cinnamon. Make sure your 1/2 cup of unsalted butter is genuinely softened (room temperature is key) so it spreads easily. Evenly spread the softened butter over the entire surface of the rolled-out dough, leaving a small border (about 1/2 inch) along one of the longer edges. This border will help seal the roll. Then, generously and evenly sprinkle the cinnamon-sugar mixture over the buttered dough, gently pressing it down so it adheres.
Step 2: Rolling, Cutting, Baking, and Glazing
Once the filling is spread, it’s time to roll. Starting from the long edge opposite the unbuttered border, gently but firmly roll the dough into a tight log. It’s important to roll it as tightly as possible to ensure beautifully swirled cinnamon rolls. As you reach the end, brush the unbuttered edge with a little water; this acts as a “glue” to seal the seam of the dough, preventing it from unrolling during baking. Pinch the seam firmly to secure it.
With your cinnamon roll log ready, it’s time to cut it into individual rolls. For consistent sizes, you can use a ruler to mark out 16 equal pieces. A sharp, un-serrated knife or, even better, unflavored dental floss or thread can be used for clean cuts without squishing the dough. If using floss, slide it under the log, cross the ends over the top, and pull to cut. You should get approximately 16 pieces, each about 1 to 1.5 inches thick.
Lightly grease a 9×13 inch baking pan (or a similar size). Arrange the cut cinnamon rolls in the prepared baking pan, leaving a small amount of space between each roll. They will expand during the second proofing and baking. Cover the pan loosely with plastic wrap or a clean kitchen towel and let them rest in a warm spot for another 45 minutes to 1 hour. This second proofing (also known as the “final rise”) is critical for achieving those super-fluffy, tender rolls.
While your cinnamon rolls are undergoing their final rise, preheat your oven to 350°F (175°C). Once the rolls have visibly puffed up and are touching each other, they are ready for the oven. Bake them in the preheated oven for 30-35 minutes, or until the tops are golden brown and the rolls are cooked through. Baking times can vary, so keep an eye on them. An internal temperature of about 200-205°F (93-96°C) indicates they are done.
While the cinnamon rolls are baking, prepare the glorious cream cheese glaze. In a medium bowl, combine 1/2 cup of softened cream cheese and 1 tablespoon of softened unsalted butter. Ensure both ingredients are at room temperature for the smoothest result. Using a handheld electric mixer, beat the cream cheese and butter together until the mixture is light, fluffy, and completely smooth, with no lumps of cream cheese remaining. Next, gradually add 1 & 1/2 cups of powdered sugar, 1/4 cup of whole milk, and 1/2 teaspoon of vanilla extract. Continue mixing until the glaze is smooth, creamy, and pourable. If it’s too thick, add a tiny bit more milk; if too thin, add a little more powdered sugar.
As soon as the cinnamon rolls come out of the oven, while they are still warm (but not piping hot), generously pour the prepared cream cheese glaze over them. The warmth of the rolls will allow the glaze to melt slightly and seep into all the delicious crevices, creating an incredibly moist and flavorful treat. Serve immediately and enjoy the pure indulgence of homemade cinnamon rolls!
Tips for Perfect Homemade Cinnamon Rolls
Even with a foolproof recipe, a few expert tips can elevate your cinnamon roll game from good to absolutely phenomenal. Pay attention to these details for consistently perfect results.
- Room Temperature Ingredients: Ensure your milk, water, egg, and especially the butter for the filling and glaze are at room temperature. This helps them combine more smoothly and contributes to a better dough texture and glaze consistency.
- Don’t Rush the Proofing: Yeast needs time and warmth to work. If your kitchen is cool, place the dough in a slightly warm (but not hot) spot. A cold oven with just the light on can create a perfect warm environment. Proper proofing is key to fluffy rolls.
- Measure Flour Correctly: Too much flour can make your rolls dry and tough. The most accurate way to measure flour is by weight using a kitchen scale. If using measuring cups, spoon the flour into the cup and then level it off with a straight edge, rather than scooping directly from the bag.
- Knead Thoroughly: The 8-10 minutes of kneading is essential for gluten development, which gives the rolls their structure and chewiness. Don’t skip or shorten this step!
- Don’t Overbake: Overbaking is the enemy of soft, tender cinnamon rolls. Bake until just golden brown. They might seem slightly underbaked when you pull them out, but they will continue to cook slightly from residual heat.
- Tight Roll for Swirls: Rolling the dough tightly ensures those beautiful, distinct cinnamon swirls. A loose roll will result in a less defined swirl.
Storage and Reheating Instructions
While these homemade cinnamon rolls are best enjoyed fresh and warm from the oven, you can certainly store any leftovers to savor later. Proper storage ensures they remain delicious.
- At Room Temperature: Place cooled cinnamon rolls in an airtight container. They will stay fresh and soft for 1-2 days at room temperature.
- In the Refrigerator: For longer storage, refrigerate your cinnamon rolls in an airtight container for up to 3-4 days. The glaze may firm up, but they will still be delicious.
- Freezing (Baked): To freeze baked cinnamon rolls, allow them to cool completely. You can freeze them glazed or unglazed. Wrap individual rolls tightly in plastic wrap, then place them in a freezer-safe bag or container. They can be frozen for up to 1-2 months. Thaw overnight in the refrigerator before reheating.
- Reheating: For the best experience, reheat individual rolls in the microwave for 15-30 seconds until warm and soft. You can also reheat them in a preheated oven at 300°F (150°C) for 5-10 minutes. If frozen, reheat from frozen in the microwave or cover loosely with foil in the oven until warmed through.
Variations to Explore
Once you’ve mastered the classic, don’t hesitate to get creative! These homemade cinnamon rolls are a fantastic base for various flavor enhancements.
- Nutty Crunch: Add 1/2 cup of finely chopped pecans or walnuts to your cinnamon sugar filling for an extra layer of texture and flavor.
- Orange Zest Delight: Incorporate 1-2 teaspoons of fresh orange zest into the dough or the cream cheese glaze for a bright, citrusy twist that complements the cinnamon beautifully.
- Maple Glaze: For a different kind of sweetness, replace some of the milk in the glaze with pure maple syrup, or add a teaspoon of maple extract.
- Pumpkin Spice Rolls: During autumn, try adding 1-2 teaspoons of pumpkin pie spice to your cinnamon sugar filling for a seasonal treat.
- Mini Cinnamon Rolls: Roll the dough into a smaller rectangle and cut into more pieces (e.g., 24 instead of 16) for bite-sized delights, perfect for parties or portion control. Adjust baking time accordingly.
Conclusion: Indulge in Homemade Bliss
There you have it – a comprehensive guide to crafting the most incredible homemade cinnamon rolls. This recipe promises not just a delicious pastry but a rewarding baking experience that fills your home with warmth and an irresistible aroma. From the moment you mix the dough to the first bite of a warm, gooey roll dripping with creamy glaze, you’ll understand why homemade truly is best. Whether you’re making them for a special occasion, a weekend breakfast, or simply to treat yourself, these fluffy, flavorful cinnamon rolls are guaranteed to bring smiles and satisfaction. So, roll up your sleeves, gather your ingredients, and get ready to bake some magic. Happy baking!