
The Ultimate Guide to Cleaning and Maintaining Your Sewing Machine for Optimal Performance
A well-maintained sewing machine is the cornerstone of any successful sewing project, whether you’re a beginner or an experienced tailor. Regular cleaning isn’t just about keeping your machine looking good; it’s absolutely crucial for its performance, longevity, and the quality of your stitches. Neglecting this simple yet vital task can lead to frustrating issues such as skipped stitches, tension problems, fabric jamming, and even costly breakdowns. By dedicating a little time to proper care, you ensure a smoother, more enjoyable sewing experience and significantly extend the life of your valuable equipment.
Many believe that sewing machine maintenance is a job best left to professionals. However, cleaning and de-fluffing your sewing machine is far easier than you might imagine. With the right tools and a little guidance, you can perform essential maintenance yourself, saving time and money. This comprehensive guide will walk you through the process, empowering you to keep your machine in pristine condition. Remember, always refer to your sewing machine’s specific manual before you begin any maintenance. Your manual is your best friend for model-specific instructions and oiling requirements.
Why Regular Sewing Machine Cleaning is Essential
Understanding the “why” behind regular maintenance can motivate you to keep your sewing machine spotless. Here’s why cleaning is non-negotiable for every sewing enthusiast:
- Prevents Costly Breakdowns: Lint, dust, and thread fragments can accumulate in critical moving parts, causing friction and wear. This increased stress can lead to mechanical failures and expensive repairs or even necessitate a machine replacement.
- Ensures Smooth Operation: A clean machine runs more quietly and smoothly. Free from obstructions, gears and shafts can move unhindered, providing a seamless sewing experience.
- Improves Stitch Quality: Accumulated debris can interfere with bobbin movement, tension discs, and needle bar operation, directly impacting stitch formation. Clean components ensure consistent, even stitches every time.
- Extends Machine Lifespan: Regular cleaning and appropriate oiling reduce wear and tear on internal components, significantly prolonging your sewing machine’s functional life. It’s an investment in your machine’s future.
- Maintains Optimal Tension: Lint trapped in the tension discs can lead to uneven or incorrect thread tension, causing puckering or loose stitches. A clean tension mechanism is key to perfect tension settings. For more insights, you might find this related article helpful: How to Fix Tension in Sewing Machine Quickly.
- Boosts Efficiency: When your machine runs optimally, you spend less time troubleshooting and more time sewing, making your creative process more productive and enjoyable.
When to Clean Your Sewing Machine
The frequency of cleaning depends largely on how often you use your machine and the types of fabrics and threads you use. As a general rule:
- After Every Project: A quick surface wipe-down and removal of the needle plate to clear visible lint.
- Every 8-10 Hours of Use: A more thorough cleaning of the bobbin area, feed dogs, and tension discs.
- At Least Once a Month (for regular users): A deep clean, similar to the steps outlined below, including oiling if your machine requires it.
- If You Notice Issues: If your stitches are uneven, the machine is jamming, or it sounds sluggish, a thorough cleaning should be your first troubleshooting step.
Essential Materials Needed for Cleaning a Sewing Machine:
Before you begin, gather these simple tools. Most are readily available, and some might even come with your machine.
- Screwdriver (Flat-head or Machine-Specific): Essential for removing the needle plate, bobbin case, and other covers. Always use the screwdriver provided with your machine, if available, or one that perfectly fits the screws to prevent stripping.
- Small Cleaning Brush: The most crucial tool for dislodging lint and dust from tight spaces. Many machines come with a small, stiff-bristled brush. You can also use a small paintbrush or a clean, stiff toothbrush. Avoid using a needle or pin, as these can scratch delicate parts.
- Vacuum (Miniature or Hose Attachment): Optional but highly recommended. A small handheld vacuum or the hose attachment of a larger vacuum cleaner can effectively suck up loose lint and dust, making the cleaning process much quicker and cleaner.
- Compressed Air Duster: Use with caution. While effective for blasting out lint, ensure you direct the airflow *away* from the machine’s interior to avoid pushing debris deeper into inaccessible areas. Use short, controlled bursts.
- Lint-Free Cloths: For wiping down surfaces and applying oil. Microfiber cloths work well.
- Sewing Machine Oil (if applicable): Only use high-quality, clear sewing machine oil, specifically designed for this purpose. Never use household oils like WD-40 or cooking oil, as they can gum up the machine.
- Old Fabric Scraps: For testing your machine after cleaning and oiling.
- Camera (Phone): Invaluable for taking pictures during disassembly to aid in reassembly.
How to Clean & De-Fluff Your Sewing Machine: A Step-by-Step Guide
This detailed guide will help you perform a thorough cleaning. Remember to work in a well-lit area and take your time.
Step 1: Preparation and Disassembly
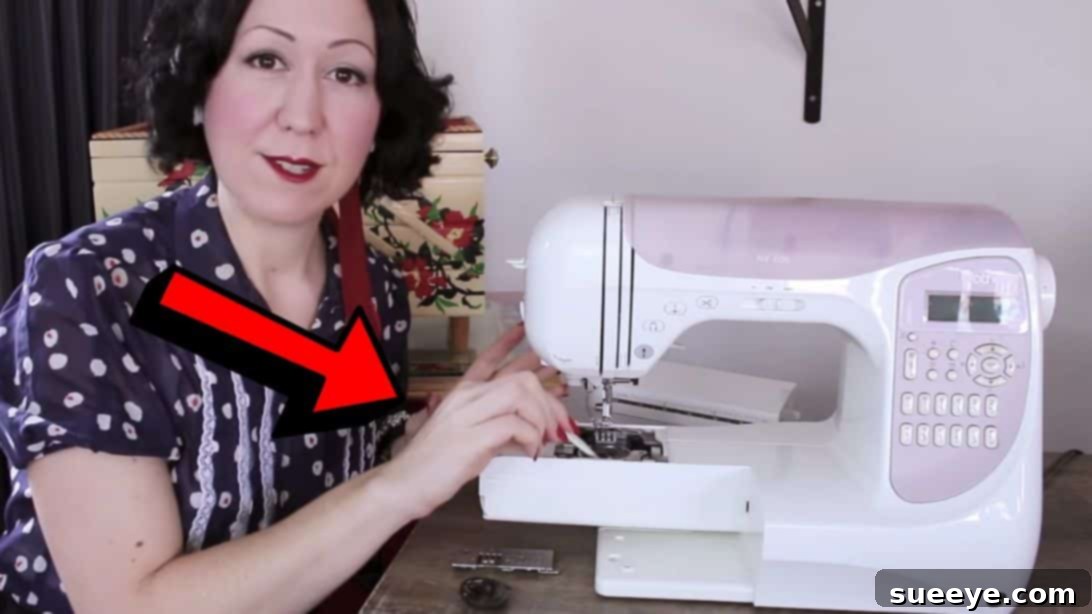
Safety is paramount. Before touching any internal components, always ensure your machine is completely safe. First, turn off or, more importantly, **completely unplug your machine from the power outlet**. This prevents accidental starts and potential injury. Clear your workspace and gather all your tools. Next, begin by carefully removing the top plastic plate (if applicable to your model) and take out the bobbin from its case. Then, use your screwdriver to remove the needle plate, which typically covers the feed dogs. It’s also wise to take out the needle and presser foot at this stage, setting them aside safely. **Crucially, take clear pictures with your phone as you remove each piece.** This visual record will be your best friend when it comes time to put everything back together, ensuring each component returns to its correct position and orientation. Finally, carefully remove the bobbin case and the shuttle hook mechanism (the part that picks up the bobbin thread). These are areas where lint and thread often accumulate heavily.
Step 2: Thorough De-Fluffing and Cleaning
With the critical components exposed, it’s time for the deep clean. Use your small cleaning brush to gently but firmly get into every single nook and cranny. Pay special attention to the feed dogs (the teeth that move the fabric), the bobbin case area, and the shuttle hook. These areas are magnets for lint, dust, and tiny thread fragments that break off during sewing. Sweep away all visible debris. For more stubborn or packed lint, a vacuum cleaner with a small nozzle attachment can be incredibly effective at lifting and collecting fluff without pushing it further into the machine. If using compressed air, direct it carefully to blow debris *out* of the machine, not deeper inside. Take your time, inspect thoroughly, and make sure no stray fibers remain.
Step 3: Oiling Your Machine (If Required)
Not all sewing machines require oiling, and some are factory-sealed or “self-lubricating.” **This is why referring to your manual is non-negotiable.** If your machine’s manual specifies oiling, this is the next critical step. Locate the designated oiling points, usually indicated in the manual or by small red dots on the machine itself. Apply a single drop of **sewing machine oil** to each point. Less is more; over-oiling can lead to oil staining your fabric and attracting more lint. If you don’t have your manual, try searching online by typing your sewing machine model number into Google. Many manufacturers provide free PDF copies of their manuals, which are invaluable resources for maintenance and troubleshooting.
Step 4: Reassembly and Testing
Once you’ve cleaned and oiled (if necessary), it’s time to reassemble your machine. Refer to the pictures you took during disassembly to ensure each part goes back exactly where it belongs. Carefully replace the shuttle hook, bobbin case, needle plate, presser foot, and needle. Make sure all screws are tightened securely but do not overtighten. Once reassembled, plug your machine back in. Before starting a new project, it’s highly recommended to run a few test stitches on a scrap piece of fabric. This helps distribute any new oil and ensures all components are correctly aligned and functioning. Look for smooth stitching and listen for any unusual noises.
Common Cleaning Mistakes to Avoid
While DIY cleaning is beneficial, be aware of these common pitfalls:
- Ignoring the Manual: The most significant mistake. Your manual is specific to your machine and provides crucial information on oiling points, disassembly, and specific care instructions.
- Over-Oiling: Too much oil can gum up the machine and seep onto your fabric, causing stains. A single drop per oiling point is usually sufficient.
- Using the Wrong Oil: Only use high-quality sewing machine oil. Other oils can attract lint, become sticky, or damage internal components.
- Using Harsh Chemicals: Never use solvents, spray cleaners, or harsh chemicals on your machine’s internal parts. These can dissolve lubricants, corrode plastic, or damage finishes.
- Blowing Air Directly Into the Machine: While compressed air can be useful, avoid blowing directly into the machine without a clear exit path for the lint. You might just push debris deeper into unreachable areas.
- Not Unplugging the Machine: Always, always unplug your machine before cleaning to prevent accidental activation and injury.
- Forgetting to Reinstall Parts: Double-check that all components, especially the bobbin case and needle plate, are correctly reinstalled before operating the machine.
Tips for Ongoing Sewing Machine Maintenance
Beyond the deep clean, a few simple habits can keep your machine running smoothly:
- Cover Your Machine: When not in use, cover your sewing machine with a dust cover to prevent dust and lint from settling on and inside it.
- Use Quality Thread: Cheap threads often produce more lint, leading to more frequent cleaning needs. Invest in good quality thread that minimizes lint production.
- Change Needles Regularly: Dull or bent needles can stress your machine and lead to skipped stitches or fabric damage. Change your needle after every 8-10 hours of sewing, or at the start of a new major project.
- Wipe Down Regularly: A quick wipe of the exterior and around the needle area with a lint-free cloth after each use can prevent buildup.
- Store Properly: Keep your machine in a stable, dry environment, away from extreme temperatures and humidity.
*All these amazing images are thanks to Evelyn Wood via YouTube. Do visit her channel to see more videos like this!
Conclusion: Empowering Your Sewing Journey
Mastering the art of sewing machine cleaning and maintenance is an empowering step for any crafter. It transforms your sewing experience from one fraught with potential technical issues into a smooth, reliable, and more enjoyable creative journey. By following these straightforward steps, you not only ensure optimal performance and stitch quality but also safeguard your investment by significantly extending your machine’s lifespan. Remember, a little proactive care goes a long way in preventing headaches and keeping your needle flying through fabric with precision and ease. So, roll up your sleeves, grab your brush, and give your trusted sewing companion the attention it deserves. Your future projects (and your wallet!) will thank you.