
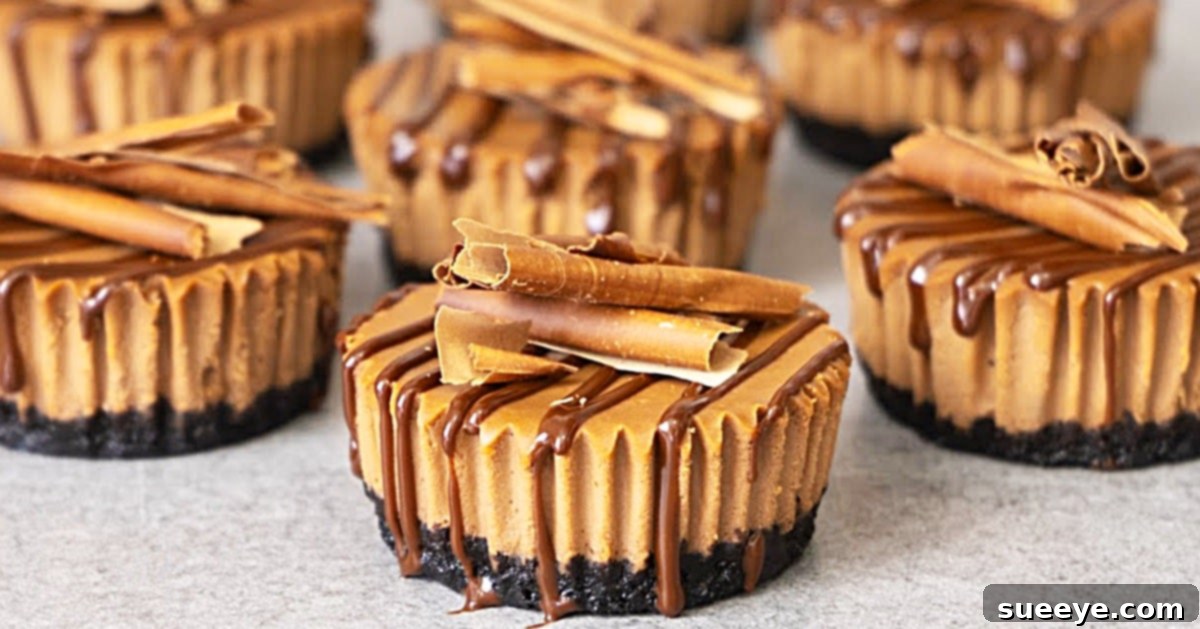
Are you searching for the ultimate bite-sized dessert that combines rich chocolate with creamy cheesecake and a delightful cookie crunch? Look no further! Mini chocolate cheesecakes are the answer to your sweet cravings, offering a perfect blend of elegance and indulgence in every single bite. These individual treats are not only incredibly delicious but also visually stunning, making them ideal for any occasion, from casual gatherings to sophisticated luncheons or even as thoughtful homemade gifts.
The quest for a truly perfect mini cheesecake led us to an exceptional video recipe tutorial for mini chocolate cheesecakes by El Mundo Eats on YouTube. This guide immediately captured our attention, promising a straightforward path to dessert perfection. El Mundo Eats has meticulously crafted a tutorial that is not only easy to follow but also a pure joy to watch, making the baking process an absolute pleasure. The moment we saw these decadent mini chocolate cheesecakes, we knew we had to try them immediately. What truly sets this recipe apart, making it an instant classic, is the ingenious use of Oreo cookies for the crust, elevating the flavor and texture to an irresistible level. Prepare to impress your friends and family with these exquisite, crowd-pleasing desserts that taste as incredible as they look.
Whether you’re a seasoned baker or just starting your culinary journey, this recipe for mini chocolate cheesecakes is designed for success. We’ll guide you through each step, ensuring you create a batch of perfectly portioned, rich, and creamy cheesecakes that will undoubtedly become a staple in your dessert repertoire. Get ready to transform simple ingredients into a sophisticated treat that delights the senses and satisfies even the most discerning sweet tooth.
Ingredients: Crafting Perfection from Simple Components
The secret to an outstanding dessert often lies in the quality and proper preparation of its ingredients. For these mini chocolate cheesecakes, each component plays a crucial role in achieving that coveted creamy texture, rich chocolate flavor, and satisfyingly crisp crust. Using room temperature ingredients for the filling, for instance, is not merely a suggestion but a critical step to ensure a smooth, lump-free batter. Let’s explore the essential items you’ll need to bring these delightful treats to life.
The Recipe For The Crust:
- 7 ounces of Oreo cookies: The foundation of our mini cheesecakes! Oreos provide a wonderful chocolatey base with a hint of vanilla cream, creating a perfect contrast to the rich cheesecake filling. Using the entire cookie, including the cream, contributes to the unique flavor profile and helps bind the crust together.
- 3 tablespoons of butter (melted): Unsalted butter is generally preferred for baking, allowing you to control the salt content in the overall recipe. Melting the butter is key, as it acts as the binding agent, holding the crushed Oreo crumbs together to form a firm, delicious crust that won’t crumble when you bite into it.
Recipe For The Chocolate Cheese Filling:
- 10 ounces of (full-fat) cream cheese (let stand till room temperature): This is the star of our cheesecake! Full-fat cream cheese provides the characteristic rich, tangy flavor and luxurious creamy texture. It’s imperative that the cream cheese is at room temperature before mixing. Cold cream cheese will result in a lumpy batter, no matter how much you try to beat it, which affects the final smoothness of your cheesecake.
- 1/3 cup sugar: Granulated sugar not only sweetens the cheesecake but also contributes to its structure and tender crumb. It balances the tanginess of the cream cheese and sour cream, creating a harmonious flavor profile.
- 1 cup sour cream: Sour cream is a fantastic addition to cheesecake batter. It introduces a delightful tanginess that cuts through the richness of the chocolate and cream cheese, brightening the overall flavor. Furthermore, it adds moisture and helps create that incredibly smooth, silken texture we all love in a classic cheesecake. Ensure it’s also at room temperature.
- 1 teaspoon vanilla extract: A staple in almost all dessert recipes, vanilla extract enhances the flavors of both the chocolate and the cream cheese, adding a warm, aromatic note that brings all the ingredients together beautifully. Use pure vanilla extract for the best results.
- 1/4 teaspoon salt: Just a pinch of salt is vital in baking. It doesn’t make the cheesecake taste salty but rather amplifies the other flavors, particularly the chocolate, and balances the sweetness, preventing the dessert from tasting flat or overly sweet.
- 4 ounces of semi-sweet chocolate (or chocolate chips), melted and cooled slightly: This is where our mini cheesecakes get their deep, irresistible chocolate flavor. Semi-sweet chocolate provides the perfect balance of bitterness and sweetness. You can use a high-quality chocolate bar, finely chopped, or good-quality chocolate chips. Melting it gently and allowing it to cool slightly before incorporating ensures it blends smoothly without curdling the other ingredients.
- 2 large eggs (let stand till they are room temperature): Eggs serve as a critical binder in cheesecake, providing structure and richness. Like the cream cheese, it’s crucial for the eggs to be at room temperature. Cold eggs don’t emulsify as well with other ingredients, potentially leading to a less uniform batter and a denser cheesecake. Gently incorporating them is key to preventing cracks during baking.
Directions: A Step-by-Step Guide to Irresistible Mini Chocolate Cheesecakes
Creating these delightful mini chocolate cheesecakes is a rewarding experience, and with a clear, step-by-step approach, you’ll find the process surprisingly simple and enjoyable. The excellent video recipe tutorial for mini chocolate cheesecakes by El Mundo Eats on YouTube offers invaluable visual guidance, but we’ll walk you through each critical stage here, ensuring every detail is covered for your baking success. Precision and patience are your best friends when making cheesecakes, guaranteeing a smooth, creamy result.
Step 1: Preparing the Irresistible Oreo Crust
The foundation of any great cheesecake begins with its crust, and for these mini delights, the Oreo crust is truly a game-changer. It’s simple to make and adds a phenomenal chocolatey crunch that perfectly complements the creamy filling.
- Crushing the Oreos: Begin by finely crushing your 7 ounces of Oreo cookies. You can achieve this in a few ways:
- Food Processor Method: The quickest and most efficient way is to pulse the cookies in a food processor until they resemble fine, even crumbs. Ensure there are no large chunks remaining, as this will affect the crust’s consistency.
- Manual Method: If you don’t have a food processor, place the Oreos in a sturdy zip-top bag, seal it, and use a rolling pin or the bottom of a heavy pan to crush them into fine crumbs. This method can be quite therapeutic!
- Mixing with Butter: Once your Oreo crumbs are ready, transfer them to a medium-sized bowl. Add the 3 tablespoons of melted butter. Stir thoroughly with a spoon or your hands until all the crumbs are evenly moistened and resemble wet sand. The butter acts as the binding agent, ensuring the crust holds its shape.
- Forming the Crusts: Line a 12-cup muffin tin with paper cupcake liners. Evenly distribute the Oreo mixture among the 12 liners, typically about 1 to 1.5 tablespoons per liner. Using the back of a spoon, or even your thumb, firmly press the crumb mixture into the bottom of each liner. Compacting the crust well is crucial for it to stay together after baking. For best results, you can chill the prepared crusts in the refrigerator for about 10-15 minutes while you prepare the filling.
Step 2: Crafting the Silky Chocolate Cheesecake Filling
The heart of these mini cheesecakes is their rich, velvety chocolate filling. Achieving the perfect texture requires careful mixing and ensuring all ingredients are at room temperature.
- Melting the Chocolate: Gently melt the 4 ounces of semi-sweet chocolate. You can do this using a double boiler or carefully in a microwave. If using a microwave, heat in 30-second intervals, stirring well after each, until smooth. Let the melted chocolate cool slightly before adding it to the batter to prevent it from seizing or cooking the eggs.
- Creaming the Cream Cheese: In a large mixing bowl, using an electric mixer, beat the room temperature cream cheese on medium speed until it is completely smooth and free of lumps. This takes a few minutes and is vital for a silky cheesecake.
- Adding Sugar and Sour Cream: Gradually add the 1/3 cup of sugar to the cream cheese, beating until well combined and fluffy. Then, incorporate the room temperature sour cream, vanilla extract, and salt. Mix on low speed until just combined, scraping down the sides of the bowl as needed. Avoid overmixing at this stage.
- Incorporating Chocolate and Eggs: Pour the slightly cooled melted chocolate into the cream cheese mixture and mix on low speed until fully incorporated and the batter is uniformly chocolate-colored. Finally, add the two room temperature large eggs, one at a time, mixing on very low speed just until each egg is incorporated. **Crucially, do not overmix once the eggs are added.** Overmixing can incorporate too much air, leading to a cracked cheesecake surface.
Step 3: Assembling, Baking, and Cooling
With the crust and filling ready, it’s time for assembly and the magic of baking. Achieving the perfect bake ensures a creamy texture and prevents cracks.
- Filling the Cups: Spoon or pour the chocolate cheesecake batter evenly over the Oreo crusts in each paper pastry cup. Fill each cup about two-thirds to three-quarters full, leaving a little room for expansion.
- Baking to Perfection: Preheat your oven to 275 degrees Fahrenheit (135 degrees Celsius). Place the muffin tin with the filled cheesecake cups into the preheated oven. Bake for approximately 25-30 minutes, or until the edges are set and the center of the cheesecakes still has a slight jiggle when gently shaken. Overbaking can lead to a dry cheesecake and cracking.
- Cooling Gradually: Once baked, turn off the oven and prop the oven door open slightly, leaving the cheesecakes inside for about 15-20 minutes. This slow cooling process helps prevent drastic temperature changes that can cause cracks. After this initial cooling, remove the muffin tin from the oven and let the mini cheesecakes cool completely on a wire rack at room temperature.
Step 4: The Crucial Chill and Serving
Patience is key for the final step! Chilling is non-negotiable for cheesecake, allowing it to fully set and for flavors to meld and deepen.
- Chilling for Optimal Flavor and Texture: Once completely cooled to room temperature, transfer the muffin tin with the mini cheesecakes to the refrigerator. Chill for at least 4 hours, or preferably overnight. This chilling period is essential for the cheesecakes to firm up, develop their signature creamy texture, and for the flavors to fully bloom.
- Serving: Once thoroughly chilled, gently remove the mini cheesecakes from their liners. You can serve them plain for a classic taste, or get creative with toppings! A dollop of whipped cream, a dusting of cocoa powder, fresh berries, or a drizzle of chocolate ganache would all be exquisite additions.
These mini chocolate cheesecakes are a true testament to how simple ingredients, combined with careful technique, can create an extraordinary dessert. When we served them to our neighborhood friends during our morning coffee gathering, they were an instant hit. Everyone absolutely adored the rich chocolate flavor, the creamy texture, and the delightful crunch of the Oreo crust. They were not just delicious but also perfectly portioned, making them easy to enjoy without any fuss. This recipe is destined to become a firm favorite, perfect for sharing joy, one bite-sized cheesecake at a time.
Tips for Cheesecake Perfection:
- Room Temperature is Key: Always ensure cream cheese, sour cream, and eggs are at room temperature. This prevents lumps and ensures a smooth, uniform batter.
- Don’t Overmix: Mix the batter only until just combined, especially after adding the eggs. Overmixing can incorporate too much air, leading to cracks during baking.
- Water Bath (Optional but Recommended): For even more tender, crack-free cheesecakes, you can bake them in a water bath. Place your muffin tin inside a larger baking pan, then fill the larger pan with about an inch of hot water before placing it in the oven. This creates a moist baking environment.
- Storage: Store leftover mini cheesecakes in an airtight container in the refrigerator for up to 3-4 days. They can also be frozen for longer storage; wrap individually in plastic wrap, then place in a freezer-safe bag for up to 1 month. Thaw in the refrigerator before serving.
- Flavor Variations: While these chocolate cheesecakes are divine, feel free to experiment! You could use different cookie crumbs for the crust (e.g., graham crackers, chocolate chip cookies), or swirl in some caramel or raspberry sauce into the chocolate filling before baking for an extra layer of flavor.
Embrace the joy of baking and treat yourself and your loved ones to these absolutely delectable mini chocolate cheesecakes. They are a testament to how simple ingredients can transform into a gourmet experience, making every occasion a little sweeter and a lot more special.