
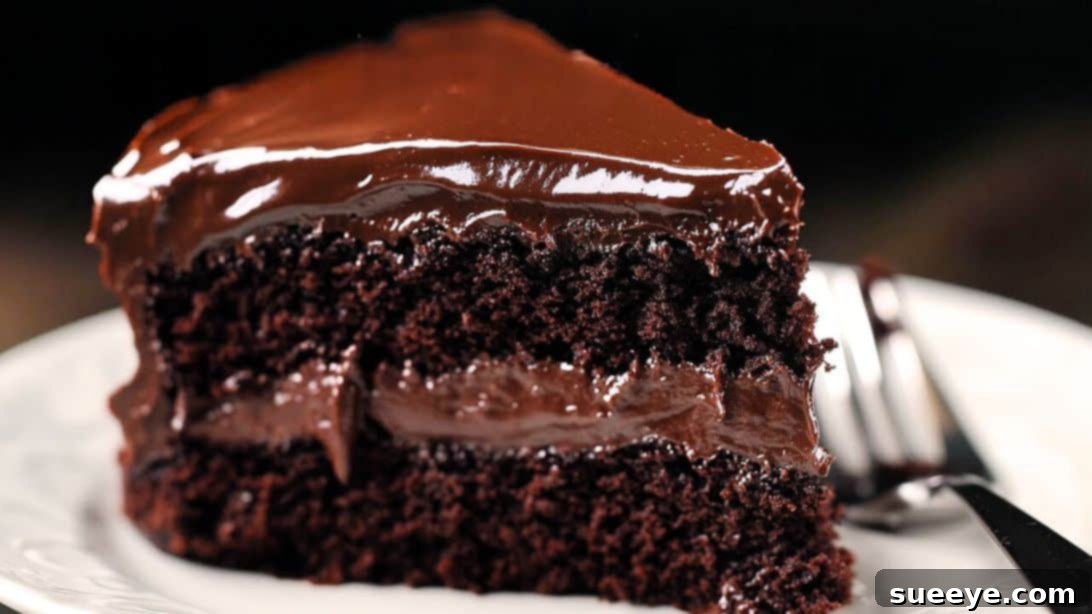
Prepare to bake what might just be the finest chocolate cake you’ve ever tasted – and certainly the best you’ll ever make at home! This isn’t just any cake; it’s a sublime creation that perfectly balances an incredibly moist crumb with a decadent, fudgy texture, all wrapped in an intensely chocolatey flavor. Forget those dry, uninspired store-bought versions; this homemade masterpiece sets a new standard for chocolate indulgence. Its rich, deep flavor and luscious consistency will have everyone asking for a second slice, making it the ultimate treat for any occasion.
What makes this **easy chocolate cake recipe** truly remarkable is its simplicity. You don’t need exotic ingredients or complicated techniques. If you enjoy baking, chances are your pantry already holds most of the fundamental items required for this delightful creation. From granulated sugar and all-purpose flour to unsweetened cocoa powder, these everyday staples transform into something extraordinary with just a few straightforward steps. This makes it an ideal choice for both seasoned bakers and enthusiastic beginners looking for a guaranteed success story in the kitchen.
This recipe is designed to be fail-proof, delivering consistent, mouth-watering results every time. It’s perfect for elevating birthday parties, adding a touch of elegance to family gatherings, celebrating special milestones, or simply indulging in a luxurious weekend dessert. Imagine the smiles when you present a beautifully frosted, towering chocolate cake that tastes even better than it looks! We highly recommend trying CookingAtHome’s fantastic guide to this moist and fudgy chocolate cake; it’s an experience absolutely worth crafting.
RELATED BAKING GUIDES:
- Best Crumb Cake Recipe: A Sweet Morning Indulgence
- Elevate Your Dessert: Delicious Coffee and Rum Cake Recipe
The Ultimate Moist and Fudgy Chocolate Cake: Essential Ingredients
Crafting the perfect chocolate cake starts with a careful selection of ingredients. While this recipe utilizes common pantry staples, understanding their roles is key to achieving that signature moist and fudgy texture. Ensure all your ingredients are at room temperature unless otherwise specified, as this helps them emulsify properly, leading to a smoother, more uniform batter.
Cake Batter Essentials:
- 2 cups of granulated sugar: Provides sweetness and contributes to the cake’s moistness.
- 1 3/4 cups of all-purpose flour: The structural backbone of the cake. Sifting is recommended for a lighter texture.
- 1 cup of unsweetened cocoa powder: The star ingredient, delivering that rich chocolate flavor. Choose a good quality cocoa for the best taste.
- 1 heaping teaspoon of baking powder: A leavening agent that helps the cake rise and achieve a tender crumb.
- 1 heaping teaspoon of baking soda: Another leavening agent, activated by the acidic ingredients (like cocoa and coffee), ensuring a light and airy texture.
- 1/3 teaspoon of salt: Balances the sweetness and enhances the overall chocolate flavor. Don’t skip it!
- 2 large eggs: Act as binders, provide moisture, and contribute to the cake’s structure and richness. Ensure they are at room temperature.
- 1 cup of milk: Adds moisture and richness to the batter. Whole milk is recommended for the best results.
- 1/2 cup of vegetable oil: Contributes significantly to the cake’s incredible moistness and tenderness. Unlike butter, oil remains liquid at room temperature, keeping the cake soft longer.
- 1 teaspoon of instant coffee powder or espresso powder: This secret ingredient doesn’t make the cake taste like coffee; instead, it deepens and intensifies the chocolate flavor, making it truly stand out.
- 1 cup of boiling water: Helps to “bloom” the cocoa powder, releasing its full flavor, and creates a beautifully moist batter.
- 2 teaspoons of vanilla extract: A classic flavor enhancer that complements the chocolate beautifully.
Decadent Chocolate Frosting:
This rich, silky smooth chocolate frosting perfectly complements the cake, adding another layer of luxurious chocolate flavor and a beautiful finish. Its creamy texture makes it easy to spread and a joy to eat.
- 3 egg yolks: Provide richness and help create a custardy base for the frosting.
- 1 heaping tablespoon of sugar: Sweetens the frosting and aids in its smooth consistency.
- 2/3 cup of heavy cream: Contributes to the frosting’s luxurious creaminess and smooth texture.
- 2 chocolate bars (approximately 7-8 oz or 200-225g), chopped: The primary flavor component. Use good quality dark or semi-sweet chocolate for the best results. Chopping ensures even melting.
Light and Airy Whipped Cream Layer:
A touch of freshly whipped cream adds a delightful contrast to the rich chocolate, offering a lighter, airy element that elevates the entire dessert. Ensure your cream is very cold for optimal whipping.
- 2/3 cup of heavy cream (chilled): Crucial for achieving stiff, fluffy peaks. Keep it in the fridge until you’re ready to whip.
- 1 heaping tablespoon of sugar: Adds just enough sweetness to the whipped cream without overpowering the chocolate.
How to Make the Best Moist and Fudgy Chocolate Cake: Step-by-Step Guide
Baking this incredible chocolate cake is a rewarding experience, and following these detailed steps will ensure a flawless result. Pay attention to the nuances in each stage, from preparing the dry ingredients to perfectly frosting your masterpiece.
Step 1: Prepare the Dry Ingredients
In a large mixing bowl, combine the granulated sugar. Next, meticulously sift in the all-purpose flour, unsweetened cocoa powder, baking soda, baking powder, and salt. Sifting is a crucial step that not only removes any lumps but also aerates the dry ingredients, leading to a lighter, more tender cake crumb. Once all the dry ingredients are in, whisk them thoroughly for about 1-2 minutes until they are perfectly combined and uniform in color. This ensures that the leavening agents and flavorings are evenly distributed throughout the batter.
Step 2: Incorporate the Wet Ingredients (Initial Mix)
Create a generous well in the center of your dry ingredient mixture. Into this well, carefully add the two large eggs (at room temperature), vegetable oil, and milk. Begin gently whisking the ingredients from the center outwards, gradually incorporating the dry ingredients into the wet ones. Continue whisking until just combined. Now, add the vanilla extract and whisk again until the batter is smooth and free of any visible lumps. It’s incredibly important not to overmix at this stage; overmixing can develop the gluten in the flour, leading to a tough and dry cake. Mix just until everything is incorporated.
Step 3: Prepare the Coffee Solution
In a separate mug or heat-proof bowl, add the instant coffee powder (or espresso powder) to the cup of boiling water. Stir well until the coffee is completely dissolved. This hot coffee solution is magical for chocolate cakes; it doesn’t make your cake taste like coffee but instead reacts with the cocoa powder to deepen and intensify its chocolate flavor, making it incredibly rich and vibrant. It also contributes significantly to the cake’s moistness.
Step 4: Prepare Your Baking Pans
This recipe uses two round baking pans, typically 8 or 9 inches in diameter. Begin by generously greasing the insides of both pans with butter or baking spray, ensuring all sides are well-coated. This prevents the cake from sticking. Next, line the bottom of each pan with a circle of parchment paper. This parchment barrier provides an extra layer of non-stick protection and ensures easy removal of your delicate cake layers after baking. A properly prepared pan is key to a beautiful, intact cake.
Step 5: Combine Wet and Dry Batters with Coffee
Gradually pour the hot coffee solution into your prepared cake batter, adding it little by little and mixing gently after each addition. You’ll notice the batter might appear quite runny at this stage, which is perfectly normal and exactly what we’re aiming for. Do not be alarmed by the thin consistency; this is crucial for the cake’s signature moist and fudgy texture. The hot water “blooms” the cocoa, releasing its full flavor potential and creating a super-hydrated batter that bakes into an exceptionally tender cake. Continue mixing until the coffee is fully incorporated and the batter is smooth.
Step 6: Bake the Cake Layers
Carefully divide the runny chocolate cake batter evenly between your two prepared baking molds. To eliminate any trapped air bubbles that could create large pockets in your cake, gently tap each pan a few times on your countertop. This also helps settle the batter evenly. Place the pans into a 350°F (175°C) preheated oven. Bake for approximately 30 minutes. To ensure even baking, if your oven rack isn’t wide enough for both pans side-by-side, stagger them slightly on different levels to allow for proper air circulation. The cakes are done when a toothpick inserted into the center comes out clean or with moist crumbs attached, but no wet batter. Avoid opening the oven door frequently, as this can cause the cakes to sink.
Step 7: Prepare the Fluffy Whipped Cream
For the perfect whipped cream, start with a very cold bowl and very cold heavy cream. You can even chill your whisk attachment for a few minutes beforehand. Pour the chilled heavy cream into the cold bowl and begin whisking on low speed until it starts to thicken slightly. Gradually add the heaping tablespoon of sugar as you continue whisking, then increase the speed to medium. Whip for several minutes, patiently observing the cream transform. You’re looking for the cream to thicken significantly and form “stiff peaks” – when you lift the whisk, the peaks should hold their shape firmly. Be careful not to over-whip, as it can quickly turn into butter.
Step 8: Craft the Decadent Chocolate Frosting Base
In a medium saucepan, combine the egg yolks and sugar. Whisk vigorously until the mixture is smooth and the sugar is well incorporated. Next, pour in the heavy cream and stir until everything is perfectly combined. Place the saucepan on the stove over medium heat. It’s crucial to keep stirring continuously as the mixture heats up. Cook the mixture until it visibly thickens to a custard-like consistency, coating the back of a spoon. This process is similar to making a crème anglaise. Be extremely careful not to let it come to a boil, as this can curdle the egg yolks. Once thickened, immediately remove the pan from the stove and add the finely chopped chocolate bars. The residual heat from the cream mixture will melt the chocolate. Stir constantly until the chocolate is completely smooth and glossy, creating a rich, luscious base for your frosting.
Step 9: Gently Fold the Chocolate Mixture into Whipped Cream
Allow the melted chocolate mixture from Step 8 to cool down slightly – it should still be warm but not hot, to avoid deflating the whipped cream. Then, with a gentle hand, gradually fold this rich chocolate mixture into your prepared whipped cream. Use a spatula and a gentle, cutting, and folding motion to combine the two. The goal is to incorporate the chocolate without losing the airiness and volume of the whipped cream. This careful folding creates a light yet incredibly flavorful and airy chocolate frosting that is truly irresistible.
Step 10: Cool and Unmold the Cake Layers
Once your cake layers are baked to perfection, remove them from the oven. It’s vital to let them cool in their molds for about 10 to 15 minutes on a wire rack. This initial cooling period allows the cakes to firm up slightly, making them less fragile and easier to handle. After this time, run a thin spatula or knife carefully around the edges of each cake to loosen it from the pan. Then, gently invert the cake onto the wire rack. Tap the bottom of the pan lightly if needed to encourage release. Once unmolded, carefully peel off the parchment paper from the bottom of each cake layer. Allow the cakes to cool completely on the wire rack before frosting. Attempting to frost a warm cake will result in a melted, messy frosting.
Step 11: Assemble and Frost Your Masterpiece
Once both cake layers are completely cool, place one layer on your desired cake stand or serving plate. Using an offset spatula or knife, generously spread a thick, even layer of your decadent chocolate frosting over the top of this first layer. Ensure it reaches the edges. Carefully place the second cake layer on top, aligning it perfectly. Now, cover the entire cake – top and sides – with the remaining frosting. For a smooth finish, use your spatula to create an even coat. For a rustic look, you can swirl the frosting. Don’t be afraid to be generous with the frosting; it’s what makes this cake truly irresistible. You can also pipe decorative borders or swirls if desired.
Expert Baking Tips for a Perfect Moist and Fudgy Chocolate Cake
Achieving the perfect moist and fudgy chocolate cake every time involves a few simple yet crucial tips. These professional insights will help you avoid common pitfalls and ensure your cake is always a showstopper.
- Room Temperature Ingredients: This cannot be stressed enough! Eggs, milk, and any other dairy should be at room temperature. They combine more easily and create a smoother, more emulsified batter, leading to a finer crumb and better texture.
- Accurate Measuring: Baking is a science, and precision matters. Use proper measuring cups for dry ingredients (levelled off) and liquid measuring cups for wet ingredients. For flour, spoon it into the measuring cup and level it off rather than scooping directly, which can compact it and lead to too much flour.
- Don’t Overmix: After adding the wet ingredients to the dry, mix only until just combined. Overmixing develops gluten, which can result in a tough, dense cake. A few small lumps in the batter are acceptable.
- Quality Cocoa Powder: The flavor of your chocolate cake largely depends on the cocoa powder. Invest in a good quality unsweetened cocoa powder (natural or Dutch-processed, as long as it aligns with the leavening agents – this recipe works well with natural cocoa due to baking soda).
- The Magic of Coffee: As mentioned, coffee doesn’t make your cake taste like coffee, but it significantly enhances the chocolate flavor. Don’t skip this ingredient!
- Proper Pan Preparation: Greasing and lining your pans with parchment paper is essential for easy release and prevents your beautiful cake from sticking, especially with such a moist batter.
- Oven Temperature and Doneness: Ensure your oven is fully preheated to the correct temperature. Ovens can vary, so an oven thermometer can be a worthy investment. To check for doneness, insert a toothpick into the center of the cake; it should come out clean or with a few moist crumbs, but no wet batter.
- Cool Completely: Resist the urge to frost a warm cake! Warm cake will melt your frosting into a gooey mess. Allow your cake layers to cool completely on a wire rack for several hours, or even overnight, before frosting.
- Chilling for Whipped Cream: For perfect stiff-peaked whipped cream, ensure your heavy cream, bowl, and whisk are thoroughly chilled. This speeds up the whipping process and yields better results.
Moist and Fudgy Chocolate Cake: A Dessert Masterpiece Awaits!
Congratulations, you’re now equipped with the ultimate recipe and expert tips to create a truly unforgettable **moist and fudgy chocolate cake**. This isn’t just a dessert; it’s an experience – a rich, deeply satisfying indulgence that will delight your senses and impress your guests. From its incredibly tender crumb to its luxurious, melt-in-your-mouth chocolate frosting, every element of this cake is designed for pure enjoyment.
Whether you’re celebrating a special occasion, treating your family to something extraordinary, or simply satisfying a deep chocolate craving, this homemade chocolate cake is guaranteed to be a hit. Its ease of preparation, combined with its unparalleled flavor and texture, makes it a recipe you’ll return to again and again. So, gather your ingredients, follow these simple steps, and prepare to be amazed by the deliciousness you can create right in your own kitchen. Enjoy every decadent bite!