
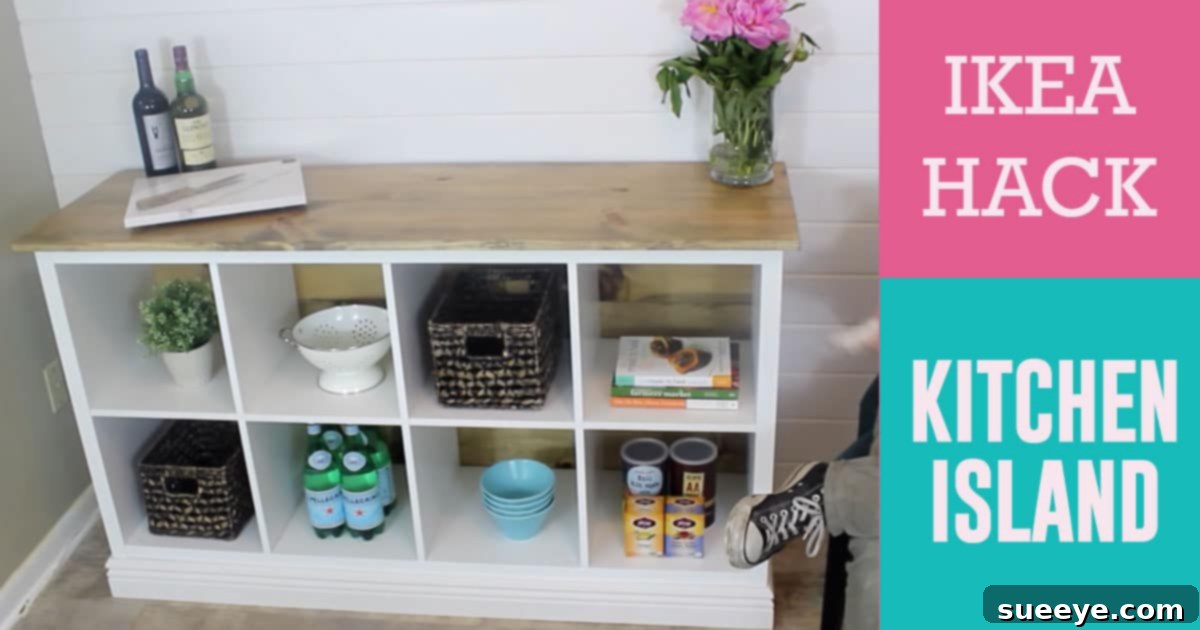
Transform Your Kitchen: The Ultimate IKEA Hack Island Tutorial for Enhanced Style and Functionality
Do you dream of a more functional, spacious, and stylish kitchen but find traditional renovation costs daunting? Many homeowners face the challenge of limited counter space, insufficient storage, or simply a kitchen layout that doesn’t quite meet their needs. Imagine a central hub where you can prep meals, enjoy family breakfasts, or even have the kids tackle their homework. A kitchen island can be the transformative solution you’re looking for, and with the power of an IKEA hack, achieving this dream is more accessible and affordable than ever. This comprehensive guide will walk you through creating your own custom kitchen island, leveraging IKEA’s versatile and budget-friendly components, to elevate your home’s most important space.
My own kitchen, though cozy, presented similar challenges. The absence of a dedicated island left me constantly searching for extra room during baking marathons or extensive meal preparations. Every pre-built island I considered seemed either prohibitively expensive or simply impractical for my specific needs. That’s when we discovered the incredible potential of an IKEA hack. It truly made all the difference, providing not just additional workspace but also much-needed storage and a beloved gathering spot for our family. It’s a project that my husband and I embarked on together, leveraging his woodworking skills and our shared vision for a more efficient kitchen. The result is an island that serves multiple purposes, from a spacious baking station to a favorite afternoon homework spot for our children, proving that custom solutions don’t have to break the bank.
Why Choose an IKEA Hack for Your Kitchen Island?
The concept of “IKEA hacking” has revolutionized home improvement, allowing individuals to customize mass-produced furniture into bespoke pieces that perfectly fit their style and functional requirements. For a kitchen island, this approach offers unparalleled advantages:
- Unbeatable Affordability: Custom kitchen islands can cost thousands. By utilizing IKEA’s modular systems, you can significantly reduce expenses while still achieving a high-end look.
- Design Flexibility: IKEA offers a vast range of cabinets, shelves, and components in various sizes and finishes. This allows for endless customization possibilities, ensuring your island perfectly complements your existing kitchen decor.
- DIY Empowerment: Building your own island, even with some guidance, provides immense satisfaction. It’s a project that can be tackled by determined DIYers, often resulting in a piece that feels uniquely yours.
- Optimized Storage: Many IKEA systems are designed with smart storage in mind, offering a variety of drawer, cabinet, and open shelving options to keep your kitchen organized and clutter-free.
- Personalized Aesthetic: From choosing the perfect countertop to selecting unique hardware and paint finishes, an IKEA hack empowers you to infuse your personality into your kitchen’s centerpiece.
The Multifaceted Benefits of a Kitchen Island
Beyond its aesthetic appeal, a well-designed kitchen island is a powerhouse of functionality, addressing several common kitchen woes:
Expanded Counter Space
Perhaps the most immediate and appreciated benefit, an island provides invaluable additional surface area. Whether you’re kneading dough, chopping vegetables, assembling a complex dish, or simply needing more room to spread out during meal prep, the extra counter space is a game-changer. It frees up your main countertops, making your kitchen feel less cluttered and more efficient.
Enhanced Storage Solutions
One of the key advantages of building your own island is the ability to integrate storage tailored to your specific needs. Incorporate deep drawers for pots and pans, pull-out shelves for small appliances, open shelving for cookbooks or decorative items, or traditional cabinets for pantry overflow. This targeted storage helps to declutter your existing cupboards and makes everything more accessible.
A Dedicated Dining and Seating Area
Transform your island into a casual dining spot, a breakfast bar, or a convenient area for children’s activities. By extending the countertop slightly beyond the base, you can comfortably tuck stools underneath, creating a relaxed environment for quick meals, snacks, or even socializing while you cook. This feature adds immense value, especially in open-plan living spaces or homes without a formal dining room.
The Heart of Your Home: A Social Hub
Kitchens are naturally magnets for gathering. An island amplifies this social aspect, providing a central point where family and friends can congregate. Guests can comfortably chat with the chef, children can do homework while parents prepare dinner, and everyone can feel more connected to the kitchen’s activities. It fosters a sense of community and warmth, making your kitchen truly the heart of your home.
Improved Kitchen Workflow
Strategically placed, an island can significantly improve the “kitchen triangle” – the path between the refrigerator, sink, and stove. It can act as an intermediate landing zone for groceries, a prep area near the sink, or a serving station adjacent to the dining area, streamlining your cooking and entertaining processes.
Planning Your IKEA Hack Kitchen Island: The Foundation of Success
Successful DIY projects begin with meticulous planning. Before you even think about assembling an IKEA cabinet, take the time to conceptualize and measure:
Measure Your Space Meticulously
This is arguably the most critical step. Measure the total available floor space where you envision your island. Crucially, factor in adequate clearance around the island for comfortable movement. A minimum of 36 inches (approx. 90 cm) of walkway space on all sides is generally recommended, but 42 inches (approx. 105 cm) is ideal, especially in high-traffic areas or where appliances like dishwashers or oven doors need to open fully. Consider the depth and width of your chosen IKEA base units, and remember to account for any countertop overhangs.
Determine Your Primary Needs and Desires
What functions do you want your island to serve most? Do you desperately need more storage for small appliances? Is a dedicated baking station your priority? Will it primarily be a seating area? Or a combination of all? Answering these questions will guide your choice of IKEA components. For example, if storage is key, look for drawer units like the IKEA MALM dresser (a popular hack) or kitchen base cabinets (SEKTION/METOD system). If seating is vital, ensure enough knee space and countertop overhang.
Selecting Your IKEA Components
IKEA offers a treasure trove of items suitable for island hacks. Some of the most popular choices include:
- KALLAX Shelving Units: Excellent for open storage, creating cubbies for baskets, books, or decorative items.
- EKET Cabinets: Smaller, more modular units perfect for compact islands or adding colorful accents.
- SEKTION / METOD Kitchen Base Cabinets: These are purpose-built kitchen cabinets, offering professional-grade drawers and doors. They come in various widths and depths, making them ideal for robust island foundations with extensive storage.
- HEMNES or MALM Dressers: Repurposing these drawers can provide ample, deep storage.
- LINNMON / ADILS Table Tops: While not typically robust enough for a main island counter, these can be used for smaller, mobile islands or as internal shelving.
For a durable and functional island, combining two or more SEKTION/METOD base cabinets back-to-back or side-by-side often forms the most stable and storage-rich foundation.
Choosing the Perfect Countertop
The countertop is both a functional surface and a major aesthetic component. Popular choices for IKEA hack islands include:
- IKEA Butcher Block (KARLBY, SKOGSÅ): Affordable, warm, and can be stained or oiled to match your decor. Easily cut to size.
- Laminate Countertops: Cost-effective, durable, and available in a wide array of patterns mimicking stone or wood.
- Custom Cut Stone/Quartz: For a more luxurious and permanent feel, you can source a custom granite, quartz, or marble slab from a local fabricator. This will be the most expensive option but offers unparalleled durability and beauty.
- Plywood/MDF with Finish: A budget-friendly option where you can paint, tile, or epoxy a sturdy wood base.
When selecting, consider durability, ease of cleaning, and how it complements your existing kitchen surfaces. For an island with seating, ensure your chosen countertop allows for sufficient overhang.
High-Level Tutorial: Building Your IKEA Hack Island
While specific steps will vary based on your chosen IKEA components, the general process for constructing your island typically involves these stages:
- Assemble IKEA Base Units: Follow IKEA’s instructions meticulously to build your chosen cabinets, dressers, or shelving units.
- Configure and Secure the Base: Arrange your assembled units in the desired island configuration. Once satisfied, securely fasten them together using appropriate screws and brackets. For added stability and a finished look, consider building a simple kick plate frame around the bottom. If adding mobility, attach heavy-duty locking casters to the base.
- Install the Countertop: Carefully position your chosen countertop onto the secured base units. Ensure it is perfectly centered and level. Attach it from underneath using screws that penetrate the cabinet tops without going through the countertop surface. Use appropriate fasteners for the material (e.g., L-brackets for butcher block, silicone adhesive for stone).
- Finishing Touches: This is where you personalize your island.
- Paint or Stain: If your IKEA units are paintable (e.g., raw wood or laminate prepped with primer), apply your desired paint color or wood stain.
- Add Trim and Paneling: For a built-in look, add decorative trim or beadboard panels to the exposed sides and back of your island. This hides seams and creates a more cohesive, custom appearance.
- Hardware: Install drawer pulls and cabinet knobs that match your kitchen’s existing hardware or introduce a new style statement.
- Functional Additions: Consider adding a power outlet, a small shelving unit on an exposed side, or a towel bar.
Unleashing Creativity: Customization Ideas
The beauty of an IKEA hack lies in its potential for personalization. Don’t be afraid to think outside the box to make your island truly unique:
- Bold Color Statements: Paint your island in a vibrant hue that contrasts with your kitchen cabinets for a pop of color.
- Textural Backing: Add shiplap, beadboard, or even decorative wallpaper to the back panel of the island for visual interest.
- Integrated Functionality: Include a wine rack, a built-in cutting board, or even a small pull-out trash bin.
- Lighting: Install small puck lights under a countertop overhang for ambient lighting or strip lights inside glass-front cabinets.
- Casters for Mobility: If your space could benefit from a movable island, add sturdy locking casters to the base.
- Open Shelving vs. Closed Storage: Mix and match to display decorative items while hiding clutter.
The Rewarding Payoff: Cost Savings and Personal Satisfaction
One of the most compelling reasons to embark on an IKEA hack kitchen island project is the significant cost savings. While a custom-built island from a cabinet maker could easily run into several thousand dollars, an IKEA hack can often be completed for a fraction of that, sometimes for just a few hundred. This allows you to allocate your budget to other kitchen upgrades or simply enjoy the savings.
Beyond the financial benefits, there’s immense satisfaction in creating something with your own hands. Every time you use your island for meal prep, gather around it with your family, or simply admire its presence in your kitchen, you’ll feel a sense of pride. It’s more than just a piece of furniture; it’s a testament to your creativity, resourcefulness, and dedication to making your home a more functional and beautiful space.
Conclusion: Your Dream Kitchen Awaits
Building your own IKEA hack kitchen island is an incredibly rewarding project that offers a practical, affordable, and customizable solution to common kitchen challenges. It transforms a simple space into a dynamic hub for cooking, dining, and family life. From increased counter space and essential storage to becoming the central gathering point in our home, our island has truly changed the way we interact with our kitchen. It’s no longer just a place to prepare meals; it’s where memories are made, homework gets done, and delicious aromas fill the air. Embrace the DIY spirit, gather your tools, and get ready to create the kitchen island you’ve always dreamed of – a functional masterpiece born from ingenuity and a bit of IKEA magic.