
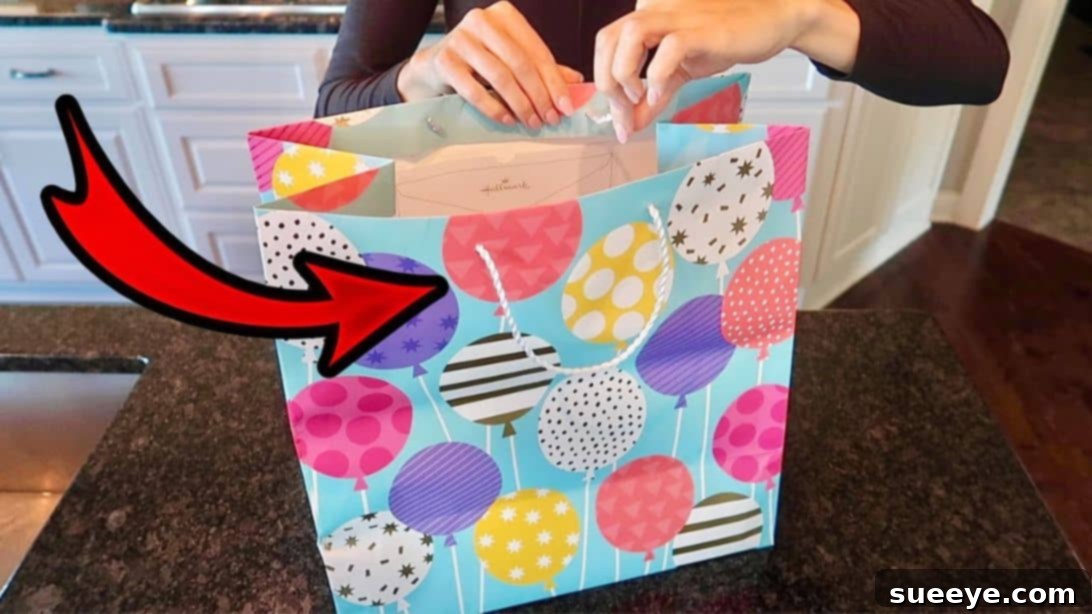
Revolutionize Your Gifting: How to Securely Close a Gift Bag Without Tape or Staples
The joy of giving is often accompanied by the minor frustration of gift wrapping. While elegant paper and ribbons create a beautiful presentation, the process can be time-consuming and sometimes tricky, especially for those less experienced with intricate folds and securing everything neatly with tape. This is precisely why gift bags have become an absolute lifesaver for many. They offer a quick, convenient, and often stylish way to package presents, transforming a potentially stressful task into a simple “drop and go” affair. Traditionally, once a gift is placed inside, a quick strip of tape or a few staples might be used to seal the bag, ensuring the contents remain a surprise until the big reveal.
But what if we told you there’s an even more ingenious method to secure your gift bags—one that requires neither tape nor staples? Imagine a clean, elegant closure that looks professionally done, requires minimal effort, and uses only the existing features of the bag itself. This clever, tape-free gift bag closure trick is not only incredibly easy but also remarkably effective, offering a seamless and secure seal that’s perfect for any occasion. It’s a game-changer for anyone looking to streamline their gift-wrapping process while maintaining a polished aesthetic.
RELATED: 10 Clever Ways to Hide Money in Gifts for a Surprise Element
The Secret Revealed: Closing Your Gift Bag Without Extra Tools
Indeed, the ability to close a gift bag without the need for additional adhesives or fasteners is not a myth. This brilliant gift-wrapping technique, popularized by Andrea Jean Cleaning, is a testament to simple innovation. You won’t need scissors, glue, tape, or a stapler. The entire method hinges on a simple manipulation of the bag’s existing strings, specifically those small plastic tips found at their ends. These unassuming little pieces are called aglets, and they are the key to unlocking this stress-free and elegant closure. While most standard gift bags come equipped with aglets, it’s worth noting that some simpler designs, like certain brown paper bags, might not. This clever trick is not only practical but also adds a touch of sophistication to your gift presentation. Once you try this method, you’ll wonder how you ever wrapped gifts without it!
Why Opt for a Tape-Free Gift Bag Closure? The Benefits Unpacked
Beyond the sheer novelty of a tape-free solution, this gift bag closure technique offers a multitude of practical advantages that enhance the overall gifting experience for both the giver and the receiver:
1. Unmatched Efficiency and Speed
Imagine wrapping multiple gifts during a busy holiday season or preparing party favors for a large event. Every second counts! This method eliminates the time spent fumbling with tape dispensers, cutting strips, or searching for a stapler. The process is fluid and intuitive, allowing you to secure gifts in mere moments, significantly speeding up your entire wrapping operation. It’s perfect for last-minute preparations when you’re short on time but still want to present a thoughtful gift.
2. Superior Aesthetics and a Clean Finish
Visible tape can often detract from an otherwise beautifully presented gift. Sticky edges, uneven strips, or crumpled tape can make a gift look rushed or messy. Staples, while secure, leave small punctures. This aglet-based technique provides a perfectly cinched, clean closure that looks intentional and professional. The seamless top gives the bag an elegant, boutique-like appearance, elevating the overall presentation of your gift.
3. Eco-Friendly and Sustainable Gifting
In an increasingly environmentally conscious world, reducing waste is paramount. By eliminating the need for single-use tape and staples, this method contributes to more sustainable gift-giving practices. It also makes gift bags more easily reusable, as there are no sticky residues or staple holes to compromise their integrity for future use. This small change can make a big difference in reducing your environmental footprint during festive seasons.
4. Ultimate Convenience and Accessibility
How many times have you started wrapping only to realize you’re out of tape or can’t find your stapler? This technique frees you from the dependency on external tools. All you need is the gift bag itself and your hands. It’s also a fantastic solution for individuals who may struggle with fine motor skills required for cutting and applying tape, making the gift-wrapping process more accessible and enjoyable for everyone.
5. Enhanced Surprise and Anticipation
A neatly sealed bag builds anticipation. Without easily visible tape or staples, the recipient knows they’re in for a careful reveal. The method makes the bag feel more secure and less likely to accidentally open, keeping the contents a true surprise until the moment of unwrapping. It adds an element of mystery and delight to the gifting ritual.
Understanding Aglets: The Unsung Heroes of This Trick
Before diving into the step-by-step process, it’s essential to understand the humble aglet. An aglet is that small plastic or metal sheath, often found on the end of shoelaces, drawstrings, and, crucially, the strings of most modern gift bags. Its primary purpose is to prevent the string from fraying and to make it easier to thread through eyelets or loops. In the context of our gift bag closure, these tiny tips serve a much grander purpose: they act as natural stoppers, holding the interwoven strings securely in place once pulled taut. Without aglets, the strings would simply slip back through the loops, rendering the technique ineffective. So, always ensure your chosen gift bag features these invaluable little plastic ends for this trick to work its magic.
The Genius Technique: Step-by-Step Guide to Tape-Free Gift Bag Closure
This ingenious gift-wrapping technique, shared by Andrea Jean Cleaning, is surprisingly simple once you get the hang of it. Follow these steps for a perfectly closed gift bag, every time.
Step 1: Initiating the Loop – Side One
Begin by ensuring your gift is safely nestled inside the bag, and any tissue paper is arranged neatly. Take one of the strings from one side of the bag’s opening (for instance, the front-left string). Now, gently guide and loop this string through one of the handle loops on the *opposite* side of the bag (e.g., the back-right handle). Pull the string completely through, making sure it’s taut and doesn’t have excess slack. Next, take the other string from the *same initial side* (the front-right string) and loop it through the *other* handle loop on the opposite side (the back-left handle). Once pulled through, you should now have two strings that have crossed over the bag’s opening, with their aglets extended towards the opposite side from where they originated. This creates the foundational interlocking pattern for the closure.
Step 2: Mirroring the Process – Side Two
Now, it’s time to mirror the process on the other side of the bag to complete the interwoven structure. Focus on the two remaining strings, which are now on the side where you just threaded the first set of strings *to*. Take one of these strings (for example, the back-left string) and loop it back through the handle loop on the *original side* (the front-right handle). Pull it through just as you did in the first step. Then, repeat this action with the last remaining string (the back-right string), looping it through the *other handle loop on the original side* (the front-left handle). At this stage, all four strings should be interlocked, creating a crisscross pattern across the top opening of your gift bag. Ensure all strings are relatively untangled and ready for the final tightening step.
Step 3: The Grand Closure and Security
With all four strings now interwoven through the opposing handle loops, it’s time for the magic moment of closure. Take both sides of the bag where the strings emerge and gently but firmly pull them away from each other. As you pull, you will notice the interwoven strings tightening, drawing the top edges of the bag inwards and upwards, effectively sealing the opening. The small plastic aglets on the ends of the strings are crucial here; they will press against the handle loops, acting as secure anchors and preventing the strings from slipping back through. Continue pulling until the bag’s opening is snugly closed, creating a neat, cinched top that perfectly secures your gift. To open the bag, simply pull on the center of the cinched section, and the strings will loosen, allowing the recipient to easily access their present without tearing the bag.
Pro Tips for Perfect Presentation
To ensure your tape-free gift bag closure looks its best and performs flawlessly, consider these expert tips:
- Choose the Right Bag: Opt for gift bags with sturdy handles and, most importantly, clearly defined aglets on all four strings. Bags made from slightly thicker paper or cardstock tend to hold their shape better when cinched.
- Don’t Overfill: While the method is secure, avoid stuffing the bag to its absolute maximum capacity. Leave a little room at the top for the paper to gather and cinch properly. Overfilling can strain the handles and make the closure less effective.
- Add Tissue Paper: For an extra touch of elegance and to further conceal the gift, layer some coordinating tissue paper inside the bag before closing it. Let the tissue paper peek out slightly from the cinched top for a luxurious look.
- Enhance with Ribbons or Tags: Even without tape, you can still personalize your gift. Once the bag is closed, tie a decorative ribbon around the cinched top or attach a personalized gift tag directly to one of the aglets or the interwoven strings.
- Practice Makes Perfect: Like any new technique, a quick practice run with an empty bag can help you master the weaving and pulling motion, ensuring a smooth process when it comes to your actual gifts.
When Might This Technique Not Be Ideal?
While this tape-free closure is incredibly versatile, there are a few scenarios where it might not be the best fit:
- Bags Without Aglets: As mentioned, the aglets are non-negotiable for this method. If your bag lacks them, you’ll need to revert to traditional tape or staples.
- Extremely Heavy or Oddly Shaped Gifts: For unusually heavy items or gifts with sharp, protruding edges, the stress on the bag handles and paper top might be too great, potentially compromising the closure or even tearing the bag.
- Flimsy Handles: Bags with very thin, weak, or easily detachable handles might not withstand the pulling tension required to cinch the top effectively.
- Gifts Requiring Tamper-Proof Sealing: For items where an absolutely tamper-proof seal is crucial (though rare for gift-giving), a traditional sealed package might be preferred, as this method is designed for easy opening by the recipient.
Beyond Convenience: The Art of Thoughtful Gifting
This clever gift bag hack isn’t just about saving tape or time; it’s about elevating the entire act of gift-giving. A beautifully and securely presented gift, even in a simple bag, communicates care and attention to detail. It shows the recipient that you’ve put thought not only into the gift itself but also into its presentation. This tape-free closure creates a moment of anticipation, a neat reveal, and contributes to the overall joy and delight of receiving. It transforms a routine task into a small, satisfying victory in the art of thoughtful gifting, allowing you to focus on the sentiment behind the present rather than the struggles of its wrapping.
Frequently Asked Questions About Tape-Free Gift Bag Closure
Q: Can I use this technique with any type of gift bag?
A: This method is primarily designed for standard gift bags that feature four string handles, each with a plastic or metal tip (an aglet). It might not work on bags with ribbon handles, paper twist handles, or bags that lack aglets on their strings.
Q: What if my gift bag strings don’t have aglets?
A: Unfortunately, aglets are essential for this trick, as they act as stoppers to hold the strings in place once tightened. If your bag lacks them, this specific tape-free method won’t be effective. You would then need to use tape, staples, or find a different bag.
Q: Is this method secure enough for valuable or fragile items?
A: When executed correctly, the closure is quite secure for most gifts. The interwoven strings and aglets create a firm cinch that prevents accidental opening. However, for extremely fragile items, ensure they are properly cushioned inside the bag, and handle the bag with care, as the closure’s security relies on the integrity of the bag’s paper and handles.
Q: Does this work for very large or very small gift bags?
A: Yes, the principle remains the same regardless of bag size, as long as the bag has the necessary string handles with aglets. For very large bags, you might need to apply a bit more tension when pulling, and for very small bags, be gentle to avoid tearing.
Q: How easy is it for the recipient to open the bag once closed this way?
A: It’s surprisingly easy! The recipient simply needs to pull on the center of the cinched top. This action releases the tension on the interwoven strings, allowing the bag to open effortlessly without any tearing or fumbling, preserving the bag for potential reuse.
Conclusion: Embrace Effortless Elegance in Gifting
The next time you find yourself reaching for a gift bag, remember this ingenious, tape-free gift bag closure trick. It’s a simple yet incredibly effective method that promises a cleaner look, a more secure seal, and a far more enjoyable wrapping experience. Say goodbye to the frustrations of sticky tape and unsightly staples, and welcome a new era of effortless elegance in your gift-giving. This clever technique by Andrea Jean Cleaning is a testament to how small adjustments can lead to significant improvements in our daily routines. Give it a try – you’ll be amazed at how quickly and beautifully you can transform your gift bags. Share this brilliant hack with your friends and family, and spread the joy of stress-free, perfectly presented gifts this season and beyond!